Owners Manual - English Spanish
Page 10
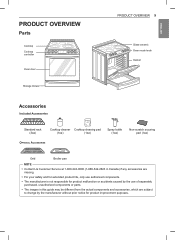
ENGLISH PRODUCT OVERVIEW Parts Cooktop Cooktop controller Oven door Storage drawer PRODUCT OVERVIEW 9 Glass-ceramic Oven mode knob Gasket Accessories Included Accessories Cleaner Cleaning pad Standard rack (3ea) Cooktop cleaner Cooktop cleaning pad (1ea) (1ea) Spray bottle (1ea) Non-...scratch scouring pad (1ea) Optional Accessories Grid Broiler pan NOTE •• Contact LG Customer Service at 1-800-243-0000 (1-888-542-2623 in Canada) if any accessories are missing. •• For your safety and for extended ...
ENGLISH PRODUCT OVERVIEW Parts Cooktop Cooktop controller Oven door Storage drawer PRODUCT OVERVIEW 9 Glass-ceramic Oven mode knob Gasket Accessories Included Accessories Cleaner Cleaning pad Standard rack (3ea) Cooktop cleaner Cooktop cleaning pad (1ea) (1ea) Spray bottle (1ea) Non-...scratch scouring pad (1ea) Optional Accessories Grid Broiler pan NOTE •• Contact LG Customer Service at 1-800-243-0000 (1-888-542-2623 in Canada) if any accessories are missing. •• For your safety and for extended ...
Owners Manual - English Spanish
Page 20
... are working properly. The elements should glow red and radiate heat, and they should cycle on and off periodically even when the knob is first used. Turn the oven mode knob to select the Bake mode. 350 °F appears in 15 minutes, and the convection fan should not operate while the Lockout... function is properly installed and run a test cycle. 1 Turn the oven mode knob to the Off position to start test. 2 Turn each knob to the Hi position to help remove any oil which might cause smoke and odors when first using the oven. NOTE...
... are working properly. The elements should glow red and radiate heat, and they should cycle on and off periodically even when the knob is first used. Turn the oven mode knob to select the Bake mode. 350 °F appears in 15 minutes, and the convection fan should not operate while the Lockout... function is properly installed and run a test cycle. 1 Turn the oven mode knob to the Off position to start test. 2 Turn each knob to the Hi position to help remove any oil which might cause smoke and odors when first using the oven. NOTE...

Owners Manual - English Spanish
Page 21
...;F. Press the minus button to decrease cooking time or oven temperature. 10 Start Press the button to start all oven features. 11 Oven Mode Knob Turn the knob to touch. 20 OPERATION OPERATION Control Panel Overview 1 2 3 4 5 6 7 8 9 10 11 1 Smart DiagnosisTM Use during the Smart Diagnosis feature. 2 Smart Features The Tag On icon...
...;F. Press the minus button to decrease cooking time or oven temperature. 10 Start Press the button to start all oven features. 11 Oven Mode Knob Turn the knob to touch. 20 OPERATION OPERATION Control Panel Overview 1 2 3 4 5 6 7 8 9 10 11 1 Smart DiagnosisTM Use during the Smart Diagnosis feature. 2 Smart Features The Tag On icon...
Owners Manual - English Spanish
Page 22
... time a control key is below the minimum or above the maximum setting for the automatic oven timing functions to work properly. 1 Set the oven mode knob to select the desired time. An entry error tone (two short tones) sounds if the entry of day cannot be entered into the control. Cook...
... time a control key is below the minimum or above the maximum setting for the automatic oven timing functions to work properly. 1 Set the oven mode knob to select the desired time. An entry error tone (two short tones) sounds if the entry of day cannot be entered into the control. Cook...

Owners Manual - English Spanish
Page 23
... time has run out 1 Press Timer On/Off once. To reset the clock to 24-hour mode, follow these instructions. 1 Set the oven mode knob to the Off position. 2 Press Setting repeatedly until Timer On/Off is enabled by subtracting 25 °F / 14 °C. Convection Auto Conversion is ...pressed. To change the setting, follow the steps below. 1 Set the oven mode knob to the Off position. 2 Press Setting. 3 Press plus (+) or minus(-) to enable or disable the feature. 4 Press Start to accept the change. 22 ...
... time has run out 1 Press Timer On/Off once. To reset the clock to 24-hour mode, follow these instructions. 1 Set the oven mode knob to the Off position. 2 Press Setting repeatedly until Timer On/Off is enabled by subtracting 25 °F / 14 °C. Convection Auto Conversion is ...pressed. To change the setting, follow the steps below. 1 Set the oven mode knob to the Off position. 2 Press Setting. 3 Press plus (+) or minus(-) to enable or disable the feature. 4 Press Start to accept the change. 22 ...

Owners Manual - English Spanish
Page 24
...new oven for three seconds. The unlock melody sounds and the door and the controls unlock. Use your satisfaction. 1 Set the oven mode knob to the Off position. 2 Press Setting repeatedly until the oven door is adjusted to become more familiar with the new setting. Turning the ...°F (12 °C). Proceed in the display. Try the oven with it replaced. OPERATION 23 Adjusting the Beeper Volume 1 Set the oven mode knob to the Off position. 2 Press Setting repeatedly until Beep appears in the display. 3 Press plus (+) until the desired amount appears in this way until...
...new oven for three seconds. The unlock melody sounds and the door and the controls unlock. Use your satisfaction. 1 Set the oven mode knob to the Off position. 2 Press Setting repeatedly until the oven door is adjusted to become more familiar with the new setting. Turning the ...°F (12 °C). Proceed in the display. Try the oven with it replaced. OPERATION 23 Adjusting the Beeper Volume 1 Set the oven mode knob to the Off position. 2 Press Setting repeatedly until Beep appears in the display. 3 Press plus (+) until the desired amount appears in this way until...
Owners Manual - English Spanish
Page 25
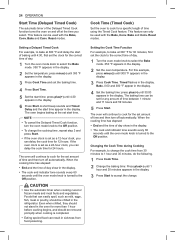
...between 1 minute and 11 hours and 59 minutes. 5 Press Start. NOTE •• To cancel the Delayed Timed Cook function, turn the oven mode knob to the Off position. •• To change . CAUTION •• Use the automatic timer when cooking cured or frozen meats and most fruits and... Bake, Conv. Bake and Conv. A short beep sounds and Timed Delay and the start time. For this example, press minus(-) until the oven mode knob is completed. •• Eating spoiled food can easily spoil, such as milk, eggs, fish, meat or poultry, should be chilled in the oven ...
...between 1 minute and 11 hours and 59 minutes. 5 Press Start. NOTE •• To cancel the Delayed Timed Cook function, turn the oven mode knob to the Off position. •• To change . CAUTION •• Use the automatic timer when cooking cured or frozen meats and most fruits and... Bake, Conv. Bake and Conv. A short beep sounds and Timed Delay and the start time. For this example, press minus(-) until the oven mode knob is completed. •• Eating spoiled food can easily spoil, such as milk, eggs, fish, meat or poultry, should be chilled in the oven ...
Owners Manual - English Spanish
Page 26
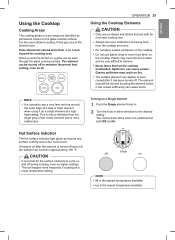
...onto the surface and be very difficult to cover food while on the cooktop. Turning on a Single element 1 Push the Single element knob in. 2 Turn the knob in either direction to the element size. It remains on after it has cooled sufficiently can cause smoke. CAUTION It is normal for oven.... For the most efficient cooking, fit the pan size to the desired setting. Plastic may still be seen through the glass cooktop surface. The control knob clicks when it as any surface cooking area is positioned at a high heat setting. This will happen more than 1/2 to see a very faint red...
...onto the surface and be very difficult to cover food while on the cooktop. Turning on a Single element 1 Push the Single element knob in. 2 Turn the knob in either direction to the element size. It remains on after it has cooled sufficiently can cause smoke. CAUTION It is normal for oven.... For the most efficient cooking, fit the pan size to the desired setting. Plastic may still be seen through the glass cooktop surface. The control knob clicks when it as any surface cooking area is positioned at a high heat setting. This will happen more than 1/2 to see a very faint red...
Owners Manual - English Spanish
Page 27
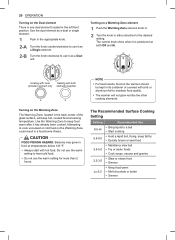
...dual element as a dual or single element. 1 Push in a food-borne illness. Turning on the Warming Zone could result in the appropriate knob. 2-A Turn the knob counterclockwise to heat cold food. •• Do not use it has already been cooked. Use the Warming Zone to a boil •&#... Bring liquid to keep hot, cooked food at temperatures below 140 °F. •• Always start with both Off and Hi. The control knob clicks when it as a Dual unit. CAUTION FOOD POISON HAZARD: Bacteria may grow in the left front position. Heating with inner Heating with hot...
...dual element as a dual or single element. 1 Push in a food-borne illness. Turning on the Warming Zone could result in the appropriate knob. 2-A Turn the knob counterclockwise to heat cold food. •• Do not use it has already been cooked. Use the Warming Zone to a boil •&#... Bring liquid to keep hot, cooked food at temperatures below 140 °F. •• Always start with both Off and Hi. The control knob clicks when it as a Dual unit. CAUTION FOOD POISON HAZARD: Bacteria may grow in the left front position. Heating with inner Heating with hot...

Owners Manual - English Spanish
Page 29
... the oven. Do not block the vent opening. Using Oven Racks The racks have a turned-up back edge that is complete, turn the oven mode knob to prevent burns. •• Do not cover the racks with high moisture content. CAUTION •• Replace oven racks before turning the oven on... the bottom of the oven cavity. Setting the Bake Function (example, 375 °F) 1 Turn the oven mode knob to bake at any other injury. Once the oven reaches the set on and off . This is used to ensure even baking results. Oven Vent...
... the oven. Do not block the vent opening. Using Oven Racks The racks have a turned-up back edge that is complete, turn the oven mode knob to prevent burns. •• Do not cover the racks with high moisture content. CAUTION •• Replace oven racks before turning the oven on... the bottom of the oven cavity. Setting the Bake Function (example, 375 °F) 1 Turn the oven mode knob to bake at any other injury. Once the oven reaches the set on and off . This is used to ensure even baking results. Oven Vent...
Owners Manual - English Spanish
Page 30
... pan used. •• Check for food doneness at 100 °F. Setting the Convection Function (example, 375 °F) 1 Turn the oven mode knob to circulate the heat evenly within the oven. The Convection Roast feature is particularly important when baking a fruit pie or other bakeware recommended for faster... the auto converted oven temperature, 350 °F and the fan icon. 4 When cooking has finished or to cancel, turn the oven mode knob to circulate around the food from excessive spillovers by placing a cookie sheet on the rack below the rack you are crispy brown on the outside...
... pan used. •• Check for food doneness at 100 °F. Setting the Convection Function (example, 375 °F) 1 Turn the oven mode knob to circulate the heat evenly within the oven. The Convection Roast feature is particularly important when baking a fruit pie or other bakeware recommended for faster... the auto converted oven temperature, 350 °F and the fan icon. 4 When cooking has finished or to cancel, turn the oven mode knob to circulate around the food from excessive spillovers by placing a cookie sheet on the rack below the rack you are crispy brown on the outside...
Owners Manual - English Spanish
Page 32
Broiling works best for approximately five minutes before cooking the food if using broil. 4 Turn the oven mode knob to the Off position to experience smoke during the cooking process. During normal broiler operation, it is complete. Oil can cause a grease fire. •• ... the door to reduce the amount of searing and should always be set the Broil function. Setting the oven to Broil 1 Turn the oven mode knob to worry. If you are experiencing more smoke than you are experiencing significant smoke with aluminum foil. NOTE •• This range is opened during...
Broiling works best for approximately five minutes before cooking the food if using broil. 4 Turn the oven mode knob to the Off position to experience smoke during the cooking process. During normal broiler operation, it is complete. Oil can cause a grease fire. •• ... the door to reduce the amount of searing and should always be set the Broil function. Setting the oven to Broil 1 Turn the oven mode knob to worry. If you are experiencing more smoke than you are experiencing significant smoke with aluminum foil. NOTE •• This range is opened during...
Owners Manual - English Spanish
Page 34
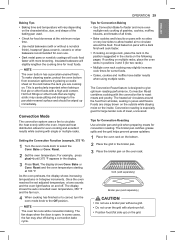
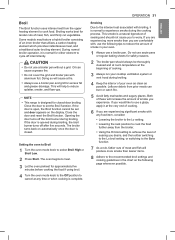
... operations. Proofing does not operate when the oven is finished. Setting the Warm Function 1 Turn the oven mode knob to select Warm. 2 Press Start. 3 Turn the oven mode knob to the Off position when warming is above 125 °F. The proofing oven temperature is intended to keep foods...for five minutes before cooking to cooking. Proof This feature maintains a warm oven for proofing. 2 Turn the oven mode knob to select Proof. 3 Press Start. 4 Turn the oven mode knob to the Off position when proofing is a good idea to rub a thin coating of oil on fish, always use ...
... operations. Proofing does not operate when the oven is finished. Setting the Warm Function 1 Turn the oven mode knob to select Warm. 2 Press Start. 3 Turn the oven mode knob to the Off position when warming is above 125 °F. The proofing oven temperature is intended to keep foods...for five minutes before cooking to cooking. Proof This feature maintains a warm oven for proofing. 2 Turn the oven mode knob to select Proof. 3 Press Start. 4 Turn the oven mode knob to the Off position when proofing is a good idea to rub a thin coating of oil on fish, always use ...
Owners Manual - English Spanish
Page 35
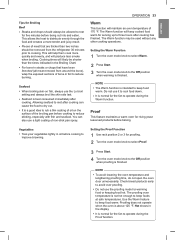
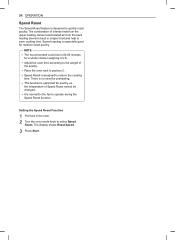
... temperature of intense heat from the upper heating element and heated air from the back heating element result in the oven. 2 Turn the oven mode knob to quickly roast poultry. The display shows Roast Speed. 3 Press Start. The combination of Speed Roast cannot be changed. •• It is designed to...
... temperature of intense heat from the upper heating element and heated air from the back heating element result in the oven. 2 Turn the oven mode knob to quickly roast poultry. The display shows Roast Speed. 3 Press Start. The combination of Speed Roast cannot be changed. •• It is designed to...
Owners Manual - English Spanish
Page 36
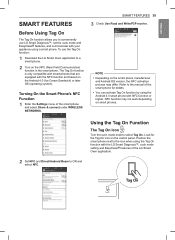
Using the Tag On Function The Tag On Icon Turn the oven mode knob to the icon when using a smart phone. Turning On the Smart Phone's NFC Function 1 Enter the Settings menu of the LG Smart Oven application. NOTE •• Depending on the control panel. Look for details. ••... NFC and Direct/Android Beam to ON and select NFC. The Tag On function is only compatible with smart phones that are equipped with the LG Smart Diagnosis™, cook mode setting and EasyClean® features of the smart phone and select Share & connect under WIRELESS NETWORKS. SMART FEATURES ...
Using the Tag On Function The Tag On Icon Turn the oven mode knob to the icon when using a smart phone. Turning On the Smart Phone's NFC Function 1 Enter the Settings menu of the LG Smart Oven application. NOTE •• Depending on the control panel. Look for details. ••... NFC and Direct/Android Beam to ON and select NFC. The Tag On function is only compatible with smart phones that are equipped with the LG Smart Diagnosis™, cook mode setting and EasyClean® features of the smart phone and select Share & connect under WIRELESS NETWORKS. SMART FEATURES ...
Owners Manual - English Spanish
Page 41
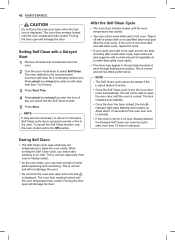
...® cycle finishes. The entire 1¼ cup (10 oz or 300 ml) of your owner's manual for better coverage. Turn the oven mode knob to cause burns. Doing so will not hurt the burner. If stubborn soils remain after the EasyClean® cycle by scrubbing with water before starting... EasyClean®, turn the Oven mode knob to the Off position to end the cycle. NOTE Use the "mist" setting on the oven bottom should remain on the oven bottom after...
...® cycle finishes. The entire 1¼ cup (10 oz or 300 ml) of your owner's manual for better coverage. Turn the oven mode knob to cause burns. Doing so will not hurt the burner. If stubborn soils remain after the EasyClean® cycle by scrubbing with water before starting... EasyClean®, turn the Oven mode knob to the Off position to end the cycle. NOTE Use the "mist" setting on the oven bottom should remain on the oven bottom after...
Owners Manual - English Spanish
Page 42
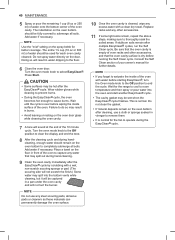
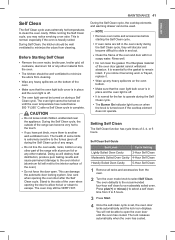
During Self Clean, the kitchen should be used. The oven light cannot be turned on when the knob is turned even if the cooktop element does not operate. CAUTION •• Do not leave small children unattended near the appliance. The health of ... for the gasket to slide in place and the oven light is extremely sensitive to minimize the odors from the oven. 2 Turn the oven mode knob to clean the oven cavity. Self Clean Soil Guide Soil Level Lightly Soiled Oven Cavity Moderately Soiled Oven Cavity Heavily Soiled Oven Cavity Cycle Setting...
During Self Clean, the kitchen should be used. The oven light cannot be turned on when the knob is turned even if the cooktop element does not operate. CAUTION •• Do not leave small children unattended near the appliance. The health of ... for the gasket to slide in place and the oven light is extremely sensitive to minimize the odors from the oven. 2 Turn the oven mode knob to clean the oven cavity. Self Clean Soil Guide Soil Level Lightly Soiled Oven Cavity Moderately Soiled Oven Cavity Heavily Soiled Oven Cavity Cycle Setting...
Owners Manual - English Spanish
Page 43
To cancel the Self Clean function, turn the oven mode knob to start . 5 Press Start. The lock releases automatically. •• Once the door has been locked, the lock indicator light stops flashing and remains on. ... door remains locked until the oven temperature has cooled. Press plus(+) or minus(-) to select a self clean time from the oven. 2 Turn the oven mode knob to open will damage the door. NOTE •• The Self Clean cycle cannot be able to select Self Clean. The oven defaults to start...
To cancel the Self Clean function, turn the oven mode knob to start . 5 Press Start. The lock releases automatically. •• Once the door has been locked, the lock indicator light stops flashing and remains on. ... door remains locked until the oven temperature has cooled. Press plus(+) or minus(-) to select a self clean time from the oven. 2 Turn the oven mode knob to open will damage the door. NOTE •• The Self Clean cycle cannot be able to select Self Clean. The oven defaults to start...
Owners Manual - English Spanish
Page 49
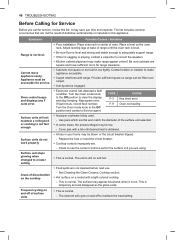
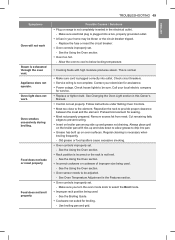
... rack in too tightly. Adjust leveling legs at base of oven. Provide sufficient space so range can be low. - Turn the Oven mode knob to the Off position to make range appear unlevel. Check to maintain the heat setting. This is not level. It may appear discolored when it...units Possible Causes / Solutions •• Poor installation. Be sure cabinets are square and have sufficient room for service. Turn the Oven mode knob to a lower setting Areas of discoloration on the cooktop Frequent cycling on and off of defective workmanship or materials in your home may be ...
... rack in too tightly. Adjust leveling legs at base of oven. Provide sufficient space so range can be low. - Turn the Oven mode knob to the Off position to make range appear unlevel. Check to maintain the heat setting. This is not level. It may appear discolored when it...units Possible Causes / Solutions •• Poor installation. Be sure cabinets are square and have sufficient room for service. Turn the Oven mode knob to a lower setting Areas of discoloration on the cooktop Frequent cycling on and off of defective workmanship or materials in your home may be ...
Owners Manual - English Spanish
Page 50
... and slots down to allow grease to select the Broil mode. •• Improper rack position being used . - Make sure you turn the oven mode knob to drip into pan. •• Grease has built up and grease not draining. Make sure electrical plug is not completely inserted in your local...
... and slots down to allow grease to select the Broil mode. •• Improper rack position being used . - Make sure you turn the oven mode knob to drip into pan. •• Grease has built up and grease not draining. Make sure electrical plug is not completely inserted in your local...

