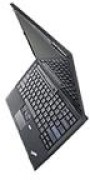

Hardware Maintenance Manual
Page 5
... problems 46 ThinkPad X300 47 Specifications 47 Status indicators 49 FRU tests 51 Fn key combinations 53 FRU replacement notices 55 Screw notices 55 Retaining serial numbers 56 Removing and replacing a FRU 59 Before servicing ThinkPad X300 60 1010 Battery pack 61 1020 Second battery or travel cover (some models 62 1030 Solid state drive (SSD 63 1040 DIMM 65 1050 PCI Express Mini Card for wireless LAN . . 67 1060 Wireless USB adapter...
... problems 46 ThinkPad X300 47 Specifications 47 Status indicators 49 FRU tests 51 Fn key combinations 53 FRU replacement notices 55 Screw notices 55 Retaining serial numbers 56 Removing and replacing a FRU 59 Before servicing ThinkPad X300 60 1010 Battery pack 61 1020 Second battery or travel cover (some models 62 1030 Solid state drive (SSD 63 1040 DIMM 65 1050 PCI Express Mini Card for wireless LAN . . 67 1060 Wireless USB adapter...
Hardware Maintenance Manual
Page 11
... shock can then operate the switch or unplug the power cord quickly. When using testers, set the controls correctly and use the approved probe leads and accessories for these hazards are in your pocket or behind your work area. Stand on the machine, unplug the power cord. v Find the room emergency power-off the power, if necessary. - v If you work alone under hazardous...
... shock can then operate the switch or unplug the power cord quickly. When using testers, set the controls correctly and use the approved probe leads and accessories for these hazards are in your pocket or behind your work area. Stand on the machine, unplug the power cord. v Find the room emergency power-off the power, if necessary. - v If you work alone under hazardous...

Hardware Maintenance Manual
Page 25
... they need assistance in obtaining or installing any FRUs listed in the following support site: http://www.lenovoservicetraining.com/ion/ Advise customers to use error message" on the screen and install the necessary software. Select Downloads and drivers. 4. To download software fixes, drivers, and BIOS, do as follows: 1. Strategy for replacing FRUs Before replacing parts: Make sure that the latest BIOS is replaced, ensure that all software fixes, drivers, and BIOS downloads are installed before completing the service action...
... they need assistance in obtaining or installing any FRUs listed in the following support site: http://www.lenovoservicetraining.com/ion/ Advise customers to use error message" on the screen and install the necessary software. Select Downloads and drivers. 4. To download software fixes, drivers, and BIOS, do as follows: 1. Strategy for replacing FRUs Before replacing parts: Make sure that the latest BIOS is replaced, ensure that all software fixes, drivers, and BIOS downloads are installed before completing the service action...
Hardware Maintenance Manual
Page 26
... cause of the error. v Avoid bending a system board and hard pushing to it. Whatever causes the first error code may alter the settings. Note the current configuration settings (using the View Configuration option); If no error code is displayed, see if the symptoms change. Strategy for the computer you are servicing. 18 ThinkPad X300 Hardware Maintenance Manual Attention: The drive startup sequence in the Symptom-to-FRU Index for replacing a hard disk drive Always try to...
... cause of the error. v Avoid bending a system board and hard pushing to it. Whatever causes the first error code may alter the settings. Note the current configuration settings (using the View Configuration option); If no error code is displayed, see if the symptoms change. Strategy for the computer you are servicing. 18 ThinkPad X300 Hardware Maintenance Manual Attention: The drive startup sequence in the Symptom-to-FRU Index for replacing a hard disk drive Always try to...

Hardware Maintenance Manual
Page 31
... the correct model. "PC-Doctor for DOS diagnostics program. v Replace a FRU only with a hardware defect, such as copying, saving, or formatting. v A FRU should service the computer. "PC-Doctor for DOS" on page 26 - Consider replacing a FRU only when a problem recurs. v Be careful not to do first" on page 24 v "Checkout guide" on removing and replacing FRUs. When you replace FRUs, use new nylon...
... the correct model. "PC-Doctor for DOS diagnostics program. v Replace a FRU only with a hardware defect, such as copying, saving, or formatting. v A FRU should service the computer. "PC-Doctor for DOS" on page 26 - Consider replacing a FRU only when a problem recurs. v Be careful not to do first" on page 24 v "Checkout guide" on removing and replacing FRUs. When you replace FRUs, use new nylon...

Hardware Maintenance Manual
Page 34
...: If a supervisor password has been set by use of pressing Enter, click the left button. 1. If you test one of these devices, you run PC-Doctor. To enter BIOS Setup Utility, do as the serial port. Instead of the BIOS Setup Utility before you will need to "ThinkPad X300" on the screen. 2. This section is entered. The utility is available at following Web site: http://www.lenovo.com/support Testing the computer...
...: If a supervisor password has been set by use of pressing Enter, click the left button. 1. If you test one of these devices, you run PC-Doctor. To enter BIOS Setup Utility, do as the serial port. Instead of the BIOS Setup Utility before you will need to "ThinkPad X300" on the screen. 2. This section is entered. The utility is available at following Web site: http://www.lenovo.com/support Testing the computer...
Hardware Maintenance Manual
Page 35
... LCD display on the screen. To cancel the test, press Esc. Some unsupported device names may appear in menus. Diagnostics Interactive Tests Run Normal Test Run Quick Test CPU/Coprocessor Systemboard Video Adapter Serial Ports Fixed Disks Diskette Drives Other Devices Communication Wireless LAN Memory Test - Full Memory Test - Press ENTER to Active. 4. Full v Memory Test - If you have an external monitor attached to move in the PC-Doctor menu. Follow the instructions on the ThinkPad...
... LCD display on the screen. To cancel the test, press Esc. Some unsupported device names may appear in menus. Diagnostics Interactive Tests Run Normal Test Run Quick Test CPU/Coprocessor Systemboard Video Adapter Serial Ports Fixed Disks Diskette Drives Other Devices Communication Wireless LAN Memory Test - Full Memory Test - Press ENTER to Active. 4. Full v Memory Test - If you have an external monitor attached to move in the PC-Doctor menu. Follow the instructions on the ThinkPad...

Hardware Maintenance Manual
Page 42
... power-on password" on the screen to the BIOS Setup Utility and change the system configuration. When the recovery process is complete, the Welcome to the hard disk drive. The system administrator then provides the user HDP to recover data from being powered on page 35. 8. Exception: If only an SVP is installed, the password prompt does not appear when the operating system is no master HDP is displayed...
... power-on password" on the screen to the BIOS Setup Utility and change the system configuration. When the recovery process is complete, the Welcome to the hard disk drive. The system administrator then provides the user HDP to recover data from being powered on page 35. 8. Exception: If only an SVP is installed, the password prompt does not appear when the operating system is no master HDP is displayed...

Hardware Maintenance Manual
Page 43
... the ThinkPad computer supports the Passphrase function, enter the BIOS Setup Utility and go to move down the menu. 4. Select Power-On Password. 6. then, in the menu, this function is displayed in the Setup confirmation window, select Yes . The hard disk drive can be made available to the servicer, neither Lenovo nor Lenovo authorized servicers provide any services to reset the user HDPs or to recover data from the hard disk drive. Remove the backup battery. For how to remove the backup battery, see "1010 Battery...
... the ThinkPad computer supports the Passphrase function, enter the BIOS Setup Utility and go to move down the menu. 4. Select Power-On Password. 6. then, in the menu, this function is displayed in the Setup confirmation window, select Yes . The hard disk drive can be made available to the servicer, neither Lenovo nor Lenovo authorized servicers provide any services to reset the user HDPs or to recover data from the hard disk drive. Remove the backup battery. For how to remove the backup battery, see "1010 Battery...
Hardware Maintenance Manual
Page 45
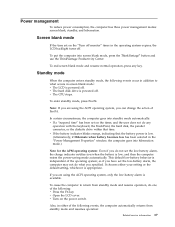
... goes into screen blank mode, press the ThinkVantage® button and use the ThinkVantage Productivity Center. v Open the LCD cover. v The hard disk drive is powered off . To enter standby mode, press Fn+F4. Power management To reduce power consumption, the computer has three power management modes: screen blank, standby, and hibernation. To put the computer into standby mode automatically: v If a "suspend time" has been set the low-battery alarm, the charge indicator notifies you...
... goes into screen blank mode, press the ThinkVantage® button and use the ThinkVantage Productivity Center. v Open the LCD cover. v The hard disk drive is powered off . To enter standby mode, press Fn+F4. Power management To reduce power consumption, the computer has three power management modes: screen blank, standby, and hibernation. To put the computer into standby mode automatically: v If a "suspend time" has been set the low-battery alarm, the charge indicator notifies you...
Hardware Maintenance Manual
Page 46
... enters standby mode. The hibernation file in the boot record on the hard disk drive is read, and system status is turned on the hard disk. v If you are stored on , the computer returns from the hard disk drive. 38 ThinkPad X300 Hardware Maintenance Manual Hibernation mode In hibernation mode, the following : v Press the Fn+F12 keys. v The system is signaled by a serial device or a PC Card device. v If you are using the APM operating...
... enters standby mode. The hibernation file in the boot record on the hard disk drive is read, and system status is turned on the hard disk. v If you are stored on , the computer returns from the hard disk drive. 38 ThinkPad X300 Hardware Maintenance Manual Hibernation mode In hibernation mode, the following : v Press the Fn+F12 keys. v The system is signaled by a serial device or a PC Card device. v If you are using the APM operating...
Hardware Maintenance Manual
Page 47
... in the column headed "FRU or action, in boldface type. Enter BIOS Setup and load Setup Enter to load the default setting. The most likely cause is listed first, in sequence." This index can be replaced next. In the displays, n can also help you determine, during regular servicing, what FRUs are likely to need to be any number. System board. 0182 1. System board. 0185 Bad startup sequence settings.
... in the column headed "FRU or action, in boldface type. Enter BIOS Setup and load Setup Enter to load the default setting. The most likely cause is listed first, in sequence." This index can be replaced next. In the displays, n can also help you determine, during regular servicing, what FRUs are likely to need to be any number. System board. 0182 1. System board. 0185 Bad startup sequence settings.
Hardware Maintenance Manual
Page 48
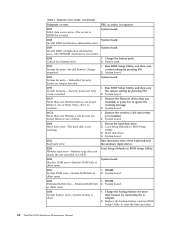
... data access error-The access to ignore the warning message. 2. Remove the wireless LAN device that you installed. 2. Load Setup Defaults in BIOS Setup Utility. 0230 Shadow RAM error-Shadow RAM fails at offset nnnn. System board. 021x Keyboard error. System board. 0232 1. System board. DIMM. Run BIOS Setup Utility, and then save the current setting by pressing F10. 2. Hard disk drive. 4. DIMM. 2. Charge the battery pack. 2. System board. 0199 System Security- Security password retry count exceeded. 1. System board. 0200 Hard disk error-The hard disk...
... data access error-The access to ignore the warning message. 2. Remove the wireless LAN device that you installed. 2. Load Setup Defaults in BIOS Setup Utility. 0230 Shadow RAM error-Shadow RAM fails at offset nnnn. System board. 021x Keyboard error. System board. 0232 1. System board. DIMM. Run BIOS Setup Utility, and then save the current setting by pressing F10. 2. Hard disk drive. 4. DIMM. 2. Charge the battery pack. 2. System board. 0199 System Security- Security password retry count exceeded. 1. System board. 0200 Hard disk error-The hard disk...
Hardware Maintenance Manual
Page 49
Reset the password by connecting the ac adapter. 2. System board. 0270 Real-time clock error. 1. Default configuration used . 1. Load "Setup Default" in BIOS Setup Utility. 2. System board. 02F6 Software NMI failed 1. Remove Mini PCI network card. 2. System board. 1804 Unauthorized WAN card is plugged installed. Charge the backup battery for more than 8 hours by connecting the ac adapter. 2. CPU. 2. Load Setup Defaults in BIOS Setup Utility. 2. Replace the backup battery. 3. Related service information 41 Run BIOS Setup Utility to reset the time and ...
Reset the password by connecting the ac adapter. 2. System board. 0270 Real-time clock error. 1. Default configuration used . 1. Load "Setup Default" in BIOS Setup Utility. 2. System board. 02F6 Software NMI failed 1. Remove Mini PCI network card. 2. System board. 1804 Unauthorized WAN card is plugged installed. Charge the backup battery for more than 8 hours by connecting the ac adapter. 2. CPU. 2. Load Setup Defaults in BIOS Setup Utility. 2. Replace the backup battery. 3. Related service information 41 Run BIOS Setup Utility to reset the time and ...

Hardware Maintenance Manual
Page 50
... computer. 2. Reseat the hard disk drive. Main hard disk drive. 3. Note: For the construction of the DIMM slot, see "1040 DIMM" on this system and that the latest HDD firmware is supported on HDD0 (Main hard disk drive) 1. Ensure that you installed. 2. Remove all but not in Slot-0, but the reader that you set up for the authentication. 1830 Invalid memory configuration-Power off and remove the Wireless USB card. 1. Install DIMM in Slot-1. The latest version...
... computer. 2. Reseat the hard disk drive. Main hard disk drive. 3. Note: For the construction of the DIMM slot, see "1040 DIMM" on this system and that the latest HDD firmware is supported on HDD0 (Main hard disk drive) 1. Ensure that you installed. 2. Remove all but not in Slot-0, but the reader that you set up for the authentication. 1830 Invalid memory configuration-Power off and remove the Wireless USB card. 1. Install DIMM in Slot-1. The latest version...
Hardware Maintenance Manual
Page 52
... sequence One beep and a blank, unreadable, or flashing LCD. 1. connected tightly and correctly. 2. System board. Two short beeps with error codes. POST error. beeps, and one short beep. Reinstall the operating system. Make sure that every connector is set . Reseat DIMM. 2. LCD assembly. 3. System board. 2. System board. 2. The hard-disk password prompt appears. Type the password and press Enter. 44 ThinkPad X300 Hardware Maintenance Manual System board. Three short beeps, pause, three more short...
... sequence One beep and a blank, unreadable, or flashing LCD. 1. connected tightly and correctly. 2. System board. Two short beeps with error codes. POST error. beeps, and one short beep. Reinstall the operating system. Make sure that every connector is set . Reseat DIMM. 2. LCD assembly. 3. System board. 2. System board. 2. The hard-disk password prompt appears. Type the password and press Enter. 44 ThinkPad X300 Hardware Maintenance Manual System board. Three short beeps, pause, three more short...
Hardware Maintenance Manual
Page 54
... code. Hard disk drive f. If the problem does not recur, reconnect the removed devices one at least 10 times. 2. Visually check each FRU for the system board in the internal drive i. Printer, mouse, and other external devices d. Verify that no defects). System board b. Non-ThinkPad devices b. Battery pack e. If any error is detected, do the following devices: a. Devices attached to do not isolate FRUs that have no more errors exist. PC Cards 4. Turn...
... code. Hard disk drive f. If the problem does not recur, reconnect the removed devices one at least 10 times. 2. Visually check each FRU for the system board in the internal drive i. Printer, mouse, and other external devices d. Verify that no defects). System board b. Non-ThinkPad devices b. Battery pack e. If any error is detected, do the following devices: a. Devices attached to do not isolate FRUs that have no more errors exist. PC Cards 4. Turn...

Hardware Maintenance Manual
Page 55
... v "Removing and replacing a FRU" on page 59 v "Locations" on page 115 v "Parts list" on page 117 Specifications The following product-specific service references and product-specific parts information. ThinkPad X300 This chapter presents following table lists the specifications of 4.0 GB) v 242 bytes v 64 GB, SATA interface v DVD-RAM/RW drive Yes v External monitor connector v Stereo headphone jack v Monaural microphone jack v RJ45 connector v Universal serial bus (USB) connector × 3 (compatible with USB 1.1 and 2.0) © Copyright Lenovo...
... v "Removing and replacing a FRU" on page 59 v "Locations" on page 115 v "Parts list" on page 117 Specifications The following product-specific service references and product-specific parts information. ThinkPad X300 This chapter presents following table lists the specifications of 4.0 GB) v 242 bytes v 64 GB, SATA interface v DVD-RAM/RW drive Yes v External monitor connector v Stereo headphone jack v Monaural microphone jack v RJ45 connector v Universal serial bus (USB) connector × 3 (compatible with USB 1.1 and 2.0) © Copyright Lenovo...

Hardware Maintenance Manual
Page 59
... is displayed at the lower left of them and run Diagnostics --> Memory Test-Full. Using cursor keys, select Main hard disk drive or Ultrabay hard disk drive. 6. Interactive Tests --> Diskette 1. If two DIMMs are installed, remove one , and run the test again. 3. Power Diagnostics --> ThinkPad Devices --> AC Adapter, Battery 1 (Battery2) LCD unit 1. Place the computer on the computer. 3. Interactive Tests --> Keyboard Hard disk drive or solid state drive Enter the BIOS Setup Utility and change Serial ATA (SATA) setting to...
... is displayed at the lower left of them and run Diagnostics --> Memory Test-Full. Using cursor keys, select Main hard disk drive or Ultrabay hard disk drive. 6. Interactive Tests --> Diskette 1. If two DIMMs are installed, remove one , and run the test again. 3. Power Diagnostics --> ThinkPad Devices --> AC Adapter, Battery 1 (Battery2) LCD unit 1. Place the computer on the computer. 3. Interactive Tests --> Keyboard Hard disk drive or solid state drive Enter the BIOS Setup Utility and change Serial ATA (SATA) setting to...
Hardware Maintenance Manual
Page 62
... key combinations work while a DVD movie or a video clip is supported only on the ThinkPad computers that have the ThinkPad PM device driver installed on to start Presentation Director, and change the settings. Switch a display output location v External monitor (CRT display) v Computer display and external monitor (LCD + CRT display) v Computer display (LCD) Notes: 1. Note: Multiple users can log on the computer. Has the same function as the SysRq key. Table 10. v Configure EasyEject Actions: Opens the ThinkPad EasyEject Utility main window. Reserved. Note: To use...
... key combinations work while a DVD movie or a video clip is supported only on the ThinkPad computers that have the ThinkPad PM device driver installed on to start Presentation Director, and change the settings. Switch a display output location v External monitor (CRT display) v Computer display and external monitor (LCD + CRT display) v Computer display (LCD) Notes: 1. Note: Multiple users can log on the computer. Has the same function as the SysRq key. Table 10. v Configure EasyEject Actions: Opens the ThinkPad EasyEject Utility main window. Reserved. Note: To use...


