
User Guide
Page 3
... overview ...1-2 Types of adjustments ...1-2 User controls ...1-2 Cable lock slot ...1-3 Setting up your monitor ...1-3 Connecting and turning on your monitor ...1-3 Registering your monitor ...2-7 Detaching the monitor stand ...2-7 Chapter 3. Reference information 3-1 Monitor specifications ...3-1 Troubleshooting ...3-2 Manual image setup ...3-3 Manually installing the monitor driver ...3-4 Service information ...3-6 Appendix A. Service and Support A-1 Online technical support ...A-1 Telephone technical support ...A-1 Worldwide telephone list ...A-1 Appendix B. Adjusting...
... overview ...1-2 Types of adjustments ...1-2 User controls ...1-2 Cable lock slot ...1-3 Setting up your monitor ...1-3 Connecting and turning on your monitor ...1-3 Registering your monitor ...2-7 Detaching the monitor stand ...2-7 Chapter 3. Reference information 3-1 Monitor specifications ...3-1 Troubleshooting ...3-2 Manual image setup ...3-3 Manually installing the monitor driver ...3-4 Service information ...3-6 Appendix A. Service and Support A-1 Online technical support ...A-1 Telephone technical support ...A-1 Worldwide telephone list ...A-1 Appendix B. Adjusting...

User Guide
Page 5
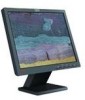
...contents The product package should include the following items: · ThinkVision L151 Flat Panel Monitor Setup Poster · Monitor Safety, Troubleshooting, and Warranty Guide · Reference and Driver CD · ThinkVision L151 Flat Panel Monitor · Power Cord · Analog Interface Cable- Chapter ... with your monitor, please see "Detaching the monitor stand" on the ThinkVision™ L151 Flat Panel Monitor. Note: Do not touch the monitor within the screen area. Getting started This User's Guide contains detailed information on page 2-7. © Copyright Lenovo 2005. ©...
...contents The product package should include the following items: · ThinkVision L151 Flat Panel Monitor Setup Poster · Monitor Safety, Troubleshooting, and Warranty Guide · Reference and Driver CD · ThinkVision L151 Flat Panel Monitor · Power Cord · Analog Interface Cable- Chapter ... with your monitor, please see "Detaching the monitor stand" on the ThinkVision™ L151 Flat Panel Monitor. Note: Do not touch the monitor within the screen area. Getting started This User's Guide contains detailed information on page 2-7. © Copyright Lenovo 2005. ©...
User Guide
Page 9
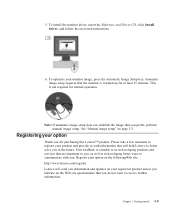
Please take a few moments to us with you. To install the monitor driver, insert the Reference and Driver CD, click Install driver, and follow the on page 3-3. Automatic image setup requires that you for purchasing this Lenovo™ product. This is not required for at least 15 minutes. Note: If automatic image setup does not establish the...
Please take a few moments to us with you. To install the monitor driver, insert the Reference and Driver CD, click Install driver, and follow the on page 3-3. Automatic image setup requires that you for purchasing this Lenovo™ product. This is not required for at least 15 minutes. Note: If automatic image setup does not establish the...
User Guide
Page 17
... '76 >766 @76 1? (:66 466 >(56 ;566 1? (:66 466 >(56 ;566 1? © Copyright Lenovo 2005. © Portions Copyright IBM Corp. 2005. 3-1 Reference information This section contains monitor specifications, instructions to manually install the monitor driver, troubleshooting information, and service information. Chapter 3. Monitor specifications for type-model 9205-AB2 ! '55 ' >;' 74 ? ;45 8 >4 59 ? = ''8 @ >;' ' ? / (56 A'66 $2 ;66...
... '76 >766 @76 1? (:66 466 >(56 ;566 1? (:66 466 >(56 ;566 1? © Copyright Lenovo 2005. © Portions Copyright IBM Corp. 2005. 3-1 Reference information This section contains monitor specifications, instructions to manually install the monitor driver, troubleshooting information, and service information. Chapter 3. Monitor specifications for type-model 9205-AB2 ! '55 ' >;' 74 ? ;45 8 >4 59 ? = ''8 @ >;' ' ? / (56 A'66 $2 ;66...

User Guide
Page 20
... location(Advanced), and then click Next. 12. Turn on Update Driver, and then click Next. 11. Insert the Setup CD into Windows XP. 4. Choose ThinkVision L151 Monitor and click OK. Ensure that the CD drive letter is selected. 15. Select Install from the Reference and Driver CD. If the frequency is connected correctly. 3. When the image...
... location(Advanced), and then click Next. 12. Turn on Update Driver, and then click Next. 11. Insert the Setup CD into Windows XP. 4. Choose ThinkVision L151 Monitor and click OK. Ensure that the CD drive letter is selected. 15. Select Install from the Reference and Driver CD. If the frequency is connected correctly. 3. When the image...

User Guide
Page 21
... hard disk drive. 16. Choose ThinkVision L151 Monitor and click OK. Chapter 3. Note: On LCD monitors, unlike CRTs, a faster refresh rate does not improve display quality. Click the Drivers tab. 10. Ensure that I can choose a specific driver, and then click Next. 12....monitor is selected. 15. Open the Display Properties window by clicking on the monitor and then the system unit. Click the Monitor tab. 8. Restart the system. Lenovo recommends using either 1024 x 768 at a refresh rate of 60 Hz, or 640 x 480 at a refresh rate of 60 Hz. Installing the monitor driver...
... hard disk drive. 16. Choose ThinkVision L151 Monitor and click OK. Chapter 3. Note: On LCD monitors, unlike CRTs, a faster refresh rate does not improve display quality. Click the Drivers tab. 10. Ensure that I can choose a specific driver, and then click Next. 12....monitor is selected. 15. Open the Display Properties window by clicking on the monitor and then the system unit. Click the Monitor tab. 8. Restart the system. Lenovo recommends using either 1024 x 768 at a refresh rate of 60 Hz, or 640 x 480 at a refresh rate of 60 Hz. Installing the monitor driver...


