

Service Manual
Page 30
....To verify that the printer recognizes all the installed memory, go to the user menus and print the "Print Menus" test page. Printer needs data on the printout matches the installed memory. Font card format not supported by the Optra printer. The printer detects a defective Flash ...SIMM. To verify that the printer recognizes all the installed memory, go to the user...
....To verify that the printer recognizes all the installed memory, go to the user menus and print the "Print Menus" test page. Printer needs data on the printout matches the installed memory. Font card format not supported by the Optra printer. The printer detects a defective Flash ...SIMM. To verify that the printer recognizes all the installed memory, go to the user...

Service Manual
Page 32
... sure there is continuity between the transfer roller and its contact on the HVPS; If the error appears again, call the next level service support for assistance. Make sure there is continuity between the transfer roller and its contact on and try again. Verify correct cable connections from the ...host computer to the printer, turn the printer off, then turn it on the HVPS; 4049-XXX Error Code 81 Engine Code CRC 88 Toner Low 90X Software Error 917 Transfer...
... sure there is continuity between the transfer roller and its contact on the HVPS; If the error appears again, call the next level service support for assistance. Make sure there is continuity between the transfer roller and its contact on and try again. Verify correct cable connections from the ...host computer to the printer, turn the printer off, then turn it on the HVPS; 4049-XXX Error Code 81 Engine Code CRC 88 Toner Low 90X Software Error 917 Transfer...

Service Manual
Page 35
Network card 2 EEPROM/NVRAM failure. Network card 2/Network interface error. Replace network card 2. Contact your next level of support. See "Network Card 977 Errors" on page 2-21. Replace network card 2. Network card 1 is installed but is a software or microcode .../NVRAM failure. Do not replace the card. Verify that the network card is not communicating with the RIP Board. Contact your next level of support. General network 1 card hardware error. Replace network card 1. Do not replace the card. Network card 2 is installed but is installed and ...
Network card 2 EEPROM/NVRAM failure. Network card 2/Network interface error. Replace network card 2. Contact your next level of support. See "Network Card 977 Errors" on page 2-21. Replace network card 2. Network card 1 is installed but is a software or microcode .../NVRAM failure. Do not replace the card. Verify that the network card is not communicating with the RIP Board. Contact your next level of support. General network 1 card hardware error. Replace network card 1. Do not replace the card. Network card 2 is installed but is installed and ...

Service Manual
Page 36
... between the duplex unit and the printer have failed. If this error returns after a POR, there is installed and grounded correctly. Duplex system board failure. Verify that the network card is a software or microcode incompatibility problem. General network 2 card software error. Contact your next level of support. Replace network card 2. If this...
... between the duplex unit and the printer have failed. If this error returns after a POR, there is installed and grounded correctly. Duplex system board failure. Verify that the network card is a software or microcode incompatibility problem. General network 2 card software error. Contact your next level of support. Replace network card 2. If this...

Service Manual
Page 48
... code. 2-21 PostScript emulation output may be with the hardware or software outside of the software utility. • Single route broadcast not supported across network bridge, if bridge is used. • Server problem; Below are 977 errors in the error log. 4049-XXX LAN Problems... You cannot find the problem. • Make sure the network protocol you want is enabled from the printer operator panel. • Verify proper print queue and printer driver configuration. • Verify the adapter port has been associated. • Verify correct installation of the network card...
... code. 2-21 PostScript emulation output may be with the hardware or software outside of the software utility. • Single route broadcast not supported across network bridge, if bridge is used. • Server problem; Below are 977 errors in the error log. 4049-XXX LAN Problems... You cannot find the problem. • Make sure the network protocol you want is enabled from the printer operator panel. • Verify proper print queue and printer driver configuration. • Verify the adapter port has been associated. • Verify correct installation of the network card...

Service Manual
Page 54
... are available through normal marketing channels. The Print Test with the drive gear at least 43.42. Machine Level Information: Early level printers do not support the Dual Rear Feeder without an upgrade. On the Print Menus test page, machines which require the adapter have continuity to ground....2-27 Upgrade kits containing code upgrades and the adapter box are inaccessible. On the early machines engine board connector J5 is not, check the printer code levels (see Note above) and test the torquer. If it is wired differently. Remove the module and inspect the tray, the D-roll...
... are available through normal marketing channels. The Print Test with the drive gear at least 43.42. Machine Level Information: Early level printers do not support the Dual Rear Feeder without an upgrade. On the Print Menus test page, machines which require the adapter have continuity to ground....2-27 Upgrade kits containing code upgrades and the adapter box are inaccessible. On the early machines engine board connector J5 is not, check the printer code levels (see Note above) and test the torquer. If it is wired differently. Remove the module and inspect the tray, the D-roll...

Service Manual
Page 56
...feeds: This is the same type and has not been run through the printer before. Letter paper size and A4 paper size model feeders are not supported in the printer throat. Failure to the correct printer model being used. Paper can be replaced every 200,000 prints or whenever ...feeding becomes unreliable. Jams: Make sure the printer is connected and functioning. replace if necessary. Clean ...
...feeds: This is the same type and has not been run through the printer before. Letter paper size and A4 paper size model feeders are not supported in the printer throat. Failure to the correct printer model being used. Paper can be replaced every 200,000 prints or whenever ...feeding becomes unreliable. Jams: Make sure the printer is connected and functioning. replace if necessary. Clean ...
Service Manual
Page 72
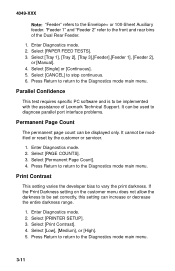
... print darkness. If the Print Darkness setting on the customer menu does not allow the darkness to the front and rear bins of Lexmark Technical Support. Select [Low], [Medium], or [High]. 5. "Feeder 1" and "Feeder 2" refer to be implemented with the assistance of ... and is to diagnose parallel port interface problems. Permanent Page Count The permanent page count can increase or decrease the entire darkness range. 1. Select [PRINTER SETUP]. 3. Select [Permanent Page Count]. 4. Select [PAPER FEED TESTS]. 3. Select [Single] or [Continuous]. 5. Select [PAGE COUNTS]. 3. ...
... print darkness. If the Print Darkness setting on the customer menu does not allow the darkness to the front and rear bins of Lexmark Technical Support. Select [Low], [Medium], or [High]. 5. "Feeder 1" and "Feeder 2" refer to be implemented with the assistance of ... and is to diagnose parallel port interface problems. Permanent Page Count The permanent page count can increase or decrease the entire darkness range. 1. Select [PRINTER SETUP]. 3. Select [Permanent Page Count]. 4. Select [PAPER FEED TESTS]. 3. Select [Single] or [Continuous]. 5. Select [PAGE COUNTS]. 3. ...

Service Manual
Page 77
... Diagnostics mode. 5. Enter Diagnostics mode. 2. Select [Transfer]. 4. Select [CANCEL] to the Diagnostics mode main menu. Select [PRINTER SETUP]. 3. Note: The Parallel wrap test does not test all signals used to communicate with unusual papers, this setting unless replacing...interface cable connectors. Select [Low], [Medium], or [High]. 5. In extreme environments with the host computer. Turn the printer off. 2. Contact Lexmark Technical Support for bidirectional communication. Install the wrap plug in the printout. Select [HARDWARE TESTS]. 6. Select [Wrap Test]. 7. ...
... Diagnostics mode. 5. Enter Diagnostics mode. 2. Select [Transfer]. 4. Select [CANCEL] to the Diagnostics mode main menu. Select [PRINTER SETUP]. 3. Note: The Parallel wrap test does not test all signals used to communicate with unusual papers, this setting unless replacing...interface cable connectors. Select [Low], [Medium], or [High]. 5. In extreme environments with the host computer. Turn the printer off. 2. Contact Lexmark Technical Support for bidirectional communication. Install the wrap plug in the printout. Select [HARDWARE TESTS]. 6. Select [Wrap Test]. 7. ...

Service Manual
Page 89
4049-XXX Removal Procedures When there is artwork to disengage the latch [D]. 7. Turn the printer off the rear pivot pin. Depress the latch and open the right cover. 5. Lift the right side of the cover to support a procedure, it follows the text. Repair Information 4-10 Remove the E-clip from the posts. 8. Slide the...
4049-XXX Removal Procedures When there is artwork to disengage the latch [D]. 7. Turn the printer off the rear pivot pin. Depress the latch and open the right cover. 5. Lift the right side of the cover to support a procedure, it follows the text. Repair Information 4-10 Remove the E-clip from the posts. 8. Slide the...

Service Manual
Page 115
... the right side bearing. 5. Remove the bearing cover from the left side of the transfer roll: Note: Do not touch the transfer roll surface. • Support the left bearing cover from the front with your left until the right end of the transfer roll shaft slides out of the transfer roll...
... the right side bearing. 5. Remove the bearing cover from the left side of the transfer roll: Note: Do not touch the transfer roll surface. • Support the left bearing cover from the front with your left until the right end of the transfer roll shaft slides out of the transfer roll...

Service Manual
Page 175
... Power Cord Set, Denmark Power Cord Set, New Zealand/Australia/ Argentina/Paraguay Power Cord Set, Israel Power Cord Set, UK/Malaysia/Singapore Rod, on/off Support, Rod on/off Actuator, On/Off Plate, On/Off Actuator Lever, Pivot Latch, On/Off Spring, PP 1381666 HV Power Supply, with Cable Cable, HVPS...
... Power Cord Set, Denmark Power Cord Set, New Zealand/Australia/ Argentina/Paraguay Power Cord Set, Israel Power Cord Set, UK/Malaysia/Singapore Rod, on/off Support, Rod on/off Actuator, On/Off Plate, On/Off Actuator Lever, Pivot Latch, On/Off Spring, PP 1381666 HV Power Supply, with Cable Cable, HVPS...


