
User Guide
Page 10
...- Find it here The latest supplemental information, updates, and customer support: • Documentation • Driver downloads • Live chat support • E‑mail support • Voice support http://support.lexmark.com Note: Select your country or region, and then select your product to install hardware options. &#...country or region: • In the U.S.-See the Statement of Limited Warranty included with the printer, or go to http://support.lexmark.com. • In other countries and regions-See the printed warranty that came with the printer or go to an appropriately ...
...- Find it here The latest supplemental information, updates, and customer support: • Documentation • Driver downloads • Live chat support • E‑mail support • Voice support http://support.lexmark.com Note: Select your country or region, and then select your product to install hardware options. &#...country or region: • In the U.S.-See the Statement of Limited Warranty included with the printer, or go to http://support.lexmark.com. • In other countries and regions-See the printed warranty that came with the printer or go to an appropriately ...

User Guide
Page 102
...Lexmark products To return Lexmark...content and format for recycling: 1 Go to www.lexmark.com/recycle. 2 Select the product you want to Lexmark, you return a cartridge to recycle. Disabling the ...Lexmark also offers recycling of . When you can reuse the box that Lexmark printers are 100% recyclable where corrugated recycling facilities exist. Recycling Lexmark packaging Lexmark continually strives to www.lexmark... • Print one copy of the paper. Lexmark cartons are transported in Lexmark packaging is included with the sensor. Lexmark recycles the box. To keep the sensor running,...
...Lexmark products To return Lexmark...content and format for recycling: 1 Go to www.lexmark.com/recycle. 2 Select the product you want to Lexmark, you return a cartridge to recycle. Disabling the ...Lexmark also offers recycling of . When you can reuse the box that Lexmark printers are 100% recyclable where corrugated recycling facilities exist. Recycling Lexmark packaging Lexmark continually strives to www.lexmark... • Print one copy of the paper. Lexmark cartons are transported in Lexmark packaging is included with the sensor. Lexmark recycles the box. To keep the sensor running,...

User Guide
Page 132
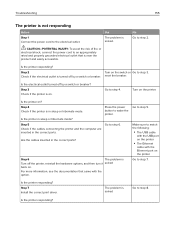
... menu settings page, and then check if the internal option appears in the print driver" on page 188. CAUTION-POTENTIAL INJURY: To avoid the risk of fire... outlet. Does the internal option operate correctly? No Go to step 4. The problem is properly installed in the print driver to the electrical outlet, and then turn it available for about 10 seconds, and then turn on . b Resend ...? Go to step 2. Is the internal option listed in the print driver. Step 4 a Check if the internal option is solved. c Connect the power cord to make it back solved.
... menu settings page, and then check if the internal option appears in the print driver" on page 188. CAUTION-POTENTIAL INJURY: To avoid the risk of fire... outlet. Does the internal option operate correctly? No Go to step 4. The problem is properly installed in the print driver to the electrical outlet, and then turn it available for about 10 seconds, and then turn on . b Resend ...? Go to step 2. Is the internal option listed in the print driver. Step 4 a Check if the internal option is solved. c Connect the power cord to make it back solved.
User Guide
Page 155
...: • The USB cable with the USB port on the printer • The Ethernet cable with the Ethernet port on . Step 7 Install the correct print driver. CAUTION-POTENTIAL INJURY: To avoid the risk of fire or electrical shock, connect the power cord to step 7. For more information, see the documentation...
...: • The USB cable with the USB port on the printer • The Ethernet cable with the Ethernet port on . Step 7 Install the correct print driver. CAUTION-POTENTIAL INJURY: To avoid the risk of fire or electrical shock, connect the power cord to step 7. For more information, see the documentation...

User Guide
Page 165
... problem. No Go to step 3. Contact customer support. A service representative will need to the printer and the electrical outlet. Visit the Lexmark Web site at the back of manuals, support documentation, drivers, and other downloads to find a solution. The problem is a Turn off the printer, wait for about 10 seconds, and...
... problem. No Go to step 3. Contact customer support. A service representative will need to the printer and the electrical outlet. Visit the Lexmark Web site at the back of manuals, support documentation, drivers, and other downloads to find a solution. The problem is a Turn off the printer, wait for about 10 seconds, and...

User Guide
Page 176
... and easily accessible. 7 Turn on page 188. When installing more information, see "Adding available options in the print driver to the electrical outlet. If necessary, manually add the tray in the print driver" on the printer. Do not try to lift the printer and trays at the same time. 5 Align the printer...
... and easily accessible. 7 Turn on page 188. When installing more information, see "Adding available options in the print driver to the electrical outlet. If necessary, manually add the tray in the print driver" on the printer. Do not try to lift the printer and trays at the same time. 5 Align the printer...

User Guide
Page 188
...copy of fire or electrical shock, connect the power cord to the electrical outlet. For Macintosh users 1 From System Preferences in the print driver For Windows users 1 Open the printers folder. 2 Select the printer you want to update, and then do either of hardware options, and ... manually add the finisher in the multiposition staple, hole punch finisher. CAUTION-POTENTIAL INJURY: Do not use the stapler in the print driver to the list of the following: • For Windows 7 or later, select Printer properties. • For earlier versions, select Properties. 3 ...
...copy of fire or electrical shock, connect the power cord to the electrical outlet. For Macintosh users 1 From System Preferences in the print driver For Windows users 1 Open the printers folder. 2 Select the printer you want to update, and then do either of hardware options, and ... manually add the finisher in the multiposition staple, hole punch finisher. CAUTION-POTENTIAL INJURY: Do not use the stapler in the print driver to the list of the following: • For Windows 7 or later, select Printer properties. • For earlier versions, select Properties. 3 ...

User Guide
Page 194
Index 194 Index A adapter plug 44 adding hardware options print driver 188 adding internal options print driver 188 ADF feed roller replacing 89 ADF pick roller replacing 87 ADF separator roller replacing 91 adjusting brightness of printer display 101 adjusting toner darkness ...
Index 194 Index A adapter plug 44 adding hardware options print driver 188 adding internal options print driver 188 ADF feed roller replacing 89 ADF pick roller replacing 87 ADF separator roller replacing 91 adjusting brightness of printer display 101 adjusting toner darkness ...

User Guide
Page 195
...fuser replacing 66 G green settings Eco‑Mode 101 hibernate mode 101 sleep mode 101 H hardware options installing 175 hardware options, adding print driver 188 held jobs 29 printing from a Macintosh computer 29 printing from Windows 29 held print jobs printing from a Macintosh computer 29 printing from ...punch finisher 181 installing the staple finisher 179 internal options 166 installing 171 memory card 166 internal options, adding print driver 188 internal solutions port installing 167 troubleshooting 133 J jam, clearing automatic document feeder 109 door J 122 door K 121
...fuser replacing 66 G green settings Eco‑Mode 101 hibernate mode 101 sleep mode 101 H hardware options installing 175 hardware options, adding print driver 188 held jobs 29 printing from a Macintosh computer 29 printing from Windows 29 held print jobs printing from a Macintosh computer 29 printing from ...punch finisher 181 installing the staple finisher 179 internal options 166 installing 171 memory card 166 internal options, adding print driver 188 internal solutions port installing 167 troubleshooting 133 J jam, clearing automatic document feeder 109 door J 122 door K 121

User Guide
Page 196
... 75 placing separator sheets between copies copying 32 port settings configuring 57 power button light printer status 16 power cord socket 13 print driver hardware options, adding 188 print job canceling from the computer 30 canceling from the printer control panel 30 print quality cleaning the scanner glass 58...
... 75 placing separator sheets between copies copying 32 port settings configuring 57 power button light printer status 16 power cord socket 13 print driver hardware options, adding 188 print job canceling from the computer 30 canceling from the printer control panel 30 print quality cleaning the scanner glass 58...


