User Guide
Page 8
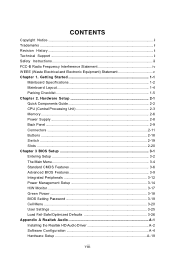
... Radio Frequency Interference Statement iv W EEE (Waste Electrical and Electronic Equipment) Statement v Chapter 1. Hardware Setup 2-1 Quick Components Guide 2-2 CPU (Central Processing Unit 2-3 Memory ...2-6 Power Supply ...2-8 Back Panel ...2-9 Connectors ...2-11 Buttons ...2-18 Switc h ...2-19 Slots ...2-20 Chapter...Cell Menu ...3-20 User Settings ...3-25 Load Fail-Safe/Optimized Defaults 3-26 Appendix A Realtek Audio A-1 Installing the Realtek HD Audio Driver A-2 Software Configuration A-4 Hardware Setup A-19 viii Getting Started 1-1 Mainboard Specifications 1-2 Mainboard Layout 1-4...
... Radio Frequency Interference Statement iv W EEE (Waste Electrical and Electronic Equipment) Statement v Chapter 1. Hardware Setup 2-1 Quick Components Guide 2-2 CPU (Central Processing Unit 2-3 Memory ...2-6 Power Supply ...2-8 Back Panel ...2-9 Connectors ...2-11 Buttons ...2-18 Switc h ...2-19 Slots ...2-20 Chapter...Cell Menu ...3-20 User Settings ...3-25 Load Fail-Safe/Optimized Defaults 3-26 Appendix A Realtek Audio A-1 Installing the Realtek HD Audio Driver A-2 Software Configuration A-4 Hardware Setup A-19 viii Getting Started 1-1 Mainboard Specifications 1-2 Mainboard Layout 1-4...

User Guide
Page 66
A-1 Realtek Audio Appendix A Realtek Audio The Realtek Audio provides 10-channel DAC that simultaneously supports 7.1 sound playback and 2 channels (multiple streaming) of independent stereo sound output through the Front-Out-Left and Front-Out-Right c h an nels .
A-1 Realtek Audio Appendix A Realtek Audio The Realtek Audio provides 10-channel DAC that simultaneously supports 7.1 sound playback and 2 channels (multiple streaming) of independent stereo sound output through the Front-Out-Left and Front-Out-Right c h an nels .

User Guide
Page 67
...update to enhance audio applications. channel or 7.1+2 channel audio operations. The setup screen will automatically appear. 2. Insert the MSI DVD into the DVD-ROM drive. Follow the procedures described below to install the drivers for different operating systems. Installation for ...reference only. Click Realtek HD Audio Drivers. a A-2 Hence, the program screens shown here in different operating systems. 1. MS-7576 Mainboard Installing the Realtek HD Audio Driver You need to install the driver for Realtek Audio codec to function properly before ...
...update to enhance audio applications. channel or 7.1+2 channel audio operations. The setup screen will automatically appear. 2. Insert the MSI DVD into the DVD-ROM drive. Follow the procedures described below to install the drivers for different operating systems. Installation for ...reference only. Click Realtek HD Audio Drivers. a A-2 Hence, the program screens shown here in different operating systems. 1. MS-7576 Mainboard Installing the Realtek HD Audio Driver You need to install the driver for Realtek Audio codec to function properly before ...

User Guide
Page 68
Click here Select this option A-3 Realtek Audio 3. Click Next to restart the system. Click Finish to install the Realtek High Definition Audio Driver. 4.
Click here Select this option A-3 Realtek Audio 3. Click Next to restart the system. Click Finish to install the Realtek High Definition Audio Driver. 4.

User Guide
Page 69
channel audio feature now. or 8- Double click a A-4 MS-7576 Mainboard Software Configuration After installing the audio driver, you are able to activate the HD Audio Configuration. It is also available to enable the audio driver by clicking the Realtek HD Audio M anager from the system tray at the lower-right corner of the screen to use the 2-, 4-, 6- Click the audio icon from the Control Panel.
channel audio feature now. or 8- Double click a A-4 MS-7576 Mainboard Software Configuration After installing the audio driver, you are able to activate the HD Audio Configuration. It is also available to enable the audio driver by clicking the Realtek HD Audio M anager from the system tray at the lower-right corner of the screen to use the 2-, 4-, 6- Click the audio icon from the Control Panel.

User Guide
Page 70
...value, or click "Delete EQ Setting" button to choose by pulling down the arrow, totally 23 kinds of sound effect will adjust automatically. Realtek Audio Sound Effect Here you can select a sound effect you to remove a preset EQ setting. If you like from the Environment list. ... enjoy different sound experience by clicking "Others" under the Equalizer part. Environment Simulation You will be shown for quick enjoyment. A-5 Realtek HD Audio Sound Manager also provides five popular settings "Stone Corridor", "Bathroom", "Sewer pipe", "Arena" and "Audio Corridor" for selection.
...value, or click "Delete EQ Setting" button to choose by pulling down the arrow, totally 23 kinds of sound effect will adjust automatically. Realtek Audio Sound Effect Here you can select a sound effect you to remove a preset EQ setting. If you like from the Environment list. ... enjoy different sound experience by clicking "Others" under the Equalizer part. Environment Simulation You will be shown for quick enjoyment. A-5 Realtek HD Audio Sound Manager also provides five popular settings "Stone Corridor", "Bathroom", "Sewer pipe", "Arena" and "Audio Corridor" for selection.

User Guide
Page 72
Remove the human voice Raise the key Lower the key A-7 By leveraging our long experience at audio field, Realtek HD Audio Sound Manager provides you certain optimized equalizer settings that are frequently used for your quick enjoyment. [How to Use It] Other than the ..., while the background music is still in place, and you can be that you might have. Karaoke Mode Karaoke mode brings Karaoke fun back home. Realtek Audio Frequently Used Equalizer Setting Realtek recognizes the needs that singer! 2.Key Adjustment: Using "Up / Down Arrow" to you.
Remove the human voice Raise the key Lower the key A-7 By leveraging our long experience at audio field, Realtek HD Audio Sound Manager provides you certain optimized equalizer settings that are frequently used for your quick enjoyment. [How to Use It] Other than the ..., while the background music is still in place, and you can be that you might have. Karaoke Mode Karaoke mode brings Karaoke fun back home. Realtek Audio Frequently Used Equalizer Setting Realtek recognizes the needs that singer! 2.Key Adjustment: Using "Up / Down Arrow" to you.

User Guide
Page 73
...menu will appear after you plugging the speakers into the jacks on the rear/ front panel before enable the multi-stream function. a A-8 The Realtek HD Audio front output item will appear. Important You have to save the setup. Multi-Stream Function ALC888 supports an outstanding feature called Multi-..., which means you may adjust the volumes of the speakers that you plugged in front or rear panel by select the Realtek HD Audio rear output or Realtek HD Audio front output items. Important Before set up, please make sure the playback devices are using the same computer together...
...menu will appear after you plugging the speakers into the jacks on the rear/ front panel before enable the multi-stream function. a A-8 The Realtek HD Audio front output item will appear. Important You have to save the setup. Multi-Stream Function ALC888 supports an outstanding feature called Multi-..., which means you may adjust the volumes of the speakers that you plugged in front or rear panel by select the Realtek HD Audio rear output or Realtek HD Audio front output items. Important Before set up, please make sure the playback devices are using the same computer together...

User Guide
Page 74
Then you are playing the first audio source (for example: use Winamp to play DVD/VCD), the output will come out from the scroll list first, and use a different program to play the second audio source (for example: use W indows Media Player to play MP3 files). A-9 You will find that the second audio source (MP3 music) will be played from the rear panel, which is the default setting. Realtek Audio W hen you must to select the Realtek HD Audio front output from the Line-Out audio jack of Front Panel.
Then you are playing the first audio source (for example: use Winamp to play DVD/VCD), the output will come out from the scroll list first, and use a different program to play the second audio source (for example: use W indows Media Player to play MP3 files). A-9 You will find that the second audio source (MP3 music) will be played from the rear panel, which is the default setting. Realtek Audio W hen you must to select the Realtek HD Audio front output from the Line-Out audio jack of Front Panel.

User Guide
Page 75
Playback control Tool Mute Playback device This function is to let you will be displayed. - a A-10 Realtek HD Audio Front Output Mute You may choose to mute single or multiple volume controls or to have an audio chat with your friends via ... This is essential when multistreamingplayback enabled. - Enable playback multi-streaming W ith this is to let you can have music (stream 2 from back panel) in play. Realtek HD Audio Rear Output - At any given period, you freely decide which ports to be able to completely mute sound output. MS-7576 Mainboard 3.
Playback control Tool Mute Playback device This function is to let you will be displayed. - a A-10 Realtek HD Audio Front Output Mute You may choose to mute single or multiple volume controls or to have an audio chat with your friends via ... This is essential when multistreamingplayback enabled. - Enable playback multi-streaming W ith this is to let you can have music (stream 2 from back panel) in play. Realtek HD Audio Rear Output - At any given period, you freely decide which ports to be able to completely mute sound output. MS-7576 Mainboard 3.

User Guide
Page 76
Show the following 4 channels to completely mute sound input. Enable recording multi-streaming Important Realtek Audio allows you to record the CD, Line, Mic and Stereo Mix channels simultaneously, frees you freely decide which volume control items to let you .... A-11 At any given period, you may choose to mute single or multiple volume controls or to record. Tool - Recording control Realtek Audio Tool Mute Recording device -Back Line in/Mic, Front Line in -Realtek HD Audio Input Mute You may choose 1 of the following volume controls This is to be displayed. - 4.
Show the following 4 channels to completely mute sound input. Enable recording multi-streaming Important Realtek Audio allows you to record the CD, Line, Mic and Stereo Mix channels simultaneously, frees you freely decide which volume control items to let you .... A-11 At any given period, you may choose to mute single or multiple volume controls or to record. Tool - Recording control Realtek Audio Tool Mute Recording device -Back Line in/Mic, Front Line in -Realtek HD Audio Input Mute You may choose 1 of the following volume controls This is to be displayed. - 4.

User Guide
Page 77
... that is being plugged into the correct jack. MS-7576 Mainboard Audio I/O In this tab, you have plugged in the corresponding jack. 2. If not correct, Realtek HD Audio Manager will guide you to plug the device into the correct jack, you will pop up for 7.1-Speaker Output Speaker Configuration: 1.
... that is being plugged into the correct jack. MS-7576 Mainboard Audio I/O In this tab, you have plugged in the corresponding jack. 2. If not correct, Realtek HD Audio Manager will guide you to plug the device into the correct jack, you will pop up for 7.1-Speaker Output Speaker Configuration: 1.

User Guide
Page 78
Realtek Audio Disable front panel jack detection (option) Find no function on your system are so-called AC'97 jacks. If so, please check this item checked, the dialog "Connected device" would automatically pop up when device plugged in . Connector Settings Click to disable front panel jack detection. Enable auto popup dialogue, when device has been plugged in Once this item to access connector settings. Please check if front jacks on front panel jacks? A-13 Mute rear panel output when front headphone plugged in .
Realtek Audio Disable front panel jack detection (option) Find no function on your system are so-called AC'97 jacks. If so, please check this item checked, the dialog "Connected device" would automatically pop up when device plugged in . Connector Settings Click to disable front panel jack detection. Enable auto popup dialogue, when device has been plugged in Once this item to access connector settings. Please check if front jacks on front panel jacks? A-13 Mute rear panel output when front headphone plugged in .

User Guide
Page 80
Or you select will light up and make sound, then check whether the cable is inserted firmly to make testing sound. If any speaker fails to the connector or replace the bad speakers with good ones. Center Front Left Side Left Rear Left Front Right Side Right Sub woof er Rear Right A-15 Realtek Audio Test Speakers You can select the speaker by clicking it to test the sounds of each speaker automatically. The one you may click the auto test button to test its functionality.
Or you select will light up and make sound, then check whether the cable is inserted firmly to make testing sound. If any speaker fails to the connector or replace the bad speakers with good ones. Center Front Left Side Left Rear Left Front Right Side Right Sub woof er Rear Right A-15 Realtek Audio Test Speakers You can select the speaker by clicking it to test the sounds of each speaker automatically. The one you may click the auto test button to test its functionality.

User Guide
Page 82
Realtek Audio 3D Audio Demo In this tab you like gaming. You may also select different environment to choose the most suitable environment you may adjust your 3D positional audio before playing 3D audio applications like . A-17
Realtek Audio 3D Audio Demo In this tab you like gaming. You may also select different environment to choose the most suitable environment you may adjust your 3D positional audio before playing 3D audio applications like . A-17

User Guide
Page 84
n 2-Channel Mode for Stereo-Speaker Output 1 4 2 5 3 6 1 Line In 2 Line Out (Front channels) 3 MIC 4 No function 5 No function 6 No function A-19 Realtek Audio Hardware Setup Connecting the Speakers W hen you have set the Multi-Channel Audio Function mode properly in the software utility, connect your speakers to the correct phone jacks in accordance with the setting in software utility.
n 2-Channel Mode for Stereo-Speaker Output 1 4 2 5 3 6 1 Line In 2 Line Out (Front channels) 3 MIC 4 No function 5 No function 6 No function A-19 Realtek Audio Hardware Setup Connecting the Speakers W hen you have set the Multi-Channel Audio Function mode properly in the software utility, connect your speakers to the correct phone jacks in accordance with the setting in software utility.

User Guide
Page 86
n 6-Channel Mode for 6-Speaker Output Realtek Audio 1 4 2 5 3 6 6-Channel Analog Audio Output 1 Line In 2 Line Out (Front channels) 3 MIC 4 Line Out (Rear channels) 5 Line Out (Center and Subwoofer channel) 6 No function A-21
n 6-Channel Mode for 6-Speaker Output Realtek Audio 1 4 2 5 3 6 6-Channel Analog Audio Output 1 Line In 2 Line Out (Front channels) 3 MIC 4 Line Out (Rear channels) 5 Line Out (Center and Subwoofer channel) 6 No function A-21

User Guide
Page 87
Or, the mainboard will support 5.1 channel audio-out only. a A-22 MS-7576 Mainboard n 8-Channel Mode for 8-Speaker Output 1 4 2 5 3 6 8-Channel Analog Audio Output 1 Line In 2 Line Out (Front channels) 3 MIC 4 Line Out (Rear channels) 5 Line Out (Center and Subwoofer channel) 6 Line Out (Side channels) Important To enable 7.1 channel audio-out function on Vista operating system, you have to install the Realtek Audio Driver.
Or, the mainboard will support 5.1 channel audio-out only. a A-22 MS-7576 Mainboard n 8-Channel Mode for 8-Speaker Output 1 4 2 5 3 6 8-Channel Analog Audio Output 1 Line In 2 Line Out (Front channels) 3 MIC 4 Line Out (Rear channels) 5 Line Out (Center and Subwoofer channel) 6 Line Out (Side channels) Important To enable 7.1 channel audio-out function on Vista operating system, you have to install the Realtek Audio Driver.