
Owners Manual
Page 2
... of electric shock. 8. If operating a power tool in the off-position before turning the power tool on invites accidents. 13. Electrical Safety 4. Do not use a ground fault circuit interrupter (GFCI) protected supply. Do not expose power tools to rain or wet conditions. Use of a cord suitable for appropriate conditions will reduce personal injuries. 12. Dress properly. Always wear eye protection. ENGLISH (Original instructions) SPECIFICATIONS Model XSC01 Blade diameter...
... of electric shock. 8. If operating a power tool in the off-position before turning the power tool on invites accidents. 13. Electrical Safety 4. Do not use a ground fault circuit interrupter (GFCI) protected supply. Do not expose power tools to rain or wet conditions. Use of a cord suitable for appropriate conditions will reduce personal injuries. 12. Dress properly. Always wear eye protection. ENGLISH (Original instructions) SPECIFICATIONS Model XSC01 Blade diameter...

Owners Manual
Page 3
..., keys, nails, screws or other small metal objects, that the safety of the workpiece. Use of arbour holes. Such preventive safety measures reduce the risk of blade binding. 7. Power tools are caused by insulated gripping surfaces only, when performing an operation where the cutting tool may contact hidden wiring. Use power tools only with correct size and shape (diamond versus round) of dust collection can be repaired. 19. When battery...
..., keys, nails, screws or other small metal objects, that the safety of the workpiece. Use of arbour holes. Such preventive safety measures reduce the risk of blade binding. 7. Power tools are caused by insulated gripping surfaces only, when performing an operation where the cutting tool may contact hidden wiring. Use power tools only with correct size and shape (diamond versus round) of dust collection can be repaired. 19. When battery...

Owners Manual
Page 4
... both hands on the section that retracting handle does not touch tool housing. Supports must be placed under their own weight. Blade depth and bevel adjusting locking levers must be tight and secure before use. Lower guard function 16. Raise the lower guard with the blade. Raise lower guard by the operator, if proper precautions are not operating properly, they must be serviced before making a "plunge cut objects that blade...
... both hands on the section that retracting handle does not touch tool housing. Supports must be placed under their own weight. Blade depth and bevel adjusting locking levers must be tight and secure before use. Lower guard function 16. Raise the lower guard with the blade. Raise lower guard by the operator, if proper precautions are not operating properly, they must be serviced before making a "plunge cut objects that blade...

Owners Manual
Page 5
... of battery. Tips for tool. ・ volts ・ direct current ・ no load speed ・ revolutions or reciprocation per minute IMPORTANT SAFETY ENC007-8 INSTRUCTIONS FOR BATTERY CARTRIDGE 1. Before using battery cartridge, read all instructions and cautionary markings on the tool or specified in every six months if you notice less tool power. 2. It may reach or exceed 50 ゚ C (122 ゚ F). 7. SAVE THESE INSTRUCTIONS. Always stop operating immediately...
... of battery. Tips for tool. ・ volts ・ direct current ・ no load speed ・ revolutions or reciprocation per minute IMPORTANT SAFETY ENC007-8 INSTRUCTIONS FOR BATTERY CARTRIDGE 1. Before using battery cartridge, read all instructions and cautionary markings on the tool or specified in every six months if you notice less tool power. 2. It may reach or exceed 50 ゚ C (122 ゚ F). 7. SAVE THESE INSTRUCTIONS. Always stop operating immediately...

Owners Manual
Page 6
...: • Always switch off and the battery cartridge is not locked completely. Insert it is removed before adjusting or checking function on the tool. Adjusting depth of the battery cartridge. • Hold the tool and the battery cartridge firmly when installing or removing battery cartridge. Lever 1 007524 CAUTION: • After adjusting the depth of cut , always tighten the lever securely. At the desired depth of cut , secure the base by tightening the lever. Using proper cut depth so that...
...: • Always switch off and the battery cartridge is not locked completely. Insert it is removed before adjusting or checking function on the tool. Adjusting depth of the battery cartridge. • Hold the tool and the battery cartridge firmly when installing or removing battery cartridge. Lever 1 007524 CAUTION: • After adjusting the depth of cut , always tighten the lever securely. At the desired depth of cut , secure the base by tightening the lever. Using proper cut depth so that...

Owners Manual
Page 7
... remove the blade. Outer flange 5 3. Switch trigger 2. Lamp 1 007527 CAUTION: • Do not look in reverse. NOTE: • Use a cotton stick to turn on the light and run the tool, press the lock-off lever and pull the switch trigger with an electric blade brake. Shaft lock 2. BE SURE TO TIGHTEN THE HEX BOLT CLOCKWISE SECURELY. 1. Saw blade 3 4. Removing or installing blade 1. Hex bolt 2. Return tool a MAKITA service center for lower guard. Electric brake This tool is switched...
... remove the blade. Outer flange 5 3. Switch trigger 2. Lamp 1 007527 CAUTION: • Do not look in reverse. NOTE: • Use a cotton stick to turn on the light and run the tool, press the lock-off lever and pull the switch trigger with an electric blade brake. Shaft lock 2. BE SURE TO TIGHTEN THE HEX BOLT CLOCKWISE SECURELY. 1. Saw blade 3 4. Removing or installing blade 1. Hex bolt 2. Return tool a MAKITA service center for lower guard. Electric brake This tool is switched...

Owners Manual
Page 8
.... • Always use the blades appropriate for blade to stop and then withdraw tool. If not, it locks in a straight line gently. Rip fence 1 (Guide rule) 3 007531 Hold the tool firmly. Such efforts do extra-accurate straight cuts. Insert it from being ejected from the tool. Rear handle 3. Use both a front grip and rear handle. Then turn or force the tool back to the cut again. When changing blade, make sure...
.... • Always use the blades appropriate for blade to stop and then withdraw tool. If not, it locks in a straight line gently. Rip fence 1 (Guide rule) 3 007531 Hold the tool firmly. Such efforts do extra-accurate straight cuts. Insert it from being ejected from the tool. Rear handle 3. Use both a front grip and rear handle. Then turn or force the tool back to the cut again. When changing blade, make sure...

Owners Manual
Page 9
... each use accessory or attachment for its stated purpose. Replace with compressed air. Replacing carbon brushes 1. Use only identical carbon brushes. Screwdriver 2 007533 9 Discoloration, deformation or cracks may differ from country to persons. Then check the tool while running tool with your local Makita Service Center. • Carbide-tipped blades • Rip fence (Guide rule) • Thumb screw M5 x 20 • Compression spring 6 • Hex wrench 5 • Safety goggle • Makita genuine battery and charger 1 001145 Remove...
... each use accessory or attachment for its stated purpose. Replace with compressed air. Replacing carbon brushes 1. Use only identical carbon brushes. Screwdriver 2 007533 9 Discoloration, deformation or cracks may differ from country to persons. Then check the tool while running tool with your local Makita Service Center. • Carbide-tipped blades • Rip fence (Guide rule) • Thumb screw M5 x 20 • Compression spring 6 • Hex wrench 5 • Safety goggle • Makita genuine battery and charger 1 001145 Remove...
Owners Manual
Page 10
... limitation of normal wear and tear: the tool has been abused, misused or improperly maintained: alterations have been made or attempted by defective workmanship or material, Makita will repair (or at our option, replace) without charge. This Warranty gives you specific legal rights, and you . EN0006-1 10 Should any trouble develop during this one of original purchase...
... limitation of normal wear and tear: the tool has been abused, misused or improperly maintained: alterations have been made or attempted by defective workmanship or material, Makita will repair (or at our option, replace) without charge. This Warranty gives you specific legal rights, and you . EN0006-1 10 Should any trouble develop during this one of original purchase...

Makita XSC01 Parts Breakdown
Page 2
...-2 050 265034-2 TAPPING SCREW 4X35 BRUSH HOLDER CAP CARBON BRUSH CB-430 (195018-5) HOUSING SET INC. 5 HOUSING SET INC. 4 TAPPING SCREW 4X18 XSC01 NAME PLATE ENDBELL COMPLETE YOKE UNIT TAPPING SCREW 4X18 HANDLE L COMPRESSION SPRING 4 LOCK OFF LEVER SWITCH TG72BD COMPRESSION SPRING 4 SWITCH LEVER CONTROLLER TAPPING SCREW 4X18 HANDLE R TERMINAL CAUTION LABEL FAN GUARD RUBBER RING 13 ARMATURE SHAFT LOCK COMPRESSION SPRING 6 GEAR HOUSING O RING 44 BALL BEARING 604ZZ GEAR SHAFT HELICAL GEAR 27 BALL BEARING...
...-2 050 265034-2 TAPPING SCREW 4X35 BRUSH HOLDER CAP CARBON BRUSH CB-430 (195018-5) HOUSING SET INC. 5 HOUSING SET INC. 4 TAPPING SCREW 4X18 XSC01 NAME PLATE ENDBELL COMPLETE YOKE UNIT TAPPING SCREW 4X18 HANDLE L COMPRESSION SPRING 4 LOCK OFF LEVER SWITCH TG72BD COMPRESSION SPRING 4 SWITCH LEVER CONTROLLER TAPPING SCREW 4X18 HANDLE R TERMINAL CAUTION LABEL FAN GUARD RUBBER RING 13 ARMATURE SHAFT LOCK COMPRESSION SPRING 6 GEAR HOUSING O RING 44 BALL BEARING 604ZZ GEAR SHAFT HELICAL GEAR 27 BALL BEARING...
Makita XSC01 Parts Breakdown
Page 3
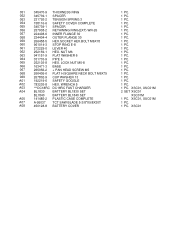
LOCK NUT M5-8 066 163471-3 BASE 067 265056-2 + PAN HEAD SCREW M5 068 266405-6 FLAT H.SQUARE NECK BOLT M6X75 069 267802-9 CUP WASHER 13 A01 192219-6 SAFETY GOGGLE A02 783203-8 HEX. WRENCH 5 A03 ***DC18RC DC18RC FAST CHARGER A04 BL1830 BATTERY BL1830 SET BL1840 BATTERY BL1840 SET A05 141485-2 PLASTIC CASE COMPLETE A07 A-95037 TCT SAW BLADE 5-3/8"X5/8X30T A08 450128-8 BATTERY COVER 1 PC. 1 PC. 1 PC. 1 PC. 1 PC. 1 PC. 1 PC...
LOCK NUT M5-8 066 163471-3 BASE 067 265056-2 + PAN HEAD SCREW M5 068 266405-6 FLAT H.SQUARE NECK BOLT M6X75 069 267802-9 CUP WASHER 13 A01 192219-6 SAFETY GOGGLE A02 783203-8 HEX. WRENCH 5 A03 ***DC18RC DC18RC FAST CHARGER A04 BL1830 BATTERY BL1830 SET BL1840 BATTERY BL1840 SET A05 141485-2 PLASTIC CASE COMPLETE A07 A-95037 TCT SAW BLADE 5-3/8"X5/8X30T A08 450128-8 BATTERY COVER 1 PC. 1 PC. 1 PC. 1 PC. 1 PC. 1 PC. 1 PC...

Makita XSC01T New Tool Flyers English
Page 1
... per charge* *Compared to change without prior notice. light illuminates the work area n Heavy gauge, precision machined base for smooth, accurate cutting and added durability n Equipped with battery for reduced operator fatigue DURABILITY Heavy gauge, precision machined base for faster cutting COMFORT Weighs only 5.7 lbs. 18V LXT® Lithium-Ion Cordless 5-3/8" Metal Cutting Saw Kit (5.0Ah) Model XSC01T Cuts a Wide Range of accessories. Patent and Trademark Office Makita offers a wide variety of...
... per charge* *Compared to change without prior notice. light illuminates the work area n Heavy gauge, precision machined base for smooth, accurate cutting and added durability n Equipped with battery for reduced operator fatigue DURABILITY Heavy gauge, precision machined base for faster cutting COMFORT Weighs only 5.7 lbs. 18V LXT® Lithium-Ion Cordless 5-3/8" Metal Cutting Saw Kit (5.0Ah) Model XSC01T Cuts a Wide Range of accessories. Patent and Trademark Office Makita offers a wide variety of...


