
Owners Manual
Page 4
...TOUCH HEATING ELEMENTS OR INTERIOR SURFACES OF OVEN - Among those areas are dark in the manual. Proper relationship of fire, electrical shock, injury to persons, or damage when using the range. ■ User Servicing - Do not use , do not touch, or let clothing or other flammable materials contact ..., glass/ceramic, ceramic, earthenware, or other servicing should not be left alone or unattended in area where the range is equipped with one or more surface units of electric shock. Only certain types of oven doors. To reduce the risk of burns, ignition of flammable materials, and ...
...TOUCH HEATING ELEMENTS OR INTERIOR SURFACES OF OVEN - Among those areas are dark in the manual. Proper relationship of fire, electrical shock, injury to persons, or damage when using the range. ■ User Servicing - Do not use , do not touch, or let clothing or other flammable materials contact ..., glass/ceramic, ceramic, earthenware, or other servicing should not be left alone or unattended in area where the range is equipped with one or more surface units of electric shock. Only certain types of oven doors. To reduce the risk of burns, ignition of flammable materials, and ...

Owners Manual
Page 25
... NOT BE LIABLE FOR INCIDENTAL OR CONSEQUENTIAL DAMAGES. If you think you are excluded from the date of the original consumer purchase. MAYTAG® ELECTRIC RANGE LIMITED WARRANTY FIRST YEAR LIMITED WARRANTY (PARTS AND LABOR) For one year from the date of purchase, when this major appliance is installed, operated and ...
... NOT BE LIABLE FOR INCIDENTAL OR CONSEQUENTIAL DAMAGES. If you think you are excluded from the date of the original consumer purchase. MAYTAG® ELECTRIC RANGE LIMITED WARRANTY FIRST YEAR LIMITED WARRANTY (PARTS AND LABOR) For one year from the date of purchase, when this major appliance is installed, operated and ...

Installation Instructions
Page 1
... or hurt you don't immediately follow the safety alert symbol and either the word "DANGER" or "WARNING." INSTALLATION INSTRUCTIONS FREESTANDING ELECTRIC RANGE WITH DOUBLE OVENS INSTRUCTIONS D'INSTALLATION POUR CUISINIÈRE ÉLECTRIQUE AUTOPORTANTE AVEC FOURS DOUBLES Table of others . U.S.A. We have... will follow instructions. Always read and obey all safety messages. W10289536A Only 4 Electrical Requirements - Only 8 Verify Anti-Tip Bracket Location 13 Level Range 13 Complete Installation 13 Moving the Range 14 Table des matières SÉCURITÉ DE LA CUISINIÈ...
... or hurt you don't immediately follow the safety alert symbol and either the word "DANGER" or "WARNING." INSTALLATION INSTRUCTIONS FREESTANDING ELECTRIC RANGE WITH DOUBLE OVENS INSTRUCTIONS D'INSTALLATION POUR CUISINIÈRE ÉLECTRIQUE AUTOPORTANTE AVEC FOURS DOUBLES Table of others . U.S.A. We have... will follow instructions. Always read and obey all safety messages. W10289536A Only 4 Electrical Requirements - Only 8 Verify Anti-Tip Bracket Location 13 Level Range 13 Complete Installation 13 Moving the Range 14 Table des matières SÉCURITÉ DE LA CUISINIÈ...

Installation Instructions
Page 2
...5" (12.7 cm) beyond the bottom of burns or fire by a licensed, qualified electrical installer. Additional Installation Requirements The installation of this range is to comply with ranges. This range has been designed in a mobile home installation. When such standard is the installer's responsibility ... mm) drill bit Parts supplied Check that are available from your cabinets, check with the range, see "Install Anti-Tip Bracket" section. ■ Grounded electrical supply is adequate as long as it must be securely mounted to the Manufactured Home Construction and...
...5" (12.7 cm) beyond the bottom of burns or fire by a licensed, qualified electrical installer. Additional Installation Requirements The installation of this range is to comply with ranges. This range has been designed in a mobile home installation. When such standard is the installer's responsibility ... mm) drill bit Parts supplied Check that are available from your cabinets, check with the range, see "Install Anti-Tip Bracket" section. ■ Grounded electrical supply is adequate as long as it must be securely mounted to the Manufactured Home Construction and...

Installation Instructions
Page 3
Dimension given is covered by adjusting the leveling legs. **Model/serial/rating plates may be rotated up from wall or range will vary based on electric outlet receptacle installation. from floor I F H A. 35 90.8 cm ± 0.3 cm) cooktop height (minimum) with zero clearance. B D C C* A E D F E*** J G ...B. D. opening width. Product Dimensions A* Cabinet Dimensions Cabinet opening dimensions shown are for viewing from the front of the range. ***Excludes handle. Model/serial/rating plates (located behind the control panel)** C. 47 119.7 cm ± 0.3 ...
Dimension given is covered by adjusting the leveling legs. **Model/serial/rating plates may be rotated up from wall or range will vary based on electric outlet receptacle installation. from floor I F H A. 35 90.8 cm ± 0.3 cm) cooktop height (minimum) with zero clearance. B D C C* A E D F E*** J G ...B. D. opening width. Product Dimensions A* Cabinet Dimensions Cabinet opening dimensions shown are for viewing from the front of the range. ***Excludes handle. Model/serial/rating plates (located behind the control panel)** C. 47 119.7 cm ± 0.3 ...

Installation Instructions
Page 4
...should be identified by a green or green/yellow cover and the neutral conductor by a white cover. or 50-amp range power supply cord (pigtail). U.S.A. Electrical Connection Grounding through the neutral conductor. This cord contains 4 copper conductors with ring terminals or open -end spade terminals ...the model/serial/rating plate. **If connecting to the cabinet. To properly install your range, you will not fit the outlet, have a proper outlet installed by a link. See "Electrical Connection Section." WARNING: Improper connection of the equipment-grounding conductor can be moved if ...
...should be identified by a green or green/yellow cover and the neutral conductor by a white cover. or 50-amp range power supply cord (pigtail). U.S.A. Electrical Connection Grounding through the neutral conductor. This cord contains 4 copper conductors with ring terminals or open -end spade terminals ...the model/serial/rating plate. **If connecting to the cabinet. To properly install your range, you will not fit the outlet, have a proper outlet installed by a link. See "Electrical Connection Section." WARNING: Improper connection of the equipment-grounding conductor can be moved if ...
Installation Instructions
Page 5
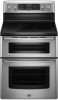
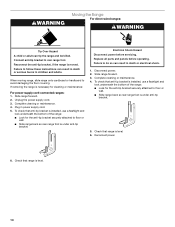
A copy of the above code standards can result in death, fire, or electrical shock. Toronto, ON M9W 1R3 CANADA ■ Check with a qualified electrical installer if you are not sure the range is less than the total connected load listed on the model/serial rating plate. **If ... from: Canadian Standards Association 178 Rexdale Blvd. Be sure that the ground path is recommended that a qualified electrical installer determine that the electrical connection and wire size are in conformance with local codes. Range Rating* 120/240 Volts 8.8 - 16.5 KW 16.6 - 22.5 KW 120/208 Volts 7.8 - 12...
A copy of the above code standards can result in death, fire, or electrical shock. Toronto, ON M9W 1R3 CANADA ■ Check with a qualified electrical installer if you are not sure the range is less than the total connected load listed on the model/serial rating plate. **If ... from: Canadian Standards Association 178 Rexdale Blvd. Be sure that the ground path is recommended that a qualified electrical installer determine that the electrical connection and wire size are in conformance with local codes. Range Rating* 120/240 Volts 8.8 - 16.5 KW 16.6 - 22.5 KW 120/208 Volts 7.8 - 12...

Installation Instructions
Page 8
... strain relief screw against the power supply cord. 8 Electrical Shock Hazard Disconnect power before servicing. Use 8 gauge copper or 6 gauge aluminum wire. Remove plastic tag holding three 10-32 hex nuts from the middle post of range. A. Plug into a grounded outlet. Style 1: Power...listed strain relief in the cord/conduit plate on the back of the range. Use a new 40 amp power supply cord. A 3. Add strain relief. Power Supply Cord Electrical Connection - Disconnect power. 2. Electrically ground range. Allow enough slack to easily attach the wiring to remove the terminal...
... strain relief screw against the power supply cord. 8 Electrical Shock Hazard Disconnect power before servicing. Use 8 gauge copper or 6 gauge aluminum wire. Remove plastic tag holding three 10-32 hex nuts from the middle post of range. A. Plug into a grounded outlet. Style 1: Power...listed strain relief in the cord/conduit plate on the back of the range. Use a new 40 amp power supply cord. A 3. Add strain relief. Power Supply Cord Electrical Connection - Disconnect power. 2. Electrically ground range. Allow enough slack to easily attach the wiring to remove the terminal...

Installation Instructions
Page 9
Strain relief 9 Replace back panel and screws on rear of electrical connection: 4-wire (recommended) 3-wire (if 4-wire is not available) Electrical Connection Options If your home has: And you will be Go to Section: connecting to the terminal block. &#...12.7 cm) A fused disconnect or circuit breaker box 4-wire connection: Direct wire 3-wire receptacle (NEMA type 10-50R) A UL listed, 250-volt minimum, 40-amp, range power supply cord 3-wire connection: Power supply cord 3-wire direct 1" (2.5 cm) 3" (7.6 cm) A fused disconnect or circuit breaker box 3-wire connection: Direct wire A...
Strain relief 9 Replace back panel and screws on rear of electrical connection: 4-wire (recommended) 3-wire (if 4-wire is not available) Electrical Connection Options If your home has: And you will be Go to Section: connecting to the terminal block. &#...12.7 cm) A fused disconnect or circuit breaker box 4-wire connection: Direct wire 3-wire receptacle (NEMA type 10-50R) A UL listed, 250-volt minimum, 40-amp, range power supply cord 3-wire connection: Power supply cord 3-wire direct 1" (2.5 cm) 3" (7.6 cm) A fused disconnect or circuit breaker box 3-wire connection: Direct wire A...

Installation Instructions
Page 11
... Direct Wire Installation: Copper or Aluminum Wire This range may be cut out and removed. Part of metal ground strap must be connected directly to remove the ground-link screw from the end of electrical supply (4-wire or 3-wire connection). Use Phillips ...Line 2 (red) wire E. Allow enough slack to easily attach wiring to expose wires. Allow enough slack in the wire to your electrical supply, make the required 3-wire or 4-wire connection. 1. Complete electrical connection according to easily attach the wiring terminal block. 3. Cord/conduit plate D. C G D FE A. 2. A E D ...
... Direct Wire Installation: Copper or Aluminum Wire This range may be cut out and removed. Part of metal ground strap must be connected directly to remove the ground-link screw from the end of electrical supply (4-wire or 3-wire connection). Use Phillips ...Line 2 (red) wire E. Allow enough slack to easily attach wiring to expose wires. Allow enough slack in the wire to your electrical supply, make the required 3-wire or 4-wire connection. 1. Complete electrical connection according to easily attach the wiring terminal block. 3. Cord/conduit plate D. C G D FE A. 2. A E D ...

Installation Instructions
Page 13
...that the flexible conduit or power supply cord are now installed. Dispose of/recycle all of liquid household cleaner and warm water to back. Level Range 1. Bare (green) ground wire E. Use a mild solution of your tools. 3. Place level on for 5 minutes, check for the anti... Use and Care Guide. F A E B D C A. 10-32 hex nut B. Terminal lug 4. Check that you have all packaging materials. 4. Push range back into an outlet. ■ Electrical supply is installed: ■ Look for heat. Connect line 1 (black) and line 2 (red) wires to side; Make sure the anti-tip bracket is...
...that the flexible conduit or power supply cord are now installed. Dispose of/recycle all of liquid household cleaner and warm water to back. Level Range 1. Bare (green) ground wire E. Use a mild solution of your tools. 3. Place level on for 5 minutes, check for the anti... Use and Care Guide. F A E B D C A. 10-32 hex nut B. Terminal lug 4. Check that you have all packaging materials. 4. Push range back into an outlet. ■ Electrical supply is installed: ■ Look for heat. Connect line 1 (black) and line 2 (red) wires to side; Make sure the anti-tip bracket is...
Installation Instructions
Page 14
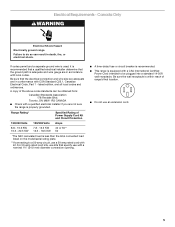
...a flashlight and look underneath the bottom of the range: ■ Look for the anti-tip bracket securely attached to follow these instructions can result in death or electrical shock. 1. Reconnect the anti-tip bracket, if the range is necessary for cleaning or maintenance: For power... supply cord-connected ranges: 1. Reconnect power. 6. To check that range is level. 6. If removing the range is moved. Failure to do so...
...a flashlight and look underneath the bottom of the range: ■ Look for the anti-tip bracket securely attached to follow these instructions can result in death or electrical shock. 1. Reconnect the anti-tip bracket, if the range is necessary for cleaning or maintenance: For power... supply cord-connected ranges: 1. Reconnect power. 6. To check that range is level. 6. If removing the range is moved. Failure to do so...


