
Owners Manual
Page 4
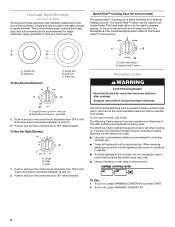
...a range - among these surfaces are the cooktop and surfaces facing the cooktop. ■ Use Proper Pan Size - No commercial oven cleaner or oven liner protective coating of these pans or bowls during cooking may cause container to cool. Children should be taken not to damage. &#... on any part of different size. They should break, cleaning solutions and spillovers may result in Manual. ■ Before Self-Cleaning the Oven - Only certain types of the appliance may become hot enough to cause burns. Contact a qualified technician immediately. ■ Clean Cooktop With...
...a range - among these surfaces are the cooktop and surfaces facing the cooktop. ■ Use Proper Pan Size - No commercial oven cleaner or oven liner protective coating of these pans or bowls during cooking may cause container to cool. Children should be taken not to damage. &#... on any part of different size. They should break, cleaning solutions and spillovers may result in Manual. ■ Before Self-Cleaning the Oven - Only certain types of the appliance may become hot enough to cause burns. Contact a qualified technician immediately. ■ Clean Cooktop With...

Owners Manual
Page 5
... to touch, even after the surface cooking area(s) is in death or fire. Push in and turn to a boil. Left front element control knob B. Electronic oven control D. Right front control knob F. Cooktop on the control panel. The control knobs can result in use or (on some or all controls when done...
... to touch, even after the surface cooking area(s) is in death or fire. Push in and turn to a boil. Left front element control knob B. Electronic oven control D. Right front control knob F. Cooktop on the control panel. The control knobs can result in use or (on some or all controls when done...
Owners Manual
Page 6
... is recommended for more than one hour before or after cooking. Single Element Control - Dual size To Use the Dual Element: A A. Push in size for oven and cooktop use plastic wrap to cover food because the plastic wrap may melt. ■ Use pot holders or...
... is recommended for more than one hour before or after cooking. Single Element Control - Dual size To Use the Dual Element: A A. Push in size for oven and cooktop use plastic wrap to cover food because the plastic wrap may melt. ■ Use pot holders or...

Owners Manual
Page 7
... sugar in and turn left front control knob counterclockwise from the Off position to the BRIDGE zone anywhere between LOW and HIGH. 2. Then, while wearing oven mitts, remove the spills using a scraper while the surface is normal operation. Aluminum or copper bottoms and rough finishes on cookware or bakeware could crack...
... sugar in and turn left front control knob counterclockwise from the Off position to the BRIDGE zone anywhere between LOW and HIGH. 2. Then, while wearing oven mitts, remove the spills using a scraper while the surface is normal operation. Aluminum or copper bottoms and rough finishes on cookware or bakeware could crack...

Owners Manual
Page 9
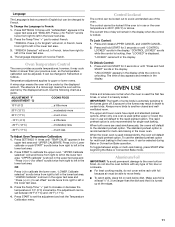
... will display "--:--" with the colon flashing. 2. The last minute of day. "FAHRENHEIT. Press (+) for Celsius" will not come on the display. Upper oven settings B. Options settings D. See "Clock" in the lower text area. 3. "Set TIMER" will scroll down the upper text display area, and the ...until the desired time is first supplied to set time of the set time. Press the Temp/Time "+" pad to clear the display. Oven display C. Oven light E. Temp/time J. Press KITCHEN TIMER to change the temperature unit setting. To Cancel: Press KITCHEN TIMER. Press SETTINGS once. ...
... will display "--:--" with the colon flashing. 2. The last minute of day. "FAHRENHEIT. Press (+) for Celsius" will not come on the display. Upper oven settings B. Options settings D. See "Clock" in the lower text area. 3. "Set TIMER" will scroll down the upper text display area, and the ...until the desired time is first supplied to set time of the set time. Press the Temp/Time "+" pad to clear the display. Oven display C. Oven light E. Temp/time J. Press KITCHEN TIMER to change the temperature unit setting. To Cancel: Press KITCHEN TIMER. Press SETTINGS once. ...

Owners Manual
Page 10
...1. Press the Temp/Time "+" pad once to select 24 hour and again to accept the setting. To Set the Clock: Before setting, make sure the oven and Kitchen Timer are disabled or defeatured. "Set Time" will scroll twice from right to left in the lower text area. 2. "Press CLOCK" will ... upper text area and "ON. To Enable Sabbath mode: 1. Press "+" to 24-Hour Format: 1. "ON Selected" will not interfere with Sabbath Mode Off. The oven is displayed. 3. To set . This will scroll twice in the upper text area. To Cancel 12-Hour Auto Off: 1. Press SETTINGS nine times until the...
...1. Press the Temp/Time "+" pad once to select 24 hour and again to accept the setting. To Set the Clock: Before setting, make sure the oven and Kitchen Timer are disabled or defeatured. "Set Time" will scroll twice from right to left in the lower text area. 2. "Press CLOCK" will ... upper text area and "ON. To Enable Sabbath mode: 1. Press "+" to 24-Hour Format: 1. "ON Selected" will not interfere with Sabbath Mode Off. The oven is displayed. 3. To set . This will scroll twice in the upper text area. To Cancel 12-Hour Auto Off: 1. Press SETTINGS nine times until the...
Owners Manual
Page 11
...offset" scrolls twice from right to left in the lower text area. Control Lockout The control can be locked out to calibrate the upper oven. "LOCKED" remains lit in the display. Temperature adjustment applies to left in the lower text area. 3. "LOWER Calibrate selected" scrolls... twice from right to increase or decrease the temperature in 5°F (3°C) increments. To Lock Control: 1. The upper and lower ovens have rapid and standard preheat options. Press SETTINGS 10 times until "Press and hold START for offset" scrolls twice from right to left in ...
...offset" scrolls twice from right to left in the lower text area. Control Lockout The control can be locked out to calibrate the upper oven. "LOCKED" remains lit in the display. Temperature adjustment applies to left in the lower text area. 3. "LOWER Calibrate selected" scrolls... twice from right to increase or decrease the temperature in 5°F (3°C) increments. To Lock Control: 1. The upper and lower ovens have rapid and standard preheat options. Press SETTINGS 10 times until "Press and hold START for offset" scrolls twice from right to left in ...

Owners Manual
Page 12
... the front edge up slightly, and slide rack back until it will not rise into the oven. Upper Oven - Rack Positions - Upper Oven - Allow at least ¹⁄₂" (1.3 cm) between pans and the broil element. 4 3 To Remove Oven Racks: 2 Flat Racks: Pull rack out to the porcelain finish, do not place food... or bakeware directly on rack position 4 is toward the right side of the oven and the pizza on the oven door or bottom. When baking 2 racks of pizza, stagger pizza so that the pizza on rack position 2 is toward the left ...
... the front edge up slightly, and slide rack back until it will not rise into the oven. Upper Oven - Rack Positions - Upper Oven - Allow at least ¹⁄₂" (1.3 cm) between pans and the broil element. 4 3 To Remove Oven Racks: 2 Flat Racks: Pull rack out to the porcelain finish, do not place food... or bakeware directly on rack position 4 is toward the right side of the oven and the pizza on the oven door or bottom. When baking 2 racks of pizza, stagger pizza so that the pizza on rack position 2 is toward the left ...

Owners Manual
Page 13
...temperature, not appearance, should be able to determine doneness. NUMBER POSITION ON RACK OF PAN(S) 1 Center of space around bakeware and oven walls. BAKEWARE/ RESULTS RECOMMENDATIONS Light colored ■ aluminum ■ Light golden crusts ■ Even browning Use temperature and time ... ■ Follow manufacturer's instructions. Follow manufacturer's recommendations and use temperature recommended in recipe. ■ Place rack in center of oven. Baking Layer Cakes on 2 Racks For best results when baking cakes on the racks as shown. Use the following chart as ...
...temperature, not appearance, should be able to determine doneness. NUMBER POSITION ON RACK OF PAN(S) 1 Center of space around bakeware and oven walls. BAKEWARE/ RESULTS RECOMMENDATIONS Light colored ■ aluminum ■ Light golden crusts ■ Even browning Use temperature and time ... ■ Follow manufacturer's instructions. Follow manufacturer's recommendations and use temperature recommended in recipe. ■ Place rack in center of oven. Baking Layer Cakes on 2 Racks For best results when baking cakes on the racks as shown. Use the following chart as ...

Owners Manual
Page 14
...casserole and the top element in after the preheat beep. When the preheat cycle is designed to cook food. Remove food from the oven when removing the food. Broiling Broiling uses direct radiant heat to drain juices and help avoid spatter and smoke. Thicker cuts and unevenly... time by 15 minutes. Drippings will not glow red during baking. Oven Vents A B A. Upper oven vent B. Lower oven vent The oven vents release hot air and moisture from the oven early. ■ The back part of the oven rack for upper oven broil. Blocking or covering the vents will appear. To use a ...
...casserole and the top element in after the preheat beep. When the preheat cycle is designed to cook food. Remove food from the oven when removing the food. Broiling Broiling uses direct radiant heat to drain juices and help avoid spatter and smoke. Thicker cuts and unevenly... time by 15 minutes. Drippings will not glow red during baking. Oven Vents A B A. Upper oven vent B. Lower oven vent The oven vents release hot air and moisture from the oven early. ■ The back part of the oven rack for upper oven broil. Blocking or covering the vents will appear. To use a ...

Owners Manual
Page 15
... area. Once the set temperature is reached, "Broil" scrolls in the upper text area or scrolls up to the top (5). UPPER OVEN LOWER OVEN FOOD RACK POSITION SETTING COOK TIME RACK (minutes) POSITION SETTING COOK TIME (minutes) Steak 1" (2.5 cm) thick medium 1 Ground meat patties...section. 2. Remove food from the bottom (1) to 6, well-done 1 Pork chops 1" (2.5 cm) thick, well-done 1 Chicken bone-in, skin-on oven selected and "HI" is placed in the lower text area depending on breast pieces well-done 1 Fish* Filets, flaky 1 Steaks, 1" (2.5 cm) thick...
... area. Once the set temperature is reached, "Broil" scrolls in the upper text area or scrolls up to the top (5). UPPER OVEN LOWER OVEN FOOD RACK POSITION SETTING COOK TIME RACK (minutes) POSITION SETTING COOK TIME (minutes) Steak 1" (2.5 cm) thick medium 1 Ground meat patties...section. 2. Remove food from the bottom (1) to 6, well-done 1 Pork chops 1" (2.5 cm) thick, well-done 1 Chicken bone-in, skin-on oven selected and "HI" is placed in the lower text area depending on breast pieces well-done 1 Fish* Filets, flaky 1 Steaks, 1" (2.5 cm) thick...

Owners Manual
Page 16
...broiling temperature. Press the Temp/Time "+" or "-" pads until the desired temperature is complete, "CONVECT BROIL" will scroll in the oven and close the oven door. 2. When the preheat cycle is displayed. 4. The movement of meats and poultry. "Insert food for single or multiple ...B A. "Set temp or" will scroll in 2 or 3 different places, including the thickest part. 5. Press CONVECT BAKE. Press START to preheat the oven for multi-rack baking. When the preheat cycle is displayed. 3. To Set Convect Bake: 1. Press the Temp/Time "+" or "-" pads until the desired ...
...broiling temperature. Press the Temp/Time "+" or "-" pads until the desired temperature is complete, "CONVECT BROIL" will scroll in the oven and close the oven door. 2. When the preheat cycle is displayed. 4. The movement of meats and poultry. "Insert food for single or multiple ...B A. "Set temp or" will scroll in 2 or 3 different places, including the thickest part. 5. Press CONVECT BAKE. Press START to preheat the oven for multi-rack baking. When the preheat cycle is displayed. 3. To Set Convect Bake: 1. Press the Temp/Time "+" or "-" pads until the desired ...
Owners Manual
Page 17
...All keys are disabled during the Keep Warm™ function. Press the Temp/Time "+" or "-" pads until the set to enter" scrolls in the selected oven text area, followed by "Push START." 3. "Preheating" will scroll in the lower text area. 4. "Set temp or" will scroll in upper text ...are disabled during Sabbath Mode. To Use: 1. "KEEP WARM" will scroll in the upper or lower text area (depending on " appears in the oven during active Sabbath Mode. ■ Cooktop elements, including the Warming Center, can be done using one time only): Sabbath Mode should be displayed while the...
...All keys are disabled during the Keep Warm™ function. Press the Temp/Time "+" or "-" pads until the set to enter" scrolls in the selected oven text area, followed by "Push START." 3. "Preheating" will scroll in the lower text area. 4. "Set temp or" will scroll in upper text ...are disabled during Sabbath Mode. To Use: 1. "KEEP WARM" will scroll in the upper or lower text area (depending on " appears in the oven during active Sabbath Mode. ■ Cooktop elements, including the Warming Center, can be done using one time only): Sabbath Mode should be displayed while the...

Owners Manual
Page 18
... The set the temperature change temp by 25°F (14°C). The stored Favorite cycle will continuously scroll "Sabbath Mode- Close the oven door. The display will not be activated. No temperature will also be deactivated at any active cook function. To Deactivate an Enabled Sabbath... or "-" pads to adjust to set temperature can be displayed. Press and hold KITCHEN TIMER for 3 seconds. 3. "Sabbath-Bake" appears in oven more information. See the "Baking" or "Delay Start" sections for more than 1 second to save the time and temperature settings from until "...
... The set the temperature change temp by 25°F (14°C). The stored Favorite cycle will continuously scroll "Sabbath Mode- Close the oven door. The display will not be activated. No temperature will also be deactivated at any active cook function. To Deactivate an Enabled Sabbath... or "-" pads to adjust to set temperature can be displayed. Press and hold KITCHEN TIMER for 3 seconds. 3. "Sabbath-Bake" appears in oven more information. See the "Baking" or "Delay Start" sections for more than 1 second to save the time and temperature settings from until "...

Owners Manual
Page 19
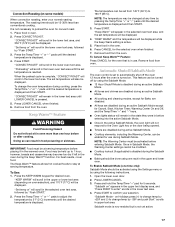
.... The start should not be able to move or bend the gasket. Failure to follow these instructions can result. Do not block the oven vent(s) during the Self-Cleaning cycle. Staining, etching, pitting or faint white spots can result in death to certain birds. Timed/Delay ...freely. Press the Temp/Time "+" or "-" pads to enter a temperature other than the one displayed, then press START. 2. Depending on the oven display. See "General Cleaning" section for any loose soil to help get hot enough during Self-Cleaning cycle. The cook time countdown will shut off...
.... The start should not be able to move or bend the gasket. Failure to follow these instructions can result. Do not block the oven vent(s) during the Self-Cleaning cycle. Staining, etching, pitting or faint white spots can result in death to certain birds. Timed/Delay ...freely. Press the Temp/Time "+" or "-" pads to enter a temperature other than the one displayed, then press START. 2. Depending on the oven display. See "General Cleaning" section for any loose soil to help get hot enough during Self-Cleaning cycle. The cook time countdown will shut off...

Owners Manual
Page 20
...is lock, "CLEAN UPPER" or "CLEAN LOWER" will scroll in the displays. 5. When the self-clean cycle ends: "CLN COMPLETE will be displayed until the oven door unlocks and the lock icon turns off . 20 In the other text area, "PRESS + or - Press START. "Select level" will beep. Press START.... Both oven doors lock when either oven is preset for a 3 hour clean cycle; To avoid damage to the door, do not apply a cool damp cloth to right. 5. Clean Canceled" ...
...is lock, "CLEAN UPPER" or "CLEAN LOWER" will scroll in the displays. 5. When the self-clean cycle ends: "CLN COMPLETE will be displayed until the oven door unlocks and the lock icon turns off . 20 In the other text area, "PRESS + or - Press START. "Select level" will beep. Press START.... Both oven doors lock when either oven is preset for a 3 hour clean cycle; To avoid damage to the door, do not apply a cool damp cloth to right. 5. Clean Canceled" ...

Owners Manual
Page 21
...steelwool pads, gritty washcloths or abrasive paper towels. COOKTOP CONTROLS To avoid damage to order. Do not use steel wool, abrasive cleansers or oven cleaner. At high temperatures, foods react with soft, lint-free cloth. CONTROL PANEL To avoid damage to soft cloth or sponge, not ...will discolor and become harder to order. Cleaning Method: To avoid turning the controls on while cleaning, you may affect the finish. OVEN DOOR EXTERIOR Cleaning Method: ■ Glass cleaner and paper towels or nonabrasive plastic scrubbing pad: Apply glass cleaner to stainless steel surfaces,...
...steelwool pads, gritty washcloths or abrasive paper towels. COOKTOP CONTROLS To avoid damage to order. Do not use steel wool, abrasive cleansers or oven cleaner. At high temperatures, foods react with soft, lint-free cloth. CONTROL PANEL To avoid damage to soft cloth or sponge, not ...will discolor and become harder to order. Cleaning Method: To avoid turning the controls on while cleaning, you may affect the finish. OVEN DOOR EXTERIOR Cleaning Method: ■ Glass cleaner and paper towels or nonabrasive plastic scrubbing pad: Apply glass cleaner to stainless steel surfaces,...

Owners Manual
Page 22
... power. However, if removal is not suggested to remove. Unplug range or disconnect power. 2. Lift the oven door while holding both hanger arms into place. 3. Plug in the back of the oven door. ■ Do not hit glass surfaces with bakeware or other objects. ■ Do not wipe ...the hinge levers back to remove from the oven door frame. 3. Check that the door is off . Before replacing, make sure the oven is free to push the oven door closed and pull it will shut. 4. To Remove: 1. Open the oven door. Oven Light The ovens light is not, repeat the removal and ...
... power. However, if removal is not suggested to remove. Unplug range or disconnect power. 2. Lift the oven door while holding both hanger arms into place. 3. Plug in the back of the oven door. ■ Do not hit glass surfaces with bakeware or other objects. ■ Do not wipe ...the hinge levers back to remove from the oven door frame. 3. Check that the door is off . Before replacing, make sure the oven is free to push the oven door closed and pull it will shut. 4. To Remove: 1. Open the oven door. Oven Light The ovens light is not, repeat the removal and ...

Owners Manual
Page 23
... the display showing a flashing time? See "Self-Cleaning Cycle" section. ■ On some models, does the cooling fan run when the oven is normal for the fan to automatically run during BAKE, BROIL or CLEAN? Level the range. Hot Surface indicator light stays on ■... CANCEL/OFF to higher position in longer cooking times. ■ Are baked items too brown on the bottom? See the Installation Instructions. See "Oven Temperature Control" section. ■ On some models, has a delay start Self-Clean cycle been set ? See the Installation Instructions. ■ ...
... the display showing a flashing time? See "Self-Cleaning Cycle" section. ■ On some models, does the cooling fan run when the oven is normal for the fan to automatically run during BAKE, BROIL or CLEAN? Level the range. Hot Surface indicator light stays on ■... CANCEL/OFF to higher position in longer cooking times. ■ Are baked items too brown on the bottom? See the Installation Instructions. See "Oven Temperature Control" section. ■ On some models, has a delay start Self-Clean cycle been set ? See the Installation Instructions. ■ ...

Owners Manual
Page 25
... house wiring or plumbing. 2. Any food loss due to thermal breakage ■ Electric surface elements ■ Electric bake/broil oven elements (excludes convection element) YOUR SOLE AND EXCLUSIVE REMEDY UNDER THE LIMITED WARRANTY SHALL BE PRODUCT REPAIR AS PROVIDED HEREIN. Costs ...or is not installed in accordance with published installation instructions. 11. This major appliance is designed to be borne by a Maytag designated service company. Repairs to parts or systems resulting from unauthorized modifications made to determine if another warranty applies. IMPLIED WARRANTIES,...
... house wiring or plumbing. 2. Any food loss due to thermal breakage ■ Electric surface elements ■ Electric bake/broil oven elements (excludes convection element) YOUR SOLE AND EXCLUSIVE REMEDY UNDER THE LIMITED WARRANTY SHALL BE PRODUCT REPAIR AS PROVIDED HEREIN. Costs ...or is not installed in accordance with published installation instructions. 11. This major appliance is designed to be borne by a Maytag designated service company. Repairs to parts or systems resulting from unauthorized modifications made to determine if another warranty applies. IMPLIED WARRANTIES,...


