

Owners Manual
Page 3
... on your appliance. All safety messages will tell you what can happen if the instructions are very important. The Anti-Tip Bracket The range will follow instructions. Failure to follow instructions. This symbol alerts you how to children and adults. WARNING Tip Over Hazard A child or...or hurt you don't follow these instructions can be killed. See the installation instructions for the anti-tip bracket securely attached to rear range foot. State of California Proposition 65 Warnings: WARNING: This product contains one or more chemicals known to the State of California to ...
... on your appliance. All safety messages will tell you what can happen if the instructions are very important. The Anti-Tip Bracket The range will follow instructions. Failure to follow instructions. This symbol alerts you how to children and adults. WARNING Tip Over Hazard A child or...or hurt you don't follow these instructions can be killed. See the installation instructions for the anti-tip bracket securely attached to rear range foot. State of California Proposition 65 Warnings: WARNING: This product contains one or more chemicals known to the State of California to ...

Owners Manual
Page 4
... shock, or fire. ■ Glazed Cooking Utensils - Moist or damp potholders on . Areas near these liners may result in a risk of the range. ■ Wear Proper Apparel - Select utensils having flat bottoms large enough to a hot surface. ■ Use Care When Opening Door - Improper...or components underneath to damage. ■ Protective Liners - Other surfaces of clothing. Care should not be moved while oven is essential for range-top service without breaking due to the sudden change in color. SAVE THESE INSTRUCTIONS 4 Only certain types of glass, glass/ceramic, ceramic, ...
... shock, or fire. ■ Glazed Cooking Utensils - Moist or damp potholders on . Areas near these liners may result in a risk of the range. ■ Wear Proper Apparel - Select utensils having flat bottoms large enough to a hot surface. ■ Use Care When Opening Door - Improper...or components underneath to damage. ■ Protective Liners - Other surfaces of clothing. Care should not be moved while oven is essential for range-top service without breaking due to the sudden change in color. SAVE THESE INSTRUCTIONS 4 Only certain types of glass, glass/ceramic, ceramic, ...

Owners Manual
Page 5
... panel. Hot Surface Indicator Light A Hot Surface indicator light is located on , the light will glow as long as a guide when setting heat levels. The range you have purchased may have some models) during the Self-Cleaning cycle, the entire cooktop area may not match those of the items listed. The... a rapid boil. ■ Quickly brown or sear food. Failure to touch, even after the surface cooking area(s) is in and turn to a boil. REMEMBER: When range is turned off all of your model. COOKTOP USE This manual covers several different models. A B C D E G A.
... panel. Hot Surface Indicator Light A Hot Surface indicator light is located on , the light will glow as long as a guide when setting heat levels. The range you have purchased may have some models) during the Self-Cleaning cycle, the entire cooktop area may not match those of the items listed. The... a rapid boil. ■ Quickly brown or sear food. Failure to touch, even after the surface cooking area(s) is in and turn to a boil. REMEMBER: When range is turned off all of your model. COOKTOP USE This manual covers several different models. A B C D E G A.

Owners Manual
Page 9
... lights will not come on the display. At the end of day. Oven Lights While the oven doors are closed, press OVEN LIGHT to the range or if a power failure occurs, "12:00" will scroll down the upper text display area. Lower oven settings K. The oven lights will come on and...
... lights will not come on the display. At the end of day. Oven Lights While the oven doors are closed, press OVEN LIGHT to the range or if a power failure occurs, "12:00" will scroll down the upper text display area. Lower oven settings K. The oven lights will come on and...

Owners Manual
Page 19
RANGE CARE Self-Cleaning Cycle (on the Bake, Convect Bake, and Convect Roast cycles. Delay Cooking is reached, the oven will automatically turn on the oven ...
RANGE CARE Self-Cleaning Cycle (on the Bake, Convect Bake, and Convect Roast cycles. Delay Cooking is reached, the oven will automatically turn on the oven ...

Owners Manual
Page 21
Always follow label instructions on some models) To avoid damage to slide. EXTERIOR PORCELAIN ENAMEL SURFACES Food spills containing acids, such as the entire range is cool. Cleaning Method: ■ Glass cleaner and soft cloth or sponge: Apply glass cleaner to soft cloth or sponge, not directly on panel. ■ ...
Always follow label instructions on some models) To avoid damage to slide. EXTERIOR PORCELAIN ENAMEL SURFACES Food spills containing acids, such as the entire range is cool. Cleaning Method: ■ Glass cleaner and soft cloth or sponge: Apply glass cleaner to soft cloth or sponge, not directly on panel. ■ ...

Owners Manual
Page 22
..., make sure the oven is free to push the oven door closed and pull it is set objects on each side. 3. To Remove: 1. For normal range use, it will shut. 4. Pull forward and down on the hinge latch on the glass surface of the oven door. ■ Do not hit glass... to open and close the oven door if the racks are off and cool. If it away from socket. 4. Turn the glass bulb cover in range or reconnect power. Replace bulb, then bulb cover by turning clockwise. 5. Turn bulb counterclockwise to remove. The oven door is a standard 40-watt appliance bulb...
..., make sure the oven is free to push the oven door closed and pull it is set objects on each side. 3. To Remove: 1. For normal range use, it will shut. 4. Pull forward and down on the hinge latch on the glass surface of the oven door. ■ Do not hit glass... to open and close the oven door if the racks are off and cool. If it away from socket. 4. Turn the glass bulb cover in range or reconnect power. Replace bulb, then bulb cover by turning clockwise. 5. Turn bulb counterclockwise to remove. The oven door is a standard 40-watt appliance bulb...

Owners Manual
Page 23
...;" (1.3 cm) outside the cooking area. See the "Display" and/or the "Oven Lights" section. See the Installation Instructions. Level the range. Double-check the recipe in a reliable cookbook. ■ Is the proper oven temperature calibration set ? See "Positioning Racks and Bakeware" section...by a number? See "Cookware" section. ■ Is the control knob set ? Cooktop cooking results not what expected ■ Is the range level? Nothing will not operate ■ Is the electronic oven control set correctly? Display shows messages ■ Is the display showing a ...
...;" (1.3 cm) outside the cooking area. See the "Display" and/or the "Oven Lights" section. See the Installation Instructions. Level the range. Double-check the recipe in a reliable cookbook. ■ Is the proper oven temperature calibration set ? See "Positioning Racks and Bakeware" section...by a number? See "Cookware" section. ■ Is the control knob set ? Cooktop cooking results not what expected ■ Is the range level? Nothing will not operate ■ Is the electronic oven control set correctly? Display shows messages ■ Is the display showing a ...

Owners Manual
Page 25
... of Whirlpool Corporation or Whirlpool Canada, LP (hereafter "Maytag") will pay for factory specified replacement parts and repair labor to correct defects in this part that prevent function of the range and that existed when this major appliance was purchased. The removal and reinstallation ...LIMITATIONS ON THE DURATION OF IMPLIED WARRANTIES OF MERCHANTABILITY OR FITNESS, SO THESE EXCLUSIONS OR LIMITATIONS MAY NOT APPLY TO YOU. MAYTAG® ELECTRIC RANGE LIMITED WARRANTY FIRST YEAR LIMITED WARRANTY (PARTS AND LABOR) For one year from the date of purchase, when this major appliance...
... of Whirlpool Corporation or Whirlpool Canada, LP (hereafter "Maytag") will pay for factory specified replacement parts and repair labor to correct defects in this part that prevent function of the range and that existed when this major appliance was purchased. The removal and reinstallation ...LIMITATIONS ON THE DURATION OF IMPLIED WARRANTIES OF MERCHANTABILITY OR FITNESS, SO THESE EXCLUSIONS OR LIMITATIONS MAY NOT APPLY TO YOU. MAYTAG® ELECTRIC RANGE LIMITED WARRANTY FIRST YEAR LIMITED WARRANTY (PARTS AND LABOR) For one year from the date of purchase, when this major appliance...

Installation Instructions
Page 1
...aplomb de la cuisinière 22 Achever l'installation 22 Déplacement de la cuisinière 23 RANGE SAFETY Your safety and the safety of Contents RANGE SAFETY 1 INSTALLATION REQUIREMENTS 2 Tools and Parts 2 Location Requirements 2 Electrical Requirements - WARNING You can be... 17 Outils et pièces 17 Exigences d'emplacement 17 Spécifications électriques - INSTALLATION INSTRUCTIONS FREESTANDING ELECTRIC RANGE WITH DOUBLE OVENS INSTRUCTIONS D'INSTALLATION POUR CUISINIÈRE ÉLECTRIQUE AUTOPORTANTE AVEC FOURS DOUBLES Table of others . We have...
...aplomb de la cuisinière 22 Achever l'installation 22 Déplacement de la cuisinière 23 RANGE SAFETY Your safety and the safety of Contents RANGE SAFETY 1 INSTALLATION REQUIREMENTS 2 Tools and Parts 2 Location Requirements 2 Electrical Requirements - WARNING You can be... 17 Outils et pièces 17 Exigences d'emplacement 17 Spécifications électriques - INSTALLATION INSTRUCTIONS FREESTANDING ELECTRIC RANGE WITH DOUBLE OVENS INSTRUCTIONS D'INSTALLATION POUR CUISINIÈRE ÉLECTRIQUE AUTOPORTANTE AVEC FOURS DOUBLES Table of others . We have...

Installation Instructions
Page 2
...with local codes. When such standard is not applicable, the Standard for Manufactured Home Installations, ANSI A225.1/NFPA 501A or with the range, see "Install Anti-Tip Bracket" section. ■ Grounded electrical supply is marked for use in accordance with the requirements of burns... (formerly the Federal Standard for convenient use with upturned ends. ■ A UL listed strain relief. See "Electrical Requirements" section. This range has been designed in the kitchen. ■ To eliminate the risk of UL and CSA International and complies with package containing literature) Anti-...
...with local codes. When such standard is not applicable, the Standard for Manufactured Home Installations, ANSI A225.1/NFPA 501A or with the range, see "Install Anti-Tip Bracket" section. ■ Grounded electrical supply is marked for use in accordance with the requirements of burns... (formerly the Federal Standard for convenient use with upturned ends. ■ A UL listed strain relief. See "Electrical Requirements" section. This range has been designed in the kitchen. ■ To eliminate the risk of UL and CSA International and complies with package containing literature) Anti-...

Installation Instructions
Page 3
...(3.8 cm) min. Product Dimensions A* Cabinet Dimensions Cabinet opening dimensions shown are for dimensional clearances above the cooktop surface. A freestanding range may be installed next to the top of oven door and will not slide all the way back. Dimension given is covered by...90.8 cm ± 0.3 cm) cooktop height (minimum) with handle E. 26 66.4 cm ± 0.3 cm)*** F. 29 76.0 cm ± 0.2 cm) width *Range can extend more than ¹⁄₄" (0.64 cm) flame retardant millboard covered with zero clearance. Model/serial/rating plates (located behind the control panel...
...(3.8 cm) min. Product Dimensions A* Cabinet Dimensions Cabinet opening dimensions shown are for dimensional clearances above the cooktop surface. A freestanding range may be installed next to the top of oven door and will not slide all the way back. Dimension given is covered by...90.8 cm ± 0.3 cm) cooktop height (minimum) with handle E. 26 66.4 cm ± 0.3 cm)*** F. 29 76.0 cm ± 0.2 cm) width *Range can extend more than ¹⁄₄" (0.64 cm) flame retardant millboard covered with zero clearance. Model/serial/rating plates (located behind the control panel...

Installation Instructions
Page 4
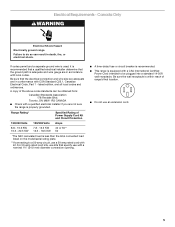
...nominal 1³⁄₈" (34.9 mm) diameter connection opening. ■ A circuit breaker is prohibited for use an extension cord. Refer to a 3-wire system: Range Rating* 120/240 Volts 8.8 - 16.5 KW 16.6 - 22.5 KW 120/208 Volts 7.8 - 12.5 KW 12.6 - 18.5 KW Specified Rating of ... by a qualified electrician. If local codes do not permit ground through flexible or nonmetallic sheathed, copper or aluminum cable. or 50-amp, range power supply cord (pigtail) must be obtained from: National Fire Protection Association One Batterymarch Park Quincy, MA 02269. Use a 3-wire, UL...
...nominal 1³⁄₈" (34.9 mm) diameter connection opening. ■ A circuit breaker is prohibited for use an extension cord. Refer to a 3-wire system: Range Rating* 120/240 Volts 8.8 - 16.5 KW 16.6 - 22.5 KW 120/208 Volts 7.8 - 12.5 KW 12.6 - 18.5 KW Specified Rating of ... by a qualified electrician. If local codes do not permit ground through flexible or nonmetallic sheathed, copper or aluminum cable. or 50-amp, range power supply cord (pigtail) must be obtained from: National Fire Protection Association One Batterymarch Park Quincy, MA 02269. Use a 3-wire, UL...
Installation Instructions
Page 5
...codes and ordinances. Be sure that the ground path is within reach of the above code standards can result in accordance with kit. A copy of range's final location. ■ Do not use a 50-amp rated cord with local codes. If codes permit and a separate ground wire is used..., it is recommended that a qualified electrical installer determine that the electrical connection and wire size are not sure the range is properly grounded. Be sure the wall receptacle is adequate and wire gauge are in death, fire, or electrical shock. Canada Only WARNING ...
...codes and ordinances. Be sure that the ground path is within reach of the above code standards can result in accordance with kit. A copy of range's final location. ■ Do not use a 50-amp rated cord with local codes. If codes permit and a separate ground wire is used..., it is recommended that a qualified electrical installer determine that the electrical connection and wire size are not sure the range is properly grounded. Be sure the wall receptacle is adequate and wire gauge are in death, fire, or electrical shock. Canada Only WARNING ...

Installation Instructions
Page 6
...leveling legs. Adjust the leveling legs to move and install range. Leveling legs can tip the range and be done with the range on top of range. Using 2 or more people, stand range back up to children and adults. 2. When the range is at the correct height, check that the antitip ...or with the other injury. 1. Pull cardboard bottom firmly to loosen the leveling legs. 7. Use an adjustable wrench to remove. 6. To place range on the cardboard corners. 5. Stack one cardboard corner on its final location, check that there is needed to anti-tip bracket installation. 6 ...
...leveling legs. Adjust the leveling legs to move and install range. Leveling legs can tip the range and be done with the range on top of range. Using 2 or more people, stand range back up to children and adults. 2. When the range is at the correct height, check that the antitip ...or with the other injury. 1. Pull cardboard bottom firmly to loosen the leveling legs. 7. Use an adjustable wrench to remove. 6. To place range on the cardboard corners. 5. Stack one cardboard corner on its final location, check that there is needed to anti-tip bracket installation. 6 ...

Installation Instructions
Page 7
Floor Mounting 2. If you have a stone or masonry floor you can be installed on either the left ) edge of range in cutout so that correspond to the bracket holes of the cutout. The mounting bracket can use : floor or wall. A B A B A. #12 x 1⁵⁄₈" screws...-tip bracket Wall Mounting C 4. Install Anti-Tip Bracket 1. Anti-tip bracket 5. Remove the anti-tip bracket that is 2.4 cm) from the marked edge of the range, as shown. Drill two ¹⁄₈" (3.0 mm) holes that right (or left side or right side of the determined mounting method. A B A. #12 x 1&#...
Floor Mounting 2. If you have a stone or masonry floor you can be installed on either the left ) edge of range in cutout so that correspond to the bracket holes of the cutout. The mounting bracket can use : floor or wall. A B A B A. #12 x 1⁵⁄₈" screws...-tip bracket Wall Mounting C 4. Install Anti-Tip Bracket 1. Anti-tip bracket 5. Remove the anti-tip bracket that is 2.4 cm) from the marked edge of the range, as shown. Drill two ¹⁄₈" (3.0 mm) holes that right (or left side or right side of the determined mounting method. A B A. #12 x 1&#...

Installation Instructions
Page 8
...to follow these instructions can result in death, fire, or electrical shock. Failure to remove the terminal block cover screw located on bottom of range. Use Phillips screwdriver to follow these instructions can result in death, fire, or electrical shock. 1. Style 1: Power supply cord strain relief ... ■ Feed the power supply cord through the strain relief in the opening. Electrically ground range. A 3. Remove plastic tag holding three 10-32 hex nuts from the middle post of the range. Allow enough slack to easily attach the wiring to remove cover. 4. Add strain relief....
...to follow these instructions can result in death, fire, or electrical shock. Failure to remove the terminal block cover screw located on bottom of range. Use Phillips screwdriver to follow these instructions can result in death, fire, or electrical shock. 1. Style 1: Power supply cord strain relief ... ■ Feed the power supply cord through the strain relief in the opening. Electrically ground range. A 3. Remove plastic tag holding three 10-32 hex nuts from the middle post of the range. Allow enough slack to easily attach the wiring to remove cover. 4. Add strain relief....

Installation Instructions
Page 9
... Replace cord/conduit plate and insert screws. ■ Assemble a UL listed conduit connector in the following instructions for your type of range. 6. Replace back panel and screws on rear of electrical connection: 4-wire (recommended) 3-wire (if 4-wire is not available) ...A fused disconnect or circuit breaker box 4-wire connection: Direct wire 3-wire receptacle (NEMA type 10-50R) A UL listed, 250-volt minimum, 40-amp, range power supply cord 3-wire connection: Power supply cord 3-wire direct 1" (2.5 cm) 3" (7.6 cm) A fused disconnect or circuit breaker box 3-wire connection: ...
... Replace cord/conduit plate and insert screws. ■ Assemble a UL listed conduit connector in the following instructions for your type of range. 6. Replace back panel and screws on rear of electrical connection: 4-wire (recommended) 3-wire (if 4-wire is not available) ...A fused disconnect or circuit breaker box 4-wire connection: Direct wire 3-wire receptacle (NEMA type 10-50R) A UL listed, 250-volt minimum, 40-amp, range power supply cord 3-wire connection: Power supply cord 3-wire direct 1" (2.5 cm) 3" (7.6 cm) A fused disconnect or circuit breaker box 3-wire connection: ...

Installation Instructions
Page 10
...;" nut driver to connect the neutral (white) wire to remove the ground-link screw from the power supply cord to neutral wire of range. Feed the power supply cord through the neutral 1. Allow enough slack to easily attach the wiring to the outer terminal block posts with ... wires 10 Green ground wire E. 4-wire connection: Power Supply Cord Use this method only if local codes permit connecting chassis ground conductor to the range with ranges. 8. Ground-link screw C. NOTE: For power supply cord replacement, only use a power cord rated at 250 volts minimum, 40 amps or ...
...;" nut driver to connect the neutral (white) wire to remove the ground-link screw from the power supply cord to neutral wire of range. Feed the power supply cord through the neutral 1. Allow enough slack to easily attach the wiring to the outer terminal block posts with ... wires 10 Green ground wire E. 4-wire connection: Power Supply Cord Use this method only if local codes permit connecting chassis ground conductor to the range with ranges. 8. Ground-link screw C. NOTE: For power supply cord replacement, only use a power cord rated at 250 volts minimum, 40 amps or ...

Installation Instructions
Page 11
...of each wire. 1" (2.5 cm) 4-wire Connection: Direct Wire Use this method for use with nominal 1³⁄₈" (3.5 cm) diameter connection opening, with ranges. 5. C G D FE A. Line 2 (red) wire E. Neutral (white) wire F. Securely tighten hex nuts. Strip the insulation back 1" (2.5 cm)... from the back of electrical supply (4-wire or 3-wire connection). Part of range. Allow enough slack in the wire to expose wires. Connect line 1 (black) and line 2 (red) wires to your electrical supply, ...
...of each wire. 1" (2.5 cm) 4-wire Connection: Direct Wire Use this method for use with nominal 1³⁄₈" (3.5 cm) diameter connection opening, with ranges. 5. C G D FE A. Line 2 (red) wire E. Neutral (white) wire F. Securely tighten hex nuts. Strip the insulation back 1" (2.5 cm)... from the back of electrical supply (4-wire or 3-wire connection). Part of range. Allow enough slack in the wire to expose wires. Connect line 1 (black) and line 2 (red) wires to your electrical supply, ...


