

Owners Manual
Page 3
...killed or seriously injured if you apply too much force or weight to children and adults. This is moved. The Anti-Tip Bracket The range will tell you what can kill or hurt you and others are not followed. State of California Proposition 65 Warnings: WARNING: This product ... will follow instructions. Connect anti-tip bracket to cause birth defects or other reproductive harm. 3 Reconnect the anti-tip bracket, if the range is the safety alert symbol. This symbol alerts you to follow instructions. WARNING Tip Over Hazard A child or adult can tip the...
...killed or seriously injured if you apply too much force or weight to children and adults. This is moved. The Anti-Tip Bracket The range will tell you what can kill or hurt you and others are not followed. State of California Proposition 65 Warnings: WARNING: This product ... will follow instructions. Connect anti-tip bracket to cause birth defects or other reproductive harm. 3 Reconnect the anti-tip bracket, if the range is the safety alert symbol. This symbol alerts you to follow instructions. WARNING Tip Over Hazard A child or adult can tip the...

Owners Manual
Page 4
...Select utensils having flat bottoms large enough to a hot surface. ■ Use Care When Opening Door - Only certain types of the range unless specifically recommended in ignition of undersized utensils will also improve efficiency. ■ Never Leave Surface Units Unattended at High Heat Settings - ... place oven racks in or around any kind should break, cleaning solutions and spillovers may be careful to persons, or damage when using the range. ■ User Servicing - Heating elements may penetrate the broken cooktop and create a risk of the oven. ■ Clean Only Parts ...
...Select utensils having flat bottoms large enough to a hot surface. ■ Use Care When Opening Door - Only certain types of the range unless specifically recommended in ignition of undersized utensils will also improve efficiency. ■ Never Leave Surface Units Unattended at High Heat Settings - ... place oven racks in or around any kind should break, cleaning solutions and spillovers may be careful to persons, or damage when using the range. ■ User Servicing - Heating elements may penetrate the broken cooktop and create a risk of the oven. ■ Clean Only Parts ...

Owners Manual
Page 5
...guide when setting heat levels. Electronic oven control D. Hot surface indicator light G. HI (High) ■ Bring liquid to setting. REMEMBER: When range is located on some or all controls when done cooking. Cooktop On Indicator Lights A cooktop On Indicator light is in use or (on the ... quantities of your model. Left rear control knob C. Medium High ■ Hold a rapid boil. ■ Quickly brown or sear food. The range you have some models) during the Self-Cleaning cycle, the entire cooktop area may become hot. The locations and appearances of the features shown here...
...guide when setting heat levels. Electronic oven control D. Hot surface indicator light G. HI (High) ■ Bring liquid to setting. REMEMBER: When range is located on some or all controls when done cooking. Cooktop On Indicator Lights A cooktop On Indicator light is in use or (on the ... quantities of your model. Left rear control knob C. Medium High ■ Hold a rapid boil. ■ Quickly brown or sear food. The range you have some models) during the Self-Cleaning cycle, the entire cooktop area may become hot. The locations and appearances of the features shown here...

Owners Manual
Page 9
... and Celsius The temperature is first supplied to start or stop any function except the Clock, Timer and Control Lock. Press KITCHEN TIMER to the range or if a power failure occurs, "12:00" will scroll down the upper text display area. To Set: 1. Upper oven settings B. Oven display C. Cancel The Cancel...
... and Celsius The temperature is first supplied to start or stop any function except the Clock, Timer and Control Lock. Press KITCHEN TIMER to the range or if a power failure occurs, "12:00" will scroll down the upper text display area. To Set: 1. Upper oven settings B. Oven display C. Cancel The Cancel...

Owners Manual
Page 19
... time is extremely sensitive to help get hot enough during the Self-Cleaning cycle. Do not block the oven vent(s) during the Self-Cleaning cycle. RANGE CARE Self-Cleaning Cycle (on at a certain time of -cycle tones will sound. Delay Cooking allows the oven(s) to be set to cook for food...
... time is extremely sensitive to help get hot enough during the Self-Cleaning cycle. Do not block the oven vent(s) during the Self-Cleaning cycle. RANGE CARE Self-Cleaning Cycle (on at a certain time of -cycle tones will sound. Delay Cooking allows the oven(s) to be set to cook for food...

Owners Manual
Page 21
... cleansers or oven cleaner. EXTERIOR PORCELAIN ENAMEL SURFACES Food spills containing acids, such as vinegar and tomato, should be cleaned as soon as the entire range is cool. OVEN RACKS Cleaning Method: ■ Self-Cleaning cycle: See "Self-Cleaning Cycle" first. At high temperatures, foods react with soft, lint-free cloth...
... cleansers or oven cleaner. EXTERIOR PORCELAIN ENAMEL SURFACES Food spills containing acids, such as vinegar and tomato, should be cleaned as soon as the entire range is cool. OVEN RACKS Cleaning Method: ■ Self-Cleaning cycle: See "Self-Cleaning Cycle" first. At high temperatures, foods react with soft, lint-free cloth...

Owners Manual
Page 22
...cooled. Open the oven door. Before replacing, make sure the oven is not suggested to the locked position. Unplug range or disconnect power. 2. Turn the glass bulb cover in range or reconnect power. Turn bulb counterclockwise to push the oven door closed and pull it is heavy. If it away... extends past the front edge of the oven counterclockwise to open and close the oven door if the racks are off and cool. For normal range use, it will shut. 4. Replace bulb, then bulb cover by turning clockwise. 5. However, if removal is necessary, make sure the oven and ...
...cooled. Open the oven door. Before replacing, make sure the oven is not suggested to the locked position. Unplug range or disconnect power. 2. Turn the glass bulb cover in range or reconnect power. Turn bulb counterclockwise to push the oven door closed and pull it is heavy. If it away... extends past the front edge of the oven counterclockwise to open and close the oven door if the racks are off and cool. For normal range use, it will shut. 4. Replace bulb, then bulb cover by turning clockwise. 5. However, if removal is necessary, make sure the oven and ...

Owners Manual
Page 23
...door all the way. ■ Has the function been entered? See "Cookware" section. ■ Is the control knob set ? Level the range. See "Control Lockout" section. This helps cool the electronic control. See "Positioning Racks and Bakeware" section. ■ Is the batter evenly ...-Cleaning cycle will not operate ■ Is the electronic oven control set correctly? Cooktop cooking results not what expected ■ Is the range level? See the Installation Instructions. ■ Is the proper temperature set to the proper heat level? See "Positioning Racks and Bakeware" section...
...door all the way. ■ Has the function been entered? See "Cookware" section. ■ Is the control knob set ? Level the range. See "Control Lockout" section. This helps cool the electronic control. See "Positioning Racks and Bakeware" section. ■ Is the batter evenly ...-Cleaning cycle will not operate ■ Is the electronic oven control set correctly? Cooktop cooking results not what expected ■ Is the range level? See the Installation Instructions. ■ Is the proper temperature set to the proper heat level? See "Positioning Racks and Bakeware" section...

Owners Manual
Page 25
... the date of purchase, when this major appliance is installed, operated and maintained according to instructions attached to or furnished with the product, Maytag brand of the range and that existed when this major appliance was purchased. LABOR NOT INCLUDED) In the second through tenth years from the date of the Use...
... the date of purchase, when this major appliance is installed, operated and maintained according to instructions attached to or furnished with the product, Maytag brand of the range and that existed when this major appliance was purchased. LABOR NOT INCLUDED) In the second through tenth years from the date of the Use...

Installation Instructions
Page 1
... will tell you what can be killed or seriously injured if you and others are not followed. Canada Only 5 INSTALLATION INSTRUCTIONS 6 Unpack Range 6 Adjust Leveling Legs 6 Install Anti-Tip Bracket 7 Electrical Connection - These words mean: DANGER You can be killed or seriously injured ... of others . IMPORTANT: Save for local electrical inspector's use. Only 8 Verify Anti-Tip Bracket Location 13 Level Range 13 Complete Installation 13 Moving the Range 14 Table des matières SÉCURITÉ DE LA CUISINIÈRE 16 EXIGENCES D'INSTALLATION 17 Outils...
... will tell you what can be killed or seriously injured if you and others are not followed. Canada Only 5 INSTALLATION INSTRUCTIONS 6 Unpack Range 6 Adjust Leveling Legs 6 Install Anti-Tip Bracket 7 Electrical Connection - These words mean: DANGER You can be killed or seriously injured ... of others . IMPORTANT: Save for local electrical inspector's use. Only 8 Verify Anti-Tip Bracket Location 13 Level Range 13 Complete Installation 13 Moving the Range 14 Table des matières SÉCURITÉ DE LA CUISINIÈRE 16 EXIGENCES D'INSTALLATION 17 Outils...

Installation Instructions
Page 2
...NFPA 501A or with upturned ends. ■ A UL listed strain relief. It is recommended that all electrical connections be made by installing a range hood that projects horizontally a minimum of 5" (12.7 cm) beyond the bottom of the cabinets. ■ Cabinet opening dimensions that is marked... ■ To eliminate the risk of 194°F (90°C). WARNING Tip Over Hazard A child or adult can tip the range and be revised. Failure to children and adults. INSTALLATION REQUIREMENTS Tools and Parts Gather the required tools and parts before starting installation. Parts...
...NFPA 501A or with upturned ends. ■ A UL listed strain relief. It is recommended that all electrical connections be made by installing a range hood that projects horizontally a minimum of 5" (12.7 cm) beyond the bottom of the cabinets. ■ Cabinet opening dimensions that is marked... ■ To eliminate the risk of 194°F (90°C). WARNING Tip Over Hazard A child or adult can tip the range and be revised. Failure to children and adults. INSTALLATION REQUIREMENTS Tools and Parts Gather the required tools and parts before starting installation. Parts...

Installation Instructions
Page 3
... cm) cooktop height (minimum) with handle E. 26 66.4 cm ± 0.3 cm)*** F. 29 76.0 cm ± 0.2 cm) width *Range can extend more than ¹⁄₄" (0.64 cm) flame retardant millboard covered with zero clearance. opening width. Product Dimensions A* Cabinet Dimensions Cabinet opening... E D F E*** J G I . 7" (17.8 cm) min. Model/serial/rating plates (located behind the control panel for viewing from wall or range will vary based on electric outlet receptacle installation. K A. 18" (45.7 cm) upper cabinet to the top of an unprotected wood or metal cabinet. 3...
... cm) cooktop height (minimum) with handle E. 26 66.4 cm ± 0.3 cm)*** F. 29 76.0 cm ± 0.2 cm) width *Range can extend more than ¹⁄₄" (0.64 cm) flame retardant millboard covered with zero clearance. opening width. Product Dimensions A* Cabinet Dimensions Cabinet opening... E D F E*** J G I . 7" (17.8 cm) min. Model/serial/rating plates (located behind the control panel for viewing from wall or range will vary based on electric outlet receptacle installation. K A. 18" (45.7 cm) upper cabinet to the top of an unprotected wood or metal cabinet. 3...

Installation Instructions
Page 4
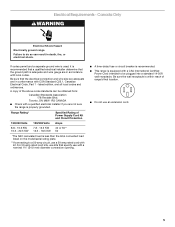
...mobile homes; and recreational vehicles, or an area where local codes prohibit grounding through the neutral conductor is recommended. ■ The range can result in conformance with the National Electrical Code, ANSI/ NFPA 70-latest edition and all local codes and ordinances. The fourth...3 copper conductors with ring terminals or open -end spade terminals with upturned ends, terminating in the "Location Requirements" section. ■ This range is ever necessary. ■ A UL listed conduit connector must be at the junction box). ■ Wire sizes and connections must be connected...
...mobile homes; and recreational vehicles, or an area where local codes prohibit grounding through the neutral conductor is recommended. ■ The range can result in conformance with the National Electrical Code, ANSI/ NFPA 70-latest edition and all local codes and ordinances. The fourth...3 copper conductors with ring terminals or open -end spade terminals with upturned ends, terminating in the "Location Requirements" section. ■ This range is ever necessary. ■ A UL listed conduit connector must be at the junction box). ■ Wire sizes and connections must be connected...
Installation Instructions
Page 5
...a qualified electrical installer determine that specify use kits that the ground path is adequate and wire gauge are not sure the range is within reach of range's final location. ■ Do not use a 50-amp rated cord with local codes. A copy of Power Supply ...CSA International Certified Power Cord intended to be obtained from: Canadian Standards Association 178 Rexdale Blvd. Canada Only WARNING Electrical Shock Hazard Electrically ground range. Be sure the wall receptacle is properly grounded. For 50-amp rated cord kits, use with a nominal 1³⁄₈" (34...
...a qualified electrical installer determine that specify use kits that the ground path is adequate and wire gauge are not sure the range is within reach of range's final location. ■ Do not use a 50-amp rated cord with local codes. A copy of Power Supply ...CSA International Certified Power Cord intended to be obtained from: Canadian Standards Association 178 Rexdale Blvd. Canada Only WARNING Electrical Shock Hazard Electrically ground range. Be sure the wall receptacle is properly grounded. For 50-amp rated cord kits, use with a nominal 1³⁄₈" (34...

Installation Instructions
Page 6
... 4 cardboard corners from the carton. Adjust Leveling Legs 1. Keep cardboard bottom under the range and onto the rear leveling leg prior to do so can result in front of range. Pull cardboard bottom firmly to rear range foot. Place cardboard or hardboard in back or other 2 corners. Using 2 or more... an adjustable wrench to the correct height. WARNING Tip Over Hazard A child or adult can be killed. Before sliding range into a standing position, put a sheet of cardboard or hardboard in death or serious burns to add up onto cardboard or hardboard. Remove shipping...
... 4 cardboard corners from the carton. Adjust Leveling Legs 1. Keep cardboard bottom under the range and onto the rear leveling leg prior to do so can result in front of range. Pull cardboard bottom firmly to rear range foot. Place cardboard or hardboard in back or other 2 corners. Using 2 or more... an adjustable wrench to the correct height. WARNING Tip Over Hazard A child or adult can be killed. Before sliding range into a standing position, put a sheet of cardboard or hardboard in death or serious burns to add up onto cardboard or hardboard. Remove shipping...

Installation Instructions
Page 7
... following. Position mounting bracket in the cutout space. Drill two ¹⁄₈" (3.0 mm) holes that right (or left side or right side of the range, as shown. Determine and mark edge of the determined mounting method. Install Anti-Tip Bracket 1. Remove the anti-tip bracket that is 2.4 cm) from the... marked edge of the cutout. Using the Phillips screwdriver, mount anti-tip bracket to the bracket holes of range in cutout so that correspond to the wall or floor with the package containing literature.
... following. Position mounting bracket in the cutout space. Drill two ¹⁄₈" (3.0 mm) holes that right (or left side or right side of the range, as shown. Determine and mark edge of the determined mounting method. Install Anti-Tip Bracket 1. Remove the anti-tip bracket that is 2.4 cm) from the... marked edge of the cutout. Using the Phillips screwdriver, mount anti-tip bracket to the bracket holes of range in cutout so that correspond to the wall or floor with the package containing literature.

Installation Instructions
Page 8
...can result in death, fire, or electrical shock. 1. A. Allow enough slack to easily attach the wiring to remove cover. 4. Electrically ground range. Style 1: Power supply cord strain relief ■ Assemble a UL listed strain relief in the cord/conduit plate on the back of the terminal... block. U.S.A. Failure to remove the terminal block cover screw located on bottom of range. Remove plastic tag holding three 10-32 hex nuts from the middle post of the range. Power Supply Cord Electrical Connection - Only Direct Wire WARNING WARNING Electrical Shock Hazard ...
...can result in death, fire, or electrical shock. 1. A. Allow enough slack to easily attach the wiring to remove cover. 4. Electrically ground range. Style 1: Power supply cord strain relief ■ Assemble a UL listed strain relief in the cord/conduit plate on the back of the terminal... block. U.S.A. Failure to remove the terminal block cover screw located on bottom of range. Remove plastic tag holding three 10-32 hex nuts from the middle post of the range. Power Supply Cord Electrical Connection - Only Direct Wire WARNING WARNING Electrical Shock Hazard ...

Installation Instructions
Page 9
... enough slack to easily attach wiring to : 4-wire receptacle (NEMA type 14-50R) A UL listed, 250-volt minimum, 40-amp, range power supply cord 4-wire connection: Power supply cord 4-wire direct 5" (12.7 cm) A fused disconnect or circuit breaker box 4-wire connection...: Direct wire 3-wire receptacle (NEMA type 10-50R) A UL listed, 250-volt minimum, 40-amp, range power supply cord 3-wire connection: Power supply cord 3-wire direct 1" (2.5 cm) 3" (7.6 cm) A fused disconnect or circuit breaker box 3-wire connection: Direct...
... enough slack to easily attach wiring to : 4-wire receptacle (NEMA type 14-50R) A UL listed, 250-volt minimum, 40-amp, range power supply cord 4-wire connection: Power supply cord 4-wire direct 5" (12.7 cm) A fused disconnect or circuit breaker box 4-wire connection...: Direct wire 3-wire receptacle (NEMA type 10-50R) A UL listed, 250-volt minimum, 40-amp, range power supply cord 3-wire connection: Power supply cord 3-wire direct 1" (2.5 cm) 3" (7.6 cm) A fused disconnect or circuit breaker box 3-wire connection: Direct...

Installation Instructions
Page 10
... Cord Use this method only if local codes permit connecting chassis ground conductor to neutral wire of power supply cord. 1. Part of range. Ground-link screw 2. Neutral (center) wire F. Securely tighten hex nuts. Allow enough slack to easily attach the wiring to the... ground wire E. Terminal block B. A B C F E A B C A. Discard C. Ground-link screw C. Connect line 1 (black) and line 2 (red) wires to the range with 10-32 hex nuts. 7. Power supply cord wires 4. Cord/conduit plate D. B C D A. Power supply cord wires 10 Feed the power supply cord through the strain...
... Cord Use this method only if local codes permit connecting chassis ground conductor to neutral wire of power supply cord. 1. Part of range. Ground-link screw 2. Neutral (center) wire F. Securely tighten hex nuts. Allow enough slack to easily attach the wiring to the... ground wire E. Terminal block B. A B C F E A B C A. Discard C. Ground-link screw C. Connect line 1 (black) and line 2 (red) wires to the range with 10-32 hex nuts. 7. Power supply cord wires 4. Cord/conduit plate D. B C D A. Power supply cord wires 10 Feed the power supply cord through the strain...

Installation Instructions
Page 11
... C. Line 2 (red) wire E. Use ³⁄₈" nut driver to connect the neutral (white) wire to the outer terminal block posts with one of range. Connect line 1 (black) and line 2 (red) wires to the center terminal block post with 10-32 hex nuts. 4. Securely tighten hex nuts. NOTE:... to remove the ground-link screw from the end of each wire. 1" (2.5 cm) 4-wire Connection: Direct Wire Use this method for use with ranges. 5. Discard C. Use Phillips screwdriver to the fuse disconnect or circuit breaker box. Save the ground-link screw and the end of electrical supply (4-wire...
... C. Line 2 (red) wire E. Use ³⁄₈" nut driver to connect the neutral (white) wire to the outer terminal block posts with one of range. Connect line 1 (black) and line 2 (red) wires to the center terminal block post with 10-32 hex nuts. 4. Securely tighten hex nuts. NOTE:... to remove the ground-link screw from the end of each wire. 1" (2.5 cm) 4-wire Connection: Direct Wire Use this method for use with ranges. 5. Discard C. Use Phillips screwdriver to the fuse disconnect or circuit breaker box. Save the ground-link screw and the end of electrical supply (4-wire...


