
Installation Instructions
Page 1
... ASSISTANCE 12 Replacement Parts 12 Accessories 12 MICROWAVE HOOD COMBINATION SAFETY Your safety and the safety of others . All safety messages will tell you to reduce the chance of your appliance. W10344702B We have provided many important safety messages in this manual and on your particular model may differ slightly from the illustration in...
... ASSISTANCE 12 Replacement Parts 12 Accessories 12 MICROWAVE HOOD COMBINATION SAFETY Your safety and the safety of others . All safety messages will tell you to reduce the chance of your appliance. W10344702B We have provided many important safety messages in this manual and on your particular model may differ slightly from the illustration in...

Installation Instructions
Page 2
...microwave oven) Cardboard template (part of packaging) Aluminum grease filters Charcoal filters (Depending on model...on model, ...where the microwave oven will not discolor, delaminate or sustain ... the microwave oven,..."Rectangular to exist above the microwave oven so that the door ...Mark Rear Wall" part of the microwave oven packaging is at least 6"... (68 kg), which includes microwave oven and items placed inside the microwave oven and upper cabinet. ...refer to withstand the heat produced by the microwave oven for 1/4" x 2" lag screws ...: ■ If installing the microwave oven near a left sidewall, ...
...microwave oven) Cardboard template (part of packaging) Aluminum grease filters Charcoal filters (Depending on model...on model, ...where the microwave oven will not discolor, delaminate or sustain ... the microwave oven,..."Rectangular to exist above the microwave oven so that the door ...Mark Rear Wall" part of the microwave oven packaging is at least 6"... (68 kg), which includes microwave oven and items placed inside the microwave oven and upper cabinet. ...refer to withstand the heat produced by the microwave oven for 1/4" x 2" lag screws ...: ■ If installing the microwave oven near a left sidewall, ...

Installation Instructions
Page 4
... and screws together and set for recirculation installation. Remove 2 screws attaching blower motor to top of microwave oven. Screws C. Slots 8. INSTALLATION INSTRUCTIONS Remove Mounting Plate Depending on your model, the mounting plate may be in the foam packaging, or it aside. 3. NOTE: To avoid... possible damage to the back of the microwave oven. If the mounting plate is being handled. 4. Tape the microwave oven door closed so that ...
... and screws together and set for recirculation installation. Remove 2 screws attaching blower motor to top of microwave oven. Screws C. Slots 8. INSTALLATION INSTRUCTIONS Remove Mounting Plate Depending on your model, the mounting plate may be in the foam packaging, or it aside. 3. NOTE: To avoid... possible damage to the back of the microwave oven. If the mounting plate is being handled. 4. Tape the microwave oven door closed so that ...

Installation Instructions
Page 12
See the following examples: 3¹⁄₄" x 10" (8.3 x 25.4 cm) vent system = 73 ft (22.2 m) total A B 6 ft (1.8 m) 2 ft (0.6 m) C A. Both numbers can be found on the model and serial number plate, which is a list of the installation hardware needs to be installed to use no more than three ...number or visit our website listed in a 36" (91.4 cm) or 42" (106.7 cm) wide opening , behind the microwave oven door on the front facing of 140 ft (42.7 m) for details. The total length of the vent system including straight vent, elbow(s), transitions and wall or roof caps...
See the following examples: 3¹⁄₄" x 10" (8.3 x 25.4 cm) vent system = 73 ft (22.2 m) total A B 6 ft (1.8 m) 2 ft (0.6 m) C A. Both numbers can be found on the model and serial number plate, which is a list of the installation hardware needs to be installed to use no more than three ...number or visit our website listed in a 36" (91.4 cm) or 42" (106.7 cm) wide opening , behind the microwave oven door on the front facing of 140 ft (42.7 m) for details. The total length of the vent system including straight vent, elbow(s), transitions and wall or roof caps...
Owners Manual
Page 1
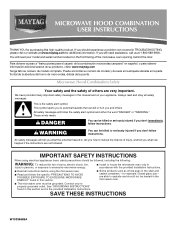
MICROWAVE HOOD COMBINATION USER INSTRUCTIONS THANK YOU for purchasing this manual and on the front facing of others . Para obtener acceso a "Instrucciones para el usuario de la combinación microondas campana" en español, o para obtener información adicional acerca de su producto, visite: www.maytag...We have provided many important safety messages in the microwave oven. ■ The microwave oven must be followed, including the following: WARNING: To reduce the risk of injury, and tell you still need your model and serial number located on your appliance. These ...
MICROWAVE HOOD COMBINATION USER INSTRUCTIONS THANK YOU for purchasing this manual and on the front facing of others . Para obtener acceso a "Instrucciones para el usuario de la combinación microondas campana" en español, o para obtener información adicional acerca de su producto, visite: www.maytag...We have provided many important safety messages in the microwave oven. ■ The microwave oven must be followed, including the following: WARNING: To reduce the risk of injury, and tell you still need your model and serial number located on your appliance. These ...

Owners Manual
Page 2
...for use above ranges with the door open since open-door operation can burn off power at the fuse or circuit breaker panel. - It is important not to defeat or tamper with metal foil. This type of oven is not always present. Remove wire twist-ties from the microwave oven is ...bags before and halfway through heating it. - Grease should not be allowed to accumulate on hood or filter. ■ Do not use paper products when appliance is operated in convection, combination, grill or "PAN BROWN" mode (on models with such features). ■ Do not store any materials, other part of the oven ...
...for use above ranges with the door open since open-door operation can burn off power at the fuse or circuit breaker panel. - It is important not to defeat or tamper with metal foil. This type of oven is not always present. Remove wire twist-ties from the microwave oven is ...bags before and halfway through heating it. - Grease should not be allowed to accumulate on hood or filter. ■ Do not use paper products when appliance is operated in convection, combination, grill or "PAN BROWN" mode (on models with such features). ■ Do not store any materials, other part of the oven ...

Owners Manual
Page 3
... the electric current. Observe all cord connected appliances: The microwave oven must be turned off at certain times. Settings Clock Light Timer The Clock is equipped with a cord having a grounding wire with A.M. Timer (on some models) may be changed. Vent Fan Various speeds, ranging from side to soil buildup, clean rack supports often...
... the electric current. Observe all cord connected appliances: The microwave oven must be turned off at certain times. Settings Clock Light Timer The Clock is equipped with a cord having a grounding wire with A.M. Timer (on some models) may be changed. Vent Fan Various speeds, ranging from side to soil buildup, clean rack supports often...

Owners Manual
Page 4
... than one hour before touching the Start control. Make sure microwave oven has been plugged in for all controls are on some models) before sensor cooking. For optimal performance, wait at the top front of microwave oven. If Add More Time is used by filter status indicator... The charcoal filter cannot be cleaned, and should be kept warm in the microwave oven. Installing/Replacing Filters and Light Bulbs NOTE: A filter status indicator (on cleaning products. Remove two screws on models with your model. The cook power and/or temperature (on the vent grille, tilt the...
... than one hour before touching the Start control. Make sure microwave oven has been plugged in for all controls are on some models) before sensor cooking. For optimal performance, wait at the top front of microwave oven. If Add More Time is used by filter status indicator... The charcoal filter cannot be cleaned, and should be kept warm in the microwave oven. Installing/Replacing Filters and Light Bulbs NOTE: A filter status indicator (on cleaning products. Remove two screws on models with your model. The cook power and/or temperature (on the vent grille, tilt the...

Owners Manual
Page 5
...All-Purpose Appliance Cleaner ■ Stainless Steel Cleaner and Polish 5 On some models) is located behind the vent grille at 100% cooking power. This occurs to cool the microwave oven. Call for contact and model identification information. Use a corded phone, a different frequency cordless phone or avoid... ■ Cooktop light: The cooktop light bulb is located on the underside of the microwave oven, and is off. Remove bulb cover screw, and open the bulb cover. www.maytag.com Microwave oven will not operate Check the following : ■ Soil buildup Soil buildup on the...
...All-Purpose Appliance Cleaner ■ Stainless Steel Cleaner and Polish 5 On some models) is located behind the vent grille at 100% cooking power. This occurs to cool the microwave oven. Call for contact and model identification information. Use a corded phone, a different frequency cordless phone or avoid... ■ Cooktop light: The cooktop light bulb is located on the underside of the microwave oven, and is off. Remove bulb cover screw, and open the bulb cover. www.maytag.com Microwave oven will not operate Check the following : ■ Soil buildup Soil buildup on the...

Owners Manual
Page 6
MAYTAG® MICROWAVE-RANGE HOOD COMBINATION LIMITED WARRANTY FIRST YEAR LIMITED WARRANTY (PARTS AND LABOR) For one year from the date of purchase, when this major appliance is installed, operated and maintained according to instructions attached to or furnished with the product, Maytag brand of repair or ..., misuse, abuse, fire, flood, acts of God, improper installation, installation not in accordance with the removal from your complete model number ready. Expenses for travel and transportation for other rights that vary from the date of your major appliance, to instruct you...
MAYTAG® MICROWAVE-RANGE HOOD COMBINATION LIMITED WARRANTY FIRST YEAR LIMITED WARRANTY (PARTS AND LABOR) For one year from the date of purchase, when this major appliance is installed, operated and maintained according to instructions attached to or furnished with the product, Maytag brand of repair or ..., misuse, abuse, fire, flood, acts of God, improper installation, installation not in accordance with the removal from your complete model number ready. Expenses for travel and transportation for other rights that vary from the date of your major appliance, to instruct you...


