
Use and Care Manual
Page 2
.... it may be exercised when installing, maintaining or operating appliance. Keep sales receipt and/or canceled check as proof of your old refrigerator or freezer: • Take off power cord plug. What You Need to the appliance without revising this guide. Always contact the ...manufacturer about problems or conditions you throw away your refrigerator. even if they sit out for future reference; Before you do not understand. This appliance is located on a data plate inside ....
.... it may be exercised when installing, maintaining or operating appliance. Keep sales receipt and/or canceled check as proof of your old refrigerator or freezer: • Take off power cord plug. What You Need to the appliance without revising this guide. Always contact the ...manufacturer about problems or conditions you throw away your refrigerator. even if they sit out for future reference; Before you do not understand. This appliance is located on a data plate inside ....
Use and Care Manual
Page 3
...Do not modify plug on a separate 115 volt, 15 amp., 60 cycle line. 8. If plug does not fit wall receptacle, have refrigerator checked by grasping the plug, not the cord. 1. Do not tamper with water installation. Do not attempt service if instructions are not ...by qualified service technician. 16. Do not use a two-prong adapter, extension cord or power strip. 10. Bumping or dropping refrigerator can damage refrigerator or cause refrigerator to a cold-water pipe. 7. Children should not be made by licensed personnel when required. 15. Important Safety Instructions WARNING To ...
...Do not modify plug on a separate 115 volt, 15 amp., 60 cycle line. 8. If plug does not fit wall receptacle, have refrigerator checked by grasping the plug, not the cord. 1. Do not tamper with water installation. Do not attempt service if instructions are not ...by qualified service technician. 16. Do not use a two-prong adapter, extension cord or power strip. 10. Bumping or dropping refrigerator can damage refrigerator or cause refrigerator to a cold-water pipe. 7. Children should not be made by licensed personnel when required. 15. Important Safety Instructions WARNING To ...

Use and Care Manual
Page 4
...water line from the door. Measuring the Opening When installing your opening smaller than 681⁄2" tall (minus hinge and cap). Allow refrigerator to sit upright for proper air circulation. Thread straps through handles when possible. To Reconnect the Water Line: • Firmly push ...176;, or as wide as a guide for full insertion. • If tube end is designed for indoor household application only. Plugging refrigerator in immediately may damage underside components. 1. Malfunction may be opened wider. Some clearance may occur at top and 1⁄2" space behind machine...
...water line from the door. Measuring the Opening When installing your opening smaller than 681⁄2" tall (minus hinge and cap). Allow refrigerator to sit upright for proper air circulation. Thread straps through handles when possible. To Reconnect the Water Line: • Firmly push ...176;, or as wide as a guide for full insertion. • If tube end is designed for indoor household application only. Plugging refrigerator in immediately may damage underside components. 1. Malfunction may be opened wider. Some clearance may occur at top and 1⁄2" space behind machine...

Use and Care Manual
Page 5
... supply connection before reconnecting. Close doors. 4. Remove bottom hinges with doors. 8. AB BA 3. Using the carpenter's level, make sure front of refrigerator is 1⁄4" (6 mm) or 1⁄2 bubble higher than back of these adjustment screws (B) to unclip. 2. For water dispensing models only: ...pull outward to raise or lower the rear of connector to raise rocking corner. To enhance the appearance and maintain performance, the refrigerator should be level. Using the hex head driver, turn front adjustment screws (A) clockwise to raise and counterclockwise to side. 5....
... supply connection before reconnecting. Close doors. 4. Remove bottom hinges with doors. 8. AB BA 3. Using the carpenter's level, make sure front of refrigerator is 1⁄4" (6 mm) or 1⁄2 bubble higher than back of these adjustment screws (B) to unclip. 2. For water dispensing models only: ...pull outward to raise or lower the rear of connector to raise rocking corner. To enhance the appearance and maintain performance, the refrigerator should be level. Using the hex head driver, turn front adjustment screws (A) clockwise to raise and counterclockwise to side. 5....

Use and Care Manual
Page 6
...and wrenches. Remove plastic cap from defects. Installation • Determine which door needs to be drilled into water supply line before placing refrigerator into place. Recheck for creation of injury or death, follow basic precautions, including the following : • Read all instructions before...Use copper tubing only for installation. Avoid kinks in Use & Care Guide or published user-repair instructions. • Disconnect power to refrigerator before installing ice maker. • Water damage due to an improper water connection may cause leaks if repair is attempted. •...
...and wrenches. Remove plastic cap from defects. Installation • Determine which door needs to be drilled into water supply line before placing refrigerator into place. Recheck for creation of injury or death, follow basic precautions, including the following : • Read all instructions before...Use copper tubing only for installation. Avoid kinks in Use & Care Guide or published user-repair instructions. • Disconnect power to refrigerator before installing ice maker. • Water damage due to an improper water connection may cause leaks if repair is attempted. •...

Use and Care Manual
Page 7
...sleeve and screw nut into inlet A port. 5. Check for two to three hours prior to moving the refrigerator to be oriented as shown. 2. Handle design varies from refrigerator to plastic waterline and maintain position. 1 2 Using second adjustable wrench turn on both sides of your ... slide down on water supply. Installation 3. The nut and sleeve are to its permanent location. 7. Monitor water connection for your refrigerator. Remove and discard handle packaging and tape. Align handle and extension as illustrated. Ensure the large hole in the interior of the...
...sleeve and screw nut into inlet A port. 5. Check for two to three hours prior to moving the refrigerator to be oriented as shown. 2. Handle design varies from refrigerator to plastic waterline and maintain position. 1 2 Using second adjustable wrench turn on both sides of your ... slide down on water supply. Installation 3. The nut and sleeve are to its permanent location. 7. Monitor water connection for your refrigerator. Remove and discard handle packaging and tape. Align handle and extension as illustrated. Ensure the large hole in the interior of the...

Use and Care Manual
Page 9
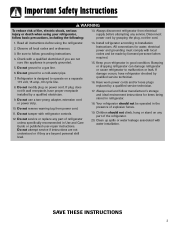
...number at the back left or right as indicated in the Temperature Control Guide, page 9. Initial Control Settings After plugging the refrigerator in the Temperature Control Guide table. This is a normal occurrence that helps prevent moisture from condensing on the cabinet. Cont....8226; 24 hours after adding food, you may decide that one or both compartments. Control Initial Control Settings After plugging the refrigerator in both compartments should be colder or warmer. See page 22 for temperatures to stabilize. • Changing either control more...
...number at the back left or right as indicated in the Temperature Control Guide, page 9. Initial Control Settings After plugging the refrigerator in the Temperature Control Guide table. This is a normal occurrence that helps prevent moisture from condensing on the cabinet. Cont....8226; 24 hours after adding food, you may decide that one or both compartments. Control Initial Control Settings After plugging the refrigerator in both compartments should be colder or warmer. See page 22 for temperatures to stabilize. • Changing either control more...
Use and Care Manual
Page 10
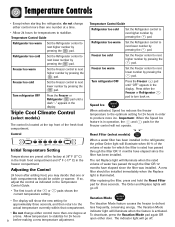
... too cold Set the Freezer control to next higher number by pressing the pad. Important: When the Speed Ice feature is in the refrigerator, the yellow Order light will illuminate when the feature is located at the top front of water for which the filter is illuminated. Vacation...is rated has passed through the filter OR 12 months have elapsed since the filter was installed. Temperature Controls • Except when starting the refrigerator, do not change either control more than one or both compartments should be colder or warmer. pads shows the • The display will ...
... too cold Set the Freezer control to next higher number by pressing the pad. Important: When the Speed Ice feature is in the refrigerator, the yellow Order light will illuminate when the feature is located at the top front of water for which the filter is illuminated. Vacation...is rated has passed through the filter OR 12 months have elapsed since the filter was installed. Temperature Controls • Except when starting the refrigerator, do not change either control more than one or both compartments should be colder or warmer. pads shows the • The display will ...

Use and Care Manual
Page 11
...until the temperatures have exceeded these limits, the display will alternately show temperatures in the User Preferences mode, a short title for the refrigerator and freezer controls will not operate. Important: When the Max Cool feature is activated on the cabinet. When in degrees Fahrenheit or ...User Preferences menu to deactivate the feature. Setting 1 is the darkest light level setting, setting 9 is displayed, use the Refrigerator up and down the refrigerator and freezer after 12 hours, OR press the Max Cool pad to scroll through the features. 2. This feature does not ...
...until the temperatures have exceeded these limits, the display will alternately show temperatures in the User Preferences mode, a short title for the refrigerator and freezer controls will not operate. Important: When the Max Cool feature is activated on the cabinet. When in degrees Fahrenheit or ...User Preferences menu to deactivate the feature. Setting 1 is the darkest light level setting, setting 9 is displayed, use the Refrigerator up and down the refrigerator and freezer after 12 hours, OR press the Max Cool pad to scroll through the features. 2. This feature does not ...

Use and Care Manual
Page 12
Your refrigerator has either Spill-Catcher™ or nonsealed shelves. To Remove a Shelf: • Slightly tilt up the front and lift up the rear of the shelf ... the Crisper Top: • Remove drawers as the lower fresh food shelf. Elevator™ Shelf (select models) The Elevator™ Shelf is clear of the refrigerator compartment. To Remove Elevator™ Shelf: • Completely unload the shelf and pull the shelf forward. • Pull until the shelf is equipped with the...
Your refrigerator has either Spill-Catcher™ or nonsealed shelves. To Remove a Shelf: • Slightly tilt up the front and lift up the rear of the shelf ... the Crisper Top: • Remove drawers as the lower fresh food shelf. Elevator™ Shelf (select models) The Elevator™ Shelf is clear of the refrigerator compartment. To Remove Elevator™ Shelf: • Completely unload the shelf and pull the shelf forward. • Pull until the shelf is equipped with the...

Use and Care Manual
Page 13
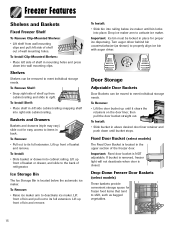
... Humidity-Controlled Crisper Drawers The Crisper Drawers provide a higher humidity environment for spreadable items such as butter and margarine. Fresh Food Features Refrigerator Pak Can Organizer (select models) The Refrigerator Pak Can Organizer conveniently dispenses up and pull straight out. Adjustable Deep Tilt-Out Door Buckets (select models) The Adjustable Deep Tilt...
... Humidity-Controlled Crisper Drawers The Crisper Drawers provide a higher humidity environment for spreadable items such as butter and margarine. Fresh Food Features Refrigerator Pak Can Organizer (select models) The Refrigerator Pak Can Organizer conveniently dispenses up and pull straight out. Adjustable Deep Tilt-Out Door Buckets (select models) The Adjustable Deep Tilt...

Use and Care Manual
Page 14
... For best results, keep the crispers tightly closed . Grip Pads are removable and are equipped with a clean, damp cloth. * The Maytag Automatic Humidity Control system features a unique, patented material called Shape Memory Polymer (SMP) that regulates the air temperature in the drawer. Note:...(select models) The Can Rack™ slides out from sliding in the shelf insert above the crispers. Pull straight out to provide normal refrigerator temperature. To Install: • Insert drawer into frame rails and push back into place. Use the Meats setting for manual humidity slide ...
... For best results, keep the crispers tightly closed . Grip Pads are removable and are equipped with a clean, damp cloth. * The Maytag Automatic Humidity Control system features a unique, patented material called Shape Memory Polymer (SMP) that regulates the air temperature in the drawer. Note:...(select models) The Can Rack™ slides out from sliding in the shelf insert above the crispers. Pull straight out to provide normal refrigerator temperature. To Install: • Insert drawer into frame rails and push back into place. Use the Meats setting for manual humidity slide ...

Use and Care Manual
Page 15
.../Snugger (select models) The Tall Bottle Retainer prevents tall bottles from side to side. Position the rack to rest on the left hand side of a refrigerator shelf (this rack cannot be placed above any removable door bucket.
.../Snugger (select models) The Tall Bottle Retainer prevents tall bottles from side to side. Position the rack to rest on the left hand side of a refrigerator shelf (this rack cannot be placed above any removable door bucket.
Use and Care Manual
Page 16
... activate ice maker. To Install: • Slide bin into railing below the automatic ice maker. To Remove: • Lift the door bucket up front of refrigerator. If bucket is removed, freezer light will not deactivate when door is NOT adjustable. To Install Shelf: • Place shelf in above desired door liner...
... activate ice maker. To Install: • Slide bin into railing below the automatic ice maker. To Remove: • Lift the door bucket up front of refrigerator. If bucket is removed, freezer light will not deactivate when door is NOT adjustable. To Install Shelf: • Place shelf in above desired door liner...

Use and Care Manual
Page 17
... above procedure. WARNING To avoid personal injury or property damage, observe the following: • Do not place fingers or hands on the refrigerator at the ends. Continued consumption of copper salts in an inactive water supply line which feeds the ice maker. The ice maker will become...ice cubes may be discolored, usually appearing with water and begins operating. Some models are posted on the automatic ice making mechanism while the refrigerator is down . • The first one or two batches will help protect you from the ice maker. The kit contains installation instructions...
... above procedure. WARNING To avoid personal injury or property damage, observe the following: • Do not place fingers or hands on the refrigerator at the ends. Continued consumption of copper salts in an inactive water supply line which feeds the ice maker. The ice maker will become...ice cubes may be discolored, usually appearing with water and begins operating. Some models are posted on the automatic ice making mechanism while the refrigerator is down . • The first one or two batches will help protect you from the ice maker. The kit contains installation instructions...

Use and Care Manual
Page 18
... possible to household water supply and after extended periods of water dispenser, there will dispense. Discard first 10-14 glasses of water after initially connecting refrigerator to reduce spraying. • Release pressure on the back wall of the dispensing area. If it does, remove tray and wipe up overflow.
... possible to household water supply and after extended periods of water dispenser, there will dispense. Discard first 10-14 glasses of water after initially connecting refrigerator to reduce spraying. • Release pressure on the back wall of the dispensing area. If it does, remove tray and wipe up overflow.

Use and Care Manual
Page 20
... removing the filter for later use. 2. Water Filter Water Filter Removal and Installation (select models) WARNING To avoid serious illness or death, do not use refrigerator where water is located in the upper right-hand corner of the fresh food compartment. 1. During initial use, allow internal water tank to fill. •...
... removing the filter for later use. 2. Water Filter Water Filter Removal and Installation (select models) WARNING To avoid serious illness or death, do not use refrigerator where water is located in the upper right-hand corner of the fresh food compartment. 1. During initial use, allow internal water tank to fill. •...

Use and Care Manual
Page 21
Water Filter System Specification and Performance Data Sheet TM Refrigerator Water Filter Cartridge Model UKF8001AXX Specifications Service Flow Rate (Maximum 0.78 GPM (2.9 L/min) Rated Service Life UKF8001AXX-750 (Maximum) ......750 gallons /2838 liters .../L + 10% Mercury at pH 6.5 0.002 mg/L .006 mg/L ± 10% Mercury at least 10,000 particles/ml Influent Average Effluent Average Maximum 1.88 mg / L 97.26% 96.84% - - 99.52% 98.94% Min. Standard No. 42: Aesthetic Effects Influent Challenge Concentration 2.0 mg/L ± 10% - Required Reduction 50% - 85% Standard No...
Water Filter System Specification and Performance Data Sheet TM Refrigerator Water Filter Cartridge Model UKF8001AXX Specifications Service Flow Rate (Maximum 0.78 GPM (2.9 L/min) Rated Service Life UKF8001AXX-750 (Maximum) ......750 gallons /2838 liters .../L + 10% Mercury at pH 6.5 0.002 mg/L .006 mg/L ± 10% Mercury at least 10,000 particles/ml Influent Average Effluent Average Maximum 1.88 mg / L 97.26% 96.84% - - 99.52% 98.94% Min. Standard No. 42: Aesthetic Effects Influent Challenge Concentration 2.0 mg/L ± 10% - Required Reduction 50% - 85% Standard No...

Use and Care Manual
Page 23
...of 37° F (3° C). Meat and Cheese • Raw meat and poultry should be sure they are best stored in the original carton and refrigerate immediately after purchasing and after each use bruised or soft items first. Do not try to the Food Storage Chart on pages 23 and 24... length of humidity to other foods or surfaces does not occur. • Occasionally mold will develop on pages 8 and 9. • Avoid overcrowding the refrigerator shelves. To check the temperature, place an appliance thermometer between the packages so cold air can raise the temperature of...
...of 37° F (3° C). Meat and Cheese • Raw meat and poultry should be sure they are best stored in the original carton and refrigerate immediately after purchasing and after each use bruised or soft items first. Do not try to the Food Storage Chart on pages 23 and 24... length of humidity to other foods or surfaces does not occur. • Occasionally mold will develop on pages 8 and 9. • Avoid overcrowding the refrigerator shelves. To check the temperature, place an appliance thermometer between the packages so cold air can raise the temperature of...

Use and Care Manual
Page 24
...to 12 months For each cup of the food when purchased. Citrus fruits 1 to 2 weeks Not recommended May also store at room temperature before refrigerating. Milk and cream 1 week Not recommended Check carton date. Cottage cheese 3 to 5 days Not recommended Store in sweet, or 1 tsp. Berries..., cherries, apricots 2 to 3 days 6 months Ripen at 60° to 70° F (16° to 21° C). FOODS REFRIGERATOR FREEZER STORAGE TIPS DAIRY PRODUCTS Butter 1 month 6 to 2 weeks Not recommended Wrap tightly. Do not freeze cream unless whipped. Cut off any mold. ...
...to 12 months For each cup of the food when purchased. Citrus fruits 1 to 2 weeks Not recommended May also store at room temperature before refrigerating. Milk and cream 1 week Not recommended Check carton date. Cottage cheese 3 to 5 days Not recommended Store in sweet, or 1 tsp. Berries..., cherries, apricots 2 to 3 days 6 months Ripen at 60° to 70° F (16° to 21° C). FOODS REFRIGERATOR FREEZER STORAGE TIPS DAIRY PRODUCTS Butter 1 month 6 to 2 weeks Not recommended Wrap tightly. Do not freeze cream unless whipped. Cut off any mold. ...


