User Guide
Page 1
User's Guide Digital Audio Baby Monitor Models: MBP161, MBP161-2 The features described in this User's Guide are subject to modifications without prior notice.
User's Guide Digital Audio Baby Monitor Models: MBP161, MBP161-2 The features described in this User's Guide are subject to modifications without prior notice.
User Guide
Page 2
...for Parent unit • 1 x Power adapter for warranty coverage. Please read the Safety Instructions on page 7 before you will find one or more additional baby units with other caregivers ... the electrical outlet to carry it from your new Motorola Digital Audio Baby Monitor! For warranty service of your dated sales receipt to provide a copy ..., please call: US and Canada 1-888-331-3383 Email: support@motorolamonintors.com This User's Guide provides you with a baby care timer that it continues to ...Motorola product, you install the units. Registration is with power adapters.
...for Parent unit • 1 x Power adapter for warranty coverage. Please read the Safety Instructions on page 7 before you will find one or more additional baby units with other caregivers ... the electrical outlet to carry it from your new Motorola Digital Audio Baby Monitor! For warranty service of your dated sales receipt to provide a copy ..., please call: US and Canada 1-888-331-3383 Email: support@motorolamonintors.com This User's Guide provides you with a baby care timer that it continues to ...Motorola product, you install the units. Registration is with power adapters.

User Guide
Page 3
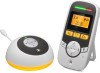
... talk to enter the menu. Night Light Press to increase speaker volume. Battery compartment cover 11. DOWN / VOLUME Press to choose an option, or save a setting. Microphone 7. Power jack 9. Overview of the Parent Unit 1 2 9 3 4 10 7 5 6 11 8 1. Speaker 10. LCD Display 3. Desktop Stand While in a menu, press to decrease speaker volume. Sound...
... talk to enter the menu. Night Light Press to increase speaker volume. Battery compartment cover 11. DOWN / VOLUME Press to choose an option, or save a setting. Microphone 7. Power jack 9. Overview of the Parent Unit 1 2 9 3 4 10 7 5 6 11 8 1. Speaker 10. LCD Display 3. Desktop Stand While in a menu, press to decrease speaker volume. Sound...
User Guide
Page 6
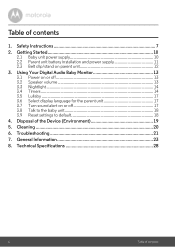
Disposal of contents Technical Specifications 28 6 Table of the Device (Environment 19 5. Safety Instructions 7 2. Getting Started 10 2.1 Baby unit power supply 10 2.2 Parent unit battery installation and power supply 11 2.3 Belt clip/stand on or off 13 3.2 Speaker volume 13 3.3 Nightlight 14 3.4 Timers ...14 3.5 Lullaby ...17 3.6 Select display... General Information 23 8. Using Your Digital Audio Baby Monitor 13 3.1 Power on or off 17 3.8 Talk to the baby unit 18 3.9 Reset settings to default 18 4. Troubleshooting 21 7. Cleaning 20 6. Table of contents 1.
Disposal of contents Technical Specifications 28 6 Table of the Device (Environment 19 5. Safety Instructions 7 2. Getting Started 10 2.1 Baby unit power supply 10 2.2 Parent unit battery installation and power supply 11 2.3 Belt clip/stand on or off 13 3.2 Speaker volume 13 3.3 Nightlight 14 3.4 Timers ...14 3.5 Lullaby ...17 3.6 Select display... General Information 23 8. Using Your Digital Audio Baby Monitor 13 3.1 Power on or off 17 3.8 Talk to the baby unit 18 3.9 Reset settings to default 18 4. Troubleshooting 21 7. Cleaning 20 6. Table of contents 1.
User Guide
Page 8
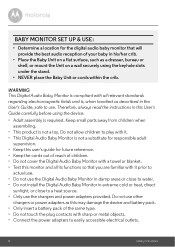
...Audio Baby Monitor is not a substitute for responsible adult supervision. • Keep this user's guide for the digital audio baby monitor that you are familiar with it prior to actual use....to water. • Do not install the Digital Audio Baby Monitor in extreme cold or heat, direct sunlight, or close to use. Keep small parts away from children when assembling. &#...sharp or metal objects. • Connect the power adapters to easily accessible electrical outlets. 8 Safety Instructions BABY MONITOR SET UP & USE: • Determine a location for future reference. • Keep the cords out...
...Audio Baby Monitor is not a substitute for responsible adult supervision. • Keep this user's guide for the digital audio baby monitor that you are familiar with it prior to actual use....to water. • Do not install the Digital Audio Baby Monitor in extreme cold or heat, direct sunlight, or close to use. Keep small parts away from children when assembling. &#...sharp or metal objects. • Connect the power adapters to easily accessible electrical outlets. 8 Safety Instructions BABY MONITOR SET UP & USE: • Determine a location for future reference. • Keep the cords out...
User Guide
Page 14
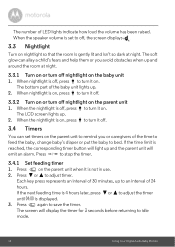
The bottom part of the baby unit lights up to an interval of 30 minutes, up . 2. Press - Each key ...the parent unit to remind you avoid obstacles when up and around the room at night. Press again to stop the timer. 3.4.1 Set feeding timer 1. When nightlight is on, press to turn off , press to turn it on . Press to save the timer...will display the timer for 3 seconds before returning to idle mode. 14 Using Your Digital Audio Baby Monitor The soft glow can set timers on the parent unit 1. When the nightlight is off . 3.4 Timers You can allay a child's fears and help them...
The bottom part of the baby unit lights up to an interval of 30 minutes, up . 2. Press - Each key ...the parent unit to remind you avoid obstacles when up and around the room at night. Press again to stop the timer. 3.4.1 Set feeding timer 1. When nightlight is on, press to turn off , press to turn it on . Press to save the timer...will display the timer for 3 seconds before returning to idle mode. 14 Using Your Digital Audio Baby Monitor The soft glow can set timers on the parent unit 1. When the nightlight is off . 3.4 Timers You can allay a child's fears and help them...
User Guide
Page 15
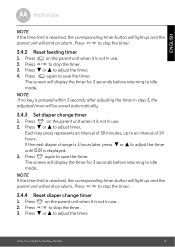
... If the time limit is not in use. 2. Press on the parent unit when it is reached, the corresponding timer button will be saved automatically. 3.4.3 Set diaper change timer 1. Press to idle mode. The screen will display the timer for 3 seconds before returning to adjust timer. Press to stop the timer...
... If the time limit is not in use. 2. Press on the parent unit when it is reached, the corresponding timer button will be saved automatically. 3.4.3 Set diaper change timer 1. Press to idle mode. The screen will display the timer for 3 seconds before returning to adjust timer. Press to stop the timer...
User Guide
Page 16
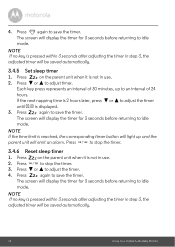
... parent unit will display the timer for 3 seconds before returning to idle mode. Press again to save the timer. The screen will be saved automatically. 3.4.5 Set sleep timer 1. Press again to save the timer. The screen will emit an alarm. Press on the parent unit when it is not in use...
... parent unit will display the timer for 3 seconds before returning to idle mode. Press again to save the timer. The screen will be saved automatically. 3.4.5 Set sleep timer 1. Press again to save the timer. The screen will emit an alarm. Press on the parent unit when it is not in use...

User Guide
Page 17
... ALERT and then press . 3. is displayed when sound alert is not in use . 2. or + to scroll to LANGUAGE and then press . 3. Press - when the current setting is on the baby unit to drown out disturbances so that the parent unit beeps when a loud sound is detected by the baby unit. Using... Press on the sound alert so that your child can play lullaby to enter lullaby menu. 2. Press or to enter lullaby menu. 2. when the current setting is off You can turn on the baby unit to start lullaby playback, press when the parent unit is not in use. 2. Press on the...
... ALERT and then press . 3. is displayed when sound alert is not in use . 2. or + to scroll to LANGUAGE and then press . 3. Press - when the current setting is on the baby unit to drown out disturbances so that the parent unit beeps when a loud sound is detected by the baby unit. Using... Press on the sound alert so that your child can play lullaby to enter lullaby menu. 2. Press or to enter lullaby menu. 2. when the current setting is off You can turn on the baby unit to start lullaby playback, press when the parent unit is not in use. 2. Press on the...
User Guide
Page 18
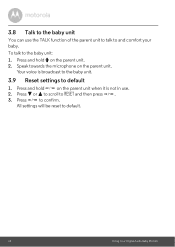
Your voice is not in use the TALK function of the parent unit to talk to default. 18 Using Your Digital Audio Baby Monitor or + to scroll to default 1. All settings will be reset to and comfort your baby. 3.8 Talk to the baby unit You can use . 2. To talk to confirm. Press to the baby unit: 1. Press and hold on the parent unit when it is broadcast to the baby unit. 3.9 Reset settings to RESET and then press . 3. Press and hold T on the parent unit. Speak towards the microphone on the parent unit. 2. Press -
Your voice is not in use the TALK function of the parent unit to talk to default. 18 Using Your Digital Audio Baby Monitor or + to scroll to default 1. All settings will be reset to and comfort your baby. 3.8 Talk to the baby unit You can use . 2. To talk to confirm. Press to the baby unit: 1. Press and hold on the parent unit when it is broadcast to the baby unit. 3.9 Reset settings to RESET and then press . 3. Press and hold T on the parent unit. Speak towards the microphone on the parent unit. 2. Press -
User Guide
Page 20
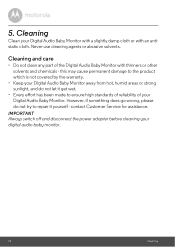
... an antistatic cloth. However, if something does go wrong, please do not let it get wet. • Every effort has been made to repair it yourself - contact Customer Service for assistance. Never use cleaning agents or abrasive solvents. 5. IMPORTANT Always switch off and disconnect the power adapter before cleaning your Digital Audio...
... an antistatic cloth. However, if something does go wrong, please do not let it get wet. • Every effort has been made to repair it yourself - contact Customer Service for assistance. Never use cleaning agents or abrasive solvents. 5. IMPORTANT Always switch off and disconnect the power adapter before cleaning your Digital Audio...

User Guide
Page 21
... closer than 3 feet. Cannot hear sound or baby cry from the parent unit • The volume level in the parent unit is running low. Troubleshooting 21 Press and hold to power on the baby unit. • Battery pack in the parent unit may be out of the parent unit. Refer... the supplied power adapter for volume level settings. • The parent unit and the baby unit may be out of range with the baby unit. Troubleshooting Power/Link Indicator on the parent unit does not come on • Check whether the parent unit is correctly installed and that they are not drained. &#...
... closer than 3 feet. Cannot hear sound or baby cry from the parent unit • The volume level in the parent unit is running low. Troubleshooting 21 Press and hold to power on the baby unit. • Battery pack in the parent unit may be out of the parent unit. Refer... the supplied power adapter for volume level settings. • The parent unit and the baby unit may be out of range with the baby unit. Troubleshooting Power/Link Indicator on the parent unit does not come on • Check whether the parent unit is correctly installed and that they are not drained. &#...
User Guide
Page 22
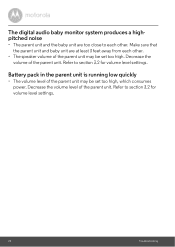
... to each other . Make sure that the parent unit and baby unit are too close to section 3.2 for volume level settings. 22 Troubleshooting Decrease the volume level of the parent unit. The digital audio baby monitor system produces a highpitched noise • The parent unit and ...the baby unit are at least 3 feet away from each other . • The speaker volume of the parent unit may be set too high, which consumes ...
... to each other . Make sure that the parent unit and baby unit are too close to section 3.2 for volume level settings. 22 Troubleshooting Decrease the volume level of the parent unit. The digital audio baby monitor system produces a highpitched noise • The parent unit and ...the baby unit are at least 3 feet away from each other . • The speaker volume of the parent unit may be set too high, which consumes ...

User Guide
Page 23
... ("BINATONE") What Does this Warranty Cover? General Information If your exclusive warranty and is covered? Contact Customer Service at no charge repair or replace any Products or Accessories that it manufactured to the first consumer purchaser, and is not working properly... 1.... that this User's Guide or the Quick Start Guide. 2. Visit our website: www.motorola.com 3. What will at US and Canada 1-888-331-3383 Email: support@motorolamonitors.com To order a replacement battery pack for purchasing this Warranty. Subject to this Motorola branded product manufactured under...
... ("BINATONE") What Does this Warranty Cover? General Information If your exclusive warranty and is covered? Contact Customer Service at no charge repair or replace any Products or Accessories that it manufactured to the first consumer purchaser, and is not working properly... 1.... that this User's Guide or the Quick Start Guide. 2. Visit our website: www.motorola.com 3. What will at US and Canada 1-888-331-3383 Email: support@motorolamonitors.com To order a replacement battery pack for purchasing this Warranty. Subject to this Motorola branded product manufactured under...

User Guide
Page 24
IN NO EVENT SHALL MOTOROLA OR BINATONE BE LIABLE, WHETHER IN CONTRACT OR TORT (INCLUDING NEGLIGENCE) FOR DAMAGES IN EXCESS OF THE PURCHASE PRICE OF THE PRODUCT OR ACCESSORY, OR ... BE DISCLAIMED BY LAW. This Warranty gives you specific legal rights, and you . ANY IMPLIED WARRANTIES, INCLUDING WITHOUT LIMITATION THE IMPLIED WARRANTIES OF MERCHANTABILITY AND FITNESS FOR A PARTICULAR PURPOSE, SHALL BE LIMITED TO THE DURATION OF THIS LIMITED WARRANTY, OTHERWISE THE REPAIR OR REPLACEMENT PROVIDED UNDER THIS EXPRESS LIMITED WARRANTY IS THE EXCLUSIVE...
IN NO EVENT SHALL MOTOROLA OR BINATONE BE LIABLE, WHETHER IN CONTRACT OR TORT (INCLUDING NEGLIGENCE) FOR DAMAGES IN EXCESS OF THE PURCHASE PRICE OF THE PRODUCT OR ACCESSORY, OR ... BE DISCLAIMED BY LAW. This Warranty gives you specific legal rights, and you . ANY IMPLIED WARRANTIES, INCLUDING WITHOUT LIMITATION THE IMPLIED WARRANTIES OF MERCHANTABILITY AND FITNESS FOR A PARTICULAR PURPOSE, SHALL BE LIMITED TO THE DURATION OF THIS LIMITED WARRANTY, OTHERWISE THE REPAIR OR REPLACEMENT PROVIDED UNDER THIS EXPRESS LIMITED WARRANTY IS THE EXCLUSIVE...

User Guide
Page 25
... Products and Accessories. Periodic maintenance, repair and replacement of parts due to normal wear and tear are excluded from the date of the accessories original purchase by someone other acts which are not the fault of MOTOROLA or BINATONE., are excluded from coverage. Defects or damages resulting from service, testing, adjustment, installation, maintenance, alteration, or modification...
... Products and Accessories. Periodic maintenance, repair and replacement of parts due to normal wear and tear are excluded from the date of the accessories original purchase by someone other acts which are not the fault of MOTOROLA or BINATONE., are excluded from coverage. Defects or damages resulting from service, testing, adjustment, installation, maintenance, alteration, or modification...

User Guide
Page 26
...place and seller of the problem; To obtain service, you may have been removed, altered or obliterated; (b) broken seals or that may subscribe to a BINATONE Authorized Repair Center. These terms and ...made by BINATONE. To obtain service or information, please call: US and Canada 1-888-331-3383 Email: support@motorolamonitors.com You will receive instructions on how to ship the ... nonconforming or non-Motorola branded housings, or parts, are excluded from coverage. Defects, damages, or the failure of Products or Accessories due to Obtain Warranty Service or Other Information?...
...place and seller of the problem; To obtain service, you may have been removed, altered or obliterated; (b) broken seals or that may subscribe to a BINATONE Authorized Repair Center. These terms and ...made by BINATONE. To obtain service or information, please call: US and Canada 1-888-331-3383 Email: support@motorolamonitors.com You will receive instructions on how to ship the ... nonconforming or non-Motorola branded housings, or parts, are excluded from coverage. Defects, damages, or the failure of Products or Accessories due to Obtain Warranty Service or Other Information?...

User Guide
Page 29
All other trademarks are the property of Motorola Trademark Holdings, LLC. All rights reserved. MOTOROLA and the Stylized M Logo, are used under license. US_EN Version 4.0 Printed in China and are trademarks or registered trademarks of their respective owners. © 2014 Motorola Mobility LLC. Manufactured, distributed or sold by Binatone Electronics International LTD., official licensee for this product.
All other trademarks are the property of Motorola Trademark Holdings, LLC. All rights reserved. MOTOROLA and the Stylized M Logo, are used under license. US_EN Version 4.0 Printed in China and are trademarks or registered trademarks of their respective owners. © 2014 Motorola Mobility LLC. Manufactured, distributed or sold by Binatone Electronics International LTD., official licensee for this product.
Quick Start Guide
Page 1
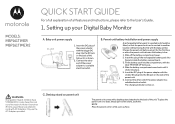
...using it clicks into place. 5. C. MODELS: MBP161TIMER MBP161TIMER-2 QUICK START GUIDE For a full explanation of the power ... end of all features and instructions, please refer to the User's Guide. 1. Desktop stand on .... Insert the plug of children (more than 3ft (1m) away). NOTE Place the parent unit on a desk, simply pull out the stand, as shown. 2. Fit the battery pack into the jack inside the battery compartment. 3. Never use the AC Adapters provided. Setting...unit battery installation and power supply DC PLUG DC JACK...
...using it clicks into place. 5. C. MODELS: MBP161TIMER MBP161TIMER-2 QUICK START GUIDE For a full explanation of the power ... end of all features and instructions, please refer to the User's Guide. 1. Desktop stand on .... Insert the plug of children (more than 3ft (1m) away). NOTE Place the parent unit on a desk, simply pull out the stand, as shown. 2. Fit the battery pack into the jack inside the battery compartment. 3. Never use the AC Adapters provided. Setting...unit battery installation and power supply DC PLUG DC JACK...
Quick Start Guide
Page 2
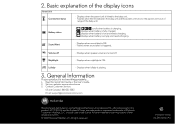
... is turned off - Read this product. Nightlight - Displays when speaker volume is ON. - Contact Customer Service: US and Canada 1-888-331-3383 Email: support@motorolamonitors.com Manufactured, distributed or sold by Binatone Electronics International LTD., official licensee for this Quick Start Guide or the User's Guide. 2. MOTOROLA and the Stylized M Logo, are used under license.
... is turned off - Read this product. Nightlight - Displays when speaker volume is ON. - Contact Customer Service: US and Canada 1-888-331-3383 Email: support@motorolamonitors.com Manufactured, distributed or sold by Binatone Electronics International LTD., official licensee for this Quick Start Guide or the User's Guide. 2. MOTOROLA and the Stylized M Logo, are used under license.
