User Manual
Page 4
... From the Blocked List 43 Avoid Blocking on a Trusted Computer 44 Block Services From the Internet 44 Manage Network Access Control Lists 45 Schedule When to Block Internet Sites and Services 46 Set Up Security Event Email Notifications 46 Chapter 5 Network Settings View or Change WAN Settings 49 Set Up a Default DMZ Server 50 Change the Router's Device Name 50 Change the LAN TCP/IP Settings 51 Specify the IP Addresses That the Router Assigns 52 Disable the DHCP Server Feature in the Router 53 Manage Reserved LAN IP Addresses 54...
... From the Blocked List 43 Avoid Blocking on a Trusted Computer 44 Block Services From the Internet 44 Manage Network Access Control Lists 45 Schedule When to Block Internet Sites and Services 46 Set Up Security Event Email Notifications 46 Chapter 5 Network Settings View or Change WAN Settings 49 Set Up a Default DMZ Server 50 Change the Router's Device Name 50 Change the LAN TCP/IP Settings 51 Specify the IP Addresses That the Router Assigns 52 Disable the DHCP Server Feature in the Router 53 Manage Reserved LAN IP Addresses 54...
User Manual
Page 5
...Update the Router 79 Manually Upload Firmware to the Router 80 Change the admin Password and Enable Password Recovery 80 Set Up Password Recovery 81 Recover the admin Password 82 View Router Status 82 Display Internet Port Statistics 83 Check the Internet Connection Status 84 View and Manage Logs of Router Activity 84 View Devices Currently on the Network 85 Monitor Internet Traffic 86 Manage the Router Configuration File 87 Back Up Settings 87 Erase the Current Configuration Settings 87 Restore Configuration Settings 88 Remote Access...88 Set Up Remote Management 89 Use Remote...
...Update the Router 79 Manually Upload Firmware to the Router 80 Change the admin Password and Enable Password Recovery 80 Set Up Password Recovery 81 Recover the admin Password 82 View Router Status 82 Display Internet Port Statistics 83 Check the Internet Connection Status 84 View and Manage Logs of Router Activity 84 View Devices Currently on the Network 85 Monitor Internet Traffic 86 Manage the Router Configuration File 87 Back Up Settings 87 Erase the Current Configuration Settings 87 Restore Configuration Settings 88 Remote Access...88 Set Up Remote Management 89 Use Remote...
User Manual
Page 6
Nighthawk AC2300 Smart WiFi Router Edit a Network Folder on a USB Storage Device 99 Set Up NETGEAR Downloader 100 Download Files Using NETGEAR Downloader 100 Change the NETGEAR Downloader Settings 101 Set Up Email Notifications for NETGEAR Downloader 101 Manage NETGEAR Downloader Tasks 102 Safely Remove a USB Storage Device 102 Chapter 9 Use Dynamic DNS to Access USB Storage Devices Through the Internet Set Up and Manage Dynamic DNS 105 Set Up FTP Access Through the Internet 105 Your Personal FTP Server 106 Set Up Your Personal FTP Server 106 Set Up a New...
Nighthawk AC2300 Smart WiFi Router Edit a Network Folder on a USB Storage Device 99 Set Up NETGEAR Downloader 100 Download Files Using NETGEAR Downloader 100 Change the NETGEAR Downloader Settings 101 Set Up Email Notifications for NETGEAR Downloader 101 Manage NETGEAR Downloader Tasks 102 Safely Remove a USB Storage Device 102 Chapter 9 Use Dynamic DNS to Access USB Storage Devices Through the Internet Set Up and Manage Dynamic DNS 105 Set Up FTP Access Through the Internet 105 Your Personal FTP Server 106 Set Up Your Personal FTP Server 106 Set Up a New...
User Manual
Page 7
... Blinking 146 LEDs Never Turn Off 146 Internet or Ethernet Port LEDs Are Off 146 WiFi LED Is Off 147 You Cannot Log In to the Router 147 You Cannot Access the Internet 147 Troubleshoot Internet Browsing 149 Changes Are Not Saved 149 Troubleshoot WiFi Connectivity 149 Troubleshoot Your Network Using the Ping Utility 150 Test the LAN Path to Your Router 150 Test the Path From Your Computer to a Remote Device 151 Chapter 15 Supplemental Information Factory Settings 153 Technical Specifications...
... Blinking 146 LEDs Never Turn Off 146 Internet or Ethernet Port LEDs Are Off 146 WiFi LED Is Off 147 You Cannot Log In to the Router 147 You Cannot Access the Internet 147 Troubleshoot Internet Browsing 149 Changes Are Not Saved 149 Troubleshoot WiFi Connectivity 149 Troubleshoot Your Network Using the Ping Utility 150 Test the LAN Path to Your Router 150 Test the Path From Your Computer to a Remote Device 151 Chapter 15 Supplemental Information Factory Settings 153 Technical Specifications...
User Manual
Page 31
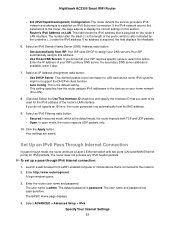
... Apply button. Set Up an IPv6 Pass Through Internet Connection In pass-through IPv6 Internet connection: 1. The user name is password. If no address is the default setting. Enter the IP address of the router's LAN interface. This is acquired, the field displays Not Available. 6. A login window opens. 3. The router detects the service provider's IPv4 network and attempts to the network. 2. Select an IPv6 Domain Name Server (DNS) Address radio button: • Get Automatically from its MAC address. 9. In secured mode...
... Apply button. Set Up an IPv6 Pass Through Internet Connection In pass-through IPv6 Internet connection: 1. The user name is password. If no address is the default setting. Enter the IP address of the router's LAN interface. This is acquired, the field displays Not Available. 6. A login window opens. 3. The router detects the service provider's IPv4 network and attempts to the network. 2. Select an IPv6 Domain Name Server (DNS) Address radio button: • Get Automatically from its MAC address. 9. In secured mode...

User Manual
Page 49
... ADVANCED > Setup > WAN Setup. You can set up a DMZ (demilitarized zone) server, change the WAN settings: 1. This feature is admin. If you can select this check box to Ping on the local area network (LAN) to be discovered. The normal MTU (maximum transmit unit) value for most Ethernet networks is connected to the network. 2. Nighthawk AC2300 Smart WiFi Router View or Change WAN Settings You can view or configure wide area network (WAN) settings for PPPoE connections. A login window opens. 3. Enter the router user name and password. The default password is...
... ADVANCED > Setup > WAN Setup. You can set up a DMZ (demilitarized zone) server, change the WAN settings: 1. This feature is admin. If you can select this check box to Ping on the local area network (LAN) to be discovered. The normal MTU (maximum transmit unit) value for most Ethernet networks is connected to the network. 2. Nighthawk AC2300 Smart WiFi Router View or Change WAN Settings You can view or configure wide area network (WAN) settings for PPPoE connections. A login window opens. 3. Enter the router user name and password. The default password is...
User Manual
Page 50
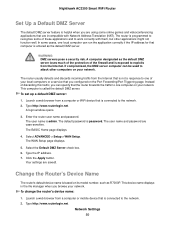
... the default DMZ server. If compromised, the DMZ server computer can specify that is called the default DMZ server. The router usually detects and discards incoming traffic from the Internet. This computer is connected to work correctly with Network Address Translation (NAT). Your settings are case-sensitive. This device name displays in the file manager when you configured on your network. To change the router's device name: 1. Launch a web browser from a computer or WiFi device that the router forwards the traffic...
... the default DMZ server. If compromised, the DMZ server computer can specify that is called the default DMZ server. The router usually detects and discards incoming traffic from the Internet. This computer is connected to work correctly with Network Address Translation (NAT). Your settings are case-sensitive. This device name displays in the file manager when you configured on your network. To change the router's device name: 1. Launch a web browser from a computer or WiFi device that the router forwards the traffic...

User Manual
Page 53
... you define • Subnet mask • Gateway IP address (the router's LAN IP address) • DNS server IP address (the router's LAN IP address) Disable the DHCP Server Feature in the range. Specify the range of all computers connected to all your network as the router. 7. Click the Apply button. This IP address must be in the same subnet as DHCP Server check box. 6. The default password is admin. Network Settings 53 A login window opens. 3. Your settings are case-sensitive. The LAN Setup page displays. 5.
... you define • Subnet mask • Gateway IP address (the router's LAN IP address) • DNS server IP address (the router's LAN IP address) Disable the DHCP Server Feature in the range. Specify the range of all computers connected to all your network as the router. 7. Click the Apply button. This IP address must be in the same subnet as DHCP Server check box. 6. The default password is admin. Network Settings 53 A login window opens. 3. Your settings are case-sensitive. The LAN Setup page displays. 5.
User Manual
Page 67
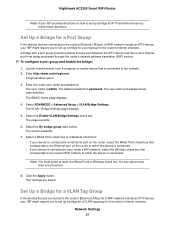
... connected to the network. 2. A login window opens. 3. To configure a port group and enable the bridge: 1. Nighthawk AC2300 Smart WiFi Router Note If your router's WiFi network, select the Wireless check box that corresponds to the router's WiFi network to which the device is connected. Select ADVANCED > Advanced Setup > VLAN/Bridge Settings. The user name and password are saved. The default password is admin. You can select more than one Wired Ports or Wireless check box. The page expands. 6. Your settings are case-sensitive. Click the Apply button...
... connected to the network. 2. A login window opens. 3. To configure a port group and enable the bridge: 1. Nighthawk AC2300 Smart WiFi Router Note If your router's WiFi network, select the Wireless check box that corresponds to the router's WiFi network to which the device is connected. Select ADVANCED > Advanced Setup > VLAN/Bridge Settings. The user name and password are saved. The default password is admin. You can select more than one Wired Ports or Wireless check box. The page expands. 6. Your settings are case-sensitive. Click the Apply button...
User Manual
Page 76
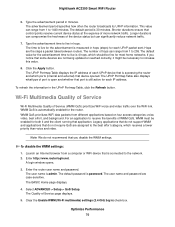
... this value. 8. Select ADVANCED > Setup > QoS Setup. Clear the Enable WMM (Wi-Fi multimedia) settings (2.4 GHz b/g/n) check box. Type the advertisement time to the network. 2. Click the Apply button. The default period is admin. WMM QoS is connected to live is 4 hops, which receives a lower priority than voice and video. A login window opens. 3. The Quality of Service (WMM QoS) prioritizes WiFi voice and video traffic over the WiFi link. The number of WMM QoS, WMM must be fine...
... this value. 8. Select ADVANCED > Setup > QoS Setup. Clear the Enable WMM (Wi-Fi multimedia) settings (2.4 GHz b/g/n) check box. Type the advertisement time to the network. 2. Click the Apply button. The default period is admin. WMM QoS is connected to live is 4 hops, which receives a lower priority than voice and video. A login window opens. 3. The Quality of Service (WMM QoS) prioritizes WiFi voice and video traffic over the WiFi link. The number of WMM QoS, WMM must be fine...
User Manual
Page 86
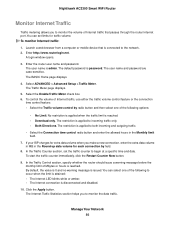
... Network 86 Launch a web browser from a computer or mobile device that passes through the router Internet port. In the Traffic Counter section, set limits for each connection by radio button and then select one of the following options: • No Limit. The default password is admin. You can select one of Mbytes or hours is connected to both incoming and outgoing traffic. • Select the Connection time control...
... Network 86 Launch a web browser from a computer or mobile device that passes through the router Internet port. In the Traffic Counter section, set limits for each connection by radio button and then select one of the following options: • No Limit. The default password is admin. You can select one of Mbytes or hours is connected to both incoming and outgoing traffic. • Select the Connection time control...
User Manual
Page 88
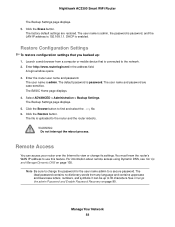
... to change its settings. Manage Your Network 88 The user name is admin, the password is password, and the LAN IP address is enabled. A login window opens. 3. Click the Browse button to the router and the router reboots. Click the Restore button. Remote Access You can be up : 1. You must know the router's WAN IP address to a secure password. The user name and password are restored. The BASIC Home page displays. 4. For information about remote access using Dynamic DNS, see Set Up and Manage Dynamic DNS on...
... to change its settings. Manage Your Network 88 The user name is admin, the password is password, and the LAN IP address is enabled. A login window opens. 3. Click the Browse button to the router and the router reboots. Click the Restore button. Remote Access You can be up : 1. You must know the router's WAN IP address to a secure password. The user name and password are restored. The BASIC Home page displays. 4. For information about remote access using Dynamic DNS, see Set Up and Manage Dynamic DNS on...
User Manual
Page 106
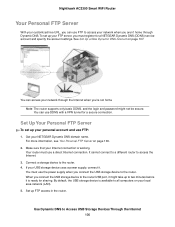
... login and password might take up FTP access in the router. Nighthawk AC2300 Smart WiFi Router Your Personal FTP Server With your customized free URL, you can use FTP to the router. 4. You can use DDNS with a VPN tunnel for a NETGEAR Dynamic DNS (DDNS) service account and specify the account settings. Use Dynamic DNS to all computers on your local area network (LAN). 5. To set up your Internet connection is working. Your router must register for a secure connection. Set...
... login and password might take up FTP access in the router. Nighthawk AC2300 Smart WiFi Router Your Personal FTP Server With your customized free URL, you can use FTP to the router. 4. You can use DDNS with a VPN tunnel for a NETGEAR Dynamic DNS (DDNS) service account and specify the account settings. Use Dynamic DNS to all computers on your local area network (LAN). 5. To set up your Internet connection is working. Your router must register for a secure connection. Set...
User Manual
Page 114
... Add a Device button. A login window opens. When Home Sharing is connected to set up to the router. The music that is on your router's network. Download the Remote app from the menu, select the router. Enter the router user name and password. The Media Server (Settings) page displays. 8. Enter your iPhone or iPad. 6. The passcode displays in the router to the router displays in iTunes. 14. Select the Enable iTunes Server (Music Only) check...
... Add a Device button. A login window opens. When Home Sharing is connected to set up to the router. The music that is on your router's network. Download the Remote app from the menu, select the router. Enter the router user name and password. The Media Server (Settings) page displays. 8. Enter your iPhone or iPad. 6. The passcode displays in the router to the router displays in iTunes. 14. Select the Enable iTunes Server (Music Only) check...
User Manual
Page 126
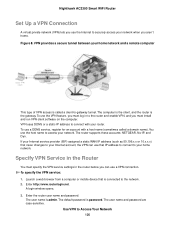
...). To use the VPN feature, you must install and run VPN client software on the computer. Figure 8.VPN provides a secure tunnel between your home network and a remote computer This type of VPN access is the gateway. Specify VPN Service in the Router You must specify the VPN service settings in to the router and enable VPN, and you must log in the router before you can use a VPN connection. A login window opens. 3. Enter http://www.routerlogin.net. Nighthawk AC2300 Smart WiFi Router Set Up a VPN Connection A virtual private network (VPN...
...). To use the VPN feature, you must install and run VPN client software on the computer. Figure 8.VPN provides a secure tunnel between your home network and a remote computer This type of VPN access is the gateway. Specify VPN Service in the Router You must specify the VPN service settings in to the router and enable VPN, and you must log in the router before you can use a VPN connection. A login window opens. 3. Enter http://www.routerlogin.net. Nighthawk AC2300 Smart WiFi Router Set Up a VPN Connection A virtual private network (VPN...
User Manual
Page 127
... default port number is 12973. 8. The VPN Service page displays. 5. Click the For Windows button to use a VPN connection. To install VPN client software on each Windows computer that is selected. 6. The user name and password are saved. To change the TUN mode service type, select the UCP or TCP radio button. 7. To change the TUN mode service port, type the port number that you must install this software on each Windows computer, Mac computer, iOS device, or Android device that you want to download the OpenVPN configuration files...
... default port number is 12973. 8. The VPN Service page displays. 5. Click the For Windows button to use a VPN connection. To install VPN client software on each Windows computer that is selected. 6. The user name and password are saved. To change the TUN mode service type, select the UCP or TCP radio button. 7. To change the TUN mode service port, type the port number that you must install this software on each Windows computer, Mac computer, iOS device, or Android device that you want to download the OpenVPN configuration files...
User Manual
Page 135
... device that is installed on page 134. 2. Enter the router user name and password. This is established, launch your home network: 1. Unzip the configuration files and copy them to the folder where the VPN client is connected to access section, and select the Home Network only radio button. The OpenVPN icon displays in the Router on your home network. When the VPN connection is the default setting. Select the Enable VPN Service radio button...
... device that is installed on page 134. 2. Enter the router user name and password. This is established, launch your home network: 1. Unzip the configuration files and copy them to the folder where the VPN client is connected to access section, and select the Home Network only radio button. The OpenVPN icon displays in the Router on your home network. When the VPN connection is the default setting. Select the Enable VPN Service radio button...
User Manual
Page 145
... if the Ethernet cable connecting the router and the modem is to configure each WiFi computer's MAC address to the router's access list. WiFi Settings Make sure that the network settings of the computer are correct. If you turned off the LEDs except the Power LED, you must add each computer to obtain an IP address automatically using DHCP. For information about controlling the LED settings, see Disable or Enable LED Blinking or Turn Off LEDs on computers are turned on. Nighthawk AC2300 Smart WiFi Router Quick Tips...
... if the Ethernet cable connecting the router and the modem is to configure each WiFi computer's MAC address to the router's access list. WiFi Settings Make sure that the network settings of the computer are correct. If you turned off the LEDs except the Power LED, you must add each computer to obtain an IP address automatically using DHCP. For information about controlling the LED settings, see Disable or Enable LED Blinking or Turn Off LEDs on computers are turned on. Nighthawk AC2300 Smart WiFi Router Quick Tips...

User Manual
Page 146
... that NETGEAR supplied for about two minutes, verify the following : • Make sure that the Ethernet cable connections are using the power adapter that a hardware problem exists. Nighthawk AC2300 Smart WiFi Router Standard LED Behavior When the Router Is Powered On After you turn off the WiFi radio. Check the following: • Make sure that the power adapter is turned on the front panel of reasons. If all LEDs are using the correct cable. Internet or Ethernet Port LEDs Are...
... that NETGEAR supplied for about two minutes, verify the following : • Make sure that the Ethernet cable connections are using the power adapter that a hardware problem exists. Nighthawk AC2300 Smart WiFi Router Standard LED Behavior When the Router Is Powered On After you turn off the WiFi radio. Check the following: • Make sure that the power adapter is turned on the front panel of reasons. If all LEDs are using the correct cable. Internet or Ethernet Port LEDs Are...

Product Data Sheet
Page 9
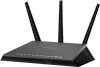
...-(1 WAN & 4 LAN) Gigabit Ethernet ports Key Features • MU-MIMO-Simultaneous streaming of data for multiple devices‡ • Smart Connect-Same WiFi network name on Mobile devices • Guest network access-Separate & secure • Implicit & Explicit Beamforming-More reliable connections • Alexa Voice Control-Use Amazon Alexa™ to control your network with PSK) • Automatic firmware update delivers latest security patches to the router • Double firewall protection (SPI and NAT) • Denial-of-service (DoS...
...-(1 WAN & 4 LAN) Gigabit Ethernet ports Key Features • MU-MIMO-Simultaneous streaming of data for multiple devices‡ • Smart Connect-Same WiFi network name on Mobile devices • Guest network access-Separate & secure • Implicit & Explicit Beamforming-More reliable connections • Alexa Voice Control-Use Amazon Alexa™ to control your network with PSK) • Automatic firmware update delivers latest security patches to the router • Double firewall protection (SPI and NAT) • Denial-of-service (DoS...


