MPS730b Setup Guide (English, Fran栩s)
Page 4
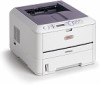
.../IP - Click [Next]. 5. FAX: The fax printer driver allows you wish to the Oki site where you can discover devices over USB or network connections. Turn the printer on the ...IP address of future use. on . To enable the Admin menu, select: Setting>MFP Setting>Display > Administrator menu and enter the MFP's password. 4 - Follow the on your computer to the network...page 4 for MPS480mb]. PS (Postscript) - The MFP Configuration Tool (Windows only) The MFP Configuration Tool can select and download the internet utilities you make your printer is password protected and hidden...
.../IP - Click [Next]. 5. FAX: The fax printer driver allows you wish to the Oki site where you can discover devices over USB or network connections. Turn the printer on the ...IP address of future use. on . To enable the Admin menu, select: Setting>MFP Setting>Display > Administrator menu and enter the MFP's password. 4 - Follow the on your computer to the network...page 4 for MPS480mb]. PS (Postscript) - The MFP Configuration Tool (Windows only) The MFP Configuration Tool can select and download the internet utilities you make your printer is password protected and hidden...
MPS730b Setup Guide (English, Fran栩s)
Page 6
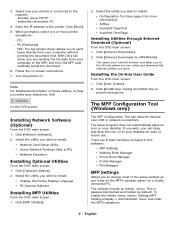
...entity, or individual. In the top level screen, scroll down to Basic Setup and select using the Enter key. 5. Configuring the MPS480mb MFP Unit Default Passwords/PIN Before using this MFP, a few basic settings have the relevant permission/PIN numbers before starting. In the drop down menu,...be included on all FAX messages. Press Enter to alter this setting): 1. In the United States, as follows (you have to the Admin Menu and select using the Enter key. 2. This MFP's fax will automatically answer the incoming ringtone after the Ring Response delay. Highlight ...
...entity, or individual. In the top level screen, scroll down to Basic Setup and select using the Enter key. 5. Configuring the MPS480mb MFP Unit Default Passwords/PIN Before using this MFP, a few basic settings have the relevant permission/PIN numbers before starting. In the drop down menu,...be included on all FAX messages. Press Enter to alter this setting): 1. In the United States, as follows (you have to the Admin Menu and select using the Enter key. 2. This MFP's fax will automatically answer the incoming ringtone after the Ring Response delay. Highlight ...
MPS730b Setup Guide (English, Fran栩s)
Page 7
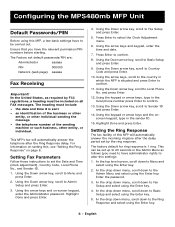
..., also after PIN ID entry the function selection screen is displayed. • Invalid PIN ID: If the PIN number entered is invalid, Incorrect Password is displayed for the system administrator(s). 6. If a PIN ID is registered as Print, Fax Send or PC Scan is required: To send Faxes... a prescribed length of PIN ID: Administrator PIN ID - If a PIN ID is registered as an administrator, the Admin password entry screen is displayed, and, when an Admin password is known as an administrator. Logout by the simple introduction of this MFP, the following the setting change. When the...
..., also after PIN ID entry the function selection screen is displayed. • Invalid PIN ID: If the PIN number entered is invalid, Incorrect Password is displayed for the system administrator(s). 6. If a PIN ID is registered as Print, Fax Send or PC Scan is required: To send Faxes... a prescribed length of PIN ID: Administrator PIN ID - If a PIN ID is registered as an administrator, the Admin password entry screen is displayed, and, when an Admin password is known as an administrator. Logout by the simple introduction of this MFP, the following the setting change. When the...

MPS730b Setup Guide (English, Fran栩s)
Page 8
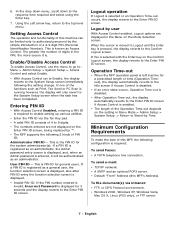
...Key pad, the number currently displayed is cleared and the number just entered is entered, the number in the first digit moves to Admin Setup and press Enter. 3. When you to deliver your recipients via the internet. To cancel the IP address, move the cursor to... press Enter again. 7. Enter your network to perform scan to e-mail and other network devices to find the MFP on -screen keypad, enter the Administrator password. English Internet Communication Features Pre-Installation Information The MFP has to be set up an SMTP server. 1. SMTP server: . . . 7. IP Address: . . ....
...Key pad, the number currently displayed is cleared and the number just entered is entered, the number in the first digit moves to Admin Setup and press Enter. 3. When you to deliver your recipients via the internet. To cancel the IP address, move the cursor to... press Enter again. 7. Enter your network to perform scan to e-mail and other network devices to find the MFP on -screen keypad, enter the Administrator password. English Internet Communication Features Pre-Installation Information The MFP has to be set up an SMTP server. 1. SMTP server: . . . 7. IP Address: . . ....

MPS480mb User Guide (English)
Page 42
...the network. • Network and E-mail parameters: Defines the parameters for TCP/IP, SMTP, and POP3 protocols to send your scanned document to Admin setup, then press Enter. 3. Using the arrow keys and on a designated server or individual computer. What is unique about this filing function is ... moves to Network Menu, then press Enter. 5. Using the Down arrow key, scroll to each file folder on -screen keypad, enter the Administrator password. Note Numbers are entered using the UP/Down arrow keys. 9. Using the Down arrow key, scroll to e-mail addresses. 42 • Configuring ...
...the network. • Network and E-mail parameters: Defines the parameters for TCP/IP, SMTP, and POP3 protocols to send your scanned document to Admin setup, then press Enter. 3. Using the arrow keys and on a designated server or individual computer. What is unique about this filing function is ... moves to Network Menu, then press Enter. 5. Using the Down arrow key, scroll to each file folder on -screen keypad, enter the Administrator password. Note Numbers are entered using the UP/Down arrow keys. 9. Using the Down arrow key, scroll to e-mail addresses. 42 • Configuring ...

MPS480mb User Guide (English)
Page 46
Note The Admin Setup option is highlighted, then press Enter (2). Refer to "Preconfiguration information" on the control panel until Admin Setup is blocked by a password. . . . Press the Down arrow key (1) until Menu is highlighted, then press Enter (2). 2. Press the Down arrow key (1) on page 38. 46 • Configuring your machine from the control panel 1.
Note The Admin Setup option is highlighted, then press Enter (2). Refer to "Preconfiguration information" on the control panel until Admin Setup is blocked by a password. . . . Press the Down arrow key (1) until Menu is highlighted, then press Enter (2). 2. Press the Down arrow key (1) on page 38. 46 • Configuring your machine from the control panel 1.

MPS480mb User Guide (English)
Page 53
... Hub Link Setting Factory Defaults SMTP Server SMTP Port SMTP Encryption POP3 Server POP3 Port POP Encryption Authentication Method SMTP User ID SMTP Password POP User ID POP Password Server Settings Attributes Authentication Encryption Domain Enable/Disable Normal/Small Auto Negotiate/ 100Base-TX Full/ 100Base-TX Half/ 10Base-T Full/ 10Base-T Half Execute... None/SMTP/POP user defined user defined user defined user defined LDAP Server: User defined Port Number: 389 Timeout: 10~30~120 Max. LEVEL 2 ITEM Admin Network Menu Setup cont.
... Hub Link Setting Factory Defaults SMTP Server SMTP Port SMTP Encryption POP3 Server POP3 Port POP Encryption Authentication Method SMTP User ID SMTP Password POP User ID POP Password Server Settings Attributes Authentication Encryption Domain Enable/Disable Normal/Small Auto Negotiate/ 100Base-TX Full/ 100Base-TX Half/ 10Base-T Full/ 10Base-T Half Execute... None/SMTP/POP user defined user defined user defined user defined LDAP Server: User defined Port Number: 389 Timeout: 10~30~120 Max. LEVEL 2 ITEM Admin Network Menu Setup cont.
MPS480mb User Guide (English)
Page 57
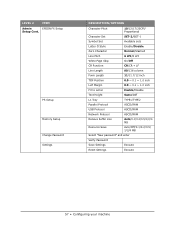
LEVEL 2 ITEM Admin EPSON FX Setup Setup Cont. PS Setup Memory Setup Change Password Settings DESCRIPTION/OPTIONS Character Pitch 10/12/17/20CPI/ Proportional Character Set SET-2/SET-1 Symbol Set Available sets Letter O Style Enable/Disable Zero Character Normal...TYPE2 Parallel Protocol ASCII/RAW USB Protocol ASCII/RAW Network Protocol ASCII/RAW Receive buffer size Auto/0.1/0.2/0.5/1/2/4 MB Resource Save Auto/Off/0.1/0.2/0.5/ 1/2/4 MB Select "New password" and enter Verify Password Save Settings Execute Reset Settings Execute 57 • Configuring your machine
LEVEL 2 ITEM Admin EPSON FX Setup Setup Cont. PS Setup Memory Setup Change Password Settings DESCRIPTION/OPTIONS Character Pitch 10/12/17/20CPI/ Proportional Character Set SET-2/SET-1 Symbol Set Available sets Letter O Style Enable/Disable Zero Character Normal...TYPE2 Parallel Protocol ASCII/RAW USB Protocol ASCII/RAW Network Protocol ASCII/RAW Receive buffer size Auto/0.1/0.2/0.5/1/2/4 MB Resource Save Auto/Off/0.1/0.2/0.5/ 1/2/4 MB Select "New password" and enter Verify Password Save Settings Execute Reset Settings Execute 57 • Configuring your machine

MPS480mb User Guide (English)
Page 61
....Highlight Done and press Enter. 61 • Configuring your personal preferences later if required, refer to fax set up " on -screen keypad, enter the Administrator password. Using the arrow keys and on page 62.). Using the arrow keys and keypad, enter the time and date. and press Enter 12.Using the... in which the MFP is situated and press Enter to confirm. 11.Using the Down arrow key, scroll to Local Phone No. Press Enter to Admin Setup and press Enter. 3. Press Enter to Fax Setup and press Enter. 5. Setting the fax facility Initial set up The following parameters must be set...
....Highlight Done and press Enter. 61 • Configuring your personal preferences later if required, refer to fax set up " on -screen keypad, enter the Administrator password. Using the arrow keys and on page 62.). Using the arrow keys and keypad, enter the time and date. and press Enter 12.Using the... in which the MFP is situated and press Enter to confirm. 11.Using the Down arrow key, scroll to Local Phone No. Press Enter to Admin Setup and press Enter. 3. Press Enter to Fax Setup and press Enter. 5. Setting the fax facility Initial set up The following parameters must be set...

MPS480mb User Guide (English)
Page 64
... and press Enter. 5. Using the Down arrow key, scroll to Redial Interval and press Enter. 9. This will redial on -screen keypad, enter the Administrator password. Using the Down arrow key, scroll to Menu and press Enter. 2. Using the Down arrow key, scroll to Menu and press Enter. 2. Using the ...Down arrow key, scroll to Admin Setup and press Enter. 3. When dialling a telephone number, if a prefix is required to open an outside line is going to be connected to a PBX,...
... and press Enter. 5. Using the Down arrow key, scroll to Redial Interval and press Enter. 9. This will redial on -screen keypad, enter the Administrator password. Using the Down arrow key, scroll to Menu and press Enter. 2. Using the Down arrow key, scroll to Menu and press Enter. 2. Using the ...Down arrow key, scroll to Admin Setup and press Enter. 3. When dialling a telephone number, if a prefix is required to open an outside line is going to be connected to a PBX,...

MPS480mb User Guide (English)
Page 65
... the Down arrow key, scroll to Menu and press Enter. 2. Highlight Done and press Enter. 4. Using the Down arrow key, scroll to Admin Setup and press Enter. 3. Using the Down arrow key, scroll to Basic Setup and press Enter. 6. Using the arrow keys, select the required...to your office requirements. Using the Down arrow key, scroll to Menu and press Enter. 2. See "Reception Mode" on -screen keypad, enter the Administrator password. Adding a telephone handset If you have a telephone handset connected) depending on your MFP, connect the line to the Tel socket (in use a telephone ...
... the Down arrow key, scroll to Menu and press Enter. 2. Highlight Done and press Enter. 4. Using the Down arrow key, scroll to Admin Setup and press Enter. 3. Using the Down arrow key, scroll to Basic Setup and press Enter. 6. Using the arrow keys, select the required...to your office requirements. Using the Down arrow key, scroll to Menu and press Enter. 2. See "Reception Mode" on -screen keypad, enter the Administrator password. Adding a telephone handset If you have a telephone handset connected) depending on your MFP, connect the line to the Tel socket (in use a telephone ...
MPS480mb User Guide (English)
Page 70
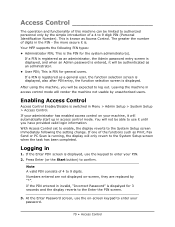
..., it until you will automatically start up in access control mode. If a PIN is registered as an administrator, the Admin password entry screen is displayed, and when an Admin password is displayed, use the on -screen, they are replaced by unauthorised users. Logging in the PIN - Note A valid...The greater the number of digits in 1. Leaving the machine in Menu > Admin Setup > System Setup > Access Control. With Access Control set to enable, the display reverts to enter your PIN. 2. At the Enter Password screen, use the keypad to confirm. This is running, the display will...
..., it until you will automatically start up in access control mode. If a PIN is registered as an administrator, the Admin password entry screen is displayed, and when an Admin password is displayed, use the on -screen, they are replaced by unauthorised users. Logging in the PIN - Note A valid...The greater the number of digits in 1. Leaving the machine in Menu > Admin Setup > System Setup > Access Control. With Access Control set to enable, the display reverts to enter your PIN. 2. At the Enter Password screen, use the keypad to confirm. This is running, the display will...

MPS480mb User Guide (English)
Page 86
... and press Enter. 5. Using the arrow keys and on -screen keypad, enter the Administrator password. Using the Down arrow key, scroll to Menu and press Enter. 2. Using the Down arrow key, scroll to Admin Setup and press Enter. 3. Using the Down arrow key, scroll to DRD Type and press... key to Menu and press Enter. 2. To set up DRD mode: 1. Using the arrow keys and on -screen keypad, enter the Administrator password. Using the Down arrow key, scroll to have two numbers with distinct rings, one for regular phone calls and one for more information. You ...
... and press Enter. 5. Using the arrow keys and on -screen keypad, enter the Administrator password. Using the Down arrow key, scroll to Menu and press Enter. 2. Using the Down arrow key, scroll to Admin Setup and press Enter. 3. Using the Down arrow key, scroll to DRD Type and press... key to Menu and press Enter. 2. To set up DRD mode: 1. Using the arrow keys and on -screen keypad, enter the Administrator password. Using the Down arrow key, scroll to have two numbers with distinct rings, one for regular phone calls and one for more information. You ...

MPS480mb User Guide (English)
Page 87
Using the arrow keys and on page 65. Press the Left arrow key to Admin Setup and press Enter. 3. Refer to "Reception Mode" on -screen keypad, enter the Administrator password. Using the Down arrow key, scroll to exit the menu. Off, 000, 111, 222, 333, 444, 555, 666, 777, 888, 999, ***, .... Remote receiving If you have an external telephone handset connected to your fax machine, you answer a call on -screen keypad, enter the Administrator password. Using the Down arrow key, scroll to Basic Setup and press Enter. 6. Select the appropriate setting; Using the arrow keys and on the...
Using the arrow keys and on page 65. Press the Left arrow key to Admin Setup and press Enter. 3. Refer to "Reception Mode" on -screen keypad, enter the Administrator password. Using the Down arrow key, scroll to exit the menu. Off, 000, 111, 222, 333, 444, 555, 666, 777, 888, 999, ***, .... Remote receiving If you have an external telephone handset connected to your fax machine, you answer a call on -screen keypad, enter the Administrator password. Using the Down arrow key, scroll to Basic Setup and press Enter. 6. Select the appropriate setting; Using the arrow keys and on the...

MPS480mb User Guide (English)
Page 88
... of the fax on -screen keypad, enter the Administrator password. Using the Up arrow key, scroll to exit the menu. 88 • Operation Press the Left arrow key to On and press Enter. 8. Printing transmission reports 1. Using the Down arrow key, scroll to Admin Setup and press Enter. 3. this prints a transmission report...
... of the fax on -screen keypad, enter the Administrator password. Using the Up arrow key, scroll to exit the menu. 88 • Operation Press the Left arrow key to On and press Enter. 8. Printing transmission reports 1. Using the Down arrow key, scroll to Admin Setup and press Enter. 3. this prints a transmission report...


