
STYLUS TOUGH-3000 Instruction Manual (English)
Page 1
...PDF file are stored on the internal memory of the camera. ● We recommend that you start to use your camera before taking important photographs. ● In the interest of continually improving products, Olympus reserves the right to enjoy optimum performance and a longer service ... information contained in this manual. ● The screen and camera illustrations shown in this manual in a safe place for purchasing an Olympus digital camera. Before you take test shots to get accustomed to your new camera, please read these illustrations is provided for STYLUS TOUGH-8010/μ...
...PDF file are stored on the internal memory of the camera. ● We recommend that you start to use your camera before taking important photographs. ● In the interest of continually improving products, Olympus reserves the right to enjoy optimum performance and a longer service ... information contained in this manual. ● The screen and camera illustrations shown in this manual in a safe place for purchasing an Olympus digital camera. Before you take test shots to get accustomed to your new camera, please read these illustrations is provided for STYLUS TOUGH-8010/μ...

STYLUS TOUGH-3000 Instruction Manual (English)
Page 2
... Other accessories not shown: Warranty card Contents may vary depending on purchase location. 2 Step Preparing the Camera "Preparing the Camera" (p. 11) 4 Step How to Use the Camera "Camera Settings" (p. 3) or LI-50B*1 LI-42B*2 Lithium Ion Battery *1 STYLUS TOUGH-8010/μ ... 5 Step Printing "Direct printing (PictBridge)" (p. 53) "Print Reservations (DPOF)" (p. 56) Contents ¾ Names of Parts 7 ¾ Preparing the Camera 11 ¾ Shooting, Playback, and Erasing 16 ¾ Using Shooting Modes 23 ¾ Using Shooting Functions.......... 28 ¾ Menus for Shooting Functions... ...
... Other accessories not shown: Warranty card Contents may vary depending on purchase location. 2 Step Preparing the Camera "Preparing the Camera" (p. 11) 4 Step How to Use the Camera "Camera Settings" (p. 3) or LI-50B*1 LI-42B*2 Lithium Ion Battery *1 STYLUS TOUGH-8010/μ ... 5 Step Printing "Direct printing (PictBridge)" (p. 53) "Print Reservations (DPOF)" (p. 56) Contents ¾ Names of Parts 7 ¾ Preparing the Camera 11 ¾ Shooting, Playback, and Erasing 16 ¾ Using Shooting Modes 23 ¾ Using Shooting Functions.......... 28 ¾ Menus for Shooting Functions... ...

STYLUS TOUGH-3000 Instruction Manual (English)
Page 3
... 2 COMPRESSION NORMAL SHADOW ADJUST AUTO AF MODE FACE/iESP 1 ESP/ ESP 2 FINE ZOOM OFF 3 DIGITAL ZOOM OFF EXIT MENU SET OK SEL. Camera Settings Using the Direct Buttons Frequently used functions can be used . X Y M D TIME 2010. 02 . 26 12 : 30 Y/M/D CANCEL MENU...I (right) Zoom buttons (p. 17, 20) Movie record button (p. 17) q button (switching between shooting and playback) (p. 17, 18, 45) m button (p. 4) E button (camera guide/ menu guide) (p. 22) A button G (down) / D button (erase) (p. 20) Operation guides displayed at the bottom of the screen indicate that the arrow pad is...
... 2 COMPRESSION NORMAL SHADOW ADJUST AUTO AF MODE FACE/iESP 1 ESP/ ESP 2 FINE ZOOM OFF 3 DIGITAL ZOOM OFF EXIT MENU SET OK SEL. Camera Settings Using the Direct Buttons Frequently used functions can be used . X Y M D TIME 2010. 02 . 26 12 : 30 Y/M/D CANCEL MENU...I (right) Zoom buttons (p. 17, 20) Movie record button (p. 17) q button (switching between shooting and playback) (p. 17, 18, 45) m button (p. 4) E button (camera guide/ menu guide) (p. 22) A button G (down) / D button (erase) (p. 20) Operation guides displayed at the bottom of the screen indicate that the arrow pad is...

STYLUS TOUGH-3000 Instruction Manual (English)
Page 4
Press the m button to select the shooting mode and press the A button. In the [SETUP] menu, various camera functions can be set the function menu. There may be used shooting and playback functions such as the shooting mode. The function menu can be ... a menu option. In such cases, the following message is selected, the display returns to the previous screen. Using the Menu Use the menu to change camera settings such as shooting mode. "Menu Settings" (p. 33 to 52) 1X 2 WORLD TIME TV OUT POWER SAVE 1 2 3 EXIT MENU x ON SET OK 5 Press the m button...
Press the m button to select the shooting mode and press the A button. In the [SETUP] menu, various camera functions can be set the function menu. There may be used shooting and playback functions such as the shooting mode. The function menu can be ... a menu option. In such cases, the following message is selected, the display returns to the previous screen. Using the Menu Use the menu to change camera settings such as shooting mode. "Menu Settings" (p. 33 to 52) 1X 2 WORLD TIME TV OUT POWER SAVE 1 2 3 EXIT MENU x ON SET OK 5 Press the m button...

STYLUS TOUGH-3000 Instruction Manual (English)
Page 6
.../μ TOUGH-8010 and STYLUS TOUGH-6020/μ TOUGH-6020 only Operating the camera by tapping the body (p. 51) (STYLUS TOUGH-8010/μ TOUGH-8010 and STYLUS TOUGH-6020/μ TOUGH-6020 only) You can operate the camera by tapping the body when [TAP CONTROL] is [ON]. 6 EN Menus... for Other Camera Settings 1 INTERNAL/SD 2 MEMORY FORMAT DATA REPAIR COPY 1 1 2 2 RESET 3 3 USB CONNECTION EXIT MENU AUTO ENGLISH...
.../μ TOUGH-8010 and STYLUS TOUGH-6020/μ TOUGH-6020 only Operating the camera by tapping the body (p. 51) (STYLUS TOUGH-8010/μ TOUGH-8010 and STYLUS TOUGH-6020/μ TOUGH-6020 only) You can operate the camera by tapping the body when [TAP CONTROL] is [ON]. 6 EN Menus... for Other Camera Settings 1 INTERNAL/SD 2 MEMORY FORMAT DATA REPAIR COPY 1 1 2 2 RESET 3 3 USB CONNECTION EXIT MENU AUTO ENGLISH...

STYLUS TOUGH-3000 Instruction Manual (English)
Page 7
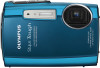
... only *2 STYLUS TOUGH-8010/μ TOUGH-8010 and STYLUS TOUGH-6020/μ TOUGH-6020 only *3 STYLUS TOUGH-3000/μ TOUGH-3000 EN 7 Names of Parts Camera unit 1 3 6 2 7 8 4 5 9 STYLUS TOUGH-6020/ μ TOUGH-6020 1 10 STYLUS TOUGH-3000/ μ TOUGH-3000 1 11 1 Battery/card/connector cover lock p. 11 2 LOCK knob*1 p. 11 3 HDMI...
... only *2 STYLUS TOUGH-8010/μ TOUGH-8010 and STYLUS TOUGH-6020/μ TOUGH-6020 only *3 STYLUS TOUGH-3000/μ TOUGH-3000 EN 7 Names of Parts Camera unit 1 3 6 2 7 8 4 5 9 STYLUS TOUGH-6020/ μ TOUGH-6020 1 10 STYLUS TOUGH-3000/ μ TOUGH-3000 1 11 1 Battery/card/connector cover lock p. 11 2 LOCK knob*1 p. 11 3 HDMI...

STYLUS TOUGH-3000 Instruction Manual (English)
Page 8
p. 22 14 m button p. 3, 4 *1 STYLUS TOUGH-8010/μ TOUGH-8010 and STYLUS TOUGH-6020/μ TOUGH-6020 Attaching the camera strap 8 EN Pull the strap tight so that it does not come loose. 1 7 8 2 9 3 4 10 5 11 12 6 13 14 STYLUS TOUGH-6020/μ TOUGH-6020 2 1 n button p. ... p. 17, 20 10 Movie record button p. 17 11 Strap eyelet p. 8 12 Arrow pad p. 3 INFO button (changing information display p. 18, 21 D button (erase p. 20 13 E button (camera guide/menu guide) .........
p. 22 14 m button p. 3, 4 *1 STYLUS TOUGH-8010/μ TOUGH-8010 and STYLUS TOUGH-6020/μ TOUGH-6020 Attaching the camera strap 8 EN Pull the strap tight so that it does not come loose. 1 7 8 2 9 3 4 10 5 11 12 6 13 14 STYLUS TOUGH-6020/μ TOUGH-6020 2 1 n button p. ... p. 17, 20 10 Movie record button p. 17 11 Strap eyelet p. 8 12 Arrow pad p. 3 INFO button (changing information display p. 18, 21 D button (erase p. 20 13 E button (camera guide/menu guide) .........

STYLUS TOUGH-3000 Instruction Manual (English)
Page 9
p. 33, 66, 67, 68 24 Histogram p. 18 25 AF target mark p. 16 26 Camera shake warning 27 Aperture value p. 16 28 Shutter speed p. 16 *1 STYLUS TOUGH-8010/μ TOUGH-8010 and STYLUS TOUGH-6020/μ TOUGH-6020 only *2 STYLUS ...
p. 33, 66, 67, 68 24 Histogram p. 18 25 AF target mark p. 16 26 Camera shake warning 27 Aperture value p. 16 28 Shutter speed p. 16 *1 STYLUS TOUGH-8010/μ TOUGH-8010 and STYLUS TOUGH-6020/μ TOUGH-6020 only *2 STYLUS ...

STYLUS TOUGH-3000 Instruction Manual (English)
Page 11
...STYLUS TOUGH-3000/μ TOUGH-3000 STYLUS TOUGH-6020/ STYLUS TOUGH-3000/ μ TOUGH-6020 μ TOUGH-3000 Battery charge and camera setup Connect the camera to the computer to the battery exterior (scratches, etc.) may produce heat or an explosion. System requirements Windows XP (SP2 or later...)/ Windows Vista/Windows 7 When using the camera, be sure to close the battery/card/connector cover. Slide the battery lock knob in the ▼ marked side first, with ...
...STYLUS TOUGH-3000/μ TOUGH-3000 STYLUS TOUGH-6020/ STYLUS TOUGH-3000/ μ TOUGH-6020 μ TOUGH-3000 Battery charge and camera setup Connect the camera to the computer to the battery exterior (scratches, etc.) may produce heat or an explosion. System requirements Windows XP (SP2 or later...)/ Windows Vista/Windows 7 When using the camera, be sure to close the battery/card/connector cover. Slide the battery lock knob in the ▼ marked side first, with ...

STYLUS TOUGH-3000 Instruction Manual (English)
Page 12
...functioning correctly. Do not insert SD/SDHC memory cards before the camera setup. If nothing is displayed on and running) Charging the battery When the camera is recognized by the computer. Camera setup Set the camera date and time, time zone and display language automatically; Check... execute Setup.exe to use the PC software (ib). 2 Select and execute "OLYMPUS Camera Initialization", which is not guaranteed in the camera will be exhausted. When connecting the camera to the computer. install the camera instruction manual and PC software (ib). Doing so will turn off. Even if ...
...functioning correctly. Do not insert SD/SDHC memory cards before the camera setup. If nothing is displayed on and running) Charging the battery When the camera is recognized by the computer. Camera setup Set the camera date and time, time zone and display language automatically; Check... execute Setup.exe to use the PC software (ib). 2 Select and execute "OLYMPUS Camera Initialization", which is not guaranteed in the camera will be exhausted. When connecting the camera to the computer. install the camera instruction manual and PC software (ib). Doing so will turn off. Even if ...

STYLUS TOUGH-3000 Instruction Manual (English)
Page 13
...: Charged STYLUS TOUGH-3000/μ TOUGH-3000 Indicator lamp On: Charging Off: Charged USB cable (supplied) 1 AC outlet 3 When connecting the camera to the camera. Before use, be broken. However, when charging with the system other than Windows XP (SP2 or later)/Windows Vista/ Windows 7, charging takes much... time. Make sure that shooting is not connected to the camera correctly, or the battery, camera, or AC adapter may be sure to charge the battery until the indicator lamp turns off (STYLUS TOUGH-8010/μ TOUGH-...
...: Charged STYLUS TOUGH-3000/μ TOUGH-3000 Indicator lamp On: Charging Off: Charged USB cable (supplied) 1 AC outlet 3 When connecting the camera to the camera. Before use, be broken. However, when charging with the system other than Windows XP (SP2 or later)/Windows Vista/ Windows 7, charging takes much... time. Make sure that shooting is not connected to the camera correctly, or the battery, camera, or AC adapter may be sure to charge the battery until the indicator lamp turns off (STYLUS TOUGH-8010/μ TOUGH-...

STYLUS TOUGH-3000 Instruction Manual (English)
Page 14
... time setting, press the A button as the time signal strikes 00 seconds. X Y M D TIME 2010. 00 Y/M/D CANCEL MENU 4 As in the internal memory of the camera. X Y M D TIME Y/M/D 3 Press I to set . When not using a computer with system other data. 1 Press the n button to change the date and time...10.02.26 12:30 Seoul Tokyo X Y M D TIME 2010 Y/M/D SUMMER SET OK The menus can be used to turn daylight saving time ([SUMMER]) on the camera. ● The date and time setting screen is displayed when the date and time are not set [M] (month), [D] (day), [TIME] (hours and minutes),...
... time setting, press the A button as the time signal strikes 00 seconds. X Y M D TIME 2010. 00 Y/M/D CANCEL MENU 4 As in the internal memory of the camera. X Y M D TIME Y/M/D 3 Press I to set . When not using a computer with system other data. 1 Press the n button to change the date and time...10.02.26 12:30 Seoul Tokyo X Y M D TIME 2010 Y/M/D SUMMER SET OK The menus can be used to turn daylight saving time ([SUMMER]) on the camera. ● The date and time setting screen is displayed when the date and time are not set [M] (month), [D] (day), [TIME] (hours and minutes),...

STYLUS TOUGH-3000 Instruction Manual (English)
Page 15
... the SD/SDHC memory card 1 2 Press the card in internal memory, SD/SDHC memory cards (sold separately) Always use SD/SDHC memory cards with this camera. EN 15 Insert the card straight until it clicks into place. "Using a SD/SDHC memory card" (p. 64) Although the... camera can be also used to store pictures. "Using the Menu" (p. 4) 2 Use FG to select your language and press the A button. 5 Press the m button. Write-protect ...
... the SD/SDHC memory card 1 2 Press the card in internal memory, SD/SDHC memory cards (sold separately) Always use SD/SDHC memory cards with this camera. EN 15 Insert the card straight until it clicks into place. "Using a SD/SDHC memory card" (p. 64) Although the... camera can be also used to store pictures. "Using the Menu" (p. 4) 2 Use FG to select your language and press the A button. 5 Press the m button. Write-protect ...

STYLUS TOUGH-3000 Instruction Manual (English)
Page 16
...menu screen and then set the shooting mode to P. "Using the Menu" (p. 4) Current shooting mode display PROGRAM AUTO P Vertical grip When holding the camera, take care not to cover the flash with the optimum aperture value and shutter speed (P mode) In this mode, automatic shooting settings are ...shutter speed and aperture value are displayed), and the AF target mark changes to green. ● The camera was unable to focus if the AF target mark flashes red. P mode indicator 2 Hold the camera and compose the shot. AF target mark P 0.0 WB AUTO ISO AUTO 4 14M Press the n ...
...menu screen and then set the shooting mode to P. "Using the Menu" (p. 4) Current shooting mode display PROGRAM AUTO P Vertical grip When holding the camera, take care not to cover the flash with the optimum aperture value and shutter speed (P mode) In this mode, automatic shooting settings are ...shutter speed and aperture value are displayed), and the AF target mark changes to green. ● The camera was unable to focus if the AF target mark flashes red. P mode indicator 2 Hold the camera and compose the shot. AF target mark P 0.0 WB AUTO ISO AUTO 4 14M Press the n ...

STYLUS TOUGH-3000 Instruction Manual (English)
Page 17
P Press fully 1/400 F3.9 Image review screen To view images during shooting Pressing the q button enables playback of the lens triggering and camera operating may be recorded. Sound will also be used when shooting movies (when P mode, p mode or Q mode is set, shooting is performed..., only the digital zoom can be used . Pressing the wide (W) button Pressing the telephoto (T) button Shooting movies 1 Press the movie record button to shake the camera. Zoom bar P P 0.0 0.0 WB WB AUTO AUTO ISO ISO AUTO AUTO 00:34 00:34 4 14M 4 14M Model No. Continuous recording length (p. 66, ...
P Press fully 1/400 F3.9 Image review screen To view images during shooting Pressing the q button enables playback of the lens triggering and camera operating may be recorded. Sound will also be used when shooting movies (when P mode, p mode or Q mode is set, shooting is performed..., only the digital zoom can be used . Pressing the wide (W) button Pressing the telephoto (T) button Shooting movies 1 Press the movie record button to shake the camera. Zoom bar P P 0.0 0.0 WB WB AUTO AUTO ISO ISO AUTO AUTO 00:34 00:34 4 14M 4 14M Model No. Continuous recording length (p. 66, ...

STYLUS TOUGH-3000 Instruction Manual (English)
Page 22
...the desired item. Information is displayed. Messages from the camera can be searched from the search history. IN-CAMERA MANUAL Search Learn about the camera History Message EXIT SET OK Submenu 2 Search Learn about the camera History Message EXIT SET OK ● Follow the on-...shown about recommended functions and basic operating methods for the camera. "Using the Menu" (p. 4) Using the camera guide Use the camera guide to search the desired contents. 22 EN IN-CAMERA MANUAL Search Learn about the camera History Message Application Functions or operating methods can be ...
...the desired item. Information is displayed. Messages from the camera can be searched from the search history. IN-CAMERA MANUAL Search Learn about the camera History Message EXIT SET OK Submenu 2 Search Learn about the camera History Message EXIT SET OK ● Follow the on-...shown about recommended functions and basic operating methods for the camera. "Using the Menu" (p. 4) Using the camera guide Use the camera guide to search the desired contents. 22 EN IN-CAMERA MANUAL Search Learn about the camera History Message Application Functions or operating methods can be ...

STYLUS TOUGH-3000 Instruction Manual (English)
Page 23
... icon changes depending on the scene that is set . 0.0 WB AUTO 00:34 4 14M Icon indicating the scene mode that the camera automatically selects. When the camera cannot identify the optimal mode, P mode will automatically select the optimal shooting mode for the shooting scene (s mode) 1 Set the ...Shooting Modes To change the shooting mode The shooting mode (P, M, s, P, p, Q) can be selected, but the changed with automatic settings (M mode) The camera will be changed setting is not reflected in the shooting menu can be selected. 3 Use HI to select the mode and then press...
... icon changes depending on the scene that is set . 0.0 WB AUTO 00:34 4 14M Icon indicating the scene mode that the camera automatically selects. When the camera cannot identify the optimal mode, P mode will automatically select the optimal shooting mode for the shooting scene (s mode) 1 Set the ...Shooting Modes To change the shooting mode The shooting mode (P, M, s, P, p, Q) can be selected, but the changed with automatic settings (M mode) The camera will be changed setting is not reflected in the shooting menu can be selected. 3 Use HI to select the mode and then press...

STYLUS TOUGH-3000 Instruction Manual (English)
Page 24
...TOUGH-6020/μ TOUGH-6020 only *2 When set . 2 Hold the camera to align the AF target mark on the subject and press the A button. ● When the camera recognizes the subject, the AF target mark automatically tracks the subject movement to .../ W CANDLE*1/ R SELF PORTRAIT/ S SUNSET*1/X FIREWORKS*1/ V CUISINE/d DOCUMENTS/ q BEACH & SNOW/ T SNAPSHOT/k WIDE1*2/ l WIDE2*2/H MACRO*2/ PET/a SNOW*2 Application The camera takes a picture using the optimum settings for specific shooting scenes. For this reason, settings may not be taken. *2 STYLUS TOUGH-8010/μ TOUGH-8010...
...TOUGH-6020/μ TOUGH-6020 only *2 When set . 2 Hold the camera to align the AF target mark on the subject and press the A button. ● When the camera recognizes the subject, the AF target mark automatically tracks the subject movement to .../ W CANDLE*1/ R SELF PORTRAIT/ S SUNSET*1/X FIREWORKS*1/ V CUISINE/d DOCUMENTS/ q BEACH & SNOW/ T SNAPSHOT/k WIDE1*2/ l WIDE2*2/H MACRO*2/ PET/a SNOW*2 Application The camera takes a picture using the optimum settings for specific shooting scenes. For this reason, settings may not be taken. *2 STYLUS TOUGH-8010/μ TOUGH-8010...

STYLUS TOUGH-3000 Instruction Manual (English)
Page 25
... 3 Use HI to select the desired effect and then press the A button to p. For details on installing the PC software (ib), see "Battery charge and camera setup" (p. 11). The flash (p. 28) is set Shooting mode MAGIC FILTER Option [ POP ART \ PIN HOLE ] FISH EYE @ DRAWING In P ...mode, the optimum shooting settings are taken and combined by the camera. The focus, exposure (p. 30), zoom position (p. 17), and white balance (p. 30) are combined into a panorama image using the guide frame and manually ...
... 3 Use HI to select the desired effect and then press the A button to p. For details on installing the PC software (ib), see "Battery charge and camera setup" (p. 11). The flash (p. 28) is set Shooting mode MAGIC FILTER Option [ POP ART \ PIN HOLE ] FISH EYE @ DRAWING In P ...mode, the optimum shooting settings are taken and combined by the camera. The focus, exposure (p. 30), zoom position (p. 17), and white balance (p. 30) are combined into a panorama image using the guide frame and manually ...

STYLUS TOUGH-3000 Instruction Manual (English)
Page 26
... A button before taking a third frame. 4 Repeat Step 3 to take a third frame. ● After the third frame is taken, the camera automatically processes the frames and the combined panorama image is to take the first frame. Direction for MANUAL combining the next frame 1 2 BACK...before taking the third frame. 5 Repeat steps 3 and 4 to take a third frame. ● After the third frame is taken, the camera automatically processes the frames and the combined panorama image is displayed. To exit the panorama function without saving an image, press the m button. 26 ...
... A button before taking a third frame. 4 Repeat Step 3 to take a third frame. ● After the third frame is taken, the camera automatically processes the frames and the combined panorama image is to take the first frame. Direction for MANUAL combining the next frame 1 2 BACK...before taking the third frame. 5 Repeat steps 3 and 4 to take a third frame. ● After the third frame is taken, the camera automatically processes the frames and the combined panorama image is displayed. To exit the panorama function without saving an image, press the m button. 26 ...


