
Instruction Manual
Page 3
... 42 Display Combinations 43 To Delete All Values Stored in the Memory 44 Downloading Instructions Installing the Software 45 Downloading and Installing Microsoft® HealthVaultTM 45 Downloading and Installing Omron Health Management Software 47 Using the Software 49 Care and Maintenance Care and Maintenance 53 Error Indicators and Troubleshooting Tips 55 FCC Statement 57...
... 42 Display Combinations 43 To Delete All Values Stored in the Memory 44 Downloading Instructions Installing the Software 45 Downloading and Installing Microsoft® HealthVaultTM 45 Downloading and Installing Omron Health Management Software 47 Using the Software 49 Care and Maintenance Care and Maintenance 53 Error Indicators and Troubleshooting Tips 55 FCC Statement 57...
Instruction Manual
Page 45
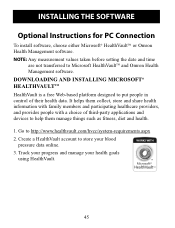
...store your health goals using HealthVault. 45 Track your progress and manage your blood pressure data online. 3. Go to Microsoft HealthVaultTM and Omron Health Management software. It helps them manage things such as fitness, diet and health. 1. Create a HealthVault account to help them collect, store and... and time are not transferred to http://www.healthvault.com/hvcc/system-requirements.aspx 2. Downloading Instructions INSTALLING THE SOFTWARE Optional Instructions for PC Connection To install software, choose either Microsoft® HealthVaultTM or Omron Health Management...
...store your health goals using HealthVault. 45 Track your progress and manage your blood pressure data online. 3. Go to Microsoft HealthVaultTM and Omron Health Management software. It helps them manage things such as fitness, diet and health. 1. Create a HealthVault account to help them collect, store and... and time are not transferred to http://www.healthvault.com/hvcc/system-requirements.aspx 2. Downloading Instructions INSTALLING THE SOFTWARE Optional Instructions for PC Connection To install software, choose either Microsoft® HealthVaultTM or Omron Health Management...

Instruction Manual
Page 46
..., any 64-bit version of Windows® XP, Windows® Vista® Starter edition, or any version of Windows® Server. Select System. 5. INSTALLING THE SOFTWARE OPERATING ENVIRONMENT REQUIREMENTS The following operating systems: Either 32-bit or 64-bit versions of: Microsoft® Windows® 7® Home Premium Windows® 7®...
..., any 64-bit version of Windows® XP, Windows® Vista® Starter edition, or any version of Windows® Server. Select System. 5. INSTALLING THE SOFTWARE OPERATING ENVIRONMENT REQUIREMENTS The following operating systems: Either 32-bit or 64-bit versions of: Microsoft® Windows® 7® Home Premium Windows® 7®...
Instruction Manual
Page 47
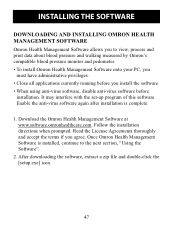
... you install the software. • When using anti-virus software, disable anti-virus software before you agree. It may interfere with the set-up program of this software. After downloading the software, extract a zip file and double-click the [setup.exe] icon. 47 INSTALLING THE SOFTWARE DOWNLOADING AND INSTALLING OMRON HEALTH MANAGEMENT SOFTWARE Omron Health Management Software allows you to...
... you install the software. • When using anti-virus software, disable anti-virus software before you agree. It may interfere with the set-up program of this software. After downloading the software, extract a zip file and double-click the [setup.exe] icon. 47 INSTALLING THE SOFTWARE DOWNLOADING AND INSTALLING OMRON HEALTH MANAGEMENT SOFTWARE Omron Health Management Software allows you to...

Instruction Manual
Page 48
... and monitor USB connector (USB Revision 1.1 compliant) Adobe Acrobat Reader 5.0 or higher NOTE: If the OS environmental requirements are required to run the Omron Health Management software. INSTALLING THE SOFTWARE OPERATING ENVIRONMENT REQUIREMENTS The following operating environments are above those listed, then additional resources may be required. *Additional 200 MB is not installed.
... and monitor USB connector (USB Revision 1.1 compliant) Adobe Acrobat Reader 5.0 or higher NOTE: If the OS environmental requirements are required to run the Omron Health Management software. INSTALLING THE SOFTWARE OPERATING ENVIRONMENT REQUIREMENTS The following operating environments are above those listed, then additional resources may be required. *Additional 200 MB is not installed.
Instruction Manual
Page 49
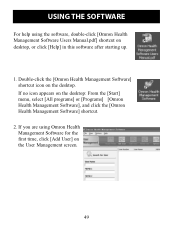
If no icon appears on the User Management screen. 49 If you are using the software, double-click [Omron Health Management Software Users Manual.pdf] shortcut on the desktop. Double-click the [Omron Health Management Software] shortcut icon on desktop, or click [Help] in this software after starting up. 1. USING THE SOFTWARE For help using Omron Health Management Software for the first time, click [Add User] on the desktop: From the [Start] menu, select [All programs] or [Programs] [Omron Health Management Software], and click the [Omron Health Management Software] shortcut. 2.
If no icon appears on the User Management screen. 49 If you are using the software, double-click [Omron Health Management Software Users Manual.pdf] shortcut on the desktop. Double-click the [Omron Health Management Software] shortcut icon on desktop, or click [Help] in this software after starting up. 1. USING THE SOFTWARE For help using Omron Health Management Software for the first time, click [Add User] on the desktop: From the [Start] menu, select [All programs] or [Programs] [Omron Health Management Software], and click the [Omron Health Management Software] shortcut. 2.
Instruction Manual
Page 50
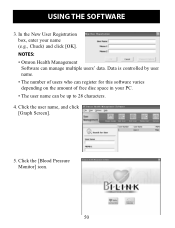
NOTES: • Omron Health Management Software can be up to 28 characters. 4. Click the [Blood Pressure Monitor] icon. 50 Click the user name, and click [Graph Screen]. 5. USING THE SOFTWARE 3. Data is controlled by user name. • The number of users who can register for this software varies depending on the amount of free disc space in your name (e.g., Chuck) and click [OK]. In the New User Registration box, enter your PC. • The user name can manage multiple users' data.
NOTES: • Omron Health Management Software can be up to 28 characters. 4. Click the [Blood Pressure Monitor] icon. 50 Click the user name, and click [Graph Screen]. 5. USING THE SOFTWARE 3. Data is controlled by user name. • The number of users who can register for this software varies depending on the amount of free disc space in your name (e.g., Chuck) and click [OK]. In the New User Registration box, enter your PC. • The user name can manage multiple users' data.

Instruction Manual
Page 51
Normal USB Connector 3. Mini USB Connector 51 Open the USB Port cover. 2. Parts and accessories not approved for use with this unit. Plug the mini USB connector (Small Connector) into the personal computer. NOTE: You cannot take a measurement while connecting the USB cable. Plug the normal USB Connector (Large Connector) into the USB Port. USING THE SOFTWARE Use only the authorized Omron USB cable, Model HHX-CABLEUSB2, included with the device may damage the unit. 1. CAUTION Use only Omron authorized parts and accessories.
Normal USB Connector 3. Mini USB Connector 51 Open the USB Port cover. 2. Parts and accessories not approved for use with this unit. Plug the mini USB connector (Small Connector) into the personal computer. NOTE: You cannot take a measurement while connecting the USB cable. Plug the normal USB Connector (Large Connector) into the USB Port. USING THE SOFTWARE Use only the authorized Omron USB cable, Model HHX-CABLEUSB2, included with the device may damage the unit. 1. CAUTION Use only Omron authorized parts and accessories.
Instruction Manual
Page 52
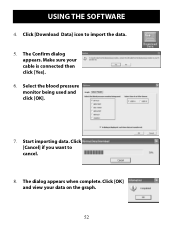
The Confirm dialog appears. Select the blood pressure monitor being used and click [OK]. 7. Click [Cancel] if you want to import the data. 5. Click [OK] and view your cable is connected then click [Yes]. 6. Click [Download Data] icon to cancel. 8. Make sure your data on the graph. 52 Start importing data. The dialog appears when complete. USING THE SOFTWARE 4.
The Confirm dialog appears. Select the blood pressure monitor being used and click [OK]. 7. Click [Cancel] if you want to import the data. 5. Click [OK] and view your cable is connected then click [Yes]. 6. Click [Download Data] icon to cancel. 8. Make sure your data on the graph. 52 Start importing data. The dialog appears when complete. USING THE SOFTWARE 4.