Optoma EP749 Support and Manuals
Get Help and Manuals for this Optoma item

View All Support Options Below
Free Optoma EP749 manuals!
Problems with Optoma EP749?
Ask a Question
Free Optoma EP749 manuals!
Problems with Optoma EP749?
Ask a Question
Optoma EP749 Videos

Optoma EP749 XGA DLP projector - $6191825
Duration: 1:13
Total Views: 1
Duration: 1:13
Total Views: 1
Popular Optoma EP749 Manual Pages
User Manual - Page 3
... Projected Image Size 15
User Controls 16 Control Panel & Remote Control 16 On-Screen Display Menus 18
How to Operate ...18 Menu Tree...19 Image-I ...20 Image-II ...22 Colour Setting ...24 Language ...26 Management ...27 Lamp Setting...30
Appendices 32 Troubleshooting 32 Replacing the Lamp 36 Compatibility Modes 37 RS232 Commands 38 Ceiling Mount Installation 39 Optoma...
User Manual - Page 4

... power.
Do not use lens cap when projector is on the projector first and then the signal sources. Do not look into the projector's lens when the lamp is in this user's guide to maximize the life of the lamp itself. Warning- Warning- Reset the "Reset Lamp Hours" function from the On Screen Display "Lamp Setting" menu after replacing...
User Manual - Page 6
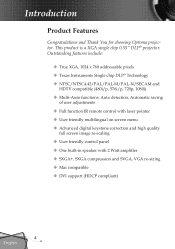
...DLP® projector. Introduction
Product Features
Congratulations and Thank You for choosing Optoma projector. Outstanding features include:
True XGA, 1024 x 768 addressable pixels Texas Instruments Single chip DLP® Technology NTSC/NTSC4.43/PAL/PAL-M/PAL-N/SECAM and
HDTV...SVGA, VGA re-sizing Mac compatible DVI support (HDCP compliant)
4 English
User Manual - Page 7
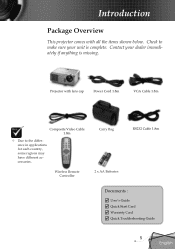
... with lens cap
Power Cord 1.8m
VGA Cable 1.8m
Composite Video Cable 1.8m
Due to make sure your dealer immediately if anything is complete. Projector with all the items shown below. Wireless Remote Controller
Carry Bag 2 x AA Batteries
RS232 Cable 1.8m
Documents :
User's Guide Quick Start Card Warranty Card Quick Troubleshooting Guide...
User Manual - Page 14

... the screen displays "No Signal", please make sure the signal cables are securely
connected. Remove the lens cap. 2. Turn on the projector first and then the signal sources.
Ensure that "Source Lock" has been set to switch.
Turn on your source automatically within "Management" menu; Installation
Text Pattern
Powering On/Off the Projector
Powering On...
User Manual - Page 15
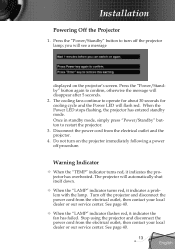
... a problem with the lamp. See page 40.
13 English Press the "Power/Standby" button to confirm, otherwise the message will flash red. The projector will see a message
displayed on the projector immediately following a power off procedure. Stop using the projector and disconnect the power cord from the electrical outlet, then contact your local dealer or our service...
User Manual - Page 22
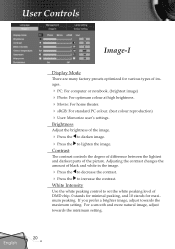
...Display Mode
There are many factory presets optimized for maximum peaking. Adjusting the contrast changes the amount of the picture. If you prefer a brighter image, adjust towards the minimum setting....
20 English For a smooth and more natural image, adjust towards the maximum setting. Contrast
The contrast controls the degree of difference between the lightest and darkest parts of...
User Manual - Page 23

...
Movie
sRGB
User
Colour Temp.
Each display mode has its own colour temperature and can memorize user's selection. at lower temperature, the screen looks warmer. User Controls
"Saturation" and "De-interlace" functions are only supported under Video mode. Colour Temperature
Adjusts the colour temperature. And this set as "User" automatically. Saturation
Adjusts...
User Manual - Page 24

... source will be scaled to fit the projection screen. 16:9 : The input source will be scaled to fit the width of the display with the graphic card. Phase
"Phase" synchronizes...are only supported under Computer mode. If you experience a vertical flickering bar, use this function to bring out the best image quality for users
who use external 16x9 lens to display 2.35:1...
User Manual - Page 26

....
- Low Mid User sRGB High
PC
Photo Movie sRGB User
LMU S H LMU S H LMU S H LMU S H LMU S H
from the same colour setting
24 English And this set as "User" automatically. User Controls
Colour Setting
Colour Setting Full Range: Adjust the Red, Green and Blue color for all screen. Enhance Individual: Adjust the Red, Green...
User Manual - Page 34
...; Check if the projection lamp has been securely installed. For Windows 95, 98, 2000, XP: 1. Verify the resolution setting is less than or equal to the "Replacing the lamp" section.
Make sure you have removed the lens cap and the projector is
switched on screen Ensure all the cables and power connections are correctly and...
User Manual - Page 35

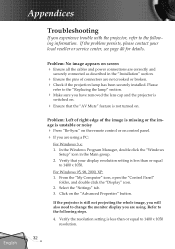
...Problem: Image is unstable or flickering Use "Phase" to correct it compatible with the product.
Press the toggle output settings.
choose the resolution mode you need under the "Models"... Adjusts the Focus Ring on the projector lens.
33 English Problem: The screen of the Notebook or PowerBook computer is not displaying a presentation
If you are using ...
User Manual - Page 36
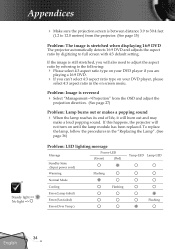
... ratio in the "Replacing the Lamp". (See page 36)
Problem: LED lighting message
Message
Standby State (Input power cord)
Power-LED
(Green)
(Red)
Warming
Flashing
Normal Mode
Cooling
Flashing
Error (Lamp failed)
Error (Fan failed)
Error (Over Temp.)
Temp-LED Lamp-LED Flashing
34 English Appendices
Steady light => No light =>
Make sure the projection screen is between...
User Manual - Page 38
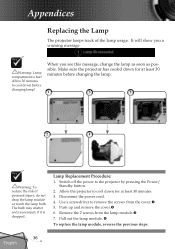
... the projector to cool down for at least 30 minutes. 3. Disconnect the power cord. 4. Allow 30 minutes to cool down before changing the lamp.
1
3
5
2
4
Warning: To reduce the risk of the lamp usage. Switch off the power to remove the screws from the lamp module. 7. Push up and remove the cover. 6. The bulb...
User Manual - Page 42

....cn
Latin America
715 Sycamore Drive
Milpitas, CA 95035, USA
www.optoma.com.br
Tel : 408-383-3700 Fax: 408-383-3702 www.optoma.com.mx
40 English Appendices
Optoma Global Offices
For service or support please contact your local office.
Tel : +886-2-2218-2360
Shindian City, Taipei Taiwan 231, Fax...
Optoma EP749 Reviews
We have not received any reviews for Optoma yet.