
PTD7500U User Guide
Page 1
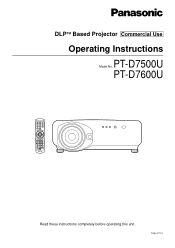
TQBJ 0113-1 PT-D7600U ON POWER OFF AUTO SETUP RGB 1 VIDEO RGB 2 S-VIDEO AUX SHUTTER SHUT MENU FREEZE PAGE UP ENTER PAGE DOWN ON SCREEN 1 2 3 STD OSD SYSTEM SEL D.ZOOM 4 FUNC 1 5 6 BRIGHT CONTRAST 7 LENS 8 9 NEXT ASPECT 0 USER LIGHT ID ALL ID SET Computer Numetric LASER ON/OFF Projector Read these instructions completely before operating this unit. DLPTM Based Projector Commercial Use Operating Instructions PT-D7500U Model No.
TQBJ 0113-1 PT-D7600U ON POWER OFF AUTO SETUP RGB 1 VIDEO RGB 2 S-VIDEO AUX SHUTTER SHUT MENU FREEZE PAGE UP ENTER PAGE DOWN ON SCREEN 1 2 3 STD OSD SYSTEM SEL D.ZOOM 4 FUNC 1 5 6 BRIGHT CONTRAST 7 LENS 8 9 NEXT ASPECT 0 USER LIGHT ID ALL ID SET Computer Numetric LASER ON/OFF Projector Read these instructions completely before operating this unit. DLPTM Based Projector Commercial Use Operating Instructions PT-D7500U Model No.

PTD7500U User Guide
Page 4
... previous screen 49 Menu items shown in gray characters 49 Menu items setting 49 Resetting to the factory default 49 Adjusting the picture 50 Switching the picture mode 50 Switching the AI control 50 Adjusting Contrast / Bright / Color / Tint 51 Adjusting the color temperature 52 Adjusting color matching 53 4 Sharpness / Gamma / Noise reduction / Pulldown mode 54 To set the sRGB compliant picture 55 To input BETACAM with the signal selector 27 Installation of input module (optional) ..........28 Installing the input...
... previous screen 49 Menu items shown in gray characters 49 Menu items setting 49 Resetting to the factory default 49 Adjusting the picture 50 Switching the picture mode 50 Switching the AI control 50 Adjusting Contrast / Bright / Color / Tint 51 Adjusting the color temperature 52 Adjusting color matching 53 4 Sharpness / Gamma / Noise reduction / Pulldown mode 54 To set the sRGB compliant picture 55 To input BETACAM with the signal selector 27 Installation of input module (optional) ..........28 Installing the input...

PTD7500U User Guide
Page 7
.... Do not reach for remote control unit [15m (49'3"), [R03NPA/2ST x 1] K1EA03NA0001 x 1] ON POWER OFF AUTO SETUP RGB 1 VIDEO RGB 2 S-VIDEO AUX SHUTTER SHUT MENU FREEZE PAGE UP ENTER PAGE DOWN ON SCREEN 1 2 3 STD OSD SYSTEM SEL D.ZOOM 4 FUNC 1 5 6 BRIGHT CONTRAST 7 LENS 8 9 NEXT ASPECT 0 USER LIGHT ID ALL ID SET Computer Numetric LASER ON/OFF Projector 7 Please discuss with the Authorized Service Center regarding cleaning costs. Do not...
.... Do not reach for remote control unit [15m (49'3"), [R03NPA/2ST x 1] K1EA03NA0001 x 1] ON POWER OFF AUTO SETUP RGB 1 VIDEO RGB 2 S-VIDEO AUX SHUTTER SHUT MENU FREEZE PAGE UP ENTER PAGE DOWN ON SCREEN 1 2 3 STD OSD SYSTEM SEL D.ZOOM 4 FUNC 1 5 6 BRIGHT CONTRAST 7 LENS 8 9 NEXT ASPECT 0 USER LIGHT ID ALL ID SET Computer Numetric LASER ON/OFF Projector 7 Please discuss with the Authorized Service Center regarding cleaning costs. Do not...

PTD7500U User Guide
Page 8
... clear images if outside light or the illumination interferes the screen surface.Draw window curtains or blinds, turn off the power. Lamp A mercury lamp with a dry cloth. Precautions on use . • In rare cases, it will be taken to "HIGH". Do not clean the lens surface with bare hand. Cover the lens with a loud sound or end its instructions. Do not place the projector on the screen affected...
... clear images if outside light or the illumination interferes the screen surface.Draw window curtains or blinds, turn off the power. Lamp A mercury lamp with a dry cloth. Precautions on use . • In rare cases, it will be taken to "HIGH". Do not clean the lens surface with bare hand. Cover the lens with a loud sound or end its instructions. Do not place the projector on the screen affected...

PTD7500U User Guide
Page 10
... Main Menu. FREEZE button (page 47) Press this button while projecting an image automatically corrects the picture positioning on the menu screen, change the value in the system, this button to the main unit in the ten's place. Arrow buttons (page 49) Use these buttons to Projector > Remote control operation indicator lamp The lamp flashes when any remote control button is set in . CONTRAST button (page 51) Switches to the mode of parts Remote control ON POWER OFF AUTO SETUP RGB 1 VIDEO RGB 2 S-VIDEO AUX SHUTTER SHUT MENU...
... Main Menu. FREEZE button (page 47) Press this button while projecting an image automatically corrects the picture positioning on the menu screen, change the value in the system, this button to the main unit in the ten's place. Arrow buttons (page 49) Use these buttons to Projector > Remote control operation indicator lamp The lamp flashes when any remote control button is set in . CONTRAST button (page 51) Switches to the mode of parts Remote control ON POWER OFF AUTO SETUP RGB 1 VIDEO RGB 2 S-VIDEO AUX SHUTTER SHUT MENU...

PTD7500U User Guide
Page 11
... SHSUHTUTTERAUX SETAUUTPO ON POWER OFF AUTO SETUP RGB 1 VIDEO RGB 2 S-VIDEO AUX SHUTTER SHUT MENU FREEZE PAGE UP ENTER PAGE DOWN ON SCREEN 1 STD 2 OSD 3 SYSTEM SEL D.ZOOM 4 FUNC 1 5 6 BRIGHT CONTRAST 7 LENS 8 9 NEXT ASPECT 0 USER LIGHT ID ALL ID SET Computer Numetric LASER ON/OFF Projector 1RGB POWEROFF ON USER button Displays the sub-memory screen of this selector to the right position to control the projector and to the...
... SHSUHTUTTERAUX SETAUUTPO ON POWER OFF AUTO SETUP RGB 1 VIDEO RGB 2 S-VIDEO AUX SHUTTER SHUT MENU FREEZE PAGE UP ENTER PAGE DOWN ON SCREEN 1 STD 2 OSD 3 SYSTEM SEL D.ZOOM 4 FUNC 1 5 6 BRIGHT CONTRAST 7 LENS 8 9 NEXT ASPECT 0 USER LIGHT ID ALL ID SET Computer Numetric LASER ON/OFF Projector 1RGB POWEROFF ON USER button Displays the sub-memory screen of this selector to the right position to control the projector and to the...

PTD7500U User Guide
Page 12
... detachable cover for this lock port. Do not connect any other cable to this switch to turn on "I" and off "o" the commercial line power applied to "I" (on the screen. Power indicator lamp (page 39) The lamp lights in red when the MAIN POWER switch is pressed. Temperature monitor (TEMP) (page 93) Lighting or blinking of this lamp indicates an abnormal condition of the remote control or the main unit is turned to the projector. Projection lens cover lock button This button toggles between lock...
... detachable cover for this lock port. Do not connect any other cable to this switch to turn on "I" and off "o" the commercial line power applied to "I" (on the screen. Power indicator lamp (page 39) The lamp lights in red when the MAIN POWER switch is pressed. Temperature monitor (TEMP) (page 93) Lighting or blinking of this lamp indicates an abnormal condition of the remote control or the main unit is turned to the projector. Projection lens cover lock button This button toggles between lock...

PTD7500U User Guide
Page 13
... picture positioning on the screen. S-VIDEO button (page 39) Switches to the adjustment mode for lens focus, zoom and shift (position). 13 MENU button (pages 48 and 49) Displays and clears the Main Menu. It can also return to black out the image temporarily. Rear view of the main unit Controls on rear panel RGB 1 RGB 2 VIDEO S-VIDEO AUTO SETUP AUX SHUTTER LENS MENU ENTER Lamp unit housing door The lamp unit is displayed. LENS button (page 41) Switches to S-VIDEO input. AUTO SETUP button...
... picture positioning on the screen. S-VIDEO button (page 39) Switches to the adjustment mode for lens focus, zoom and shift (position). 13 MENU button (pages 48 and 49) Displays and clears the Main Menu. It can also return to black out the image temporarily. Rear view of the main unit Controls on rear panel RGB 1 RGB 2 VIDEO S-VIDEO AUTO SETUP AUX SHUTTER LENS MENU ENTER Lamp unit housing door The lamp unit is displayed. LENS button (page 41) Switches to S-VIDEO input. AUTO SETUP button...

PTD7500U User Guide
Page 17
... Click button Note • To use the wired remote control in the environment in which an obstacle stands in the system, connect the units with the supplied remote control cable to the secondary projector ON POWER OFF AUTO SETUP RGB 1 VIDEO RGB 2 S-VIDEO AUX SHUTTER SHUT MENU FREEZE PAGE UP ENTER PAGE DOWN ON SCREEN 1 STD 2 OSD 3 SYSTEM SEL D.ZOOM 4 FUNC 1 5 6 BRIGHT CONTRAST 7 LENS 8 9 NEXT ASPECT 0 USER LIGHT ID ALL ID SET Computer...
... Click button Note • To use the wired remote control in the environment in which an obstacle stands in the system, connect the units with the supplied remote control cable to the secondary projector ON POWER OFF AUTO SETUP RGB 1 VIDEO RGB 2 S-VIDEO AUX SHUTTER SHUT MENU FREEZE PAGE UP ENTER PAGE DOWN ON SCREEN 1 STD 2 OSD 3 SYSTEM SEL D.ZOOM 4 FUNC 1 5 6 BRIGHT CONTRAST 7 LENS 8 9 NEXT ASPECT 0 USER LIGHT ID ALL ID SET Computer...

PTD7500U User Guide
Page 39
... AUX button is disabled when an optional input module is powered up period. Projection RGB 1 RGB 2 VIDEO S-VIDEO AUTO SETUP AUX SHUTTER ʙ LENS MENU ENTER ON POWER OFF AUTO SETUP RGB 1 VIDEO RGB 2 S-VIDEO AUX SHUTTER SHUT MENU FREEZE ʙ PAGE UP ENTER PAGE DOWN ON SCREEN 1 2 3 STD OSD SYSTEM SEL D.ZOOM 4 FUNC 1 5 6 BRIGHT CONTRAST 7 LENS 8 9 NEXT ASPECT 0 USER LIGHT ID ALL ID SET Computer Numetric LASER ON/OFF Projector Powering up the projector Connect the supplied power cable...
... AUX button is disabled when an optional input module is powered up period. Projection RGB 1 RGB 2 VIDEO S-VIDEO AUTO SETUP AUX SHUTTER ʙ LENS MENU ENTER ON POWER OFF AUTO SETUP RGB 1 VIDEO RGB 2 S-VIDEO AUX SHUTTER SHUT MENU FREEZE ʙ PAGE UP ENTER PAGE DOWN ON SCREEN 1 2 3 STD OSD SYSTEM SEL D.ZOOM 4 FUNC 1 5 6 BRIGHT CONTRAST 7 LENS 8 9 NEXT ASPECT 0 USER LIGHT ID ALL ID SET Computer Numetric LASER ON/OFF Projector Powering up the projector Connect the supplied power cable...

PTD7500U User Guide
Page 40
... turns to orange. Projection RGB 1 RGB 2 VIDEO S-VIDEO AUTO SETUP AUX SHUTTER LENS MENU ENTER ON POWER OFF AUTO SETUP RGB 1 VIDEO RGB 2 S-VIDEO AUX SHUTTER SHUT MENU FREEZE PAGE UP ENTER PAGE DOWN ON SCREEN 1 2 3 STD OSD SYSTEM SEL D.ZOOM 4 FUNC 1 5 6 BRIGHT CONTRAST 7 LENS 8 9 NEXT ASPECT 0 USER LIGHT ID ALL ID SET Computer Numetric LASER ON/OFF Projector Powering off the power supply. Please turn on again after shutting off the MAIN POWER switch, nor unplug the projector from the projector...
... turns to orange. Projection RGB 1 RGB 2 VIDEO S-VIDEO AUTO SETUP AUX SHUTTER LENS MENU ENTER ON POWER OFF AUTO SETUP RGB 1 VIDEO RGB 2 S-VIDEO AUX SHUTTER SHUT MENU FREEZE PAGE UP ENTER PAGE DOWN ON SCREEN 1 2 3 STD OSD SYSTEM SEL D.ZOOM 4 FUNC 1 5 6 BRIGHT CONTRAST 7 LENS 8 9 NEXT ASPECT 0 USER LIGHT ID ALL ID SET Computer Numetric LASER ON/OFF Projector Powering off the power supply. Please turn on again after shutting off the MAIN POWER switch, nor unplug the projector from the projector...

PTD7500U User Guide
Page 42
... "INPUT RESOLUTION", "CLOCK PHASE" and "SHIFT". • For specific signals and long-sideways (or landscape) signals such as 16:9, adjustment should be made according to supply images with blurred edges or a dark image is in automatic adjustment mode. In this case, manually adjust the "CLOCK PHASE". • If an image with a bright white frame at the outermost periphery containing characters etc. Automatic adjustment (AUTO SETUP) Automatic adjustment function adjust the resolution...
... "INPUT RESOLUTION", "CLOCK PHASE" and "SHIFT". • For specific signals and long-sideways (or landscape) signals such as 16:9, adjustment should be made according to supply images with blurred edges or a dark image is in automatic adjustment mode. In this case, manually adjust the "CLOCK PHASE". • If an image with a bright white frame at the outermost periphery containing characters etc. Automatic adjustment (AUTO SETUP) Automatic adjustment function adjust the resolution...

PTD7500U User Guide
Page 50
... for input from to the personal computer. Adjusting the picture Switching the picture mode The user can switch to the desired picture mode suitable for the image source and the environment in which this projector is automatically adjusted for the optimal contrast in response to the changes in general. The MAIN MENU screen will be displayed. Switch the AI control to "ON" with sRGB. Select "PICTURE" with the buttons. :MENU SELECT ENTER:SUB MENU PICTURE PICTURE MODE...
... for input from to the personal computer. Adjusting the picture Switching the picture mode The user can switch to the desired picture mode suitable for the image source and the environment in which this projector is automatically adjusted for the optimal contrast in response to the changes in general. The MAIN MENU screen will be displayed. Switch the AI control to "ON" with sRGB. Select "PICTURE" with the buttons. :MENU SELECT ENTER:SUB MENU PICTURE PICTURE MODE...

PTD7500U User Guide
Page 53
... is set to "USER", the color temperature will be displayed. The COLOR MATCHING screen will restore the factory defaults for adjustment with the buttons. Adjusting color matching When multiple sets are used simultaneously, this projector allows the user to or reduced from the adjustment color. PICTURE PULLDOWN MODE COLOR MATCHING AUTO USER :MENU SELECT ENTER:SUB MENU :CHANGE COLOR MATCHING:USER R G B Press "ENTER" button. Switch to be fixed to or reduced from the adjustment color. Select the color to "USER" with the buttons. :MENU SELECT ENTER:SUB MENU R R 2048...
... is set to "USER", the color temperature will be displayed. The COLOR MATCHING screen will restore the factory defaults for adjustment with the buttons. Adjusting color matching When multiple sets are used simultaneously, this projector allows the user to or reduced from the adjustment color. PICTURE PULLDOWN MODE COLOR MATCHING AUTO USER :MENU SELECT ENTER:SUB MENU :CHANGE COLOR MATCHING:USER R G B Press "ENTER" button. Switch to be fixed to or reduced from the adjustment color. Select the color to "USER" with the buttons. :MENU SELECT ENTER:SUB MENU R R 2048...

PTD7500U User Guide
Page 54
... buttons. :MENU SELECT ENTER:SUB MENU PICTURE PICTURE MODE COLOR TINT COLOR TEMP. The PICTURE screen will be displayed. Note • When and buttons are displayed above or under the items in the following table for the items and the details. Increase the vertical resolution when the PAL (or SECAM) 576i signal input or the NTSC 480i signal input is selected for setting of the image. Select "PICTURE" with the buttons. Switches the gamma modes Switches...
... buttons. :MENU SELECT ENTER:SUB MENU PICTURE PICTURE MODE COLOR TINT COLOR TEMP. The PICTURE screen will be displayed. Note • When and buttons are displayed above or under the items in the following table for the items and the details. Increase the vertical resolution when the PAL (or SECAM) 576i signal input or the NTSC 480i signal input is selected for setting of the image. Select "PICTURE" with the buttons. Switches the gamma modes Switches...

PTD7500U User Guide
Page 55
...". 2. The PICTURE screen will be switched only when receiving the picture of Cb and Cr can be displayed. RGB1, RGB2 inputs do not support BETACAM signals. • This function can be switched. Set color matching adjustment to restore the factory default for "TINT", "COLOR TEMP." Set to restore the factory default. Select "PICTURE" with the buttons. It cannot be displayed. Press the STD (standard) button on the "PICTURE" menu and select the "PICTURE MODE". To input BETACAM with...
...". 2. The PICTURE screen will be switched only when receiving the picture of Cb and Cr can be displayed. RGB1, RGB2 inputs do not support BETACAM signals. • This function can be switched. Set color matching adjustment to restore the factory default for "TINT", "COLOR TEMP." Set to restore the factory default. Select "PICTURE" with the buttons. It cannot be displayed. Press the STD (standard) button on the "PICTURE" menu and select the "PICTURE MODE". To input BETACAM with...

PTD7500U User Guide
Page 93
... to replace the lamp unit. • Some error has arisen in red (3 times) Cooling fan has been stopped. voltage. Lighting in red (2 times) High temperature inside (Standby condition) • Remove the object that is • Check if the ventilation port is ditected in the lamp circuit. • Turn off the MAIN POWER switch using the procedure on the projector power supply. • This lamp monitor lights up when the lamp unit used hours have reached 1 300 hours. Indication of monitor lamp...
... to replace the lamp unit. • Some error has arisen in red (3 times) Cooling fan has been stopped. voltage. Lighting in red (2 times) High temperature inside (Standby condition) • Remove the object that is • Check if the ventilation port is ditected in the lamp circuit. • Turn off the MAIN POWER switch using the procedure on the projector power supply. • This lamp monitor lights up when the lamp unit used hours have reached 1 300 hours. Indication of monitor lamp...

PTD7500U User Guide
Page 94
.... Using the projector without the air filter fitted inside the main unit will rise and the temperature monitor (TEMP) lamp blinks, eventually turning off deposited dust with a vacuum cleaner. Clean the air filter. In addition, when the lamp unit is a sign to replace the air filter. Cleaning and replacement of air filter If too much dust is deposited in the reverse order to step . Set the air filter and then mount the filter in the air filter, temperature...
.... Using the projector without the air filter fitted inside the main unit will rise and the temperature monitor (TEMP) lamp blinks, eventually turning off deposited dust with a vacuum cleaner. Clean the air filter. In addition, when the lamp unit is a sign to replace the air filter. Cleaning and replacement of air filter If too much dust is deposited in the reverse order to step . Set the air filter and then mount the filter in the air filter, temperature...

PTD7500U User Guide
Page 95
... reset the cumulative time, except when the lamp unit has been replaced with a new unit. If you continue to keep a spare bulb. The life of initial lighting, power supply is dropped because of lamp unit replacement The lamp used in the diagram on the right, recommending replacement of lamp unit. (The indication on again. Therefore, it is turned on the below diagram will be used. After 1 500 hours of light source lamp used for the user...
... reset the cumulative time, except when the lamp unit has been replaced with a new unit. If you continue to keep a spare bulb. The life of initial lighting, power supply is dropped because of lamp unit replacement The lamp used in the diagram on the right, recommending replacement of lamp unit. (The indication on again. Therefore, it is turned on the below diagram will be used. After 1 500 hours of light source lamp used for the user...

PTD7500U User Guide
Page 98
... between the remote control and the beam receiving window? (Refer to page 15.) • Are you supplying a signal that is blurred • Is the lens in a correct manner? • Is the device(s) connected to the projector working normally? • Is the shutter function used? (Refer to page 47.) Screen image is not compatible with the cap? • Is the screen image input connected in focus? (Refer to...
... between the remote control and the beam receiving window? (Refer to page 15.) • Are you supplying a signal that is blurred • Is the lens in a correct manner? • Is the device(s) connected to the projector working normally? • Is the shutter function used? (Refer to page 47.) Screen image is not compatible with the cap? • Is the screen image input connected in focus? (Refer to...


