Touch Panel For Pdp
Page 1
Please keep this product, please read these instructions completely. English TQZW464 ® Operating Instructions Touch Panel Model No. TY-TP42P8-S TY-TP50P8-S Before connecting, operating or adjusting this manual for future reference.
Please keep this product, please read these instructions completely. English TQZW464 ® Operating Instructions Touch Panel Model No. TY-TP42P8-S TY-TP50P8-S Before connecting, operating or adjusting this manual for future reference.

Touch Panel For Pdp
Page 2
... 5 Accessories 6 Touch panel unit 6 Setup procedure 7 Attachment of the touch panel to the plasma display 8 Connection between the computer and plasma display .......... 10 Installation of the USB driver 11 In case of Windows 98SE 12 In case of Windows ME 14 In case of Windows 2000 16 In case of Windows XP 18 Installation of the Touch Panel Driver 21 Uninstallation of the Touch Panel Driver 22 Setup the program 23 Troubleshooting 34 Specifications...
... 5 Accessories 6 Touch panel unit 6 Setup procedure 7 Attachment of the touch panel to the plasma display 8 Connection between the computer and plasma display .......... 10 Installation of the USB driver 11 In case of Windows 98SE 12 In case of Windows ME 14 In case of Windows 2000 16 In case of Windows XP 18 Installation of the Touch Panel Driver 21 Uninstallation of the Touch Panel Driver 22 Setup the program 23 Troubleshooting 34 Specifications...

Touch Panel For Pdp
Page 3
...), unplug the USB cable and contact your dealer. Using the equipment in an extremely hot or cold location may cause malfunction. Do not lie the touch panel unit face down or place a plasma display on the cord may cause cord damage, a fire or electric shock. Do not touch components inside the touch panel unit. • Directly touching components inside the touch panel unit may cause...
...), unplug the USB cable and contact your dealer. Using the equipment in an extremely hot or cold location may cause malfunction. Do not lie the touch panel unit face down or place a plasma display on the cord may cause cord damage, a fire or electric shock. Do not touch components inside the touch panel unit. • Directly touching components inside the touch panel unit may cause...

Touch Panel For Pdp
Page 4
Use a power supply within the rated voltage range • Be sure that hold liquid (flower vases, fish bowls, cosmetics, chemicals or water) on top of this occur, please restart the PC. • When connecting or disconnecting the USB cable, be careful not to place heavy objects on top of chemicals or steam, or locations where contact may operate incorrectly if...
Use a power supply within the rated voltage range • Be sure that hold liquid (flower vases, fish bowls, cosmetics, chemicals or water) on top of this occur, please restart the PC. • When connecting or disconnecting the USB cable, be careful not to place heavy objects on top of chemicals or steam, or locations where contact may operate incorrectly if...

Touch Panel For Pdp
Page 6
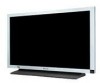
...TY-TP42P8-S (4) TY-TP50P8-S (2) Mounting brackets [B] TY-TP50P8-S (3) CD-ROM (1) • USB driver software • Touch Panel Driver software Mounting screws [A] for Mounting brackets [A, B] TY-TP42P8-S (8) TY-TP50P8-S (10) Mounting bracket for USB cable (1) Mounting brackets [C] TY-TP50P8-S (2) Left Right Mounting screws for USB cable (2) Mounting screws for Mounting brackets [C] TY-TP50P8-S (4) Touch panel unit (Front) (Rear) USB Pen OFF ON Light receiver for receiving light signals from the special-purpose touch pen. Pen Selection switch OFF ON ON: Touch pen mode (when using...
...TY-TP42P8-S (4) TY-TP50P8-S (2) Mounting brackets [B] TY-TP50P8-S (3) CD-ROM (1) • USB driver software • Touch Panel Driver software Mounting screws [A] for Mounting brackets [A, B] TY-TP42P8-S (8) TY-TP50P8-S (10) Mounting bracket for USB cable (1) Mounting brackets [C] TY-TP50P8-S (2) Left Right Mounting screws for USB cable (2) Mounting screws for Mounting brackets [C] TY-TP50P8-S (4) Touch panel unit (Front) (Rear) USB Pen OFF ON Light receiver for receiving light signals from the special-purpose touch pen. Pen Selection switch OFF ON ON: Touch pen mode (when using...

Touch Panel For Pdp
Page 7
Setup procedure 1 Attachment of the touch panel to the plasma display 2 Connection between the computer and the plasma display 3 Installation of USB Driver 4 Installation of Touch Panel Driver 5 Setup Program P 8 P 10 P 11 P 21 P 23 7
Setup procedure 1 Attachment of the touch panel to the plasma display 2 Connection between the computer and the plasma display 3 Installation of USB Driver 4 Installation of Touch Panel Driver 5 Setup Program P 8 P 10 P 11 P 21 P 23 7

Touch Panel For Pdp
Page 10
... screen. Connection between the computer and plasma display 1 Connection with computer USB USB connector USB cable Plasma Display (Rear view) Pen OFF ON Computer Touch Panel ∗ Check that state, it again. You do not need to restart the computer. 2 In order to the USB hub. • For details on USB driver software setup, see "USB driver setup." (See below) • After USB driver setup, you use the following the instructions on the touch panel. Mounting bracket for USB cable (accessory) 2 USB...
... screen. Connection between the computer and plasma display 1 Connection with computer USB USB connector USB cable Plasma Display (Rear view) Pen OFF ON Computer Touch Panel ∗ Check that state, it again. You do not need to restart the computer. 2 In order to the USB hub. • For details on USB driver software setup, see "USB driver setup." (See below) • After USB driver setup, you use the following the instructions on the touch panel. Mounting bracket for USB cable (accessory) 2 USB...

Touch Panel For Pdp
Page 11
... changing of a mouse. Operating environment Personal computer PC/AT compatible machine (DOS/V machine) Models equipped with a USB port and CD-ROM drive Compatible OS Windows 98 Second Edition Windows Millennium Edition Windows 2000 Windows XP (Service Pack 1 or later recommended) • The touch panel and control software can be used by converting touch panel output data into that simulates the output of touch panel operation settings by using the touch panel setting program. This is compatible with their operation...
... changing of a mouse. Operating environment Personal computer PC/AT compatible machine (DOS/V machine) Models equipped with a USB port and CD-ROM drive Compatible OS Windows 98 Second Edition Windows Millennium Edition Windows 2000 Windows XP (Service Pack 1 or later recommended) • The touch panel and control software can be used by converting touch panel output data into that simulates the output of touch panel operation settings by using the touch panel setting program. This is compatible with their operation...

Touch Panel For Pdp
Page 13
.... 8 The new hardware window is displayed again, and the driver for using a touch panel. As for the COM port number, the setup number varies in the use environment of the PC. 4 Next, double-click "Universal Serial Bus controllers". 5 Confirm that "USBSerial for Touch Panel V2 (COMx)" is found in "Ports [COM&LPT]". (COMx) is the COM port number for the assumed COM port is installed. The setup of the USB driver is confirmed...
.... 8 The new hardware window is displayed again, and the driver for using a touch panel. As for the COM port number, the setup number varies in the use environment of the PC. 4 Next, double-click "Universal Serial Bus controllers". 5 Confirm that "USBSerial for Touch Panel V2 (COMx)" is found in "Ports [COM&LPT]". (COMx) is the COM port number for the assumed COM port is installed. The setup of the USB driver is confirmed...

Touch Panel For Pdp
Page 15
Installation of the USB Driver COM port number is confirmed with "Device Manager" 1 Click on [Start] [Settings] [Control Panel] Double-click on "the system" icon of the control panel, and open the properties of the system. 2 The properties of the PC. 4 Next, double-click "Universal Serial Bus controllers". 5 Confirm that "USB-Serial for Touch Panel V2 (COMx)" is found in "Universal Serial Bus controllers". 6 Click on the "Device Manager...
Installation of the USB Driver COM port number is confirmed with "Device Manager" 1 Click on [Start] [Settings] [Control Panel] Double-click on "the system" icon of the control panel, and open the properties of the system. 2 The properties of the PC. 4 Next, double-click "Universal Serial Bus controllers". 5 Confirm that "USB-Serial for Touch Panel V2 (COMx)" is found in "Universal Serial Bus controllers". 6 Click on the "Device Manager...

Touch Panel For Pdp
Page 16
... a USB cable is connected, it is recognized as a new hardware, and a message is indicated. "Install Hardware Device Drivers" is indicated. 4 Choose "CD-ROM drives". 5 Click on this button. "Locate Driver Files" is indicated. 2 Choose this item. 3 Click on this button. Setup Wizard will start. 1 Click on this button. 16 Next, touch panel and PC are connected with USB driver software is started. Installation of the USB Driver In case of Windows 2000 Install USB Driver...
... a USB cable is connected, it is recognized as a new hardware, and a message is indicated. "Install Hardware Device Drivers" is indicated. 4 Choose "CD-ROM drives". 5 Click on this button. "Locate Driver Files" is indicated. 2 Choose this item. 3 Click on this button. Setup Wizard will start. 1 Click on this button. 16 Next, touch panel and PC are connected with USB driver software is started. Installation of the USB Driver In case of Windows 2000 Install USB Driver...

Touch Panel For Pdp
Page 17
... on the "Device Manager" button. 3 Double-click "Ports [COM&LPT]". Installation of the USB Driver "Driver Files Search Results" is indicated. 6 Click on this wizard. 8 It is recognized as new hardware once again, and the screen on the left is displayed. As for using a touch panel. Then click on the "Hardware" tab. Driver software is set up, and "Completing the Found New Hardware Wizard" is indicated...
... on the "Device Manager" button. 3 Double-click "Ports [COM&LPT]". Installation of the USB Driver "Driver Files Search Results" is indicated. 6 Click on this wizard. 8 It is recognized as new hardware once again, and the screen on the left is displayed. As for using a touch panel. Then click on the "Hardware" tab. Driver software is set up, and "Completing the Found New Hardware Wizard" is indicated...

Touch Panel For Pdp
Page 20
... this COM number when you unplug and plug USB cable quickly, the PC sometimes does not recognize it. Specify this case, cancel the setup, and connect it to the USB port, where the driver was setup. Installation of the USB Driver About the COM port When it is set up, the USB driver is re-connected to the PC. If you don't use environment of USB cables. In that Windows XP Service Pack 1 (or...
... this COM number when you unplug and plug USB cable quickly, the PC sometimes does not recognize it. Specify this case, cancel the setup, and connect it to the USB port, where the driver was setup. Installation of the USB Driver About the COM port When it is set up, the USB driver is re-connected to the PC. If you don't use environment of USB cables. In that Windows XP Service Pack 1 (or...

Touch Panel For Pdp
Page 21
... setup program will start . In the default, it and then install the new driver software. Driver software starts when the PC is restarted after installation is registered as the startup program. Start the set-up automatically the next time the unit is turned on. 3 Click to end installation of control software installers (one for Windows 98SE and Windows ME, and one for the OS you are using . OS Windows 98SE Windows ME CD-ROM (Installer) \English\Win9x_me\setup.exe...
... setup program will start . In the default, it and then install the new driver software. Driver software starts when the PC is restarted after installation is registered as the startup program. Start the set-up automatically the next time the unit is turned on. 3 Click to end installation of control software installers (one for Windows 98SE and Windows ME, and one for the OS you are using . OS Windows 98SE Windows ME CD-ROM (Installer) \English\Win9x_me\setup.exe...

Touch Panel For Pdp
Page 22
... the program using one of the "Control Panel". USB driver software Load the included CD-ROM into the CD-ROM drive, run the program "Un-Installer.exe" on the CD-ROM, and follow the instructions on the [Change and delete] button. (5) The file delete confirmation screen will begin. This may be displayed. Then proceed to uninstall the Setup Program. In case of Windows 2000 (1) Click on [Start] [Settings] [Control...
... the program using one of the "Control Panel". USB driver software Load the included CD-ROM into the CD-ROM drive, run the program "Un-Installer.exe" on the CD-ROM, and follow the instructions on the [Change and delete] button. (5) The file delete confirmation screen will begin. This may be displayed. Then proceed to uninstall the Setup Program. In case of Windows 2000 (1) Click on [Start] [Settings] [Control...

Touch Panel For Pdp
Page 23
... valid at the touched position normally. Changes to permit changes in set values in the order of all settings records all set values. Setup program The setup program is to set communication ports and various operation modes and to the driver software in "C:\Program Files\tpdrv" folder. Adds a Setup Program short cut onto the task bar. And calibration is off slightly for cancellation.) User Setting (see page 26) Target is displayed in "tpdrv.ini...
... valid at the touched position normally. Changes to permit changes in set values in the order of all settings records all set values. Setup program The setup program is to set communication ports and various operation modes and to the driver software in "C:\Program Files\tpdrv" folder. Adds a Setup Program short cut onto the task bar. And calibration is off slightly for cancellation.) User Setting (see page 26) Target is displayed in "tpdrv.ini...

Touch Panel For Pdp
Page 24
Communication Port Calibration Mode 24 When "Auto connect" is set up. Setup program Setup of basic settings This sets the COM port of PC. (1) Normal Please select this mode when you caliblate normally. (2) Special Please select this mode if you can not caliblate normally. (ex:display is selected. If it is chosen, driver software detects it automatically, and it isn't possible to connect automatically, choose a connecting port. Connecting port number will vary depending upon the environment of connecting PC. The port being used for connection with the touch panel is zoomed.)
Communication Port Calibration Mode 24 When "Auto connect" is set up. Setup program Setup of basic settings This sets the COM port of PC. (1) Normal Please select this mode when you caliblate normally. (2) Special Please select this mode if you can not caliblate normally. (ex:display is selected. If it is chosen, driver software detects it automatically, and it isn't possible to connect automatically, choose a connecting port. Connecting port number will vary depending upon the environment of connecting PC. The port being used for connection with the touch panel is zoomed.)

Touch Panel For Pdp
Page 32
... is set . Setup program User Setting The following window is returned. Available time settings are 0.2 to 1.0 seconds within the set time, it is set up "Narrow", it works the same as double click. In Windows use "slow" mouse setting when you want to "Normal" setting.) Touch Pen Switch Sets the function switch of the optional touch pen. (TY-TPEN6) • Right Button By touching a display while pushing the function switch, it becomes narrow. (When compared to change...
... is set . Setup program User Setting The following window is returned. Available time settings are 0.2 to 1.0 seconds within the set time, it is set up "Narrow", it works the same as double click. In Windows use "slow" mouse setting when you want to "Normal" setting.) Touch Pen Switch Sets the function switch of the optional touch pen. (TY-TPEN6) • Right Button By touching a display while pushing the function switch, it becomes narrow. (When compared to change...

Touch Panel For Pdp
Page 35
... the device being used with exclusive driver software. ∗2 This applies to 80% (must be no condensation) ∗2 Lateral light: 2,000 lux MIN +20% (angle of incidence: 20°) Frontal light: 10,000 lux MIN +20% (angle of optic elements (W × H) Optic element pitch (W × H) Minimum stylus size (W × H) Touch pen USB Interface (USB 1.1) TY-TP42P8-S Optic Touch Panel TY-TP50P8-S DC + 5 V ±...
... the device being used with exclusive driver software. ∗2 This applies to 80% (must be no condensation) ∗2 Lateral light: 2,000 lux MIN +20% (angle of incidence: 20°) Frontal light: 10,000 lux MIN +20% (angle of optic elements (W × H) Optic element pitch (W × H) Minimum stylus size (W × H) Touch pen USB Interface (USB 1.1) TY-TP42P8-S Optic Touch Panel TY-TP50P8-S DC + 5 V ±...

Touch Panel For Pdp
Page 36
... Reserved. Specifications External dimensions TY-TP42P8-S Unit: mm (Inch) 63.9 (2.5) 63.9 (2.5) 1,073 (42.2) 945.2 (37.2) 63.9 (2.5) 659 (25.9) 518 (20.4) 25.5 (1.0) 63.9 (2.5) External dimensions TY-TP50P8-S Unit: mm (Inch) 63.9 (2.5) 138 (5.4) 63.9 (2.5) 797 (31.4) 1,257 (49.5) 1,106 (43.5) 138 (5.4) 61 (2.4) 8 (0.3) 35.5 (1.4) 63.9 (2.5) 773 (30.4) 645.2 (25.4) 25.5 (1.0) 63.9 (2.5) 230 (9.1) 797 (31.4) 230 (9.1) 61 (2.4) 8 (0.3) 35.5 (1.4) Customer's Record The model number and serial number of...
... Reserved. Specifications External dimensions TY-TP42P8-S Unit: mm (Inch) 63.9 (2.5) 63.9 (2.5) 1,073 (42.2) 945.2 (37.2) 63.9 (2.5) 659 (25.9) 518 (20.4) 25.5 (1.0) 63.9 (2.5) External dimensions TY-TP50P8-S Unit: mm (Inch) 63.9 (2.5) 138 (5.4) 63.9 (2.5) 797 (31.4) 1,257 (49.5) 1,106 (43.5) 138 (5.4) 61 (2.4) 8 (0.3) 35.5 (1.4) 63.9 (2.5) 773 (30.4) 645.2 (25.4) 25.5 (1.0) 63.9 (2.5) 230 (9.1) 797 (31.4) 230 (9.1) 61 (2.4) 8 (0.3) 35.5 (1.4) Customer's Record The model number and serial number of...


