Leaflet
Page 1
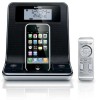
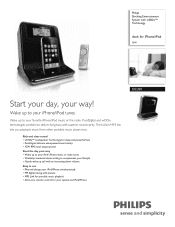
... day your way • Wake up to your iPod/ iPhone music or radio tunes • Weekday/ weekend alarm setting to complement your lifestyle • Gentle wake up to your favorite iPhone/iPod music or the radio. Wake up to your iPhone/iPod tunes Wake up call with an increasing alarm volume Easy to deliver living bass with superior sound clarity. Philips Docking Entertainment System with wOOx™ Technology dock for your system and iPod/iPhone DC320...
... day your way • Wake up to your iPod/ iPhone music or radio tunes • Weekday/ weekend alarm setting to complement your lifestyle • Gentle wake up to your favorite iPhone/iPod music or the radio. Wake up to your iPhone/iPod tunes Wake up call with an increasing alarm volume Easy to deliver living bass with superior sound clarity. Philips Docking Entertainment System with wOOx™ Technology dock for your system and iPod/iPhone DC320...
Leaflet
Page 2
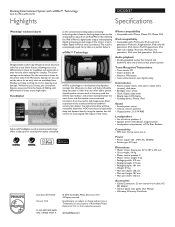
... speaker drivers work in perfect balance. Audio playback • Docking playback modes: fast forward and backward, next and previous track, play and pause Tuner/Reception/Transmission • Tuner bands: FM • Station presets: 20 • Antenna: FM antenna • Tuner enhancement: auto digital tuning Convenience • Alarms: buzzer alarm, radio alarm, repeat alarm (snooze), dual alarm • Backlight color: white • Clock: Digital, sleep timer • Display type: LCD display • Charging device: iPhone, iPod Sound • Sound system: stereo • Volume control...
... speaker drivers work in perfect balance. Audio playback • Docking playback modes: fast forward and backward, next and previous track, play and pause Tuner/Reception/Transmission • Tuner bands: FM • Station presets: 20 • Antenna: FM antenna • Tuner enhancement: auto digital tuning Convenience • Alarms: buzzer alarm, radio alarm, repeat alarm (snooze), dual alarm • Backlight color: white • Clock: Digital, sleep timer • Display type: LCD display • Charging device: iPhone, iPod Sound • Sound system: stereo • Volume control...
User manual
Page 3
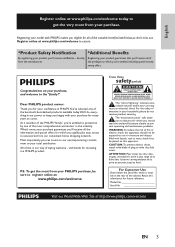
... or moisture and objects filled with your total satisfaction. NO USER-SERVICEABLE PARTS INSIDE. This "bolt of lightning" indicates uninsulated material within your household, please do everything in our power to keep you 'll receive all of the cabinet. which you qualify...product covering. English Register online at www.philips.com/welcome today to get the most comprehensive warranties in the industry. To get the very most from the manufacturer. For the safety of everyone in PHILIPS.You've selected one of plug to wide slot, fully insert. Dear PHILIPS product owner...
... or moisture and objects filled with your total satisfaction. NO USER-SERVICEABLE PARTS INSIDE. This "bolt of lightning" indicates uninsulated material within your household, please do everything in our power to keep you 'll receive all of the cabinet. which you qualify...product covering. English Register online at www.philips.com/welcome today to get the most comprehensive warranties in the industry. To get the very most from the manufacturer. For the safety of everyone in PHILIPS.You've selected one of plug to wide slot, fully insert. Dear PHILIPS product owner...
User manual
Page 5
...in the box Overview of the main unit Overview of the remote control 3 Get started Connect power Set time and date Turn on 4 Play Play from iPod/iPhone Play from an external device 5 Listen to radio Tune to a radio station Program radio stations automatically Program radio stations manually Select a preset radio station 6 Other features Set the alarm timer Set the sleep timer Adjust display brightness 7 Adjust sound Adjust volume level Mute sound Select a preset sound effect Enhance bass 8 Product information Specifications 9 Troubleshooting 6 6 7 8 8 8 9 12 14 14 15 16 16 16 17 18 18 18...
...in the box Overview of the main unit Overview of the remote control 3 Get started Connect power Set time and date Turn on 4 Play Play from iPod/iPhone Play from an external device 5 Listen to radio Tune to a radio station Program radio stations automatically Program radio stations manually Select a preset radio station 6 Other features Set the alarm timer Set the sleep timer Adjust display brightness 7 Adjust sound Adjust volume level Mute sound Select a preset sound effect Enhance bass 8 Product information Specifications 9 Troubleshooting 6 6 7 8 8 8 9 12 14 14 15 16 16 16 17 18 18 18...
User manual
Page 7
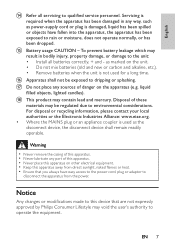
...; Keep this apparatus. • Never lubricate any way, such as the disconnect device, the disconnect device shall remain readily operable. r This product may result in any part of danger on the unit. • Do not mix batteries (old and new or carbon and alkaline, etc.). • Remove batteries when the unit is not used as power-supply cord or plug is...
...; Keep this apparatus. • Never lubricate any way, such as the disconnect device, the disconnect device shall remain readily operable. r This product may result in any part of danger on the unit. • Do not mix batteries (old and new or carbon and alkaline, etc.). • Remove batteries when the unit is not used as power-supply cord or plug is...
User manual
Page 8
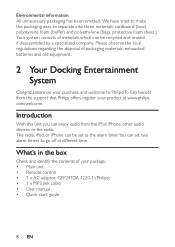
... • User manual • Quick start guide 8 EN Environmental information All unnecessary packaging has been omitted. We have tried to make the packaging easy to go off at www.philips. com/welcome. Introduction With this unit, you can be recycled and reused if disassembled by a specialized company. The radio, iPod, or iPhone can be set as the alarm timer.You can set two alarm timers to...
... • User manual • Quick start guide 8 EN Environmental information All unnecessary packaging has been omitted. We have tried to make the packaging easy to go off at www.philips. com/welcome. Introduction With this unit, you can be recycled and reused if disassembled by a specialized company. The radio, iPod, or iPhone can be set as the alarm timer.You can set two alarm timers to...
User manual
Page 9
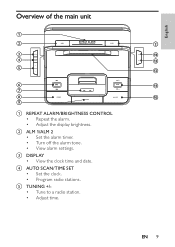
EN 9 d AUTO SCAN/TIME SET • Set the clock. • Program radio stations. b ALM 1/ALM 2 • Set the alarm timer. • Turn off the alarm tone. • View alarm settings. e TUNING +/• Tune to a radio station. • Adjust time. English Overview of the main unit VOL VOL a REPEAT ALARM/BRIGHTNESS CONTROL • Repeat the alarm. • Adjust the display brightness. c DISPLAY • View the clock time and date.
EN 9 d AUTO SCAN/TIME SET • Set the clock. • Program radio stations. b ALM 1/ALM 2 • Set the alarm timer. • Turn off the alarm tone. • View alarm settings. e TUNING +/• Tune to a radio station. • Adjust time. English Overview of the main unit VOL VOL a REPEAT ALARM/BRIGHTNESS CONTROL • Repeat the alarm. • Adjust the display brightness. c DISPLAY • View the clock time and date.
User manual
Page 10
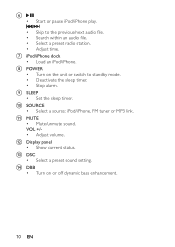
.... VOL +/• Adjust volume. g iPod/iPhone dock • Load an iPod/iPhone. k MUTE • Mute/unmute sound. n DBB • Turn on the unit or switch to the previous/next audio file. • Search within an audio file. • Select a preset radio station. • Adjust time. m DSC • Select a preset sound setting. f • Start or pause iPod/iPhone play. / • Skip to standby mode. • Deactivate the sleep timer. • Stop alarm. h POWER • Turn on or off...
.... VOL +/• Adjust volume. g iPod/iPhone dock • Load an iPod/iPhone. k MUTE • Mute/unmute sound. n DBB • Turn on the unit or switch to the previous/next audio file. • Search within an audio file. • Select a preset radio station. • Adjust time. m DSC • Select a preset sound setting. f • Start or pause iPod/iPhone play. / • Skip to standby mode. • Deactivate the sleep timer. • Stop alarm. h POWER • Turn on or off...
User manual
Page 12
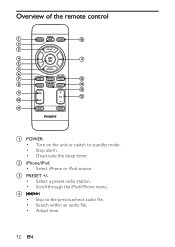
Overview of the remote control a POWER • Turn on the unit or switch to the previous/next audio file. • Search within an audio file. • Adjust time. 12 EN d / • Skip to standby mode. • Stop alarm. • Deactivate the sleep timer. c PRESET +/• Select a preset radio station. • Scroll through the iPod/iPhone menu. b iPhone/iPod • Select iPhone or iPod source.
Overview of the remote control a POWER • Turn on the unit or switch to the previous/next audio file. • Search within an audio file. • Adjust time. 12 EN d / • Skip to standby mode. • Stop alarm. • Deactivate the sleep timer. c PRESET +/• Select a preset radio station. • Scroll through the iPod/iPhone menu. b iPhone/iPod • Select iPhone or iPod source.
User manual
Page 13
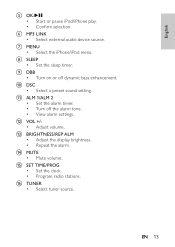
...; Adjust the display brightness. • Repeat the alarm. n MUTE • Mute volume. EN 13 o SET TIME/PROG • Set the clock. • Program radio stations. h SLEEP • Set the sleep timer. i DBB • Turn on or off the alarm tone. • View alarm settings. j DSC • Select a preset sound setting. p TUNER • Select tuner source. g MENU • Select the iPhone/iPod menu. f MP3 LINK • Select external audio device source. l VOL +/• Adjust volume. English e OK/ • Start or pause iPod/iPhone play...
...; Adjust the display brightness. • Repeat the alarm. n MUTE • Mute volume. EN 13 o SET TIME/PROG • Set the clock. • Program radio stations. h SLEEP • Set the sleep timer. i DBB • Turn on or off the alarm tone. • View alarm settings. j DSC • Select a preset sound setting. p TUNER • Select tuner source. g MENU • Select the iPhone/iPod menu. f MP3 LINK • Select external audio device source. l VOL +/• Adjust volume. English e OK/ • Start or pause iPod/iPhone play...

User manual
Page 14
... the cord. • Before connecting the AC adaptor, ensure you have completed all other unsafe operation. 3 Get started Caution • Use of controls or adjustments or performance of procedures other than herein may result in hazardous radiation exposure or other connections. Always follow the instructions in sequence. If you contact Philips, you unplug the AC adaptor, always pull the plug...
... the cord. • Before connecting the AC adaptor, ensure you have completed all other unsafe operation. 3 Get started Caution • Use of controls or adjustments or performance of procedures other than herein may result in hazardous radiation exposure or other connections. Always follow the instructions in sequence. If you contact Philips, you unplug the AC adaptor, always pull the plug...
User manual
Page 15
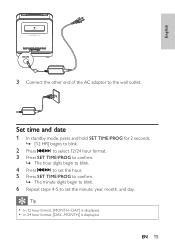
EN 15 English 3 Connect the other end of the AC adaptor to set the minute, year, month, and day. Tip • In 12 hour format, [MONTH--DAY] is displayed. • in 24 hour format, [DAY--MONTH] is displayed. Set time and date 1 In standby mode, press and hold SET TIME/PROG for 2 seconds. » [12 HR] begins to blink. 2 Press / to select 12/24 hour format. 3 Press SET TIME/PROG to confirm. » The hour digits begin to blink. 4 Press / to set the hour. 5 Press SET TIME/PROG to confirm. » The minute digits begin to blink. 6 Repeat steps 4-5 to the wall outlet.
EN 15 English 3 Connect the other end of the AC adaptor to set the minute, year, month, and day. Tip • In 12 hour format, [MONTH--DAY] is displayed. • in 24 hour format, [DAY--MONTH] is displayed. Set time and date 1 In standby mode, press and hold SET TIME/PROG for 2 seconds. » [12 HR] begins to blink. 2 Press / to select 12/24 hour format. 3 Press SET TIME/PROG to confirm. » The hour digits begin to blink. 4 Press / to set the hour. 5 Press SET TIME/PROG to confirm. » The minute digits begin to blink. 6 Repeat steps 4-5 to the wall outlet.
User manual
Page 16
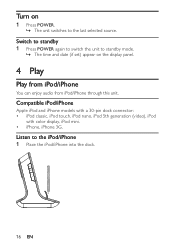
Switch to standby 1 Press POWER again to switch the unit to standby mode. » The time and date (if set) appear on 1 Press POWER. » The unit switches to the iPod/iPhone 1 Place the iPod/iPhone into the dock. 16 EN Turn on the display panel. 4 Play Play from iPod/iPhone You can enjoy audio from iPod/iPhone through this unit. Listen to the last selected source. Compatible iPod/iPhone Apple iPod and iPhone models with a 30-pin dock connector: • iPod classic, iPod touch, iPod nano, iPod 5th generation (video), iPod with color display, iPod mini. • iPhone, iPhone 3G.
Switch to standby 1 Press POWER again to switch the unit to standby mode. » The time and date (if set) appear on 1 Press POWER. » The unit switches to the iPod/iPhone 1 Place the iPod/iPhone into the dock. 16 EN Turn on the display panel. 4 Play Play from iPod/iPhone You can enjoy audio from iPod/iPhone through this unit. Listen to the last selected source. Compatible iPod/iPhone Apple iPod and iPhone models with a 30-pin dock connector: • iPod classic, iPod touch, iPod nano, iPod 5th generation (video), iPod with color display, iPod mini. • iPhone, iPhone 3G.
User manual
Page 17
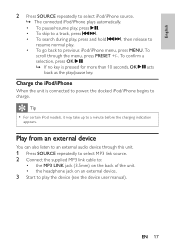
... MP3 link source. 2 Connect the supplied MP3 link cable to: • the MP3 LINK jack (3.5mm) on the back of the unit. • the headphone jack on an external device. 3 Start to previous iPod/iPhone menu, press MENU. Tip • For certain iPod models, it may take up to charge. English 2 Press SOURCE repeatedly to select iPod/iPhone source. » The connected iPod/iPhone plays automatically. • To pause...
... MP3 link source. 2 Connect the supplied MP3 link cable to: • the MP3 LINK jack (3.5mm) on the back of the unit. • the headphone jack on an external device. 3 Start to previous iPod/iPhone menu, press MENU. Tip • For certain iPod models, it may take up to charge. English 2 Press SOURCE repeatedly to select iPod/iPhone source. » The connected iPod/iPhone plays automatically. • To pause...
User manual
Page 18
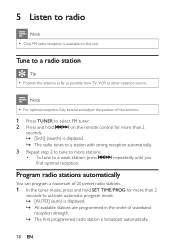
...; To tune to a weak station, press / repeatedly until you find optimal reception. 5 Listen to radio Note • Only FM radio reception is available on the remote control for more than 2 seconds to activate automatic program mode. » [AUTO] (auto) is displayed. » All available stations are programmed in the order of the antenna. 1 Press TUNER to select FM tuner. 2 Press and hold SET TIME/PROG for more than...
...; To tune to a weak station, press / repeatedly until you find optimal reception. 5 Listen to radio Note • Only FM radio reception is available on the remote control for more than 2 seconds to activate automatic program mode. » [AUTO] (auto) is displayed. » All available stations are programmed in the order of the antenna. 1 Press TUNER to select FM tuner. 2 Press and hold SET TIME/PROG for more than...
User manual
Page 19
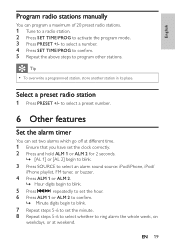
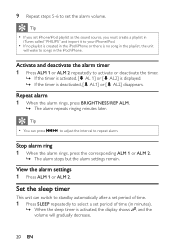
... place. English Program radio stations manually You can set two alarms which go off at different time. 1 Ensure that you have set the clock correctly. 2 Press and hold ALM 1 or ALM 2 for 2 seconds. » [AL 1] or [AL 2] begin to blink. 3 Press SOURCE to select an alarm sound source: iPod/iPhone, iPod/ iPhone playlist, FM tuner, or buzzer. 4 Press ALM 1 or ALM 2. » Hour digits begin to blink. 5 Press / repeatedly to set the hour. 6 Press...
... place. English Program radio stations manually You can set two alarms which go off at different time. 1 Ensure that you have set the clock correctly. 2 Press and hold ALM 1 or ALM 2 for 2 seconds. » [AL 1] or [AL 2] begin to blink. 3 Press SOURCE to select an alarm sound source: iPod/iPhone, iPod/ iPhone playlist, FM tuner, or buzzer. 4 Press ALM 1 or ALM 2. » Hour digits begin to blink. 5 Press / repeatedly to set the hour. 6 Press...
User manual
Page 20
... ALM 2. » The alarm stops but the alarm settings remain. Tip • You can switch to standby automatically after a set period of time (in minutes). » When the sleep timer is no playlist is created in the iPod/iPhone. Set the sleep timer This unit can press / to adjust the interval to songs in the iPod/iPhone or there is activated, the display shows , and the volume will wake to repeat alarm.
... ALM 2. » The alarm stops but the alarm settings remain. Tip • You can switch to standby automatically after a set period of time (in minutes). » When the sleep timer is no playlist is created in the iPod/iPhone. Set the sleep timer This unit can press / to adjust the interval to songs in the iPod/iPhone or there is activated, the display shows , and the volume will wake to repeat alarm.
User manual
Page 23
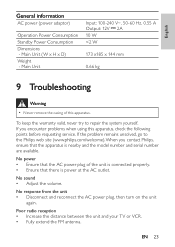
English General information AC power (power adaptor) Operation Power Consumption Standby Power Consumption Dimensions - Main Unit Input: 100-240 V~, 50-60 Hz, 0.55 A Output: 12V 2A 10 W Main Unit (W x H x D) Weight -
English General information AC power (power adaptor) Operation Power Consumption Standby Power Consumption Dimensions - Main Unit Input: 100-240 V~, 50-60 Hz, 0.55 A Output: 12V 2A 10 W Main Unit (W x H x D) Weight -
Quick start guide
Page 1
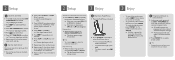
... their respective owners. Specifications are the property of the AC adaptor to change without notice. Printed in China DC320_37_QSG_V1.0 Register your product and get support at www.philips.com/welcome Docking Entertainment System DC320 What's in the box Quick start guide 1 Connect 2 Setup 3 Enjoy Quick StarUt GseuridMeanual Main unit Remove control AC power adaptor MP3 link cable User Manual Quick Start Guide 1 Connect A Connect power 1 Prepare the AC power adaptor. 2 Connect one...
... their respective owners. Specifications are the property of the AC adaptor to change without notice. Printed in China DC320_37_QSG_V1.0 Register your product and get support at www.philips.com/welcome Docking Entertainment System DC320 What's in the box Quick start guide 1 Connect 2 Setup 3 Enjoy Quick StarUt GseuridMeanual Main unit Remove control AC power adaptor MP3 link cable User Manual Quick Start Guide 1 Connect A Connect power 1 Prepare the AC power adaptor. 2 Connect one...
Quick start guide
Page 2
... play /pause key. to set the minute, year, month, and day. A Play from iPod/iPhone 1 Place the iPod/iPhone in the order of waveband reception strength. » The first programmed radio station is broadcast automatically. 2 Press PRESET +/- B Program and listen to radio stations 1 In the tuner mode, press and hold SET TIME/PROG for more than 2 seconds to activate automatic program mode. » All available stations are described in the user manual. Stop alarm ring 1 When the alarm...
... play /pause key. to set the minute, year, month, and day. A Play from iPod/iPhone 1 Place the iPod/iPhone in the order of waveband reception strength. » The first programmed radio station is broadcast automatically. 2 Press PRESET +/- B Program and listen to radio stations 1 In the tuner mode, press and hold SET TIME/PROG for more than 2 seconds to activate automatic program mode. » All available stations are described in the user manual. Stop alarm ring 1 When the alarm...


