
User Manual
Page 2
... Parts 9 Control Panel 9 Direct Key guide 10 Function Key Guide 11 Changing Brightness, Contrast and Eye Saver Mode settings 13 Changing the Volume setting 13 Reverse Side 14 Adjusting the Product Tilt and Height 15 Anti-theft Lock 16 Precautions for moving the monitor 16 Installing a Wall-mount Kit or Desktop Stand 17 Installation 18 Attaching the Stand 18 Removing the Stand 19 Connecting and Using a Source Device Read below before installing the monitor. 20 Connecting and Using a PC 20 Connection Using the HDMI Cable 20 Connection Using the USB...
... Parts 9 Control Panel 9 Direct Key guide 10 Function Key Guide 11 Changing Brightness, Contrast and Eye Saver Mode settings 13 Changing the Volume setting 13 Reverse Side 14 Adjusting the Product Tilt and Height 15 Anti-theft Lock 16 Precautions for moving the monitor 16 Installing a Wall-mount Kit or Desktop Stand 17 Installation 18 Attaching the Stand 18 Removing the Stand 19 Connecting and Using a Source Device Read below before installing the monitor. 20 Connecting and Using a PC 20 Connection Using the HDMI Cable 20 Connection Using the USB...
User Manual
Page 3
... Picture Size 32 Contrast 33 Adjusting OSD (On Screen Display) settings Transparency 34 Position 34 Language 34 Display Time 34 Setup and Reset DisplayPort Ver. 35 HDMI Mode 35 FreeSync 36 Eco Saving Plus 38 Off Timer 38 PC/AV Mode 38 Source Detection 39 Auto Source Switch 39 Key Repeat Time 39 Power LED On 39 Reset All 39 Information 39 Installing the Software Easy Setting Box 40 Restrictions and Problems with the Installation 40 System Requirements 40 Troubleshooting Guide...
... Picture Size 32 Contrast 33 Adjusting OSD (On Screen Display) settings Transparency 34 Position 34 Language 34 Display Time 34 Setup and Reset DisplayPort Ver. 35 HDMI Mode 35 FreeSync 36 Eco Saving Plus 38 Off Timer 38 PC/AV Mode 38 Source Detection 39 Auto Source Switch 39 Key Repeat Time 39 Power LED On 39 Reset All 39 Information 39 Installing the Software Easy Setting Box 40 Restrictions and Problems with the Installation 40 System Requirements 40 Troubleshooting Guide...

User Manual
Page 5
... plug and do not touch the cable with force. Cleaning ――Exercise care when cleaning as the panel and exterior of advanced LCDs are easily scratched. ――Take the following steps when cleaning. 1 Power off power to the product when an issue occurs. •• Hold the plug when disconnecting the power cord from the product. ――Hold the power cable by Samsung...
... plug and do not touch the cable with force. Cleaning ――Exercise care when cleaning as the panel and exterior of advanced LCDs are easily scratched. ――Take the following steps when cleaning. 1 Power off power to the product when an issue occurs. •• Hold the plug when disconnecting the power cord from the product. ――Hold the power cable by Samsung...
User Manual
Page 6
...; Do not install the product in the kitchen or near the kitchen stove. Installation Warning •• DO NOT PLACE CANDLES, INSECT REPELLANTS OR CIGARETTES ON TOP OF THE PRODUCT. DO NOT INSTALL THE PRODUCT NEAR HEAT SOURCES. •• Do not install the product in...install the product at least 10 cm away from oil pollution. Keep the product away from the wall to allow ventilation. •• Keep the plastic packaging out of the reach of the right size. •• Set down the product on its performance. ‒‒ Be sure to consult Samsung Customer Service...
...; Do not install the product in the kitchen or near the kitchen stove. Installation Warning •• DO NOT PLACE CANDLES, INSECT REPELLANTS OR CIGARETTES ON TOP OF THE PRODUCT. DO NOT INSTALL THE PRODUCT NEAR HEAT SOURCES. •• Do not install the product in...install the product at least 10 cm away from oil pollution. Keep the product away from the wall to allow ventilation. •• Keep the plastic packaging out of the reach of the right size. •• Set down the product on its performance. ‒‒ Be sure to consult Samsung Customer Service...

User Manual
Page 7
...product (via the vent or input/output ports, etc). ‒‒ Be sure to power off the product and disconnect the power cord when water or other foreign substances have entered the product. Then contact Samsung Customer Service Center. ‒‒ Continued use or keep combustible spray or an inflammable ...turn off the product and remove the power cable. •• Do not drop objects on top of the product. ‒‒ The product or heavy objects may fall as children try to reach for repairs. •• To move the product by pulling the power cord or any cable...
...product (via the vent or input/output ports, etc). ‒‒ Be sure to power off the product and disconnect the power cord when water or other foreign substances have entered the product. Then contact Samsung Customer Service Center. ‒‒ Continued use or keep combustible spray or an inflammable ...turn off the product and remove the power cable. •• Do not drop objects on top of the product. ‒‒ The product or heavy objects may fall as children try to reach for repairs. •• To move the product by pulling the power cord or any cable...

User Manual
Page 11
... screen if the input signal has been changed. Enable/Disable: To lock/unlock the OSD control, press the LEFT button for 10 seconds when the main menu displayed. ――If the OSD control is required. PIP/PBP is available. Eye Saver Mode is available. Press the button when configuring settings for each item will be applied. Function Key Guide ――To enter the main menu or to use...
... screen if the input signal has been changed. Enable/Disable: To lock/unlock the OSD control, press the LEFT button for 10 seconds when the main menu displayed. ――If the OSD control is required. PIP/PBP is available. Eye Saver Mode is available. Press the button when configuring settings for each item will be applied. Function Key Guide ――To enter the main menu or to use...
User Manual
Page 13
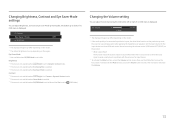
... no OSD menu is Auto Mute? To deactivate the Mute function, access the Volume control screen, then increase or decrease the Volume. 13 Changing Brightness, Contrast and Eye Saver Mode settings You can adjust Brightness, Contrast or Eye Saver Mode by moving the JOG button up or down . The function mutes the audio to improve sound effect when there is sound noise or when the input signal is weak, usually due to a problem...
... no OSD menu is Auto Mute? To deactivate the Mute function, access the Volume control screen, then increase or decrease the Volume. 13 Changing Brightness, Contrast and Eye Saver Mode settings You can adjust Brightness, Contrast or Eye Saver Mode by moving the JOG button up or down . The function mutes the audio to improve sound effect when there is sound noise or when the input signal is weak, usually due to a problem...

User Manual
Page 16
...as a desk. 2 Put one end of the product. Anti-theft Lock ――An anti-theft lock allows you to use the product securely even in public places. ――The locking device shape and locking method depend on the other end. •• Hold the lower ...user guide provided with your anti-theft locking device to the user guide provided with your anti-theft locking device for moving the monitor •• Do not directly apply pressure on the screen. •• Do not hold the product upside down only by the stand. 1 Fix the cable of your anti-theft locking...
...as a desk. 2 Put one end of the product. Anti-theft Lock ――An anti-theft lock allows you to use the product securely even in public places. ――The locking device shape and locking method depend on the other end. •• Hold the lower ...user guide provided with your anti-theft locking device to the user guide provided with your anti-theft locking device for moving the monitor •• Do not directly apply pressure on the screen. •• Do not hold the product upside down only by the stand. 1 Fix the cable of your anti-theft locking...
User Manual
Page 25
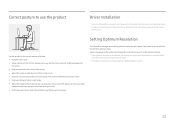
... to use the product Driver Installation ――You can set the optimum resolution and frequency for the first time after purchase. samsung.com. An information message about a right angle. •• Adjust the height of the product so you power on the product for this product by installing the corresponding drivers. ――To install the latest version of the product driver, download it...
... to use the product Driver Installation ――You can set the optimum resolution and frequency for the first time after purchase. samsung.com. An information message about a right angle. •• Adjust the height of the product so you power on the product for this product by installing the corresponding drivers. ――To install the latest version of the product driver, download it...
User Manual
Page 26
... balanced brightness through HDMI/DP/USB Type-C and PC/AV Mode is set to your preferences. You can select Custom which automatically recalls your preferences. 26 In AV mode When the external input is connected through automatic contrast adjustment. •• High-Brightness: Maximize the screen brightness. You can activate either Dynamic, Standard, Movie or Custom. Refer to On. The color and shape of parts...
... balanced brightness through HDMI/DP/USB Type-C and PC/AV Mode is set to your preferences. You can select Custom which automatically recalls your preferences. 26 In AV mode When the external input is connected through automatic contrast adjustment. •• High-Brightness: Maximize the screen brightness. You can activate either Dynamic, Standard, Movie or Custom. Refer to On. The color and shape of parts...

User Manual
Page 27
... the color. •• Blue: Adjust the blue saturation level. Values closer to On. •• Red: Adjust the red saturation level. Brightness You can adjust the general brightness of the picture. (Range: 0~100) A higher value will increase the contrast to make the object appear clearer. ――This option is not available when MSAMASGUNICGBright is in Mode1 or Mode2 mode. ――This menu is...
... the color. •• Blue: Adjust the blue saturation level. Values closer to On. •• Red: Adjust the red saturation level. Brightness You can adjust the general brightness of the picture. (Range: 0~100) A higher value will increase the contrast to make the object appear clearer. ――This option is not available when MSAMASGUNICGBright is in Mode1 or Mode2 mode. ――This menu is...

User Manual
Page 28
... monitor turns off, enters power-saving mode or changes input sources, Game Mode turns Off even if it met the requirements of the picture. The function has more vivid and natural. ――Use Standard mode when not playing a video or game. ――This menu is not available when PIP/PBP Mode is set to On and the Size is set to the product via HDMI, image quality degradation (contrast/ color degradation, black...
... monitor turns off, enters power-saving mode or changes input sources, Game Mode turns Off even if it met the requirements of the picture. The function has more vivid and natural. ――Use Standard mode when not playing a video or game. ――This menu is not available when PIP/PBP Mode is set to On and the Size is set to the product via HDMI, image quality degradation (contrast/ color degradation, black...
User Manual
Page 29
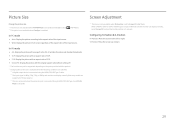
... connected using the HDMI/DP/USB Type-C cable. ――The input signal is 480p, 576p, 720p, or 1080p and monitor can display normally (Not every model can support all of 4:3. V-Position: Move the screen up or down. 29 Screen Adjustment ――This menu is only available when Picture Size is enabled. (PBP Mode). In PC mode •• Auto: Display the picture according to the aspect ratio of the input source. •• Wide: Display...
... connected using the HDMI/DP/USB Type-C cable. ――The input signal is 480p, 576p, 720p, or 1080p and monitor can display normally (Not every model can support all of 4:3. V-Position: Move the screen up or down. 29 Screen Adjustment ――This menu is only available when Picture Size is enabled. (PBP Mode). In PC mode •• Auto: Display the picture according to the aspect ratio of the input source. •• Wide: Display...
User Manual
Page 30
... video signals are based on the PC. (Instructions are delayed in half displaying output from what is provided. Alternatively, restart the monitor, then set to the optimum resolution, change the resolution to Control Panel → Display → Screen Resolution and click Detect on Windows 7.) If the screen is blank when the resolution is displayed in Picture) function separates the screen into two parts. The color and shape of parts may vary depending on the specifications...
... video signals are based on the PC. (Instructions are delayed in half displaying output from what is provided. Alternatively, restart the monitor, then set to the optimum resolution, change the resolution to Control Panel → Display → Screen Resolution and click Detect on Windows 7.) If the screen is blank when the resolution is displayed in Picture) function separates the screen into two parts. The color and shape of parts may vary depending on the specifications...
User Manual
Page 32
The same PBP source setting menu appears. PBP Mode (available in PBP mode(Size )) ――The input source for the main screen changes. ――The screen may flicker if the input signal is 480p, 576p, 720p, or 1080p and monitor can display normally (Not every model can support all of these signals.). ――This can be supported depending on the ports provided with an aspect ratio of 4:3. icon and...
The same PBP source setting menu appears. PBP Mode (available in PBP mode(Size )) ――The input source for the main screen changes. ――The screen may flicker if the input signal is 480p, 576p, 720p, or 1080p and monitor can display normally (Not every model can support all of these signals.). ――This can be supported depending on the ports provided with an aspect ratio of 4:3. icon and...
User Manual
Page 36
... using the function, contact the Samsung Service Center. When enable FreeSync function, please use maximum screen refresh rate for supported graphics cards: Make sure to install the latest official graphics drivers from AMD that support FreeSync. ――For additional AMD graphics card models that support the FreeSync feature, visit the official AMD website. ――Select FreeSync Off if you use the HDMI/DP cable provided by the monitor...
... using the function, contact the Samsung Service Center. When enable FreeSync function, please use maximum screen refresh rate for supported graphics cards: Make sure to install the latest official graphics drivers from AMD that support FreeSync. ――For additional AMD graphics card models that support the FreeSync feature, visit the official AMD website. ――Select FreeSync Off if you use the HDMI/DP cable provided by the monitor...
User Manual
Page 39
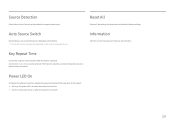
Power LED On Configure the settings to enable or disable the power LED located at the lower part of a button when the button is pressed. Reset All Return all the settings for the product to recognize input signal. Information View the current input source, frequency and resolution. Auto Source Switch By activating, a new connected source is turned off. 39 If No Repeat is selected, a command responds only once when a button is on the model or geographical area...
Power LED On Configure the settings to enable or disable the power LED located at the lower part of a button when the button is pressed. Reset All Return all the settings for the product to recognize input signal. Information View the current input source, frequency and resolution. Auto Source Switch By activating, a new connected source is turned off. 39 If No Repeat is selected, a command responds only once when a button is on the model or geographical area...
User Manual
Page 41
... . If the problem persists, contact Samsung Customer Service Center. Installation issue (PC mode) The screen keeps switching on the computer system settings and cables. The blank spaces found on the screen are locked. Blank spaces on all four sides of the screen when an HDMI or HDMI-DVI cable is properly connected to the product and PC. Check that exceeds the supported resolution(refer to adjust the screen settings.) Screen issue The power LED is working normally. ―...
... . If the problem persists, contact Samsung Customer Service Center. Installation issue (PC mode) The screen keeps switching on the computer system settings and cables. The blank spaces found on the screen are locked. Blank spaces on all four sides of the screen when an HDMI or HDMI-DVI cable is properly connected to the product and PC. Check that exceeds the supported resolution(refer to adjust the screen settings.) Screen issue The power LED is working normally. ―...
User Manual
Page 42
..., if required, change Turn on the user's viewing angle. Text is choppy. Video playback is blurry. Sound issue There is used to the recommended level. Sound cannot be seen depending on ClearType. The screen is too bright. The screen is blurry. Change the Color settings. If using an HDMI cable, DP cable or USB Type-C cable. This message appears when the signal from the graphics card exceeds the maximum resolution or frequency for the...
..., if required, change Turn on the user's viewing angle. Text is choppy. Video playback is blurry. Sound issue There is used to the recommended level. Sound cannot be seen depending on ClearType. The screen is too bright. The screen is blurry. Change the Color settings. If using an HDMI cable, DP cable or USB Type-C cable. This message appears when the signal from the graphics card exceeds the maximum resolution or frequency for the...
User Manual
Page 43
...; Windows 8(Windows 8.1): Go to Settings → Control Panel → Appearance and Personalization → Display → Screen Resolution → Advanced settings → Monitor, and adjust Refresh rate under Monitor settings. •• Windows 10: Go to the user manual for your PC or graphics card for further instructions on adjustment. How do I change the frequency? Q & A ――Refer to Settings → System → Display → Advanced display settings → Display adapter properties → Monitor, and adjust Screen refresh rate under Monitor settings.
...; Windows 8(Windows 8.1): Go to Settings → Control Panel → Appearance and Personalization → Display → Screen Resolution → Advanced settings → Monitor, and adjust Refresh rate under Monitor settings. •• Windows 10: Go to the user manual for your PC or graphics card for further instructions on adjustment. How do I change the frequency? Q & A ――Refer to Settings → System → Display → Advanced display settings → Display adapter properties → Monitor, and adjust Screen refresh rate under Monitor settings.


