
User Manual
Page 1
USER'S MANUAL SRP-770 LABEL PRINTER JE68-00131B Rev. 1.05 www.samsungminiprinters.com 1
USER'S MANUAL SRP-770 LABEL PRINTER JE68-00131B Rev. 1.05 www.samsungminiprinters.com 1

User Manual
Page 2
... not plug in one multi-outlet. DISASSEMBLING PROHIBITED PRINER TO UNPLUG Do not let water or other adapters. Install the printer on his head. If this happened, switch off and unplug the printer before calling your dealer when you observe a strange smoke, odor or noise from the mains. If the plug is...
... not plug in one multi-outlet. DISASSEMBLING PROHIBITED PRINER TO UNPLUG Do not let water or other adapters. Install the printer on his head. If this happened, switch off and unplug the printer before calling your dealer when you observe a strange smoke, odor or noise from the mains. If the plug is...

User Manual
Page 3
...; Operator's Manual & CD ⑨ Label (Paper) ⑦ Power Cord ⑥ Cushion (TOP) ⑤ Printer (SRP-770) ③ Power Supply ② Cushion (Bottom) ④ Pe-bag ① Printer Box ※ You can repack the printer package in above numeric order(①~⑨) 5 Samsung Label Printer 6 3. The Self Test 11 8. Cleaning Head 15 12. Setting the Dip Switches 10...
...; Operator's Manual & CD ⑨ Label (Paper) ⑦ Power Cord ⑥ Cushion (TOP) ⑤ Printer (SRP-770) ③ Power Supply ② Cushion (Bottom) ④ Pe-bag ① Printer Box ※ You can repack the printer package in above numeric order(①~⑨) 5 Samsung Label Printer 6 3. The Self Test 11 8. Cleaning Head 15 12. Setting the Dip Switches 10...

User Manual
Page 4
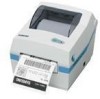
...down. 7 Connecting the Power Supply CAUTIONS: When connecting or disconnecting the power supply from the electrical outlet. 2. Samsung Label Printer Feed Button Cover Peel-off Cover Open/Close Printer Head Paper Holder Paper Guide Paper(gap) Sensor Peel-off , and the power supply's power cord is unplugged from... the printer, make sure that the voltage required by the power supply matches that the printer's power switch is not plugged into an electrical outlet. Otherwise, you may damage the power supply...
...down. 7 Connecting the Power Supply CAUTIONS: When connecting or disconnecting the power supply from the electrical outlet. 2. Samsung Label Printer Feed Button Cover Peel-off Cover Open/Close Printer Head Paper Holder Paper Guide Paper(gap) Sensor Peel-off , and the power supply's power cord is unplugged from... the printer, make sure that the voltage required by the power supply matches that the printer's power switch is not plugged into an electrical outlet. Otherwise, you may damage the power supply...

User Manual
Page 6
...takes effect when you turn on the power while holding(2sec) down in the Figure below. 4. Functions of the printer and open the bracket. 3. Turn on the printer. The Dip Switches are off when up and on the bottom of next page With Off Back Feeding printing AutoCutter ... and Black-mark Memory Off 4 Selection for Image Store On SRAM Flash Rom 5 Emulation Off SAMSUNG command On Emulation 6~8 Developer Mode Default --- The Self Test The self-test checks whether the printer has any problems. (You cannot perform this procedure if using tweezers or another narrow-ended tool....
...takes effect when you turn on the power while holding(2sec) down in the Figure below. 4. Functions of the printer and open the bracket. 3. Turn on the printer. The Dip Switches are off when up and on the bottom of next page With Off Back Feeding printing AutoCutter ... and Black-mark Memory Off 4 Selection for Image Store On SRAM Flash Rom 5 Emulation Off SAMSUNG command On Emulation 6~8 Developer Mode Default --- The Self Test The self-test checks whether the printer has any problems. (You cannot perform this procedure if using tweezers or another narrow-ended tool....

User Manual
Page 7
8. The Peel-off Printers can Peel-off cover and turn on peeler switch. ② Remove the one a paper and insert the paper through both the rear slot and guides. Adjust holders and guides to the width of the paper. Open the Dust Cover and Insert paper Dust Cover Adjust holders papers and paper Fixed Adjust Guides Paper Fixed 13 Using Fan Fold Paper Insert paper through slot. ③ Adjust the paper guides and close the cover. remove 12 9. You must remove the label before the printer prints the next label. ① Open the peel-off a single label.
8. The Peel-off Printers can Peel-off cover and turn on peeler switch. ② Remove the one a paper and insert the paper through both the rear slot and guides. Adjust holders and guides to the width of the paper. Open the Dust Cover and Insert paper Dust Cover Adjust holders papers and paper Fixed Adjust Guides Paper Fixed 13 Using Fan Fold Paper Insert paper through slot. ③ Adjust the paper guides and close the cover. remove 12 9. You must remove the label before the printer prints the next label. ① Open the peel-off a single label.

User Manual
Page 8
...in order for next printing. Caution (Partial cut) : Once the printer cut it up completely, close the cover. Clean the thermal element (the area which is marked a thin black line) of burn injury. Never touch the thermal element with a alcohol solvent (ethanol, methanol, or IPA). 3. ... deterioration. 15 After confirming that the thermal head becomes very hot during normal operation, creating the danger of the thermal head with a cotton swab moistened with your hand, then the thermal element can be used for about 2~3 minutes after turning printer power off before cleaning. 2. Auto...
...in order for next printing. Caution (Partial cut) : Once the printer cut it up completely, close the cover. Clean the thermal element (the area which is marked a thin black line) of burn injury. Never touch the thermal element with a alcohol solvent (ethanol, methanol, or IPA). 3. ... deterioration. 15 After confirming that the thermal head becomes very hot during normal operation, creating the danger of the thermal head with a cotton swab moistened with your hand, then the thermal element can be used for about 2~3 minutes after turning printer power off before cleaning. 2. Auto...

User Manual
Page 11
(3) Click "Install" Button. (4) Select operating system type. 20 (5) Select "USB" interface (port) type. (6) Please turn-off printer and turn-on printer. (7) When "Add new hardware wizard" for install "USB print support" driver pops up, click "Next" button. 21
(3) Click "Install" Button. (4) Select operating system type. 20 (5) Select "USB" interface (port) type. (6) Please turn-off printer and turn-on printer. (7) When "Add new hardware wizard" for install "USB print support" driver pops up, click "Next" button. 21

User Manual
Page 12
B. Windows NT/2000 (1) Double click "SRP-770_V3.X.X.exe" file. (2) Click "Next" Button. (3) Click "Install" Button. (4) Select operating system type. 22 23 (8) Please click "Next" button three times. (9) When "USB print support" driver is installed, your system automatically restart after 10 seconds. (10) After the system restart, please turn-on printer.
B. Windows NT/2000 (1) Double click "SRP-770_V3.X.X.exe" file. (2) Click "Next" Button. (3) Click "Install" Button. (4) Select operating system type. 22 23 (8) Please click "Next" button three times. (9) When "USB print support" driver is installed, your system automatically restart after 10 seconds. (10) After the system restart, please turn-on printer.

User Manual
Page 13
(5) Select "USB" interface (port) type. (6) Please turn-off printer and turn-on printer. * If you can see this dialog, don't worry comment in dialog. Printer and driver work well. Windows XP/2003 Server (1) Double click "SRP-770_V3.X.X.exe" file. (2) Click "Next" Button. (3) Click "Install" Button. 25 Please click "Yes" button. 24 C.
(5) Select "USB" interface (port) type. (6) Please turn-off printer and turn-on printer. * If you can see this dialog, don't worry comment in dialog. Printer and driver work well. Windows XP/2003 Server (1) Double click "SRP-770_V3.X.X.exe" file. (2) Click "Next" Button. (3) Click "Install" Button. 25 Please click "Yes" button. 24 C.

User Manual
Page 14
Printer and driver work well. Please click "Continue Anyway" button. (7) If "Add new hardware wizard" for install "SAMSUNGSRP-770" driver pops up, click "Next" button. 27 (4) Select operating system type. (5) Select "USB" interface (port) type. (6) Please turn-off printer and turn-on printer. 26 * If you can see this dialog, don't worry comment in dialog.
Printer and driver work well. Please click "Continue Anyway" button. (7) If "Add new hardware wizard" for install "SAMSUNGSRP-770" driver pops up, click "Next" button. 27 (4) Select operating system type. (5) Select "USB" interface (port) type. (6) Please turn-off printer and turn-on printer. 26 * If you can see this dialog, don't worry comment in dialog.

User Manual
Page 15
Please click "Continue Anyway" button. 28 29 (8) Please click "Next" button until you can see "Finish" button. (9) Please click "Finish" button. 12.3 Uninstall Windows Driver (1) Click on the Start button, and then click on Settings > Control Panel. (2) Double click "Add/Remove Programs" icon. (3) Select "SAMSUNG SRP-770 LABEL Windows Driver 3.X.X". (4) Click "Change/Remove" button. *If you can see this dialog, don't worry comment in dialog. Printer and driver work well.
Please click "Continue Anyway" button. 28 29 (8) Please click "Next" button until you can see "Finish" button. (9) Please click "Finish" button. 12.3 Uninstall Windows Driver (1) Click on the Start button, and then click on Settings > Control Panel. (2) Double click "Add/Remove Programs" icon. (3) Select "SAMSUNG SRP-770 LABEL Windows Driver 3.X.X". (4) Click "Change/Remove" button. *If you can see this dialog, don't worry comment in dialog. Printer and driver work well.

User Manual
Page 16
(5) Select printer to remove. 12.4 Printer Settings (6) Click "Uninstall" Button. (7) Please reboot computer. 30 1) Measurement: Select measurement of "Top Margin". (Inch or millimeters) 2) Top Margin: top margin value of paper 3) Density: Select density of printing quality. (0 ~ 20) 4) Media Type: Select paper media type. ("Black Mark" is under development) 5) Orientation: Set printing direction. 6) Speed: Set printing speed. (2.5 ~ 3.0) 31
(5) Select printer to remove. 12.4 Printer Settings (6) Click "Uninstall" Button. (7) Please reboot computer. 30 1) Measurement: Select measurement of "Top Margin". (Inch or millimeters) 2) Top Margin: top margin value of paper 3) Density: Select density of printing quality. (0 ~ 20) 4) Media Type: Select paper media type. ("Black Mark" is under development) 5) Orientation: Set printing direction. 6) Speed: Set printing speed. (2.5 ~ 3.0) 31


