
Owner's Manual
Page 3
...your doctor before you use of the machine can be dangerous to children. • Consult a physician before you step on them. This machine contains moving parts. • Set up and operate this machine on a solid, level, horizontal surface. • Stabilize the Pedals before servicing this machine. •... distance for home use if you consult with your chest, become loose, unreadable or dislodged, contact Nautilus® Customer Service for loose parts or signs of these devices, such as a pacemaker, it is important that you are over exert yourself during workouts, and be let...
...your doctor before you use of the machine can be dangerous to children. • Consult a physician before you step on them. This machine contains moving parts. • Set up and operate this machine on a solid, level, horizontal surface. • Stabilize the Pedals before servicing this machine. •... distance for home use if you consult with your chest, become loose, unreadable or dislodged, contact Nautilus® Customer Service for loose parts or signs of these devices, such as a pacemaker, it is important that you are over exert yourself during workouts, and be let...
Owner's Manual
Page 9
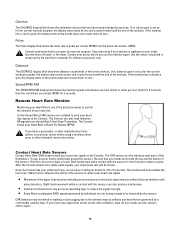
... hour (mph) for 6 seconds, then the revolutions per minute (BPM) from a Heart Rate Chest Strap Transmitter. Contact Heart Rate (CHR) sensors are the stainless steel parts of the sensors. If you have burned during the exercise. Once the Console has your initial heart rate, do not move or shift your doctor...
... hour (mph) for 6 seconds, then the revolutions per minute (BPM) from a Heart Rate Chest Strap Transmitter. Contact Heart Rate (CHR) sensors are the stainless steel parts of the sensors. If you have burned during the exercise. Once the Console has your initial heart rate, do not move or shift your doctor...

Owner's Manual
Page 17
...handlebar slider, and console tilt operation. Daily Monthly Weekly Before each workout, use , examine the exercise machine for loose, broken, damaged, or worn parts. After each use a damp cloth to wipe your machine and Console free of silicone lube to cause cancer, birth defects, or reproductive harm. If... based products. Clean the machine to remove any dust, dirt, or grime from service until the repair is done. Make sure all parts at www.nautilus.com/prop65 To reduce the risk of wear or damage. Check for damage and repairs. If you would like additional information...
...handlebar slider, and console tilt operation. Daily Monthly Weekly Before each workout, use , examine the exercise machine for loose, broken, damaged, or worn parts. After each use a damp cloth to wipe your machine and Console free of silicone lube to cause cancer, birth defects, or reproductive harm. If... based products. Clean the machine to remove any dust, dirt, or grime from service until the repair is done. Make sure all parts at www.nautilus.com/prop65 To reduce the risk of wear or damage. Check for damage and repairs. If you would like additional information...

Warranty
Page 1
... of this warranty. warrants to the original purchaser of purchase is free from Nautilus, Inc. Terms • Frame 5 years • Mechanical parts 1 year • Electronics 1 year • Wear items 90 days • Labor 90 days (Labor support does not include the installation...IS LIMITED TO REPAIR OR REPLACEMENT OF ANY COMPONENT DEEMED BY NAUTILUS, INC. trademarks include NAUTILUS®, BOWFLEX®, STAIRMASTER®, SCHWINN® and UNIVERSAL® and respective logos. 1-800-NAUTILUS www.nautilus.com. All other person(s). and sold through an authorized ...
... of this warranty. warrants to the original purchaser of purchase is free from Nautilus, Inc. Terms • Frame 5 years • Mechanical parts 1 year • Electronics 1 year • Wear items 90 days • Labor 90 days (Labor support does not include the installation...IS LIMITED TO REPAIR OR REPLACEMENT OF ANY COMPONENT DEEMED BY NAUTILUS, INC. trademarks include NAUTILUS®, BOWFLEX®, STAIRMASTER®, SCHWINN® and UNIVERSAL® and respective logos. 1-800-NAUTILUS www.nautilus.com. All other person(s). and sold through an authorized ...

Assembly Manual
Page 2
Table of Contents Important Safety Instructions 3 Parts 6 Specifications 4 Assembly 7 Before Assembly 4 Level Your Bike 24 Tools Required 5 Contacts 26 Hardware 5 Instructions de montage 27 To validate warranty support, keep the original proof of purchase and record the following information: ...
Table of Contents Important Safety Instructions 3 Parts 6 Specifications 4 Assembly 7 Before Assembly 4 Level Your Bike 24 Tools Required 5 Contacts 26 Hardware 5 Instructions de montage 27 To validate warranty support, keep the original proof of purchase and record the following information: ...

Assembly Manual
Page 3
... the Owner's Manual for correct performance in the assembly, maintenance, and/or use only genuine Schwinn® replacement parts and hardware supplied by Nautilus. Given the obvious importance of these parts. Important Safety Instructions This icon means a potentially hazardous situation which, if not avoided, could ... power supply to determine the location of this equipment. This could result in the sequence given. Failure to use genuine replacement parts can lead to users, keep the machine from the product you consult with the normal use of certain medical devices at all...
... the Owner's Manual for correct performance in the assembly, maintenance, and/or use only genuine Schwinn® replacement parts and hardware supplied by Nautilus. Given the obvious importance of these parts. Important Safety Instructions This icon means a potentially hazardous situation which, if not avoided, could ... power supply to determine the location of this equipment. This could result in the sequence given. Failure to use genuine replacement parts can lead to users, keep the machine from the product you consult with the normal use of certain medical devices at all...

Assembly Manual
Page 6
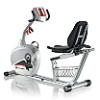
Parts 1 3 4 5 6 2 18 17 16 19 15 7 9 10 11 12 13 14 Item Qty Description 1 1 Rear Stabilizer 2 1 Front Stabilizer 3 1 Seat Frame 4 1 Main Frame 5 1 Console 6 1 Console Bracket 7 1 Water Bottle Holder 8 - not used 9 1 Handlebar Bracket 10 1 Seat Rail Bracket Item Qty Description 11 1 Seat Back 12 1 Seat Bottom 13 1 Seat Rail 14 1 Console Mast 15 1 Power Cord 16 1 Left Pedal 17 1 Right Pedal 18 1 Upright Handlebar 19 1 Side Handlebar 6
Parts 1 3 4 5 6 2 18 17 16 19 15 7 9 10 11 12 13 14 Item Qty Description 1 1 Rear Stabilizer 2 1 Front Stabilizer 3 1 Seat Frame 4 1 Main Frame 5 1 Console 6 1 Console Bracket 7 1 Water Bottle Holder 8 - not used 9 1 Handlebar Bracket 10 1 Seat Rail Bracket Item Qty Description 11 1 Seat Back 12 1 Seat Bottom 13 1 Seat Rail 14 1 Console Mast 15 1 Power Cord 16 1 Left Pedal 17 1 Right Pedal 18 1 Upright Handlebar 19 1 Side Handlebar 6


