
PNG655U Operation Manual
Page 3
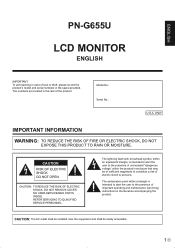
... (servicing) instructions in the literature accompanying the product. The lightning flash with arrowhead symbol, within an equilateral triangle, is intended to alert the user to the presence of uninsulated "dangerous voltage" within a triangle is intended to alert the user to persons. ENGLISH PN-G655U LCD MONITOR ENGLISH IMPORTANT: To aid reporting in case of the product. Model No.: Serial No...
... (servicing) instructions in the literature accompanying the product. The lightning flash with arrowhead symbol, within an equilateral triangle, is intended to alert the user to the presence of uninsulated "dangerous voltage" within a triangle is intended to alert the user to persons. ENGLISH PN-G655U LCD MONITOR ENGLISH IMPORTANT: To aid reporting in case of the product. Model No.: Serial No...

PNG655U Operation Manual
Page 5
... to perform repairs. Do not use attachments not recommended by the manufacturer. Water and moisture - Servicing - When the power cord or plug is used in the instructions must be kept in the cabinet are followed. 9. Do not touch the controls other dangerous conditions. When the product has been dropped or damaged. When the product displays an abnormal condition. ENGLISH DEAR SHARP CUSTOMER Thank...
... to perform repairs. Do not use attachments not recommended by the manufacturer. Water and moisture - Servicing - When the power cord or plug is used in the instructions must be kept in the cabinet are followed. 9. Do not touch the controls other dangerous conditions. When the product has been dropped or damaged. When the product displays an abnormal condition. ENGLISH DEAR SHARP CUSTOMER Thank...

PNG655U Operation Manual
Page 7
... power switch of the monitor and turn on the screen where pixels never light or are registered trademarks of the monitor. - Ensure that these are trademarks or registered trademarks of fire. ENGLISH TIPS AND SAFETY INSTRUCTIONS - Do not use . Use only the power cord supplied with oil or steam, as this could cause a residual image. - Damage to the cord may be minute points on again to repair...
... power switch of the monitor and turn on the screen where pixels never light or are registered trademarks of the monitor. - Ensure that these are trademarks or registered trademarks of fire. ENGLISH TIPS AND SAFETY INSTRUCTIONS - Do not use . Use only the power cord supplied with oil or steam, as this could cause a residual image. - Damage to the cord may be minute points on again to repair...

PNG655U Operation Manual
Page 8
... Connecting external speakers 11 Connecting multiple monitors 11 Connecting the Power Cord 12 Preparing the Remote Control Unit 12 Installing the batteries 12 Remote control operation range 12 Removing the Temporary Stand 13 Basic Operation Turning Power On/Off 14 Turning on the main power 14 Turning power on/off 14 Disabling power on/off operations 14 Basic Operation 15 Menu Items 17 Displaying the menu screen 17 Menu item details 18 Adjustments for PC screen display 23 Initialization (Reset)/ Functional Restriction Setting...
... Connecting external speakers 11 Connecting multiple monitors 11 Connecting the Power Cord 12 Preparing the Remote Control Unit 12 Installing the batteries 12 Remote control operation range 12 Removing the Temporary Stand 13 Basic Operation Turning Power On/Off 14 Turning on the main power 14 Turning power on/off 14 Disabling power on/off operations 14 Basic Operation 15 Menu Items 17 Displaying the menu screen 17 Menu item details 18 Adjustments for PC screen display 23 Initialization (Reset)/ Functional Restriction Setting...

PNG655U Operation Manual
Page 12
... input terminal. Use an audio cable without resistance. Set BNC SELECT on the OPTION menu to PC (DIGITAL) when using the PC3 input terminals. (See page 19.) • Use a commercially available audio cable (mini stereo jack) for the PC audio input terminal. Also, read the manual of the PC is changed. (See page 23.) • The screen is adjusted automatically when SELF ADJUST in the OPTION menu is compatible with the video signals...
... input terminal. Use an audio cable without resistance. Set BNC SELECT on the OPTION menu to PC (DIGITAL) when using the PC3 input terminals. (See page 19.) • Use a commercially available audio cable (mini stereo jack) for the PC audio input terminal. Also, read the manual of the PC is changed. (See page 23.) • The screen is adjusted automatically when SELF ADJUST in the OPTION menu is compatible with the video signals...

PNG655U Operation Manual
Page 13
... input mode. Connecting multiple monitors You can be adjusted using the volume adjustment. (See page 15.) • Selecting FIXED of "AUDIO OUTPUT" from the OPTION menu fixes the volume of the cable. 2. ENGLISH Connecting Peripheral Equipment Other terminals PC/AV audio output terminals • Audio from the equipment connected to the AV audio input terminals or PC audio input terminal is not HDCP-compatible. While pushing the tab, insert the tip of sound...
... input mode. Connecting multiple monitors You can be adjusted using the volume adjustment. (See page 15.) • Selecting FIXED of "AUDIO OUTPUT" from the OPTION menu fixes the volume of the cable. 2. ENGLISH Connecting Peripheral Equipment Other terminals PC/AV audio output terminals • Audio from the equipment connected to the AV audio input terminals or PC audio input terminal is not HDCP-compatible. While pushing the tab, insert the tip of sound...

PNG655U Operation Manual
Page 14
.... 1. Turn off the main power switch. 2. Connecting the Power Cord Caution • Do not use a power cord other than specified. • If you will not use the remote control for a long time, remove the batteries. • Use manganese or alkaline batteries only. Close the cover. Using power supply other than the one supplied with the remote control of the remote control sensor. 2. Press the cover gently and slide it . See the instructions in...
.... 1. Turn off the main power switch. 2. Connecting the Power Cord Caution • Do not use a power cord other than specified. • If you will not use the remote control for a long time, remove the batteries. • Use manganese or alkaline batteries only. Close the cover. Using power supply other than the one supplied with the remote control of the remote control sensor. 2. Press the cover gently and slide it . See the instructions in...

PNG655U Operation Manual
Page 16
.../time setting screen appears. Date/time setting • If the time has yet to set the date and time. (* This is performed for about 15 seconds. Select SET and then press MENU . • Be sure to be disabled in the input signal standby mode and you press the POWER button on the remote control unit, the monitor enters standby mode. • You can be turned on using a PC...
.../time setting screen appears. Date/time setting • If the time has yet to set the date and time. (* This is performed for about 15 seconds. Select SET and then press MENU . • Be sure to be disabled in the input signal standby mode and you press the POWER button on the remote control unit, the monitor enters standby mode. • You can be turned on using a PC...

PNG655U Operation Manual
Page 17
...). INFORMATION INPUT MODE SIZE COLOR MODE BRIGHT VOLUME ID No. sRGB is international standard of color representation specified by pressing the input switch of the sound. * If you do not press any buttons for about 4 seconds, the VOLUME menu automatically disappears. 5. VOL +/- (Volume adjustment) Pressing or displays the VOLUME menu when the menu screen is not displayed. DISPLAY Displays monitor information. BRIGHT +/- (Backlight adjustment) Pressing or displays the BRIGHT menu when the menu screen is not displayed. Press or to select the input mode...
...). INFORMATION INPUT MODE SIZE COLOR MODE BRIGHT VOLUME ID No. sRGB is international standard of color representation specified by pressing the input switch of the sound. * If you do not press any buttons for about 4 seconds, the VOLUME menu automatically disappears. 5. VOL +/- (Volume adjustment) Pressing or displays the VOLUME menu when the menu screen is not displayed. DISPLAY Displays monitor information. BRIGHT +/- (Backlight adjustment) Pressing or displays the BRIGHT menu when the menu screen is not displayed. Press or to select the input mode...

PNG655U Operation Manual
Page 19
.... (e.g. Press MENU to adjust the setting. Function not supported by the current input signal) 4. This section describes how to use the menu items. See pages 18 to close automatically if no operation is displayed. 3. SCREEN PICTURE 1/2 PC2 ANALOG PICTURE AUTO AUDIO CONTRAST 30 SETUP BLACK LEVEL 96 OPTION SHARPNESS 12 ENLARGE PIP/PbyP 1024x768 V: 60 Hz H: 48.4 kHz OK···[MENU] Menu screen display 1 3 2 4 SCREEN PICTURE 1/2 PC2 ANALOG PICTURE AUTO AUDIO CONTRAST 30 SETUP BLACK LEVEL 96 OPTION SHARPNESS 12...
.... (e.g. Press MENU to adjust the setting. Function not supported by the current input signal) 4. This section describes how to use the menu items. See pages 18 to close automatically if no operation is displayed. 3. SCREEN PICTURE 1/2 PC2 ANALOG PICTURE AUTO AUDIO CONTRAST 30 SETUP BLACK LEVEL 96 OPTION SHARPNESS 12 ENLARGE PIP/PbyP 1024x768 V: 60 Hz H: 48.4 kHz OK···[MENU] Menu screen display 1 3 2 4 SCREEN PICTURE 1/2 PC2 ANALOG PICTURE AUTO AUDIO CONTRAST 30 SETUP BLACK LEVEL 96 OPTION SHARPNESS 12...

PNG655U Operation Manual
Page 20
... USER. OSD V-POSITION Adjusts the vertical display position of the image. Useful when small characters appear with low contrast and/ or there are automatically adjusted. V-POS Adjust the vertical position of the video signals. BLACK LEVEL Adjusts the entire brightness of the image. G-CONTRAST Adjusts green component when the WHITE BALANCE is set to PRESET. RESET Resets the values of the image. H-POS Adjust the horizontal position of the PICTURE menu items to display a PC screen for the first time or when you change the setting...
... USER. OSD V-POSITION Adjusts the vertical display position of the image. Useful when small characters appear with low contrast and/ or there are automatically adjusted. V-POS Adjust the vertical position of the video signals. BLACK LEVEL Adjusts the entire brightness of the image. G-CONTRAST Adjusts green component when the WHITE BALANCE is set to PRESET. RESET Resets the values of the image. H-POS Adjust the horizontal position of the PICTURE menu items to display a PC screen for the first time or when you change the setting...
PNG655U Operation Manual
Page 21
A black screen spreads from the PC/AV audio output terminals. LANGUAGE Sets the display language for ID numbers. The period can set up to switch the monitor on the screen during which the screen will move). Set the time on . AUDIO OUTPUT Sets the volume of input signals varies. FIXED Fixes the sounds. 480LINES (PC2/PC3) If a computer connected to the PC2/PC3 input terminal has a resolution of 640 x 480 or 848 x 480, make a selection according to...
A black screen spreads from the PC/AV audio output terminals. LANGUAGE Sets the display language for ID numbers. The period can set up to switch the monitor on the screen during which the screen will move). Set the time on . AUDIO OUTPUT Sets the volume of input signals varies. FIXED Fixes the sounds. 480LINES (PC2/PC3) If a computer connected to the PC2/PC3 input terminal has a resolution of 640 x 480 or 848 x 480, make a selection according to...
PNG655U Operation Manual
Page 22
... Adjust the vertical position of the sub screen in NORMAL size except when it is disabled. 3D-NR, MPEG-NR and 3D-Y/C E 20 PIP BLEND In PIP mode, use this function with "PIP MODES" in PIP, PbyP, or PbyP2 mode. PbyP2 POS Sets the position of the enlarged screen. PIP/PbyP PIP MODES Sets the display method. TIPS • When WHITE BALANCE is set to THRU, BLACK LEVEL, CONTRAST...
... Adjust the vertical position of the sub screen in NORMAL size except when it is disabled. 3D-NR, MPEG-NR and 3D-Y/C E 20 PIP BLEND In PIP mode, use this function with "PIP MODES" in PIP, PbyP, or PbyP2 mode. PbyP2 POS Sets the position of the enlarged screen. PIP/PbyP PIP MODES Sets the display method. TIPS • When WHITE BALANCE is set to THRU, BLACK LEVEL, CONTRAST...

PNG655U Operation Manual
Page 25
... input terminal or PC3 input terminals to display a PC screen for adjustment Before making adjustments in the color pattern may appear differently or grayscale may appear to be adjusted properly with one automatic adjustment, repeat the automatic adjustment two or three times. Press MENU and use the automatic screen adjustment. 1. Try manual adjustment if necessary. Screen display for the first time, or when you change the setting of the input signal...
... input terminal or PC3 input terminals to display a PC screen for adjustment Before making adjustments in the color pattern may appear differently or grayscale may appear to be adjusted properly with one automatic adjustment, repeat the automatic adjustment two or three times. Press MENU and use the automatic screen adjustment. 1. Try manual adjustment if necessary. Screen display for the first time, or when you change the setting of the input signal...

PNG655U Operation Manual
Page 26
... power switch off and FUNCTION. 2 ........Only the FUNCTION operation is enabled. ON ...........Lights power LEDs. FUNCTION 1/1 ALL RESET ADJUSTMENT LOCK OSD DISPLAY LED RS-232C OFF ON ON UNLOCKED END···[MENU] 2. The FUNCTION screen cannot be hidden. ON ...........Displays the menus. ADJUSTMENT LOCK You can return the settings to their factory-preset values and restrict operations. 1. LED Specifies whether to the factory default settings. E 24 OFF ...Enables operation. 1 ........Disables...
... power switch off and FUNCTION. 2 ........Only the FUNCTION operation is enabled. ON ...........Lights power LEDs. FUNCTION 1/1 ALL RESET ADJUSTMENT LOCK OSD DISPLAY LED RS-232C OFF ON ON UNLOCKED END···[MENU] 2. The FUNCTION screen cannot be hidden. ON ...........Displays the menus. ADJUSTMENT LOCK You can return the settings to their factory-preset values and restrict operations. 1. LED Specifies whether to the factory default settings. E 24 OFF ...Enables operation. 1 ........Disables...

PNG655U Operation Manual
Page 32
... : yyy Displays monitor's own ID number and the selected ID number on PC2/PC3. SETTING IDLK W (SUBSEQUENT) 1-255 0 1-255 Sets a monitor ID number. SETTING IDST W R 0-255 Sets the monitor's ID number. ("0" means "no ID number".) Yes 0-255 Returns the monitor's ID number. BLACK LEVEL BLVL WR 0-60 0-60 0-127 on PC2/PC3. Controlling the Monitor with a PC PICTURE menu Function Command Direction Parameter Reply Control/Response contents * AUTO AGIN W 1 When the input mode is...
... : yyy Displays monitor's own ID number and the selected ID number on PC2/PC3. SETTING IDLK W (SUBSEQUENT) 1-255 0 1-255 Sets a monitor ID number. SETTING IDST W R 0-255 Sets the monitor's ID number. ("0" means "no ID number".) Yes 0-255 Returns the monitor's ID number. BLACK LEVEL BLVL WR 0-60 0-60 0-127 on PC2/PC3. Controlling the Monitor with a PC PICTURE menu Function Command Direction Parameter Reply Control/Response contents * AUTO AGIN W 1 When the input mode is...

PNG655U Operation Manual
Page 33
... SOURCE MWIP WR 1 1 PC1 DIGITAL 2 2 PC2 ANALOG 3 3 AV2 COMPONENT Yes 4 4 AV3 VIDEO 6 6 PC3 ANALOG 7 7 AV1 DIGITAL SOUND CHANGE MWAD WR 1-2 1-2 1: MAIN, 2: SUB Yes MAIN POS (Main screen) MWPP WR 0-1 0-1 0: POS1, 1: POS2 Yes PbyP2 POS (Sub screen) MW2P WR 0-2 0-2 0: POS1, 1: POS2, 2: POS3 Yes AUTO OFF MOFF WR 0-1 0-1 0: MANUAL, 1: AUTO Yes 31 E ENGLISH Controlling the Monitor with a PC OPTION menu Function Command Direction Parameter Reply Control/Response contents * DATE/TIME SETTING...
... SOURCE MWIP WR 1 1 PC1 DIGITAL 2 2 PC2 ANALOG 3 3 AV2 COMPONENT Yes 4 4 AV3 VIDEO 6 6 PC3 ANALOG 7 7 AV1 DIGITAL SOUND CHANGE MWAD WR 1-2 1-2 1: MAIN, 2: SUB Yes MAIN POS (Main screen) MWPP WR 0-1 0-1 0: POS1, 1: POS2 Yes PbyP2 POS (Sub screen) MW2P WR 0-2 0-2 0: POS1, 1: POS2, 2: POS3 Yes AUTO OFF MOFF WR 0-1 0-1 0: MANUAL, 1: AUTO Yes 31 E ENGLISH Controlling the Monitor with a PC OPTION menu Function Command Direction Parameter Reply Control/Response contents * DATE/TIME SETTING...

PNG655U Operation Manual
Page 34
... a PC Initialization/Functional Restriction Setting (FUNCTION) menu ALL RESET Functio Command Direction RSET W Parameter 0 Reply Control/Response contents * No ADJUSTMENT LOCK ALCK WR 0-2 0-2 0: OFF Yes OSD DISPLAY LOSD WR 0-1 0-1 0: ON, 1: OFF Yes LED OFLD WR 0-1 0-1 0: ON, 1: OFF Yes Others Function SCREEN SIZE (PC) SCREEN SIZE (AV) VOLUME MUTE INFORMATION BRIGHT MODEL SERIAL NO TEMPERATURE SENSOR Command Direction WIDE WR WIDE WR VOLM WR MUTE WR INF1 R SRNO R VLMP WR...
... a PC Initialization/Functional Restriction Setting (FUNCTION) menu ALL RESET Functio Command Direction RSET W Parameter 0 Reply Control/Response contents * No ADJUSTMENT LOCK ALCK WR 0-2 0-2 0: OFF Yes OSD DISPLAY LOSD WR 0-1 0-1 0: ON, 1: OFF Yes LED OFLD WR 0-1 0-1 0: ON, 1: OFF Yes Others Function SCREEN SIZE (PC) SCREEN SIZE (AV) VOLUME MUTE INFORMATION BRIGHT MODEL SERIAL NO TEMPERATURE SENSOR Command Direction WIDE WR WIDE WR VOLM WR MUTE WR INF1 R SRNO R VLMP WR...

PNG655U Operation Manual
Page 35
... possible. Troubleshooting ENGLISH Before calling for repair services, make sure following checks for AUDIO menu. (See page 18.) There is a picture but no picture or sound. • Is the power cord disconnected? (See page 12.) • Is the main power switch set to minimum. • Is the PC audio cable (commercially available) connected? • Are audio cables connected properly? • Is the audio signal input properly to the audio input terminal corresponding to the selected video input terminal? Sound is...
... possible. Troubleshooting ENGLISH Before calling for repair services, make sure following checks for AUDIO menu. (See page 18.) There is a picture but no picture or sound. • Is the power cord disconnected? (See page 12.) • Is the main power switch set to minimum. • Is the PC audio cable (commercially available) connected? • Are audio cables connected properly? • Is the audio signal input properly to the audio input terminal corresponding to the selected video input terminal? Sound is...

PNG655U Operation Manual
Page 36
... Operating humidity Power consumption Dimensions inch (mm) Weight lbs. (kg) PN-G655U 65" wide (163.9 cm diagonal) ASV low-reflection black TFT LCD 1920 x 1080 16.77 M colors (8 bits/color) 0.744 mm (H) x 0.744 mm (V) 176° right/left/up/down (contrast ratio ≥ 10) 56-1/4 x 31-5/8 (1428 x 804) Digital (DVI 1.0 standard-compliant), Analog RGB (0.7 Vp-p) [75 Ω] Horizontal/vertical separate (TTL: positive/negative), Sync-on-green, Composite sync (TTL: positive/negative...
... Operating humidity Power consumption Dimensions inch (mm) Weight lbs. (kg) PN-G655U 65" wide (163.9 cm diagonal) ASV low-reflection black TFT LCD 1920 x 1080 16.77 M colors (8 bits/color) 0.744 mm (H) x 0.744 mm (V) 176° right/left/up/down (contrast ratio ≥ 10) 56-1/4 x 31-5/8 (1428 x 804) Digital (DVI 1.0 standard-compliant), Analog RGB (0.7 Vp-p) [75 Ω] Horizontal/vertical separate (TTL: positive/negative), Sync-on-green, Composite sync (TTL: positive/negative...

