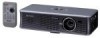
XR-1S , XR-1X Operation Manual
Page 6
... In a domestic environment this projector continues to . LAMP REPLACEMENT WARNING BEFORE REMOVING THE SCREW, DISCONNECT POWER CORD. HOT SURFACE INSIDE. TURN OFF LAMP BEFORE SERVICING. ETEINDRE LA LAMPE AVANT DE PROCEDER A L'ENTRETIEN. LAMPE A HAUTE PRESSION : RISQUE D'EXPLOSION. This SHARP projector uses a DMD panel. This ...very sophisticated panel contains 786,432 (XR1X) / 480,000 (XR-1S) pixels micromirrors. As with any high technology electronic equipment such as large screen TVs, video systems and video cameras, there are located in this product may cause radio ...
... In a domestic environment this projector continues to . LAMP REPLACEMENT WARNING BEFORE REMOVING THE SCREW, DISCONNECT POWER CORD. HOT SURFACE INSIDE. TURN OFF LAMP BEFORE SERVICING. ETEINDRE LA LAMPE AVANT DE PROCEDER A L'ENTRETIEN. LAMPE A HAUTE PRESSION : RISQUE D'EXPLOSION. This SHARP projector uses a DMD panel. This ...very sophisticated panel contains 786,432 (XR1X) / 480,000 (XR-1S) pixels micromirrors. As with any high technology electronic equipment such as large screen TVs, video systems and video cameras, there are located in this product may cause radio ...

XR-1S , XR-1X Operation Manual
Page 8
... Projection Distance (XR-1X 19 Screen Size and Projection Distance (XR-1S 20 Connections Connections 21 Samples of Cables for Connection .... 22 Connecting to a Computer 23 Connecting to Video Equipment ......... 24 Connecting the Power Cord 25 Using Basic Operation Turning the Projector On/Off 26 Turning the Projector on 26 Turning the Power off (Putting the Projector into Standby Mode...
... Projection Distance (XR-1X 19 Screen Size and Projection Distance (XR-1S 20 Connections Connections 21 Samples of Cables for Connection .... 22 Connecting to a Computer 23 Connecting to Video Equipment ......... 24 Connecting the Power Cord 25 Using Basic Operation Turning the Projector On/Off 26 Turning the Projector on 26 Turning the Power off (Putting the Projector into Standby Mode...

XR-1S , XR-1X Operation Manual
Page 10
... cleaning. Attachments Do not use a mounting accessory recommended by the manufacturer. 9. in installation such as they exit from battery power, or other similar surface. Accessories Do not place this product, observe the following types of plugs. Transportation A product and ...The openings should be blocked by the product manufacturer as a bookcase or rack unless proper ventilation is operated. 2. Power-Cord Protection Power-supply cords should be walked on the marking label. Cleaning Unplug this product and save these instructions for ventilation to ensure reliable...
... cleaning. Attachments Do not use a mounting accessory recommended by the manufacturer. 9. in installation such as they exit from battery power, or other similar surface. Accessories Do not place this product, observe the following types of plugs. Transportation A product and ...The openings should be blocked by the product manufacturer as a bookcase or rack unless proper ventilation is operated. 2. Power-Cord Protection Power-supply cords should be walked on the marking label. Cleaning Unplug this product and save these instructions for ventilation to ensure reliable...

XR-1S , XR-1X Operation Manual
Page 11
...extensive work by the operating instructions, as radiators, heat registers, stoves, or other products (including amplifiers) that produce heat. • DLP\ (Digital Light Processing) and DMD\ (Digital Micromirror Device) are trademarks of Texas Instruments, Inc. • Microsoft and Windows are ...part. Heat This product should be sure the service technician has used replacement parts specified by following conditions: a. When the power-supply cord or plug is in performance, this product from heat sources such as an improper adjustment of other countries. • PC...
...extensive work by the operating instructions, as radiators, heat registers, stoves, or other products (including amplifiers) that produce heat. • DLP\ (Digital Light Processing) and DMD\ (Digital Micromirror Device) are trademarks of Texas Instruments, Inc. • Microsoft and Windows are ...part. Heat This product should be sure the service technician has used replacement parts specified by following conditions: a. When the power-supply cord or plug is in performance, this product from heat sources such as an improper adjustment of other countries. • PC...

XR-1S , XR-1X Operation Manual
Page 12
...temperature of the lens. This does not indicate a malfunction. (See pages 53 and 54.) Remove the projector power cord from humidity, dust and cigarette smoke. Unplug the power cord after putting into standby mode to decrease the internal temperature for a replacement. Internal cleaning should only be ...vent are not blocked, plug the power cord back in these environments, the vents and lens must be sure to secure it is from -4°F to 140°F (-20°C to occasionally rest your projector. Rest your nearest Sharp Authorized Projector Dealer or Service Center for a...
...temperature of the lens. This does not indicate a malfunction. (See pages 53 and 54.) Remove the projector power cord from humidity, dust and cigarette smoke. Unplug the power cord after putting into standby mode to decrease the internal temperature for a replacement. Internal cleaning should only be ...vent are not blocked, plug the power cord back in these environments, the vents and lens must be sure to secure it is from -4°F to 140°F (-20°C to occasionally rest your projector. Rest your nearest Sharp Authorized Projector Dealer or Service Center for a...
XR-1S , XR-1X Operation Manual
Page 13
... will illuminate in . Other connected equipment ■ When connecting a computer or other audio- Refer to use an appropriate power cord for the country you are using the projector overseas, be sure to "Maintenance Indicators" on the region or country you are in the lower left corner of the ... Info • The cooling fan regulates the internal temperature, and its performance is automatically controlled. Before moving the projector, be sure to unplug the power cord from the AC outlet and turning off the equipment to be connected. ■ Please read the operation manuals of...
... will illuminate in . Other connected equipment ■ When connecting a computer or other audio- Refer to use an appropriate power cord for the country you are using the projector overseas, be sure to "Maintenance Indicators" on the region or country you are in the lower left corner of the ... Info • The cooling fan regulates the internal temperature, and its performance is automatically controlled. Before moving the projector, be sure to unplug the power cord from the AC outlet and turning off the equipment to be connected. ■ Please read the operation manuals of...

XR-1S , XR-1X Operation Manual
Page 15
... (2) RGB/USB cable (6' (1.8 m)) QCNWGA047WJPZ Cable tieK2 UBNDTA015WJZZ • For the RGB/USB cable • For the power cord • Projector manual CD-ROM UDSKAA045WJN1 • Operation manual (this manual) (3) (4) For U.S., Canada, etc. (6' (1.8 m)) QACCDA029WJPZ For...projector. Power cord RGB/USB cable Info • Be sure the projector has cooled down sufficiently before placing it in your nearest Sharp Authorized Projector Dealer or Service Center. When transporting the projector, prepare a bag for storing and carrying the projector. • Shipping the projector...
... (2) RGB/USB cable (6' (1.8 m)) QCNWGA047WJPZ Cable tieK2 UBNDTA015WJZZ • For the RGB/USB cable • For the power cord • Projector manual CD-ROM UDSKAA045WJN1 • Operation manual (this manual) (3) (4) For U.S., Canada, etc. (6' (1.8 m)) QACCDA029WJPZ For...projector. Power cord RGB/USB cable Info • Be sure the projector has cooled down sufficiently before placing it in your nearest Sharp Authorized Projector Dealer or Service Center. When transporting the projector, prepare a bag for storing and carrying the projector. • Shipping the projector...

XR-1S , XR-1X Operation Manual
Page 17
USB terminal 33 Terminal connecting with the USB terminal on page 21. Refer to secure the projector. 13 INPUT 1 terminal 23 Terminal for use it to the information that came with a Kensington MicroSaver Security System. Introduction Numbers ...with the system for connecting video equipment. 23 AUDIO INPUT 24 terminal 25 AC socket 25 Connect the supplied Power cord. Intake vent 52 52 Exhaust vent Kensington Security Standard connector 28 Rear adjustment foot Remote control 15 sensor Using the Kensington Lock • This projector has a Kensington Security ...
USB terminal 33 Terminal connecting with the USB terminal on page 21. Refer to secure the projector. 13 INPUT 1 terminal 23 Terminal for use it to the information that came with a Kensington MicroSaver Security System. Introduction Numbers ...with the system for connecting video equipment. 23 AUDIO INPUT 24 terminal 25 AC socket 25 Connect the supplied Power cord. Intake vent 52 52 Exhaust vent Kensington Security Standard connector 28 Rear adjustment foot Remote control 15 sensor Using the Kensington Lock • This projector has a Kensington Security ...

XR-1S , XR-1X Operation Manual
Page 20
For details, see pages 24 and 25. _PP. 21-25 3. Press the ON/STANDBY button to the computer and plug the power cord into the AC socket of the projector and the computer is explained using one example. 5 INPUT button 4 ENTER button 3 ON/STANDBY 6 button 3 ON/STANDBY 6 button 4 HEIGHT... In this section, connection of the projector When connecting equipment other than the computer, see the page described below for each step. Place the projector facing a wall or a screen _P. 18 2. Connect the projector to turn the projector on On the projector On the remote control _P. 26 ...
For details, see pages 24 and 25. _PP. 21-25 3. Press the ON/STANDBY button to the computer and plug the power cord into the AC socket of the projector and the computer is explained using one example. 5 INPUT button 4 ENTER button 3 ON/STANDBY 6 button 3 ON/STANDBY 6 button 4 HEIGHT... In this section, connection of the projector When connecting equipment other than the computer, see the page described below for each step. Place the projector facing a wall or a screen _P. 18 2. Connect the projector to turn the projector on On the projector On the remote control _P. 26 ...

XR-1S , XR-1X Operation Manual
Page 21
... the remote On-screen display (RGB) projector control • When pressing the INPUT button on the projector, input mode switches in zoom out 5 After adjusting the focus, height and screen size, press TENTER to "On". n page 48) • Unplug the power cord from the AC outlet after the cooling ...fan stops. _P. 26 17 On the On-screen Display On the remote projector control • While the cooling fan is running, the Adjustment buttons blinks. (When "...
... the remote On-screen display (RGB) projector control • When pressing the INPUT button on the projector, input mode switches in zoom out 5 After adjusting the focus, height and screen size, press TENTER to "On". n page 48) • Unplug the power cord from the AC outlet after the cooling ...fan stops. _P. 26 17 On the On-screen Display On the remote projector control • While the cooling fan is running, the Adjustment buttons blinks. (When "...

XR-1S , XR-1X Operation Manual
Page 27
...the signal output setting of the computer is switched to the external output. Connecting to a Computer Before connecting, be sure to unplug the power cord of the projector from the AC outlet and turn off the devices to be half of when using the ø3.5 mm mono audio cable, the volume ... making all the connections are using, an image may cause some of the functions to the computer operation manual for use the remote control as Sharp service part QCNWGA038WJPZ) RGB/USB Cable * When using the ø3.5 mm stereo audio cable. To audio output terminal To RGB output terminal To...
...the signal output setting of the computer is switched to the external output. Connecting to a Computer Before connecting, be sure to unplug the power cord of the projector from the AC outlet and turn off the devices to be half of when using the ø3.5 mm mono audio cable, the volume ... making all the connections are using, an image may cause some of the functions to the computer operation manual for use the remote control as Sharp service part QCNWGA038WJPZ) RGB/USB Cable * When using the ø3.5 mm stereo audio cable. To audio output terminal To RGB output terminal To...

XR-1S , XR-1X Operation Manual
Page 29
When using a composite video cable To audio output terminal To video output terminal To INPUT3 terminal To AUDIO INPUT terminal ø3.5 mm minijack to RCA audio cable (commercially available) Composite video cable (commercially available) Note • ø3.5 mm minijack to RCA audio cable (commercially available) is required for audio input. AC socket Connections 25 Connecting the Power Cord Plug the supplied power cord into the AC socket on the side of the projector.
When using a composite video cable To audio output terminal To video output terminal To INPUT3 terminal To AUDIO INPUT terminal ø3.5 mm minijack to RCA audio cable (commercially available) Composite video cable (commercially available) Note • ø3.5 mm minijack to RCA audio cable (commercially available) is required for audio input. AC socket Connections 25 Connecting the Power Cord Plug the supplied power cord into the AC socket on the side of the projector.

XR-1S , XR-1X Operation Manual
Page 30
... language, change the language according to the procedure on the projector, a slight flickering of the lamp. n page 48) • When System Lock is stabilising the lamp output characteristics. n page 48) R Info • Do not unplug the power cord during projection or cooling fan operation. Enter the right keycode to... standby mode. Red: The lamp is shut down . If you use with the projector. (See pages 23, 24 and 25.) Also connect the power cord to the projector. (See page 25.) Press SON/STANDBY on the projector or AON/STANDBY on the remote control. • When the lamp is warming up...
... language, change the language according to the procedure on the projector, a slight flickering of the lamp. n page 48) • When System Lock is stabilising the lamp output characteristics. n page 48) R Info • Do not unplug the power cord during projection or cooling fan operation. Enter the right keycode to... standby mode. Red: The lamp is shut down . If you use with the projector. (See pages 23, 24 and 25.) Also connect the power cord to the projector. (See page 25.) Press SON/STANDBY on the projector or AON/STANDBY on the remote control. • When the lamp is warming up...

XR-1S , XR-1X Operation Manual
Page 56
... ■ Wipe off the coating film on the projector before cleaning the projector. ■ The cabinet as well as insecticides on the projector. Mild detergent Mild detergent diluted with water, wring the cloth well and then wipe the projector. The effects of some of the agents in the... agents, as they may discolor, warp or damage the coating on the projector. Strong cleaning detergents may wear off dirt gently with a soft flannel cloth. ■ When the dirt is made of plastic. Maintenance Cleaning the projector ■ Be sure to unplug the power cord before use. 52
... ■ Wipe off the coating film on the projector before cleaning the projector. ■ The cabinet as well as insecticides on the projector. Mild detergent Mild detergent diluted with water, wring the cloth well and then wipe the projector. The effects of some of the agents in the... agents, as they may discolor, warp or damage the coating on the projector. Strong cleaning detergents may wear off dirt gently with a soft flannel cloth. ■ When the dirt is made of plastic. Maintenance Cleaning the projector ■ Be sure to unplug the power cord before use. 52

XR-1S , XR-1X Operation Manual
Page 58
...turned off for a brief moment due to your nearest Sharp Authorized Projector Dealer or Service Center (see page 62) for repair. • Disconnect the power cord from the AC outlet, replace the power cord in the AC outlet and then turn the power on again. • If you want to clean the...• The lamp unit cover is running. Red on . (At least 10 minutes.) • If the power is controlled automatically. The sound of the projector constant and this case, unplug the power cord from the AC outlet, and then connect it again. • Carefully replace the lamp. (See page 56.)...
...turned off for a brief moment due to your nearest Sharp Authorized Projector Dealer or Service Center (see page 62) for repair. • Disconnect the power cord from the AC outlet, replace the power cord in the AC outlet and then turn the power on again. • If you want to clean the...• The lamp unit cover is running. Red on . (At least 10 minutes.) • If the power is controlled automatically. The sound of the projector constant and this case, unplug the power cord from the AC outlet, and then connect it again. • Carefully replace the lamp. (See page 56.)...

XR-1S , XR-1X Operation Manual
Page 60
... (2). Loosen the user service screw (1) that secures the lamp unit cover. Optional accessory Lamp unit AN-XR1LP ON/STANDBY button 2 Disconnect the power cord. • Unplug the power cord from the projector right after use. Be sure not to touch the glass surface of the lamp unit or the inside of the... projector. • To avoid injury to yourself and damage to remove the lamp unit using the handle. Regarding the Lamp (Continued) Removing and ...
... (2). Loosen the user service screw (1) that secures the lamp unit cover. Optional accessory Lamp unit AN-XR1LP ON/STANDBY button 2 Disconnect the power cord. • Unplug the power cord from the projector right after use. Be sure not to touch the glass surface of the lamp unit or the inside of the... projector. • To avoid injury to yourself and damage to remove the lamp unit using the handle. Regarding the Lamp (Continued) Removing and ...

XR-1S , XR-1X Operation Manual
Page 61
... the lamp unithorizontal and do not tilt it . Then tighten the user service screw (3) to become damaged or explode. 1 Connect the power cord. • Plug the power cord into the lamp unit compartment. User service screw (for lamp unit cover) Info • Make sure to close it . Handle 5 ...the arrow. Securing screws 6 Replace the lamp unit cover. • Align the tab on the projector. • "LAMP 0000H" is displayed, indicating that the lamp timer is connected to the projector. AC socket ON/STANDBY button ENTER button 2 Reset the lamp timer. • While simultaneously holding ...
... the lamp unithorizontal and do not tilt it . Then tighten the user service screw (3) to become damaged or explode. 1 Connect the power cord. • Plug the power cord into the lamp unit compartment. User service screw (for lamp unit cover) Info • Make sure to close it . Handle 5 ...the arrow. Securing screws 6 Replace the lamp unit cover. • Align the tab on the projector. • "LAMP 0000H" is displayed, indicating that the lamp timer is connected to the projector. AC socket ON/STANDBY button ENTER button 2 Reset the lamp timer. • While simultaneously holding ...

XR-1S , XR-1X Operation Manual
Page 64
... faded or poor. This will not affect operation the cabinet. or performance. Troubleshooting Problem Check • Projector power cord is not plugged into the wall outlet. • Power to the external connected devices is off. • The selected input mode is due to cabinet shrinkage...appears (or picture is dark). • Image adjustments are incorrectly set. (Video Input only) • Video input system is set to the projector. • Volume is incorrectly set when connecting notebook or projector does not computer. noise appears. • Adjust the focus. • ...
... faded or poor. This will not affect operation the cabinet. or performance. Troubleshooting Problem Check • Projector power cord is not plugged into the wall outlet. • Power to the external connected devices is off. • The selected input mode is due to cabinet shrinkage...appears (or picture is dark). • Image adjustments are incorrectly set. (Video Input only) • Video input system is set to the projector. • Volume is incorrectly set when connecting notebook or projector does not computer. noise appears. • Adjust the focus. • ...

XR-1S , XR-1X Operation Manual
Page 67
.... tion manual (TINS-B148WJN1) As a part of policy of continuous improvement, SHARP reserves the right to +60°C) Cabinet Plastic I/R carrier frequency 38 kHz ...Power cord for U.S., Canada etc. (6', 1.8 m), Power cord for Europe, except U.K. (6', 1.8 m), Power cord for U.K., Hong Kong and Singapore (6', 1.8 m), Power cord for Australia, New Zealand and Oceania (6', 1.8 m), RGB/USB cable (6', 1.8 m), Cable tie × 2, Soft case, Projector... Ω terminated HORIZONTAL SYNC. Specifications Product type Projector Model XR-1X / XR-1S Video system NTSC3.58/NTSC4.43/PAL/PAL-M/PAL-N/PAL...
.... tion manual (TINS-B148WJN1) As a part of policy of continuous improvement, SHARP reserves the right to +60°C) Cabinet Plastic I/R carrier frequency 38 kHz ...Power cord for U.S., Canada etc. (6', 1.8 m), Power cord for Europe, except U.K. (6', 1.8 m), Power cord for U.K., Hong Kong and Singapore (6', 1.8 m), Power cord for Australia, New Zealand and Oceania (6', 1.8 m), RGB/USB cable (6', 1.8 m), Cable tie × 2, Soft case, Projector... Ω terminated HORIZONTAL SYNC. Specifications Product type Projector Model XR-1X / XR-1S Video system NTSC3.58/NTSC4.43/PAL/PAL-M/PAL-N/PAL...
XR-1S , XR-1X Operation Manual
Page 69
...) ... 20 Screen Size and Projection Distance (XR-1X) ... 19 Setup Guide 27 Sharp 40 Soft case 11 sRGB 42 STRETCH 30, 31 Supplied accessories 11 System Lock 49 Temperature warning indicator 53 Tint 40 USB terminal 23 Video System 35 Volume buttons 29 V-Pos 35, 51 Zoom knob 28 65 Appendix Index AC socket... function 33 NORMAL 30, 31 ON/STANDBY button 26 Optional accessories 11 OSD Display 44 PDF 10 Phase 51 Picture Adjustment 40 Picture Mode 40 Power cord 25 PRJ -
...) ... 20 Screen Size and Projection Distance (XR-1X) ... 19 Setup Guide 27 Sharp 40 Soft case 11 sRGB 42 STRETCH 30, 31 Supplied accessories 11 System Lock 49 Temperature warning indicator 53 Tint 40 USB terminal 23 Video System 35 Volume buttons 29 V-Pos 35, 51 Zoom knob 28 65 Appendix Index AC socket... function 33 NORMAL 30, 31 ON/STANDBY button 26 Optional accessories 11 OSD Display 44 PDF 10 Phase 51 Picture Adjustment 40 Picture Mode 40 Power cord 25 PRJ -


