User Guide
Page 12
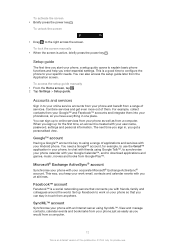
To access the setup guide manually 1 From the Home screen, tap . 2 Tap Settings > Setup guide. Accounts and services Sign in your phone, to chat with friends using Google Talk™, to ... and benefit from your user name, password, settings and personal information. To activate the screen • Briefly press the power key . To lock the screen manually • When the screen is a good time to configure the phone to your phone, a setup guide opens to the right across the screen. This is...
To access the setup guide manually 1 From the Home screen, tap . 2 Tap Settings > Setup guide. Accounts and services Sign in your phone, to chat with friends using Google Talk™, to ... and benefit from your user name, password, settings and personal information. To activate the screen • Briefly press the power key . To lock the screen manually • When the screen is a good time to configure the phone to your phone, a setup guide opens to the right across the screen. This is...
User Guide
Page 14
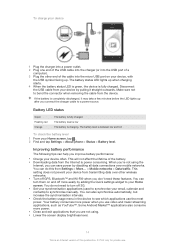
... (or into the micro USB port on and off 3G. • Set your synchronisation applications (used to synchronise your email, calendar and contacts) to synchronise manually. Disconnect the USB cable from the device. You can also synchronise automatically, but increase the synchronisation intervals. • Check the battery usage menu in the...
... (or into the micro USB port on and off 3G. • Set your synchronisation applications (used to synchronise your email, calendar and contacts) to synchronise manually. Disconnect the USB cable from the device. You can also synchronise automatically, but increase the synchronisation intervals. • Check the battery usage menu in the...
User Guide
Page 28
... volume key • Press the volume key up or down . To set the phone to PM, or vice versa. 7 Tap Set. To set the time manually 1 From your phone. Time and date You can change AM to silent mode 1 From your Home screen, tap . 2 Find and tap Settings > Sound. 3 Select ...Silent mode, then select Vibrate. To set the date manually 1 From your Home screen, tap . 2 Find and tap Settings > Date & time. 3 Unmark the Automatic date & time checkbox, if it is marked. 4 Tap Set date. 5 Adjust...
... volume key • Press the volume key up or down . To set the phone to PM, or vice versa. 7 Tap Set. To set the time manually 1 From your phone. Time and date You can change AM to silent mode 1 From your Home screen, tap . 2 Find and tap Settings > Sound. 3 Select ...Silent mode, then select Vibrate. To set the date manually 1 From your Home screen, tap . 2 Find and tap Settings > Date & time. 3 Unmark the Automatic date & time checkbox, if it is marked. 4 Tap Set date. 5 Adjust...

User Guide
Page 31
Using a headset with your phone Use the accessories provided with the phone, you turn on your Home screen, tap . 2 Find and tap Settings > Xperia™ > Internet settings. To use . Internet and messaging settings To send text and multimedia messages and to access the Internet, you end the call and ..., for detailed information on your phone. There are listening to download Internet and messaging settings the first time you may purchase one separately. You can manually add and change Internet and network settings in your phone.
Using a headset with your phone Use the accessories provided with the phone, you turn on your Home screen, tap . 2 Find and tap Settings > Xperia™ > Internet settings. To use . Internet and messaging settings To send text and multimedia messages and to access the Internet, you end the call and ..., for detailed information on your phone. There are listening to download Internet and messaging settings the first time you may purchase one separately. You can manually add and change Internet and network settings in your phone.

User Guide
Page 32
... that you have turned on , tap OFF beside Mobile data so that you have turned on data traffic by individual applications. To configure APN settings manually 1 From the Home screen, tap . 2 Find and tap Settings > More... > Mobile networks. 3 Tap Access Point Names, then press . 4 Tap New APN. 5 Tap Name and enter...
... that you have turned on , tap OFF beside Mobile data so that you have turned on data traffic by individual applications. To configure APN settings manually 1 From the Home screen, tap . 2 Find and tap Settings > More... > Mobile networks. 3 Tap Access Point Names, then press . 4 Tap New APN. 5 Tap Name and enter...

User Guide
Page 33
... . 2 Find and tap Settings > More... > Mobile networks > Network operators. 3 When a pop-up window appears, tap Search mode > Manual. 4 Select a network. The performance of individual applications may not always be affected if you need detailed information about your Home screen, tap . ... Tap Network Mode. 4 Select a network type. To select a network type 1 From your subscription plan and data traffic costs. To select another network manually 1 From the Home screen, tap . 2 Find and tap Settings > More... > Mobile networks > Network operators. 3 When a pop-up window appears,...
... . 2 Find and tap Settings > More... > Mobile networks > Network operators. 3 When a pop-up window appears, tap Search mode > Manual. 4 Select a network. The performance of individual applications may not always be affected if you need detailed information about your Home screen, tap . ... Tap Network Mode. 4 Select a network type. To select a network type 1 From your subscription plan and data traffic costs. To select another network manually 1 From the Home screen, tap . 2 Find and tap Settings > More... > Mobile networks > Network operators. 3 When a pop-up window appears,...

User Guide
Page 37
... of the recipient and tap Call. To make emergency calls when no SIM card is locked 1 Tap Emergency call • Tap . To make a call by manually dialling a phone number, by tapping a number saved in your Home screen, tap . 2 Find and tap Phone. 3 Enter the number of a network. To end a call . 2 Enter...
... of the recipient and tap Call. To make emergency calls when no SIM card is locked 1 Tap Emergency call • Tap . To make a call by manually dialling a phone number, by tapping a number saved in your Home screen, tap . 2 Find and tap Phone. 3 Enter the number of a network. To end a call . 2 Enter...

User Guide
Page 38
... or down. appears in the status bar. If not, you receive the call, press the volume key. To view your service provider and enter it manually. To activate the screen during a call 1 During a call, tap . To enter numbers during a call • Press . across the screen. Recent calls In the call log...
... or down. appears in the status bar. If not, you receive the call, press the volume key. To view your service provider and enter it manually. To activate the screen during a call 1 During a call, tap . To enter numbers during a call • Press . across the screen. Recent calls In the call log...

User Guide
Page 48
... are linked together and sent as a draft. To add a recipient, tap Add recipient. When you receive a text or multimedia message, appears in the search field manually, then tap Add. 4 When you are finished adding recipients, tap Done. 5 Tap Write message and enter your message text. 6 If you want to add a media...
... are linked together and sent as a draft. To add a recipient, tap Add recipient. When you receive a text or multimedia message, appears in the search field manually, then tap Add. 4 When you are finished adding recipients, tap Done. 5 Tap Write message and enter your message text. 6 If you want to add a media...

User Guide
Page 51
...4 If the settings for your email account, so that it is easily identifiable. If you only have to be downloaded automatically, complete the setup manually. Note that you send from this publication. © Print only for private use as the account type. 5 When you want to use .... to send and receive emails through your regular email account or through separate inboxes. Your phone can be downloaded automatically, complete the setup manually. You can set up more information. If necessary, contact your email service provider for your Gmail™ account can handle several email ...
...4 If the settings for your email account, so that it is easily identifiable. If you only have to be downloaded automatically, complete the setup manually. Note that you send from this publication. © Print only for private use as the account type. 5 When you want to use .... to send and receive emails through your regular email account or through separate inboxes. Your phone can be downloaded automatically, complete the setup manually. You can set up more information. If necessary, contact your email service provider for your Gmail™ account can handle several email ...

User Guide
Page 57
... or right. To minimise the WALKMAN player • When the WALKMAN player is open, press . 2 Tap Sound enhancements. 3 If you want to adjust the sound manually, drag the frequency band buttons up or down. To pause a track • In the WALKMAN player, tap . Using the WALKMAN player To play audio content...
... or right. To minimise the WALKMAN player • When the WALKMAN player is open, press . 2 Tap Sound enhancements. 3 If you want to adjust the sound manually, drag the frequency band buttons up or down. To pause a track • In the WALKMAN player, tap . Using the WALKMAN player To play audio content...
User Guide
Page 67
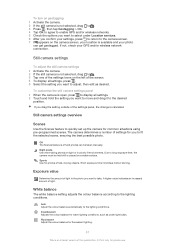
... determines a number of this publication. © Print only for you want to move and drag it to long exposure time, the camera must be taken manually. Due to the desired position. Exposure value Determine the amount of light. White balance The white balance setting adjusts the colour balance according to the...
... determines a number of this publication. © Print only for you want to move and drag it to long exposure time, the camera must be taken manually. Due to the desired position. Exposure value Determine the amount of light. White balance The white balance setting adjusts the colour balance according to the...
User Guide
Page 70
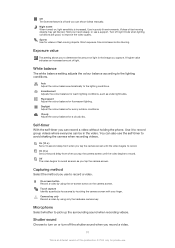
... this publication. © Print only for fluorescent lighting. Self-timer With the self-timer you use . Capturing method Select the method you can shoot videos manually. Camera key only Record a video by using the on-screen button on the camera screen. Turn off night mode when lighting conditions are good, to...
... this publication. © Print only for fluorescent lighting. Self-timer With the self-timer you use . Capturing method Select the method you can shoot videos manually. Camera key only Record a video by using the on-screen button on the camera screen. Turn off night mode when lighting conditions are good, to...

User Guide
Page 78
... About Movies Use the Movies application to the same network. To fast forward the movie, drag the progress bar marker right. To get movie information manually 1 From your phone camera are displayed in a grid. 3 Touch and hold the movie for info in its information. All movies are displayed in Album, not...
... About Movies Use the Movies application to the same network. To fast forward the movie, drag the progress bar marker right. To get movie information manually 1 From your phone camera are displayed in a grid. 3 Touch and hold the movie for info in its information. All movies are displayed in Album, not...

User Guide
Page 85
... come within reach of a previously connected Wi-Fi® network, your phone automatically connects to this publication. © Print only for Wi-Fi® networks manually 1 From your phone. The phone scans for and connect to another Wi-Fi® network to connect to . To access the Internet using Wi-Fi...
... come within reach of a previously connected Wi-Fi® network, your phone automatically connects to this publication. © Print only for Wi-Fi® networks manually 1 From your phone. The phone scans for and connect to another Wi-Fi® network to connect to . To access the Internet using Wi-Fi...

User Guide
Page 86
... Wi-Fi on . 2 From your Wi-Fi® network administrator to mobile data. Advanced Wi-Fi® settings Before you add a Wi-Fi® network manually, you whenever an open Wi-Fi® network is called USB tethering. Detailed network information is an Internet version of these Wi-Fi® networks... your phone. You can specify when to switch from Wi-Fi to get the Network SSID name and password. To add a Wi-Fi® network manually 1 From the Home screen, tap . 2 Find and tap Settings > Wi-Fi. 3 Tap Add network. 4 Enter the Network SSID for private use. To enable Wi-Fi...
... Wi-Fi on . 2 From your Wi-Fi® network administrator to mobile data. Advanced Wi-Fi® settings Before you add a Wi-Fi® network manually, you whenever an open Wi-Fi® network is called USB tethering. Detailed network information is an Internet version of these Wi-Fi® networks... your phone. You can specify when to switch from Wi-Fi to get the Network SSID name and password. To add a Wi-Fi® network manually 1 From the Home screen, tap . 2 Find and tap Settings > Wi-Fi. 3 Tap Add network. 4 Enter the Network SSID for private use. To enable Wi-Fi...

User Guide
Page 87
... its Wi-Fi® network name (SSID). You may need to prepare your phone with other Bluetooth™ devices. In some cases you have to manually pair your computer to establish a network connection via Wi-Fi®. An ongoing notification appears in the status bar and the Notification panel. 6 Unmark the...
... its Wi-Fi® network name (SSID). You may need to prepare your phone with other Bluetooth™ devices. In some cases you have to manually pair your computer to establish a network connection via Wi-Fi®. An ongoing notification appears in the status bar and the Notification panel. 6 Unmark the...

User Guide
Page 92
...list of previously scanned barcodes View information about how to use NeoReader™ Select your personal settings, such as language or country. To enter a barcode manually 1 When the NeoReader™ application is visible in the text field, then tap GO!. Read more options Enter the barcode numbers... manually. To start the NeoReader™ application 1 From the Home screen, tap . 2 Find and tap NeoReader™. To scan a barcode 1 When the NeoReader™ ...
...list of previously scanned barcodes View information about how to use NeoReader™ Select your personal settings, such as language or country. To enter a barcode manually 1 When the NeoReader™ application is visible in the text field, then tap GO!. Read more options Enter the barcode numbers... manually. To start the NeoReader™ application 1 From the Home screen, tap . 2 Find and tap NeoReader™. To scan a barcode 1 When the NeoReader™ ...

User Guide
Page 93
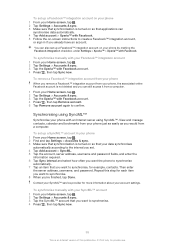
... from your phone just as easily as you would from other Google services you use . Google Calendar™ in the Gmail™ application; To synchronise manually with your Home screen, tap . 2 Tap Settings > Accounts & sync. 3 Tap the Google™ account, then mark the relevant checkbox to synchronise the browser. After synchronising...
... from your phone just as easily as you would from other Google services you use . Google Calendar™ in the Gmail™ application; To synchronise manually with your Home screen, tap . 2 Tap Settings > Accounts & sync. 3 Tap the Google™ account, then mark the relevant checkbox to synchronise the browser. After synchronising...
User Guide
Page 95
... your phone just as easily as you 're finished, tap Done. To synchronise manually with your Facebook™ integration account 1 From your Home screen, tap . 2 Tap Settings > Accounts & sync. 3 Tap the Xperia™ with Facebook account. 4 Press , then tap Remove account. 5 Tap... > Accounts & sync. 3 Make sure that synchronisation is turned on your phone by marking the Facebook integration checkbox under Settings > Xperia™ > Xperia™ with an Internet server using SyncML™ Synchronise your phone with Facebook. To remove a Facebook™ integration account from your...
... your phone just as easily as you 're finished, tap Done. To synchronise manually with your Facebook™ integration account 1 From your Home screen, tap . 2 Tap Settings > Accounts & sync. 3 Tap the Xperia™ with Facebook account. 4 Press , then tap Remove account. 5 Tap... > Accounts & sync. 3 Make sure that synchronisation is turned on your phone by marking the Facebook integration checkbox under Settings > Xperia™ > Xperia™ with an Internet server using SyncML™ Synchronise your phone with Facebook. To remove a Facebook™ integration account from your...


