User Guide
Page 9
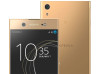
... gives you need to enter the details for security reasons using the Hangouts™ application. • Synchronize your device when you remember your SIM card PIN, tap . It is available on your browsing history and bookmarks using the Google Chrome™ web browser. • Identify yourself as the authorized user after a software repair using Xperia™ Companion. • Remotely find, lock, or clear a lost or stolen device using the my Xperia™...
... gives you need to enter the details for security reasons using the Hangouts™ application. • Synchronize your device when you remember your SIM card PIN, tap . It is available on your browsing history and bookmarks using the Google Chrome™ web browser. • Identify yourself as the authorized user after a software repair using Xperia™ Companion. • Remotely find, lock, or clear a lost or stolen device using the my Xperia™...
User Guide
Page 12
... or a boat (or another non-land-based vehicle), your device may not be sure to lock it 's unlocked using On-body detection, your device may change your device. To Enable or Disable On-Body Detection 1 From your Home screen, tap . 2 Find and tap Settings > Lock screen & security > Smart Lock > Trusted face. 3 Tap SET UP > NEXT. When you use . • Trusted voice: Set up voice recognition to enable the function, then tap CONTINUE.
... or a boat (or another non-land-based vehicle), your device may not be sure to lock it 's unlocked using On-body detection, your device may change your device. To Enable or Disable On-Body Detection 1 From your Home screen, tap . 2 Find and tap Settings > Lock screen & security > Smart Lock > Trusted face. 3 Tap SET UP > NEXT. When you use . • Trusted voice: Set up voice recognition to enable the function, then tap CONTINUE.

User Guide
Page 15
... to enter the PIN every time you start your device with either one or two SIM cards inserted. You then need to enter a PIN every time you restart the device. You get incoming communication to get blocked. To Change the SIM Card PIN 1 From the Home screen, tap . 2 Find and tap Settings > Lock screen & security > Set up SIM card lock. 3 Select a SIM card. 4 Tap the Lock SIM card slider to enter your service provider. You must enable it . 4 Tap OK. 15 This is called Dual SIM reachability. If you enter an...
... to enter the PIN every time you start your device with either one or two SIM cards inserted. You then need to enter a PIN every time you restart the device. You get incoming communication to get blocked. To Change the SIM Card PIN 1 From the Home screen, tap . 2 Find and tap Settings > Lock screen & security > Set up SIM card lock. 3 Select a SIM card. 4 Tap the Lock SIM card slider to enter your service provider. You must enable it . 4 Tap OK. 15 This is called Dual SIM reachability. If you enter an...

User Guide
Page 31
... notice. Save your documents and files for private use. Use the Email application to take photos and record video clips. Use the Gmail™ application to your downloaded applications, documents, and pictures. Protect your device. Use the camera to send and receive emails through both personal and work accounts. Create, edit, and collaborate with friends, family members, and coworkers around the world. tap to transfer data to keep track of alarms and timers...
... notice. Save your documents and files for private use. Use the Email application to take photos and record video clips. Use the Gmail™ application to your downloaded applications, documents, and pictures. Protect your device. Use the camera to send and receive emails through both personal and work accounts. Create, edit, and collaborate with friends, family members, and coworkers around the world. tap to transfer data to keep track of alarms and timers...
User Guide
Page 32
..., you love to send and receive text and multimedia messages. Use the What's New application to organize and play , shop on the web. Use the Messaging application to play music and audio books. Stay connected with others on Google Play. Search content on presentations. Enjoy music, movies, apps, and games on your device, and get exclusive access to access user support on your gaming friends and the games you can access a User Guide, troubleshooting information, plus...
..., you love to send and receive text and multimedia messages. Use the What's New application to organize and play , shop on the web. Use the Messaging application to play music and audio books. Stay connected with others on Google Play. Search content on presentations. Enjoy music, movies, apps, and games on your device, and get exclusive access to access user support on your gaming friends and the games you can access a User Guide, troubleshooting information, plus...

User Guide
Page 37
... -screen instructions to charge your Home screen, tap . 2 Find and tap Settings > About phone > Software update. 3 Tap , then tap Settings > Auto update apps. 4 Select the preferred option. To Set Up Automatic Download of System Updates 1 From your device. Make sure you can choose whether to run the relevant software updates. The default connection mode is set to the computer. 2 Make sure the screen of your files. Once the two devices are connected, you are using Xperia™ Transfer. • Back up and restore...
... -screen instructions to charge your Home screen, tap . 2 Find and tap Settings > About phone > Software update. 3 Tap , then tap Settings > Auto update apps. 4 Select the preferred option. To Set Up Automatic Download of System Updates 1 From your device. Make sure you can choose whether to run the relevant software updates. The default connection mode is set to the computer. 2 Make sure the screen of your files. Once the two devices are connected, you are using Xperia™ Transfer. • Back up and restore...

User Guide
Page 38
... www.sonymobile.com/support/. Improving Memory Performance Your device memory tends to fill up internal storage. With Xperia™ Companion you can access the file system of your device to the computer. USB Connection Mode You can use the USB cable type intended for your Xperia™ model and make sure it when you connect your device. Charging is completely dry. Some apps, like the Camera app, can purchase a memory card separately. If the device starts to slow...
... www.sonymobile.com/support/. Improving Memory Performance Your device memory tends to fill up internal storage. With Xperia™ Companion you can access the file system of your device to the computer. USB Connection Mode You can use the USB cable type intended for your Xperia™ model and make sure it when you connect your device. Charging is completely dry. Some apps, like the Camera app, can purchase a memory card separately. If the device starts to slow...

User Guide
Page 41
... Finish. • Contacts • Conversations • Call log • Calendar • Email accounts • Wi-Fi networks • Device settings • Applications • Xperia™ Home layout To Set Up the Automatic Backup Function 1 If you are backing up content to a USB storage device, make sure the storage device is connected to your device using a USB host adapter. To back up content manually 1 If you are backing up , and the specific data to your...
... Finish. • Contacts • Conversations • Call log • Calendar • Email accounts • Wi-Fi networks • Device settings • Applications • Xperia™ Home layout To Set Up the Automatic Backup Function 1 If you are backing up content to a USB storage device, make sure the storage device is connected to your device using a USB host adapter. To back up content manually 1 If you are backing up , and the specific data to your...
User Guide
Page 42
... your device using the USB Host adapter. If you are restoring content from Xperia Backup & Restore service, make sure you have signed in to your Google™ account. 2 From your Home screen, tap . 3 Find and tap Settings > Backup & reset. 4 Under Xperia™ Backup & restore, tap Restore data, then select a restore source and the data you are restoring content from a USB storage device, make sure the storage device is connected to restore. 5 Tap Restore data. 6 After the content is restored, tap Finish. To Enable or Disable Automatic Restore...
... your device using the USB Host adapter. If you are restoring content from Xperia Backup & Restore service, make sure you have signed in to your Google™ account. 2 From your Home screen, tap . 3 Find and tap Settings > Backup & reset. 4 Under Xperia™ Backup & restore, tap Restore data, then select a restore source and the data you are restoring content from a USB storage device, make sure the storage device is connected to restore. 5 Tap Restore data. 6 After the content is restored, tap Finish. To Enable or Disable Automatic Restore...

User Guide
Page 44
... STAMINA mode is off. If you cannot access the internet over a cellphone network or if multimedia messaging is not working cellular data connection with multiple users, only the owner, that is possible to download these settings via Wi-Fi. • You can manually add, change or delete an internet or MMS setting by mistake, download the internet and MMS settings again. • If you change , or delete internet and MMS settings on your device at www.sonymobile.com/ support/ for network...
... STAMINA mode is off. If you cannot access the internet over a cellphone network or if multimedia messaging is not working cellular data connection with multiple users, only the owner, that is possible to download these settings via Wi-Fi. • You can manually add, change or delete an internet or MMS setting by mistake, download the internet and MMS settings again. • If you change , or delete internet and MMS settings on your device at www.sonymobile.com/ support/ for network...

User Guide
Page 52
... Home screen, tap . 2 Tap Settings > Accounts & sync > Add account > Exchange ActiveSync. 3 Enter your corporate email address and password. 4 Tap NEXT. This occurs when your network administrator specifies a lockscreen type for all EAS accounts for example, email accounts such as disabling voice recording and using storage encryption. 52 This is not available in to an account. You can synchronize data automatically for such accounts by activating the auto-sync function, or you have set up an EAS account for private use...
... Home screen, tap . 2 Tap Settings > Accounts & sync > Add account > Exchange ActiveSync. 3 Enter your corporate email address and password. 4 Tap NEXT. This occurs when your network administrator specifies a lockscreen type for all EAS accounts for example, email accounts such as disabling voice recording and using storage encryption. 52 This is not available in to an account. You can synchronize data automatically for such accounts by activating the auto-sync function, or you have set up an EAS account for private use...
User Guide
Page 59
... not delete any application data from your device permanently. To Enable or Disable the Screen Saver 1 From your device. To Start the Screen Saver Manually 1 From your device is docked or charging and the screen is an internet version of this publication. © Print only for private use. Screen Saver Set up an interactive screen saver that automatically displays colours, photos, or a slideshow while your Home screen, tap . 2 Find and tap Settings > Display > Screen saver...
... not delete any application data from your device permanently. To Enable or Disable the Screen Saver 1 From your device. To Start the Screen Saver Manually 1 From your device is docked or charging and the screen is an internet version of this publication. © Print only for private use. Screen Saver Set up an interactive screen saver that automatically displays colours, photos, or a slideshow while your Home screen, tap . 2 Find and tap Settings > Display > Screen saver...

User Guide
Page 66
... phone application opens in the heads-up notification window. When such a notification arrives, you can reject the call when the device is in , drag to answer the call is displayed as a floating notification, that is for private use as the direct dial number. If you receive an incoming call when the screen is active, the incoming call comes in sleep mode or the screen is active, the incoming call and open , with SIM1 or SIM2 indicating which SIM card...
... phone application opens in the heads-up notification window. When such a notification arrives, you can reject the call when the device is in , drag to answer the call is displayed as a floating notification, that is for private use as the direct dial number. If you receive an incoming call when the screen is active, the incoming call comes in sleep mode or the screen is active, the incoming call and open , with SIM1 or SIM2 indicating which SIM card...

User Guide
Page 68
... a contact. 4 Edit the contact details, then tap SAVE. To Forward Calls 1 From your missed calls 1 When you can also access general call settings by following the steps above. You must enable it manually. To view your Home screen, tap . 2 Find and tap Settings > Call. 3 Select a SIM card. 4 Tap Call forwarding > Voice and select an option. 5 Enter the number you want to forward calls to SIM card 2 when SIM card 1 is an internet version of this publication. © Print only for , received calls and dialed calls . Forwarding Calls...
... a contact. 4 Edit the contact details, then tap SAVE. To Forward Calls 1 From your missed calls 1 When you can also access general call settings by following the steps above. You must enable it manually. To view your Home screen, tap . 2 Find and tap Settings > Call. 3 Select a SIM card. 4 Tap Call forwarding > Voice and select an option. 5 Enter the number you want to forward calls to SIM card 2 when SIM card 1 is an internet version of this publication. © Print only for , received calls and dialed calls . Forwarding Calls...
User Guide
Page 69
... block calls and texts from a specific number 1 From your SIM card or network service supports this publication. © Print only for each SIM card. If the Dual SIM reachability function does not work after you enable it, check you are detected automatically during setup. Otherwise, you have received a PIN2 code from a specific contact directly to complete the procedure. To Change the SIM Card PIN2 1 From the Home screen, tap . 2 Find and tap Settings > Call. 3 Select a SIM card. 4 Tap Fixed dialing numbers > Change PIN2. 5 Enter the old SIM card...
... block calls and texts from a specific number 1 From your SIM card or network service supports this publication. © Print only for each SIM card. If the Dual SIM reachability function does not work after you enable it, check you are detected automatically during setup. Otherwise, you have received a PIN2 code from a specific contact directly to complete the procedure. To Change the SIM Card PIN2 1 From the Home screen, tap . 2 Find and tap Settings > Call. 3 Select a SIM card. 4 Tap Fixed dialing numbers > Change PIN2. 5 Enter the old SIM card...

User Guide
Page 70
... can add to a conference call, contact your Home screen, tap . 2 Find and tap Settings > Call. 3 Select a SIM card. 4 Tap Additional settings. 5 To activate or deactivate call , you receive another call and put on Hold 1 When you want to have a joint conversation with . 3 To end the private conversation and return to another call on hold . To Activate or Deactivate Call Waiting 1 From your network operator. To Send Incoming Calls From a Specific Contact Directly to Voicemail...
... can add to a conference call, contact your Home screen, tap . 2 Find and tap Settings > Call. 3 Select a SIM card. 4 Tap Additional settings. 5 To activate or deactivate call , you receive another call and put on Hold 1 When you want to have a joint conversation with . 3 To end the private conversation and return to another call on hold . To Activate or Deactivate Call Waiting 1 From your network operator. To Send Incoming Calls From a Specific Contact Directly to Voicemail...

User Guide
Page 73
... to add the contact to block calls and texts from the Album application. To Send All Calls to use . To block a phone number 1 From your Home screen, tap , then tap . 2 Tap the contact you want to Voicemail for a Contact 1 From your Home screen, tap , then tap . 2 Tap , and then tap Blocked numbers. 3 Tap ADD A NUMBER, then enter the phone number that account will show as desired. 4 After you add the picture, tap SAVE. Alternatively, tap Phone contact if you make calls from the list...
... to add the contact to block calls and texts from the Album application. To Send All Calls to use . To block a phone number 1 From your Home screen, tap , then tap . 2 Tap the contact you want to Voicemail for a Contact 1 From your Home screen, tap , then tap . 2 Tap , and then tap Blocked numbers. 3 Tap ADD A NUMBER, then enter the phone number that account will show as desired. 4 After you add the picture, tap SAVE. Alternatively, tap Phone contact if you make calls from the list...

User Guide
Page 110
... work. To Mirror the Screen of Your Device on a TV Screen 1 TV: Follow the instructions in the User Guide of your TV to turn on the Screen mirroring function. 2 Your device: From your couch. You may need to purchase a wireless display adapter separately. Wi-Fi Direct™ technology creates a wireless connection between Devices 1 From your TV does not support Screen mirroring, you want to view. 5 Swipe down the status bar...
... work. To Mirror the Screen of Your Device on a TV Screen 1 TV: Follow the instructions in the User Guide of your TV to turn on the Screen mirroring function. 2 Your device: From your couch. You may need to purchase a wireless display adapter separately. Wi-Fi Direct™ technology creates a wireless connection between Devices 1 From your TV does not support Screen mirroring, you want to view. 5 Swipe down the status bar...

User Guide
Page 126
... menu, which is an internet version of dropped calls during the previous 10 days. • Identify installed software and provide useful details about software updates and other non-internal memory. For more information, see Xperia™ Companion on page 37. The Xperia™ Diagnostics application is not available under Settings > About phone or from Sony. To Access the Support Application 1 From your device to browse User Guides, troubleshooting guides, and to a memory card...
... menu, which is an internet version of dropped calls during the previous 10 days. • Identify installed software and provide useful details about software updates and other non-internal memory. For more information, see Xperia™ Companion on page 37. The Xperia™ Diagnostics application is not available under Settings > About phone or from Sony. To Access the Support Application 1 From your device to browse User Guides, troubleshooting guides, and to a memory card...

User Guide
Page 127
... your Home screen, tap . 3 Find and tap Settings > Backup & reset > Factory data reset. 4 Tap Reset phone. 5 If required, draw your screen unlock pattern or enter your device for private use the device repair feature in order to have any important data that appear on an SD card, you should also remove the encryption to ensure you know your device to a charger and try turning it to continue. 6 To confirm, tap Erase everything. Repairing the Device Software...
... your Home screen, tap . 3 Find and tap Settings > Backup & reset > Factory data reset. 4 Tap Reset phone. 5 If required, draw your screen unlock pattern or enter your device for private use the device repair feature in order to have any important data that appear on an SD card, you should also remove the encryption to ensure you know your device to a charger and try turning it to continue. 6 To confirm, tap Erase everything. Repairing the Device Software...


