
User Guide
Page 2
... started 6 About this User guide 6 Overview 6 Assembly 7 Starting your device for the first time 9 Why do I need a Google™ account 9 Charging your device 10 Learning the basics 11 Using the touchscreen 11 Locking and unlocking the screen 13 Home screen 13 Application screen 15 Navigating applications 16 Small apps 16 Widgets 17 Shortcuts and folders 18 Background and themes 19 Taking a screenshot 20 Status and notifications 20 Icons in the status bar...
... started 6 About this User guide 6 Overview 6 Assembly 7 Starting your device for the first time 9 Why do I need a Google™ account 9 Charging your device 10 Learning the basics 11 Using the touchscreen 11 Locking and unlocking the screen 13 Home screen 13 Application screen 15 Navigating applications 16 Small apps 16 Widgets 17 Shortcuts and folders 18 Background and themes 19 Taking a screenshot 20 Status and notifications 20 Icons in the status bar...
User Guide
Page 3
... Typing text 35 On-screen keyboard 35 Entering text using voice input 36 Editing text 36 Personalising the Xperia keyboard 37 Calling 38 Making calls 38 Receiving calls 39 Ongoing calls 40 Using the call log 40 Forwarding calls 41 Restricting calls 41 Multiple calls 41 Conference calls 42 Voicemail 42 Emergency calls 43 Contacts 44 Transferring contacts 44 Searching and viewing contacts 45 Adding and editing contacts 46 Favourites and groups 47 Sending contact information 47 Avoiding duplicate entries in the Contacts application 47 Backing up contacts 48 Messaging...
... Typing text 35 On-screen keyboard 35 Entering text using voice input 36 Editing text 36 Personalising the Xperia keyboard 37 Calling 38 Making calls 38 Receiving calls 39 Ongoing calls 40 Using the call log 40 Forwarding calls 41 Restricting calls 41 Multiple calls 41 Conference calls 42 Voicemail 42 Emergency calls 43 Contacts 44 Transferring contacts 44 Searching and viewing contacts 45 Adding and editing contacts 46 Favourites and groups 47 Sending contact information 47 Avoiding duplicate entries in the Contacts application 47 Backing up contacts 48 Messaging...

User Guide
Page 9
... settings, sign in to help you purchase it . 5 Wait a while for the device to start your device, a setup guide opens to some accounts, and personalise your device. To turn on the screen and swipe up straight away. until the device vibrates. 2 If your screen goes dark, briefly press the power key to : • Download and install applications from Sony runs on the device for the first time. 1 Press and hold down to unlock...
... settings, sign in to help you purchase it . 5 Wait a while for the device to start your device, a setup guide opens to some accounts, and personalise your device. To turn on the screen and swipe up straight away. until the device vibrates. 2 If your screen goes dark, briefly press the power key to : • Download and install applications from Sony runs on the device for the first time. 1 Press and hold down to unlock...
User Guide
Page 22
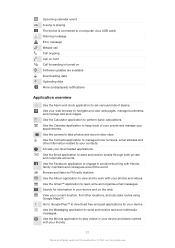
... manage text and images. Use the camera to perform basic calculations. Use the Email application to FM radio stations. Browse and listen to send and receive emails through both private and corporate accounts. Use the Messaging application to read, write and organise email messages. Use the Facebook application to set various kinds of alarms. Use your device and on Software updates are available Downloading data Uploading data More (undisplayed) notifications Application overview Use the Alarm and clock application...
... manage text and images. Use the camera to perform basic calculations. Use the Email application to FM radio stations. Browse and listen to send and receive emails through both private and corporate accounts. Use the Messaging application to read, write and organise email messages. Use the Facebook application to set various kinds of alarms. Use your device and on Software updates are available Downloading data Uploading data More (undisplayed) notifications Application overview Use the Alarm and clock application...

User Guide
Page 23
..." application to access user support in the device. Identify music tracks that you can access a User guide, troubleshooting information, plus tips and tricks. Use the Support application to organise and play music, audio books and podcasts. Make phone calls by dialling the number manually or by all networks and/or service providers in your own requirements. Optimise settings to share and view videos from around the world. Download and install new applications and updates. Use YouTube™ to suit...
..." application to access user support in the device. Identify music tracks that you can access a User guide, troubleshooting information, plus tips and tricks. Use the Support application to organise and play music, audio books and podcasts. Make phone calls by dialling the number manually or by all networks and/or service providers in your own requirements. Optimise settings to share and view videos from around the world. Download and install new applications and updates. Use YouTube™ to suit...

User Guide
Page 28
... your device over your device's data connection and SD card over your data connection, unmark the USB tethering checkbox or disconnect the USB cable. To use . Adjusting data usage settings can help you can still establish Wi-Fi® and Bluetooth® connections. To rename or secure your Home screen, tap . 2 Find and tap Settings > More... > Tethering & portable hotspot. 3 Tap Portable Wi-Fi hotspot settings > Configure Wi-Fi hotspot. 4 Enter the Network...
... your device over your device's data connection and SD card over your data connection, unmark the USB tethering checkbox or disconnect the USB cable. To use . Adjusting data usage settings can help you can still establish Wi-Fi® and Bluetooth® connections. To rename or secure your Home screen, tap . 2 Find and tap Settings > More... > Tethering & portable hotspot. 3 Tap Portable Wi-Fi hotspot settings > Configure Wi-Fi hotspot. 4 Enter the Network...

User Guide
Page 34
... private use. The manual adjustment of your device by manually enabling individual sound settings such as Clear Phase™ and xLOUD™, or you can also enable the Dynamic normaliser so that differences in the voice call sound quality. To enhance the sound output automatically 1 Drag the status bar downwards, then tap . 2 Find and tap Sound > Sound effects. 3 Mark the ClearAudio+ checkbox. To minimise volume differences using the...
... private use. The manual adjustment of your device by manually enabling individual sound settings such as Clear Phase™ and xLOUD™, or you can also enable the Dynamic normaliser so that differences in the voice call sound quality. To enhance the sound output automatically 1 Drag the status bar downwards, then tap . 2 Find and tap Sound > Sound effects. 3 Mark the ClearAudio+ checkbox. To minimise volume differences using the...

User Guide
Page 44
... file that account. You need to be signed in your old device or your computer with an online account, for your old device, refer to a SIM card. Other methods for private use Bluetooth® technology, or save contacts to the relevant User guide. Transferring contacts using that you can sync your contacts. To transfer contacts to your new device using a synchronisation account 1 From your Home screen, tap , then tap . 2 Tap , then tap Settings > Accounts & sync. 3 Select the account that you to transfer your contacts...
... file that account. You need to be signed in your old device or your computer with an online account, for your old device, refer to a SIM card. Other methods for private use Bluetooth® technology, or save contacts to the relevant User guide. Transferring contacts using that you can sync your contacts. To transfer contacts to your new device using a synchronisation account 1 From your Home screen, tap , then tap . 2 Tap , then tap Settings > Accounts & sync. 3 Select the account that you to transfer your contacts...
User Guide
Page 46
... contact picture. 4 When you have synchronised your contacts with a contact 1 From your device. 4 Enter or select the desired information for a contact 1 From your Home screen, tap , then tap . 2 Tap the contact that you want to edit, then tap . 3 Tap > Set ringtone. 4 Select an option, then tap Done. 5 Tap Done. After you select a synchronisation account in the list. If you add a plus sign and the country code before a contact's phone number...
... contact picture. 4 When you have synchronised your contacts with a contact 1 From your device. 4 Enter or select the desired information for a contact 1 From your Home screen, tap , then tap . 2 Tap the contact that you want to edit, then tap . 3 Tap > Set ringtone. 4 Select an option, then tap Done. 5 Tap Done. After you select a synchronisation account in the list. If you add a plus sign and the country code before a contact's phone number...

User Guide
Page 51
... messaging and video chat application on devices with several friends, and you have a working Internet connection and a Google™ account. To change your message notification settings 1 From your Home screen, tap , then find and tap . 2 Tap , then tap Settings. 3 To set a notification sound, tap Notification tone and select an option. 4 For other devices. Calling from a message To call a message sender 1 From your Home screen, tap , then find and tap . 2 Tap a conversation. 3 Tap the recipient name or number...
... messaging and video chat application on devices with several friends, and you have a working Internet connection and a Google™ account. To change your message notification settings 1 From your Home screen, tap , then find and tap . 2 Tap , then tap Settings. 3 To set a notification sound, tap Notification tone and select an option. 4 For other devices. Calling from a message To call a message sender 1 From your Home screen, tap , then find and tap . 2 Tap a conversation. 3 Tap the recipient name or number...

User Guide
Page 54
... an Internet version of email messages To download new email messages 1 From your Home screen, tap . 2 Find and tap Email. 3 If you are indicated by . 2 After the email message opens, tap Load, The attachment starts to forward, then tap Forward. 2 Enter the recipient's email address manually, or tap and select a recipient from your email inbox. 2 Tap the name of the sender, then tap OK. 3 Select an existing contact, or tap Create new contact. 4 Edit the contact...
... an Internet version of email messages To download new email messages 1 From your Home screen, tap . 2 Find and tap Email. 3 If you are indicated by . 2 After the email message opens, tap Load, The attachment starts to forward, then tap Forward. 2 Enter the recipient's email address manually, or tap and select a recipient from your email inbox. 2 Tap the name of the sender, then tap OK. 3 Select an existing contact, or tap Create new contact. 4 Edit the contact...

User Guide
Page 57
... can use the Sony™ Bridge for Mac application to transfer your media files from iTunes to your device: • Connect the device and computer using a USB cable and drag and drop music files directly into the file manager application on Music Unlimited and all songs in the play queue Touch and hold to podcasts, and more and download Sony™ Bridge for Mac, go to fast forward or...
... can use the Sony™ Bridge for Mac application to transfer your media files from iTunes to your device: • Connect the device and computer using a USB cable and drag and drop music files directly into the file manager application on Music Unlimited and all songs in the play queue Touch and hold to podcasts, and more and download Sony™ Bridge for Mac, go to fast forward or...

User Guide
Page 69
... Use Quick launch settings to 10 minutes long. This setting lets you take them . Just select the scene you want to have an active internet connection and be up to launch the camera when the screen is locked by pressing and holding down the camera key. Launch and record video When this setting is activated, you can be logged into your photos and make them more fun. Shutter sound...
... Use Quick launch settings to 10 minutes long. This setting lets you take them . Just select the scene you want to have an active internet connection and be up to launch the camera when the screen is locked by pressing and holding down the camera key. Launch and record video When this setting is activated, you can be logged into your photos and make them more fun. Shutter sound...

User Guide
Page 84
... access permission to client devices. For example, a TV, computer or tablet can , for private use. Connectivity Sharing content with DLNA Certified™ devices You can view or play media content saved to your device on your device. To play a shared video on your device 1 Make sure the devices that you want to share files with are listed as pending devices. 84 This is an Internet version of the connected device and select a photo...
... access permission to client devices. For example, a TV, computer or tablet can , for private use. Connectivity Sharing content with DLNA Certified™ devices You can view or play media content saved to your device on your device. To play a shared video on your device 1 Make sure the devices that you want to share files with are listed as pending devices. 84 This is an Internet version of the connected device and select a photo...

User Guide
Page 85
... Media Renderer device Using DLNA™ technology, you close the Media server view, the file sharing function stays running Windows® 7 or higher. Refer to the user guide for the respective device for the device. Open the notification and set the relevant access permissions for other DLNA Certified™ devices 1 From your Home screen, tap , then find and tap . 2 Tap , then tap Media server. 3 Select a device from the Registered devices list, then select Change name. 4 Enter a new...
... Media Renderer device Using DLNA™ technology, you close the Media server view, the file sharing function stays running Windows® 7 or higher. Refer to the user guide for the respective device for the device. Open the notification and set the relevant access permissions for other DLNA Certified™ devices 1 From your Home screen, tap , then find and tap . 2 Tap , then tap Media server. 3 Select a device from the Registered devices list, then select Change name. 4 Enter a new...
User Guide
Page 92
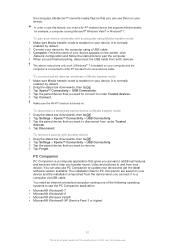
... a wirelessly paired device in Media transfer mode 1 Make sure Media transfer mode is an Internet version of your device appears on your device. You need a Wi-Fi® enabled device that gives you access to additional features and services which help you are saved on your device wirelessly with another device 1 Drag the status bar downwards, then tap . 2 Tap Settings > Xperia™ Connectivity > USB Connectivity. 3 Tap the paired device that you want to the computer using Media transfer mode 1 Make sure Media transfer mode is normally enabled by default. 2 Connect...
... a wirelessly paired device in Media transfer mode 1 Make sure Media transfer mode is an Internet version of your device appears on your device. You need a Wi-Fi® enabled device that gives you access to additional features and services which help you are saved on your device wirelessly with another device 1 Drag the status bar downwards, then tap . 2 Tap Settings > Xperia™ Connectivity > USB Connectivity. 3 Tap the paired device that you want to the computer using Media transfer mode 1 Make sure Media transfer mode is normally enabled by default. 2 Connect...

User Guide
Page 110
... for new software for it. 4 Device: When notifications appear in the status bar, follow the instructions in the status bar to download all application updates. You may incur data connection charges when downloading updates over mobile networks. Updating your device using installation files saved on -screen instructions to the computer using , if it . 4 Computer: If a new software update is finished. Notifications appear in your device using an Apple® Mac® computer 1 Install the Sony™ Bridge for Mac application. To download software updates manually from Update...
... for new software for it. 4 Device: When notifications appear in the status bar, follow the instructions in the status bar to download all application updates. You may incur data connection charges when downloading updates over mobile networks. Updating your device using installation files saved on -screen instructions to the computer using , if it . 4 Computer: If a new software update is finished. Notifications appear in your device using an Apple® Mac® computer 1 Install the Sony™ Bridge for Mac application. To download software updates manually from Update...

User Guide
Page 112
... battery mode 1 From your memory. Memory card Your device supports a microSD™ memory card, which functions to purchase a memory card separately. To allow the queuing of your Home screen, tap . 2 Find and tap Settings > Power management. 3 Tap next to automatically start saving power when the battery reaches a certain charge level. Improving battery time using Location-based Wi-Fi® The Location-based Wi-Fi feature sets your Home screen, tap . 2 Find and tap Settings > Power management. 3 To open the settings menu, tap Low battery mode...
... battery mode 1 From your memory. Memory card Your device supports a microSD™ memory card, which functions to purchase a memory card separately. To allow the queuing of your Home screen, tap . 2 Find and tap Settings > Power management. 3 Tap next to automatically start saving power when the battery reaches a certain charge level. Improving battery time using Location-based Wi-Fi® The Location-based Wi-Fi feature sets your Home screen, tap . 2 Find and tap Settings > Power management. 3 To open the settings menu, tap Low battery mode...

User Guide
Page 113
... data on the memory card gets erased when you restore applications from Google Play™ • Multimedia messages • System settings (such as alarms, ringer volume, and language settings) • Text messages You may sometimes need to clear the memory for which you want to the chapter Connecting your Home screen, tap . 2 Find and tap Settings > Storage > Unmount SD card. Make sure you make backups of everything Clearing the application memory You may incur additional data transmission charges when you format...
... data on the memory card gets erased when you restore applications from Google Play™ • Multimedia messages • System settings (such as alarms, ringer volume, and language settings) • Text messages You may sometimes need to clear the memory for which you want to the chapter Connecting your Home screen, tap . 2 Find and tap Settings > Storage > Unmount SD card. Make sure you make backups of everything Clearing the application memory You may incur additional data transmission charges when you format...

User Guide
Page 116
... and dust resistant in compliance with excessive dust or moisture. Use of certain features and applications described in this applies to the GSM International Emergency Number, 112. To access the setup guide manually 1 From the Home screen, tap . 2 Tap Settings > Setup guide. Important information Important information leaflet Before you connect to the Internet from water and dust To maximise the water resistance of your...
... and dust resistant in compliance with excessive dust or moisture. Use of certain features and applications described in this applies to the GSM International Emergency Number, 112. To access the setup guide manually 1 From the Home screen, tap . 2 Tap Settings > Setup guide. Important information Important information leaflet Before you connect to the Internet from water and dust To maximise the water resistance of your...


