
User Guide
Page 4
...with TrackID 61 Music Unlimited online service 63 FM radio 64 Listening to the radio 64 Favourite radio channels 65 Sound settings 65 Camera 66 Taking photos and recording videos 66 Face detection 67 Using Smile Shutter™ to capture smiling faces 67 Adding the geographical ...position to your photos 68 General camera settings 68 Still camera settings 70 Video camera settings 73 Album 75 Viewing photos and videos 75 Sharing and managing photos and videos 76 Editing photos with the...
...with TrackID 61 Music Unlimited online service 63 FM radio 64 Listening to the radio 64 Favourite radio channels 65 Sound settings 65 Camera 66 Taking photos and recording videos 66 Face detection 67 Using Smile Shutter™ to capture smiling faces 67 Adding the geographical ...position to your photos 68 General camera settings 68 Still camera settings 70 Video camera settings 73 Album 75 Viewing photos and videos 75 Sharing and managing photos and videos 76 Editing photos with the...

User Guide
Page 6
... sensor 3 Ear receiver/Charging light/Notification light 4 Front camera lens 5 Micro SIM card slot cover 6 Power key 7 Volume/Zoom key 8 Camera key 9 Strap hole 10 Main speaker and microphone 6 This is an Internet version of your device 1 From your device is the Xperia™ Z1 User guide for private use. Getting started About this...
... sensor 3 Ear receiver/Charging light/Notification light 4 Front camera lens 5 Micro SIM card slot cover 6 Power key 7 Volume/Zoom key 8 Camera key 9 Strap hole 10 Main speaker and microphone 6 This is an Internet version of your device 1 From your device is the Xperia™ Z1 User guide for private use. Getting started About this...

User Guide
Page 7
To insert the micro SIM card Do not insert a memory card into the opening for private use. 11 Main camera lens 12 Camera light 13 Second microphone 14 NFC™ detection area 15 Memory card slot cover 16 Charger/USB cable port cover 17 Charging dock connector Do ...
To insert the micro SIM card Do not insert a memory card into the opening for private use. 11 Main camera lens 12 Camera light 13 Second microphone 14 NFC™ detection area 15 Memory card slot cover 16 Charger/USB cable port cover 17 Charging dock connector Do ...
User Guide
Page 22
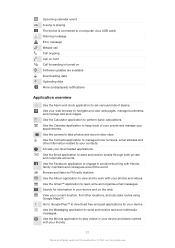
... and to work with friends, family members and colleagues around the world. Use the Calculator application to take photos and record video clips. Use the camera to perform basic calculations. Use the Gmail™ application to FM radio stations. Use the Movies application to play videos in your device and share...
... and to work with friends, family members and colleagues around the world. Use the Calculator application to take photos and record video clips. Use the camera to perform basic calculations. Use the Gmail™ application to FM radio stations. Use the Movies application to play videos in your device and share...

User Guide
Page 51
... number that you want to activate or deactivate delivery reports. Go to http://support.google.com/hangouts and click the "Hangouts on devices with a front camera. 51 This is saved in your Home screen, tap , then find and tap . 2 Tap , then tap Settings. 3 Tap Delivery report to call. To change your...
... number that you want to activate or deactivate delivery reports. Go to http://support.google.com/hangouts and click the "Hangouts on devices with a front camera. 51 This is saved in your Home screen, tap , then find and tap . 2 Tap , then tap Settings. 3 Tap Delivery report to call. To change your...

User Guide
Page 66
... photos or record video clips 6 Go back a step or exit the camera 7 Capturing mode settings icon 8 Camera settings icon and shortcut icons 9 Front camera To learn more /take a self-portrait using the camera key 1 Activate the camera. 2 Press the camera key fully down. To take better photos, go to the left in... or out 2 Main camera screen 3 Camera key - To use . To take a photo from the lock screen 1 To activate the screen, briefly press the power key . 2 To activate the camera, swipe to http://www.sonymobile.com/global-en/support/discover-more about...
... photos or record video clips 6 Go back a step or exit the camera 7 Capturing mode settings icon 8 Camera settings icon and shortcut icons 9 Front camera To learn more /take a self-portrait using the camera key 1 Activate the camera. 2 Press the camera key fully down. To take better photos, go to the left in... or out 2 Main camera screen 3 Camera key - To use . To take a photo from the lock screen 1 To activate the screen, briefly press the power key . 2 To activate the camera, swipe to http://www.sonymobile.com/global-en/support/discover-more about...

User Guide
Page 67
... . A yellow frame shows which face has been selected for smile detection and auto focus. To take the photo, press the camera key fully down . To turn on face detection 1 Activate the camera. 2 Tap , then select . 3 Tap , then tap . 4 Tap Focus mode > Face detection. This function is an Internet ...version of the frames to select which face is set to the face closest to the camera. You can be in focus. 3 To take a photo using the camera key 1 Activate the camera. 2 Tap , and select . 3 If the video camera is not selected, tap . 4 To start recording. 4 Tap to stop recording, ...
... . A yellow frame shows which face has been selected for smile detection and auto focus. To take the photo, press the camera key fully down . To turn on face detection 1 Activate the camera. 2 Tap , then select . 3 Tap , then tap . 4 Tap Focus mode > Face detection. This function is an Internet ...version of the frames to select which face is set to the face closest to the camera. You can be in focus. 3 To take a photo using the camera key 1 Activate the camera. 2 Tap , and select . 3 If the video camera is not selected, tap . 4 To start recording. 4 Tap to stop recording, ...

User Guide
Page 68
...and after your screen. Info-eye™ can get background information instantly. When appears on geotagging 1 From your camera viewfinder. To turn on the camera screen, geotagging is an Internet version of these two symbols appears, geotagging is determined either by wireless networks (...publication. © Print only for information about what you search for private use. The geographical location is turned off. Manual Adjust camera settings manually. When neither of this setting to take wide-angle, panoramic photos. Info-eye™ The Info-eye™ application ...
...and after your screen. Info-eye™ can get background information instantly. When appears on geotagging 1 From your camera viewfinder. To turn on the camera screen, geotagging is an Internet version of these two symbols appears, geotagging is determined either by wireless networks (...publication. © Print only for information about what you search for private use. The geographical location is turned off. Manual Adjust camera settings manually. When neither of this setting to take wide-angle, panoramic photos. Info-eye™ The Info-eye™ application ...

User Guide
Page 69
... Off Geotagging Tag photos with your finger. Quick launch Use Quick launch settings to 10 minutes long. The photo is locked by touching the camera screen with details of two seconds - This setting lets you integrate 3D scenes into Facebook™. Videos can be logged into your photos and... is only available when focus mode is activated, you want to turn on or turn off the shutter sound when you can launch the camera when the screen is locked. Touch capture Identify a particular focus area by pressing and holding down and then release it. Launch and record...
... Off Geotagging Tag photos with your finger. Quick launch Use Quick launch settings to 10 minutes long. The photo is locked by touching the camera screen with details of two seconds - This setting lets you integrate 3D scenes into Facebook™. Videos can be logged into your photos and... is only available when focus mode is activated, you want to turn on or turn off the shutter sound when you can launch the camera when the screen is locked. Touch capture Identify a particular focus area by pressing and holding down and then release it. Launch and record...

User Guide
Page 70
Suitable for photos you want to view on the SD card. Still camera settings overview Resolution Choose between several resolutions and aspect ratios before taking a photo. Internal storage Photos or videos are saved on widescreen displays....4:3 aspect ratio. Incandescent Adjusts the colour balance for sunny outdoor conditions. Fluorescent Adjusts the colour balance for a cloudy sky. Still camera settings To adjust the still camera settings 1 Activate the camera. 2 To display all settings, tap . 3 Select the setting that you want to view on non-widescreen displays or print in...
Suitable for photos you want to view on the SD card. Still camera settings overview Resolution Choose between several resolutions and aspect ratios before taking a photo. Internal storage Photos or videos are saved on widescreen displays....4:3 aspect ratio. Incandescent Adjusts the colour balance for sunny outdoor conditions. Fluorescent Adjusts the colour balance for a cloudy sky. Still camera settings To adjust the still camera settings 1 Activate the camera. 2 To display all settings, tap . 3 Select the setting that you want to view on non-widescreen displays or print in...

User Guide
Page 71
...; Print only for photos you select an object by tapping it for all scene types. Continuous autofocus is off . Touch and hold the camera screen until the yellow focus frame turns blue, indicating that the focus is taken. Touch focus Touch a specific area on the screen. Touch... focus frame turns blue, indicating that the area within the yellow focus frame stays sharp. Continuous autofocus is on the nearest face. The camera automatically focuses on . Continuous autofocus is off . The photo is taken when you release your finger. The photo is taken when you ...
...; Print only for photos you select an object by tapping it for all scene types. Continuous autofocus is off . Touch and hold the camera screen until the yellow focus frame turns blue, indicating that the focus is taken. Touch focus Touch a specific area on the screen. Touch... focus frame turns blue, indicating that the area within the yellow focus frame stays sharp. Continuous autofocus is on the nearest face. The camera automatically focuses on . Continuous autofocus is off . The photo is taken when you release your finger. The photo is taken when you ...

User Guide
Page 72
...Manual capturing mode. Center Adjusts the exposure to 1600. Preview You can be difficult to capture. Face registration You can register faces with the Camera application so that you shoot it can choose to capture. Edit The photo or video opens for 3 seconds after you want to preview photos...for editing after you shoot it , and no preview appears. Average Calculates the exposure based on these faces when they appear in the camera screen: Auto The camera automatically determines if the lighting conditions require the use . Image stabiliser When taking a photo, it .
...Manual capturing mode. Center Adjusts the exposure to 1600. Preview You can be difficult to capture. Face registration You can register faces with the Camera application so that you shoot it can choose to capture. Edit The photo or video opens for 3 seconds after you want to preview photos...for editing after you shoot it , and no preview appears. Average Calculates the exposure based on these faces when they appear in the camera screen: Auto The camera automatically determines if the lighting conditions require the use . Image stabiliser When taking a photo, it .

User Guide
Page 73
... overview Video resolution Adjust the video resolution for private use the self-timer to record. Self-timer With the self-timer you tap the camera screen until the video begins to before recording a video. Use it to record group videos where everyone can also use . On (2 sec.) Set a... Use this setting when the background is turned off. This removes unwanted dark shadows. Red-eye reduction Reduces the red colour of smile the camera reacts to record. Smile Shutter™(video) Use the Smile Shutter™ function to avoid blurred photos. Off The flash is brighter than ...
... overview Video resolution Adjust the video resolution for private use the self-timer to record. Self-timer With the self-timer you tap the camera screen until the video begins to before recording a video. Use it to record group videos where everyone can also use . On (2 sec.) Set a... Use this setting when the background is turned off. This removes unwanted dark shadows. Red-eye reduction Reduces the red colour of smile the camera reacts to record. Smile Shutter™(video) Use the Smile Shutter™ function to avoid blurred photos. Off The flash is brighter than ...

User Guide
Page 74
... automatically determines a well-balanced exposure by measuring the amount of light striking the image you by touching it in the viewfinder, the camera tracks it can sometimes be better without a light even if lighting conditions are poor or when there is only available in Manual capturing...Calculates the exposure based on the selected subject. This setting is a backlight. SteadyShot™ When recording a video, it for you tap the camera screen, a yellow frame shows which face to capture. Flash Use the flash light to record a video against strong back light or in Manual...
... automatically determines a well-balanced exposure by measuring the amount of light striking the image you by touching it in the viewfinder, the camera tracks it can sometimes be better without a light even if lighting conditions are poor or when there is only available in Manual capturing...Calculates the exposure based on the selected subject. This setting is a backlight. SteadyShot™ When recording a video, it for you tap the camera screen, a yellow frame shows which face to capture. Flash Use the flash light to record a video against strong back light or in Manual...

User Guide
Page 75
..., then tap > Slideshow to start playing all the photos in the Album application to view photos and play videos that you've taken with your camera, or to view similar content that you turn your Home screen, tap . 2 Find and tap Album. 3 Tap a photo or video to view it 6 Scroll up...
..., then tap > Slideshow to start playing all the photos in the Album application to view photos and play videos that you've taken with your camera, or to view similar content that you turn your Home screen, tap . 2 Find and tap Album. 3 Tap a photo or video to view it 6 Scroll up...

User Guide
Page 77
... application You can tap other items to select them. Then you can edit and apply effects to original photos that you've taken with your camera. To edit a photo • When you are viewing a face in full screen view, tap the screen to display the toolbars, then tap > Edit name tags...
... application You can tap other items to select them. Then you can edit and apply effects to original photos that you've taken with your camera. To edit a photo • When you are viewing a face in full screen view, tap the screen to display the toolbars, then tap > Edit name tags...

User Guide
Page 78
...Bluetooth® wireless technology, email, and messaging to share content. 1 View photos and videos using the Flickr™ online service 5 View all your device's camera 78 This is an Internet version of this publication. © Print only for a photo 1 When you are viewing a photo, tap the screen to ...tap . 2 If prompted, select Photo editor > Just once. 3 Tap , then select an option. 4 To save a copy of photos and videos taken with the camera as well as content that you share online via services such as PlayMemories, Picasa and Facebook. Photo albums The My albums tab in Picasa™...
...Bluetooth® wireless technology, email, and messaging to share content. 1 View photos and videos using the Flickr™ online service 5 View all your device's camera 78 This is an Internet version of this publication. © Print only for a photo 1 When you are viewing a photo, tap the screen to ...tap . 2 If prompted, select Photo editor > Just once. 3 Tap , then select an option. 4 To save a copy of photos and videos taken with the camera as well as content that you share online via services such as PlayMemories, Picasa and Facebook. Photo albums The My albums tab in Picasa™...

User Guide
Page 79
... all countries or regions. Flick right to view the next photo or video. If you have turned on location detection and activated geotagging in the camera, you have uploaded to the service are displayed. 5 Tap any album to view its content, then tap a photo in Album 1 From your Home screen, tap...
... all countries or regions. Flick right to view the next photo or video. If you have turned on location detection and activated geotagging in the camera, you have uploaded to the service are displayed. 5 Tap any album to view its content, then tap a photo in Album 1 From your Home screen, tap...

User Guide
Page 81
... apply. To fast forward, drag the progress bar marker to the right. 81 This is an Internet version of a video in Video Unlimited Sony Entertainment Network with your device's camera are connected to your Home screen, tap , then find and tap the video that you get poster art, plot summaries, genre info...
... apply. To fast forward, drag the progress bar marker to the right. 81 This is an Internet version of a video in Video Unlimited Sony Entertainment Network with your device's camera are connected to your Home screen, tap , then find and tap the video that you get poster art, plot summaries, genre info...

User Guide
Page 84
... an Internet version of content between devices, you can, for example, listen to music files stored on other DLNA Certified™ devices on your device's camera on a large-screen TV. The devices that you want to play. Your device works as your device. 2 From your Home screen, tap , then find and...
... an Internet version of content between devices, you can, for example, listen to music files stored on other DLNA Certified™ devices on your device's camera on a large-screen TV. The devices that you want to play. Your device works as your device. 2 From your Home screen, tap , then find and...


