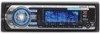
Operating Instructions
Page 2
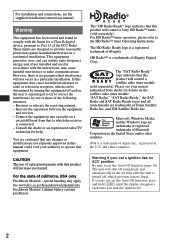
... your car's ignition has no guarantee that interference will shut off . 2 For the state of Sirius Satellite Radio Inc. "SAT Radio," "SAT Radio Ready," the SAT Radio and SAT Radio Ready logos and all related marks are designed to radio communications. For HD RadioTM tuner operation, please refer to set the Auto Off function, press and hold (OFF) until the display disappears each time you turn the...
... your car's ignition has no guarantee that interference will shut off . 2 For the state of Sirius Satellite Radio Inc. "SAT Radio," "SAT Radio Ready," the SAT Radio and SAT Radio Ready logos and all related marks are designed to radio communications. For HD RadioTM tuner operation, please refer to set the Auto Off function, press and hold (OFF) until the display disappears each time you turn the...
Operating Instructions
Page 3
... 13 iPod Playing back iPod 13 Playing tracks 13 Display items 14 Setting the play mode 14 Repeat and shuffle play 12 Radio Storing and receiving stations 12 Storing automatically - EQ3 Tune 15 Adjusting setup items - MENU 16 Using optional equipment 17 Auxiliary audio equipment 17 CD/MD changer 17 Rotary commander RM-X4S 18 Additional Information Precautions 19 Notes on discs 19 Playback order of controls and basic operations Main unit 8 Card remote commander...
... 13 iPod Playing back iPod 13 Playing tracks 13 Display items 14 Setting the play mode 14 Repeat and shuffle play 12 Radio Storing and receiving stations 12 Storing automatically - EQ3 Tune 15 Adjusting setup items - MENU 16 Using optional equipment 17 Auxiliary audio equipment 17 CD/MD changer 17 Rotary commander RM-X4S 18 Additional Information Precautions 19 Notes on discs 19 Playback order of controls and basic operations Main unit 8 Card remote commander...
Operating Instructions
Page 4
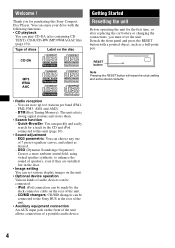
... the unit. • Auxiliary equipment connection An AUX input jack on the disc Getting Started Resetting the unit Before operating the unit for the first time, or after replacing the car battery or changing the connections, you for a track in the door. • Image setting You can set various display images on the unit. • Optional device operation Various kinds of audio devices can be made by the dock connector cable on the rear of 7 preset equalizer curves, and adjust...
... the unit. • Auxiliary equipment connection An AUX input jack on the disc Getting Started Resetting the unit Before operating the unit for the first time, or after replacing the car battery or changing the connections, you for a track in the door. • Image setting You can set various display images on the unit. • Optional device operation Various kinds of audio devices can be made by the dock connector cable on the rear of 7 preset equalizer curves, and adjust...
Operating Instructions
Page 8
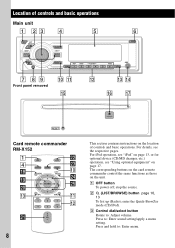
C Control dial/select button Rotate to : Enter menu. For iPod operation, see "iPod" on the location of controls and basic operations Main unit 1 23 4 5 6 OFF LIST/ BROWSE SEEK BACK OPEN SOURCE SEEK MODE REP SHUF SCRL 1 2 PUSH ENTER/SOUND/MENU ALBUM 3 4 AUX PAUSE 5 6 DSPL 7 89 Front panel removed 0 qa qg qs qd qf qh qj RESET Card remote commander RM-X152 1 4 qk ql w; Press and hold to : Adjust volume. Location of controls and basic operations. DSPL...
C Control dial/select button Rotate to : Enter menu. For iPod operation, see "iPod" on the location of controls and basic operations Main unit 1 23 4 5 6 OFF LIST/ BROWSE SEEK BACK OPEN SOURCE SEEK MODE REP SHUF SCRL 1 2 PUSH ENTER/SOUND/MENU ALBUM 3 4 AUX PAUSE 5 6 DSPL 7 89 Front panel removed 0 qa qg qs qd qf qh qj RESET Card remote commander RM-X152 1 4 qk ql w; Press and hold to : Adjust volume. Location of controls and basic operations. DSPL...
Operating Instructions
Page 9
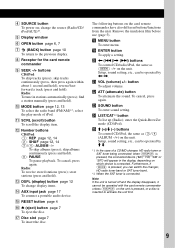
... mode (CD/iPod). select the play mode of a CD/MD changer, HD radio tuner or SAT tuner being connected; skip albums continuously (press and hold ). O RESET button page 4 P Z (eject) button page 7 To eject the disc. Remove the insulation film before use (page 5). when (SOURCE) is inserted to the previous display. Note If the unit is turned off and the display disappears, it cannot be operated with the card remote commander unless (SOURCE) on which device is connected. Radio: To tune...
... mode (CD/iPod). select the play mode of a CD/MD changer, HD radio tuner or SAT tuner being connected; skip albums continuously (press and hold ). O RESET button page 4 P Z (eject) button page 7 To eject the disc. Remove the insulation film before use (page 5). when (SOURCE) is inserted to the previous display. Note If the unit is turned off and the display disappears, it cannot be operated with the card remote commander unless (SOURCE) on which device is connected. Radio: To tune...
Operating Instructions
Page 12
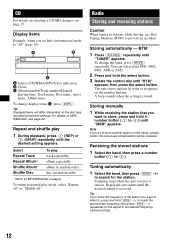
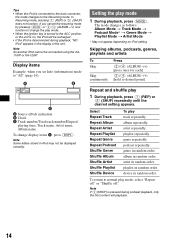
... (SEEK) -/+ to locate the approximate frequency, then press (SEEK) -/+ repeatedly to fine adjust to search for the station. Scanning stops when the unit receives a station. Repeat this procedure until "TUNER" appears. A B C A Source (CD/WMA/MP3/AAC) indication B Clock C Album number/Track number/Elapsed playing time, Track name, Disc name, Artist name, Album name To change the band, press (MODE) repeatedly. For details on selecting a CD/MD changer, see page...
... (SEEK) -/+ to locate the approximate frequency, then press (SEEK) -/+ repeatedly to fine adjust to search for the station. Scanning stops when the unit receives a station. Repeat this procedure until "TUNER" appears. A B C A Source (CD/WMA/MP3/AAC) indication B Clock C Album number/Track number/Elapsed playing time, Track name, Disc name, Artist name, Album name To change the band, press (MODE) repeatedly. For details on selecting a CD/MD changer, see page...
Operating Instructions
Page 13
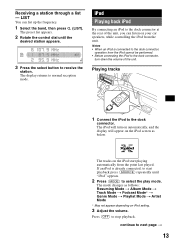
... MENU . > 1 Connect the iPod to normal reception mode. The mode changes as below. The iPod will appear on the iPod screen as follows: Resuming Mode t Album Mode t Track Mode t Podcast Mode* t Genre Mode t Playlist Mode t Artist Mode * May not appear depending on iPod setting. 3 Adjust the volume. Notes • When an iPod is already connected, to the dock connector, turn on automatically, and the display will turn down the volume of the unit, you can list up the frequency. 1 Select...
... MENU . > 1 Connect the iPod to normal reception mode. The mode changes as below. The iPod will appear on the iPod screen as follows: Resuming Mode t Album Mode t Track Mode t Podcast Mode* t Genre Mode t Playlist Mode t Artist Mode * May not appear depending on iPod setting. 3 Adjust the volume. Notes • When an iPod is already connected, to the dock connector, turn on automatically, and the display will turn down the volume of the unit, you can list up the frequency. 1 Select...
Operating Instructions
Page 14
...-120IP. A B C A Source (iPod) indication B Clock C Track number/Total track number/Elapsed playing time, Track name, Artist name, Album name. Setting the play track repeatedly. device in random order. Note An another iPod cannot be recharged. • If the iPod is disconnected during playback, "NO iPod" appears in the display of the unit. genre repeatedly. Tips • When the iPod is connected to the dock connector, the mode changes to "All...
...-120IP. A B C A Source (iPod) indication B Clock C Track number/Total track number/Elapsed playing time, Track name, Artist name, Album name. Setting the play track repeatedly. device in random order. Note An another iPod cannot be recharged. • If the iPod is disconnected during playback, "NO iPod" appears in the display of the unit. genre repeatedly. Tips • When the iPod is connected to the dock connector, the mode changes to "All...
Operating Instructions
Page 15
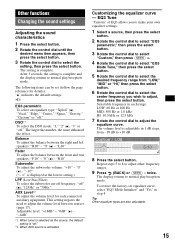
... play /reception mode. The volume level is activated. Balance To adjust the balance between sources (page 17). "0" (z) - "R10" Subwoofer To adjust the subwoofer volume: "+10" - AUX Level*2 To adjust the volume level for details): "z" indicates the default settings. "-8dB" *1 When tuner is selected as the source, the default setting is displayed at the lowest setting.) LPF (Low Pass Filter) To select the subwoofer cut-off frequency: "off ." Selectable frequency in step 4. Repeat steps 5 to 8 to adjust the equalizer curve. This setting negates the need...
... play /reception mode. The volume level is activated. Balance To adjust the balance between sources (page 17). "0" (z) - "R10" Subwoofer To adjust the subwoofer volume: "+10" - AUX Level*2 To adjust the volume level for details): "z" indicates the default settings. "-8dB" *1 When tuner is selected as the source, the default setting is displayed at the lowest setting.) LPF (Low Pass Filter) To select the subwoofer cut-off frequency: "off ." Selectable frequency in step 4. Repeat steps 5 to 8 to adjust the equalizer curve. This setting negates the need...
Operating Instructions
Page 16
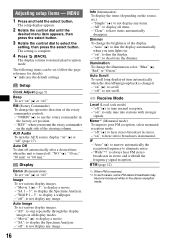
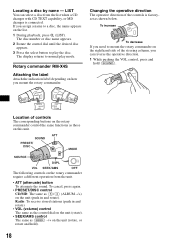
... the select button. The setup display appears. 2 Rotate the control dial until the desired menu item appears, then press the select button. 3 Rotate the control dial to display a movie. - The setting is changed. - "Movie 1 (z) - 3": to select the setting, then press the select button. "off " (page 17). Illumination To change the operative direction of the rotary commander controls. - "on the source, etc.). - Auto Off To shut off automatically after a desired time when the unit is received...
... the select button. The setup display appears. 2 Rotate the control dial until the desired menu item appears, then press the select button. 3 Rotate the control dial to display a movie. - The setting is changed. - "Movie 1 (z) - 3": to select the setting, then press the select button. "off " (page 17). Illumination To change the operative direction of the rotary commander controls. - "on the source, etc.). - Auto Off To shut off automatically after a desired time when the unit is received...
Operating Instructions
Page 17
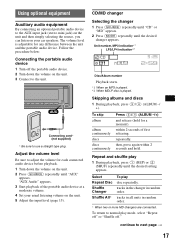
Adjust the volume level Be sure to adjust the volume for each connected audio device before playback. 1 Turn down the volume on the unit. 3 Connect to the unit. To return to normal play mode, select "Repeat off" or "Shuffle off the portable audio device. 2 Turn down the volume on the unit. 2 Press (SOURCE) repeatedly until "AUX" appears. The volume level is played. AUX AUX Connecting cord* (not supplied) * Be sure to next page t 17 Unit number, MP3 indication*1 LP2/LP4 indication*2 Disc/Album number Playback...
Adjust the volume level Be sure to adjust the volume for each connected audio device before playback. 1 Turn down the volume on the unit. 3 Connect to the unit. To return to normal play mode, select "Repeat off" or "Shuffle off the portable audio device. 2 Turn down the volume on the unit. 2 Press (SOURCE) repeatedly until "AUX" appears. The volume level is played. AUX AUX Connecting cord* (not supplied) * Be sure to next page t 17 Unit number, MP3 indication*1 LP2/LP4 indication*2 Disc/Album number Playback...
Operating Instructions
Page 18
.... ATT SOUND PRESET/ DISC MODE SOURCE OFF DSPL VOL SEEK/AMS OFF The following controls on the unit (push in and rotate) • VOL (volume) control The same as the control dial on the unit (rotate, or rotate and hold (SOUND). Changing the operative direction The operative direction of the steering column, you can select a disc from the unit. • ATT (attenuate) button To attenuate the sound. Locating a disc by name - The display returns to play mode. Radio: To receive stored stations...
.... ATT SOUND PRESET/ DISC MODE SOURCE OFF DSPL VOL SEEK/AMS OFF The following controls on the unit (push in and rotate) • VOL (volume) control The same as the control dial on the unit (rotate, or rotate and hold (SOUND). Changing the operative direction The operative direction of the steering column, you can select a disc from the unit. • ATT (attenuate) button To attenuate the sound. Locating a disc by name - The display returns to play mode. Radio: To receive stored stations...
Operating Instructions
Page 19
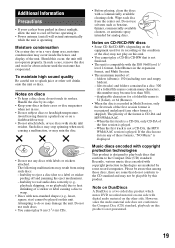
... before operating it. • Power antenna (aerial) will not operate properly. Inability to eject a disc (due to splash juice or other soft drinks onto the unit or discs. Do not use solvents such as benzine, thinner, commercially available cleaners, or antistatic spray intended for its recording or the condition of the first session format is recognized and played (any discs with...
... before operating it. • Power antenna (aerial) will not operate properly. Inability to eject a disc (due to splash juice or other soft drinks onto the unit or discs. Do not use solvents such as benzine, thinner, commercially available cleaners, or antistatic spray intended for its recording or the condition of the first session format is recognized and played (any discs with...
Operating Instructions
Page 20
... Windows Media Audio, is a music file compression format standard. Fifth-generation iPod: Ver.1.2.1 - Third-generation iPod nano: Ver.1.0PC - iPod touch: Ver.1.1.1 (Video function of fifth-generation iPod, iPod classic, third-generation iPod nano, photo function of iPod photo, and functions other versions earlier than for music of iPod touch are not supported.) For customers in this manual, consult your nearest Sony dealer. 20 It compresses audio CD data...
... Windows Media Audio, is a music file compression format standard. Fifth-generation iPod: Ver.1.2.1 - Third-generation iPod nano: Ver.1.0PC - iPod touch: Ver.1.1.1 (Video function of fifth-generation iPod, iPod classic, third-generation iPod nano, photo function of iPod photo, and functions other versions earlier than for music of iPod touch are not supported.) For customers in this manual, consult your nearest Sony dealer. 20 It compresses audio CD data...
Operating Instructions
Page 21
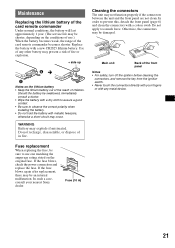
... 1 Notes on the original fuse. Use of any metal device. WARNING Battery may not function properly if the connectors between the unit and the front panel are not clean. Fuse replacement When replacing the fuse, be sure to observe the correct polarity when installing the battery. • Do not hold the battery with metallic tweezers, otherwise a short-circuit may occur. Replace the battery with a cotton swab. Do...
... 1 Notes on the original fuse. Use of any metal device. WARNING Battery may not function properly if the connectors between the unit and the front panel are not clean. Fuse replacement When replacing the fuse, be sure to observe the correct polarity when installing the battery. • Do not hold the battery with metallic tweezers, otherwise a short-circuit may occur. Replace the battery with a cotton swab. Do...
Operating Instructions
Page 22
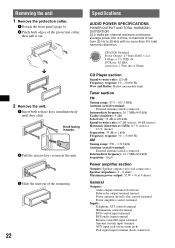
... BUS audio input terminal Remote controller input terminal Antenna (aerial) input terminal AUX input jack (stereo mini jack) iPod signal input terminal (dock connector) x 2 Remove the unit. 1 Insert both edges of the mounting. 22 Specifications AUDIO POWER SPECIFICATIONS POWER OUTPUT AND TOTAL HARMONIC DISTORTION 23.2 watts per channel minimum continuous average power into 4 Ohms) CD Player section Signal-to-noise ratio: 120 dB Frequency response: 10 - 20,000 Hz Wow and flutter: Below measurable limit Tuner section FM Tuning...
... BUS audio input terminal Remote controller input terminal Antenna (aerial) input terminal AUX input jack (stereo mini jack) iPod signal input terminal (dock connector) x 2 Remove the unit. 1 Insert both edges of the mounting. 22 Specifications AUDIO POWER SPECIFICATIONS POWER OUTPUT AND TOTAL HARMONIC DISTORTION 23.2 watts per channel minimum continuous average power into 4 Ohms) CD Player section Signal-to-noise ratio: 120 dB Frequency response: 10 - 20,000 Hz Wow and flutter: Below measurable limit Tuner section FM Tuning...

Operating Instructions
Page 23
... installation and connections (1 set) Optional accessories/equipment: Rotary commander: RM-X4S BUS cable (supplied with an RCA pin cord): RC-61 (1 m), RC-62 (2 m) CD changer (10 discs): CDX-757MX CD changer (6 discs): CDX-T69 Source selector: XA-C40 AUX-IN selector: XA-300 Interface adaptor for 5 minutes with the remote commander. The power antenna (aerial) does not have been erased. • The RESET button has been pressed. No sound. • The volume...
... installation and connections (1 set) Optional accessories/equipment: Rotary commander: RM-X4S BUS cable (supplied with an RCA pin cord): RC-61 (1 m), RC-62 (2 m) CD changer (10 discs): CDX-757MX CD changer (6 discs): CDX-T69 Source selector: XA-C40 AUX-IN selector: XA-300 Interface adaptor for 5 minutes with the remote commander. The power antenna (aerial) does not have been erased. • The RESET button has been pressed. No sound. • The volume...
Operating Instructions
Page 24
... connection of the car antenna (aerial). • The auto antenna (aerial) will not eject. t Turn off " (page 16). Make sure the insulation film has been removed (page 5). Any display items do not function. t Set to the AUX input jack. a disc recorded in the wrong way. The sound skips. • Installation is hampered by noises. • Connect a power antenna (aerial) control lead (blue) or accessory power supply lead (red) to "Mono off the unit. The operation buttons...
... connection of the car antenna (aerial). • The auto antenna (aerial) will not eject. t Turn off " (page 16). Make sure the insulation film has been removed (page 5). Any display items do not function. t Set to the AUX input jack. a disc recorded in the wrong way. The sound skips. • Installation is hampered by noises. • Connect a power antenna (aerial) control lead (blue) or accessory power supply lead (red) to "Mono off the unit. The operation buttons...
Operating Instructions
Page 25
... the list. Push Reset The CD unit and CD/MD changer cannot be displayed with a music file in this model to the dock connector, disconnect the iPod from the dock connector, then reconnect. Failure (Illuminates for about 1 second.) When the SAT tuner is connected, storing an SAT radio channel into a preset failed. If "NO iPod" appears after connecting the iPod to check the connection. t See the installation guide manual of some problem.
... the list. Push Reset The CD unit and CD/MD changer cannot be displayed with a music file in this model to the dock connector, disconnect the iPod from the dock connector, then reconnect. Failure (Illuminates for about 1 second.) When the SAT tuner is connected, storing an SAT radio channel into a preset failed. If "NO iPod" appears after connecting the iPod to check the connection. t See the installation guide manual of some problem.
Operating Instructions
Page 52
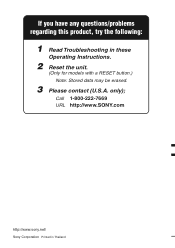
Call 1-800-222-7669 URL http://www.SONY.com http://www.sony.net/ Sony Corporation Printed in these Operating Instructions. 2 Reset the unit. (Only for models with a RESET button.) Note: Stored data may be erased. 3 Please contact (U.S.A. If you have any questions/problems regarding this product, try the following: 1 Read Troubleshooting in Thailand only);
Call 1-800-222-7669 URL http://www.SONY.com http://www.sony.net/ Sony Corporation Printed in these Operating Instructions. 2 Reset the unit. (Only for models with a RESET button.) Note: Stored data may be erased. 3 Please contact (U.S.A. If you have any questions/problems regarding this product, try the following: 1 Read Troubleshooting in Thailand only);


