Operating Instructions
Page 1
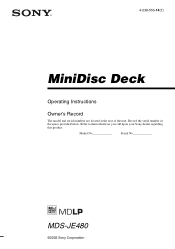
Model No Serial No MDS-JE480 ©2002 Sony Corporation 4-238-553-14(1) MiniDisc Deck Operating Instructions Owner's Record The model and serial numbers are located at the rear of the unit. Refer to them whenever you call upon your Sony dealer regarding this product. Record the serial number in the space provided below.
Model No Serial No MDS-JE480 ©2002 Sony Corporation 4-238-553-14(1) MiniDisc Deck Operating Instructions Owner's Record The model and serial numbers are located at the rear of the unit. Refer to them whenever you call upon your Sony dealer regarding this product. Record the serial number in the space provided below.
Operating Instructions
Page 3
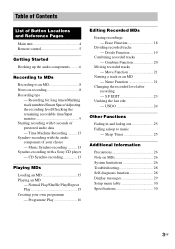
... tips - Programme Play 16 Editing Recorded MDs Erasing recordings - Recording for long times/Marking track numbers/Smart Space/Adjusting the recording level/Checking the remaining recordable time/Input monitor 9 Starting recording with a Sony CD player - Erase Function 18 Dividing recorded tracks ...- Move Function 21 Naming a track or an MD - Time Machine Recording .......... 13 Synchro-recording with the audio component of ...
... tips - Programme Play 16 Editing Recorded MDs Erasing recordings - Recording for long times/Marking track numbers/Smart Space/Adjusting the recording level/Checking the remaining recordable time/Input monitor 9 Starting recording with a Sony CD player - Erase Function 18 Dividing recorded tracks ...- Move Function 21 Naming a track or an MD - Time Machine Recording .......... 13 Synchro-recording with the audio component of ...

Operating Instructions
Page 4
... ql (10) (16) (18) (21) (23) (25) CLEAR qk (17) (22) Display window qd EJECT A 4 (8) (16) (17) INPUT qf (8) LEVEL/DISPLAY/CHAR qs (8) (16) (21) MD (insertion slot) 2 MDLP (indicator) 3 (9) (16) MENU/NO 8 (9) (10) (11) (21) P - List of Button Locations and Reference Pages How to use this page Use this page...
... ql (10) (16) (18) (21) (23) (25) CLEAR qk (17) (22) Display window qd EJECT A 4 (8) (16) (17) INPUT qf (8) LEVEL/DISPLAY/CHAR qs (8) (16) (21) MD (insertion slot) 2 MDLP (indicator) 3 (9) (16) MENU/NO 8 (9) (10) (11) (21) P - List of Button Locations and Reference Pages How to use this page Use this page...
Operating Instructions
Page 8
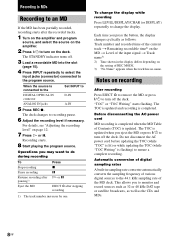
... the 44.1 kHz sampling rate of Contents (TOC) is updated when you press the button, the display changes cyclically as the CDs and MDs. 8GB To change the display while recording Press LEVEL/DISPLAY/CHAR (or DISPLAY) repeatedly to recording pause. 6 Adjust the recording level if ... press ?/1 to ensure a complete recording. This allows you may want to do during recording To Stop recording Pause recording Resume recording after pausing1) Eject the MD Press x X H or X EJECT A after the recorded tracks. 1 Turn on the amplifier and program source, and select the source on the amplifier. 2...
... the 44.1 kHz sampling rate of Contents (TOC) is updated when you press the button, the display changes cyclically as the CDs and MDs. 8GB To change the display while recording Press LEVEL/DISPLAY/CHAR (or DISPLAY) repeatedly to recording pause. 6 Adjust the recording level if ... press ?/1 to ensure a complete recording. This allows you may want to do during recording To Stop recording Pause recording Resume recording after pausing1) Eject the MD Press x X H or X EJECT A after the recorded tracks. 1 Turn on the amplifier and program source, and select the source on the amplifier. 2...

Operating Instructions
Page 9
... step 4 above . • The deck is approximately double the stereo recording time. To prevent accidental erasure of the recorded material To protect an MD recording, slide the recordprotect tab in the direction of a track name automatically. When recording in LP2 Stereo mode, you can record 2 times the ...has two long time recording modes: LP2 and LP4 (MDLP recording). Tips • The MDLP indicator lights up when you press REC MODE repeatedly to MDs appears, then press PUSH ENTER or YES. 3 Turn AMS (or press ./> repeatedly) until "Setup?" To enable re-recording, close the slot....
... step 4 above . • The deck is approximately double the stereo recording time. To prevent accidental erasure of the recorded material To protect an MD recording, slide the recordprotect tab in the direction of a track name automatically. When recording in LP2 Stereo mode, you can record 2 times the ...has two long time recording modes: LP2 and LP4 (MDLP recording). Tips • The MDLP indicator lights up when you press REC MODE repeatedly to MDs appears, then press PUSH ENTER or YES. 3 Turn AMS (or press ./> repeatedly) until "Setup?" To enable re-recording, close the slot....
Operating Instructions
Page 10
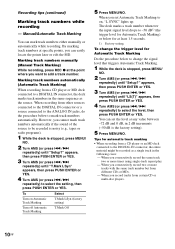
...) until "Setup?" When you consecutively record the same track two or more tracks with the same track number but from a CD player or MD deck connected to on Automatic Track Marking Turn off Automatic Track Marking T.Mark LSyn (factory setting) T.Mark Off 5 Press MENU/NO... Marking track numbers manually (Manual Track Marking) While recording, press REC z at specific points, you record tracks from a CD player or an MD deck connected to mark track numbers automatically. When you can mark track numbers either manually or automatically while recording. Recording tips (continued...
...) until "Setup?" When you consecutively record the same track two or more tracks with the same track number but from a CD player or MD deck connected to on Automatic Track Marking Turn off Automatic Track Marking T.Mark LSyn (factory setting) T.Mark Off 5 Press MENU/NO... Marking track numbers manually (Manual Track Marking) While recording, press REC z at specific points, you record tracks from a CD player or an MD deck connected to mark track numbers automatically. When you can mark track numbers either manually or automatically while recording. Recording tips (continued...
Operating Instructions
Page 11
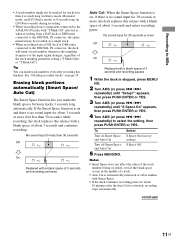
... continues recording pause for 30 seconds or more Off On Replaced with a blank space of about 3 seconds and enters recording pause. continued 11GB Recording to MDs • A track number might not be recorded as a single track. • When recording from a DAT deck or DBS tuner connected to the DIGITAL IN connector...
... continues recording pause for 30 seconds or more Off On Replaced with a blank space of about 3 seconds and enters recording pause. continued 11GB Recording to MDs • A track number might not be recorded as a single track. • When recording from a DAT deck or DBS tuner connected to the DIGITAL IN connector...
Operating Instructions
Page 12
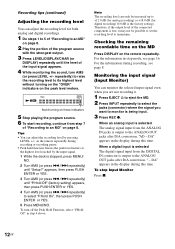
...for digital recording) (0.0 dB is the factory setting). Checking the remaining recordable time on the MD Press DISPLAY on page 8. DA" appears in the display during this time. DA" appears in...(continued) Adjusting the recording level You can only be possible to set the recording level to an MD" on the remote repeatedly. repeatedly) to raise the recording level to select "P.Hold On", then... the selected input signal even when you are not recording it. 1 Press EJECT A to eject the MD. 2 Press INPUT repeatedly to select the jacks (connector) where the signal you want to monitor is low...
...for digital recording) (0.0 dB is the factory setting). Checking the remaining recordable time on the MD Press DISPLAY on page 8. DA" appears in the display during this time. DA" appears in...(continued) Adjusting the recording level You can only be possible to set the recording level to an MD" on the remote repeatedly. repeatedly) to raise the recording level to select "P.Hold On", then... the selected input signal even when you are not recording it. 1 Press EJECT A to eject the MD. 2 Press INPUT repeatedly to select the jacks (connector) where the signal you want to monitor is low...
Operating Instructions
Page 13
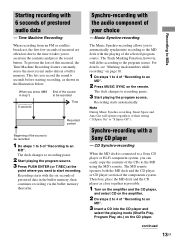
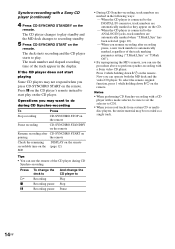
... of the CDs to the program source. The deck changes to MDs Note During Music Synchro-recording, Smart Space and Auto Cut will differ according to the MD using the MD's remote. Recording starts with a Sony CD player - Synchro-recording with the six seconds of prestored data in a... buffer memory. CD Synchro-recording When the MD deck is connected to a Sony CD player or Hi-Fi component system, you to...
... of the CDs to the program source. The deck changes to MDs Note During Music Synchro-recording, Smart Space and Auto Cut will differ according to the MD using the MD's remote. Recording starts with a Sony CD player - Synchro-recording with the six seconds of prestored data in a... buffer memory. CD Synchro-recording When the MD deck is connected to a Sony CD player or Hi-Fi component system, you to...
Operating Instructions
Page 14
... playing Some CD players may not respond when you can operate both the MD deck and the video CD player. If the CD player does not start play . Press X on the CD player's remote instead to perform synchro-recording with a Sony video CD player. When the CD player is connected to... on the remote. Notes • When performing CD Synchro-recording with a CD player with a Sony CD player (continued) 4 Press CD-SYNCHRO STANDBY on the remote. Operations you record tracks from certain CD or multidisc players, the entire material may want to CD1. • When you may be recorded ...
... playing Some CD players may not respond when you can operate both the MD deck and the video CD player. If the CD player does not start play . Press X on the CD player's remote instead to perform synchro-recording with a Sony video CD player. When the CD player is connected to... on the remote. Notes • When performing CD Synchro-recording with a CD player with a Sony CD player (continued) 4 Press CD-SYNCHRO STANDBY on the remote. Operations you record tracks from certain CD or multidisc players, the entire material may want to CD1. • When you may be recorded ...
Operating Instructions
Page 15
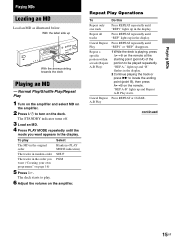
... ?/1 to be played repeatedly. "REP A-B" lights up and "B" flashes in the display. 2 Continue playing the track or press M to play Select The MD in the original order Blank (no PLAY MODE indication) The tracks in random order SHUF The tracks in the display. To play . 6 Adjust the volume... on the remote. Playing MDs Playing MDs Loading an MD Load an MD as illustrated below. The deck starts to locate the ending point (point B), then press AyB on the amplifier. Repeat Play Operations...
... ?/1 to be played repeatedly. "REP A-B" lights up and "B" flashes in the display. 2 Continue playing the track or press M to play Select The MD in the original order Blank (no PLAY MODE indication) The tracks in random order SHUF The tracks in the display. To play . 6 Adjust the volume... on the remote. Playing MDs Playing MDs Loading an MD Load an MD as illustrated below. The deck starts to locate the ending point (point B), then press AyB on the amplifier. Repeat Play Operations...
Operating Instructions
Page 16
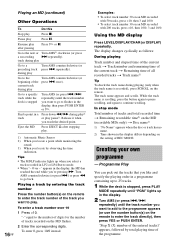
...or LP4 Stereo mode. • When "- Programme Play You can pick out the tracks that you want to flashes in the display, the MD has reached the end while you select a track recorded in the display differs depending on the setting of tracks recorded on the remote. "-" ...succeeding > repeatedly). The track name appears and scrolls. In stop mode Total number of tracks and total recorded time t Remaining recordable time2) on an MD recorded with 200 tracks, press >10, then 10/0, 3 and 10/0. Go to the number of digits for the number of REC MODE. Resume play...
...or LP4 Stereo mode. • When "- Programme Play You can pick out the tracks that you want to flashes in the display, the MD has reached the end while you select a track recorded in the display differs depending on the setting of tracks recorded on the remote. "-" ...succeeding > repeatedly). The track name appears and scrolls. In stop mode Total number of tracks and total recorded time t Remaining recordable time2) on an MD recorded with 200 tracks, press >10, then 10/0, 3 and 10/0. Go to the number of digits for the number of REC MODE. Resume play...

Operating Instructions
Page 17
...When "Tr Protected" appears in the programme Press CLEAR repeatedly until "PGM" turns off the deck. After editing Press EJECT A to remove the MD or press ?/1 to cancel the last edit and restore the contents of the programme during Programme Play Turn AMS (press ./> repeatedly). The TOC is... 2 to ensure a complete editing. 17GB To check the total of the programme Do steps 2 above while the deck is completed. appears when you eject the MD, the programme will be lost. • The display shows "- - - The TOC is stopped and the "PGM" lights up, press LEVEL/DISPLAY/CHAR repeatedly. m...
...When "Tr Protected" appears in the programme Press CLEAR repeatedly until "PGM" turns off the deck. After editing Press EJECT A to remove the MD or press ?/1 to cancel the last edit and restore the contents of the programme during Programme Play Turn AMS (press ./> repeatedly). The TOC is... 2 to ensure a complete editing. 17GB To check the total of the programme Do steps 2 above while the deck is completed. appears when you eject the MD, the programme will be lost. • The display shows "- - - The TOC is stopped and the "PGM" lights up, press LEVEL/DISPLAY/CHAR repeatedly. m...

Operating Instructions
Page 18
...press ./> repeatedly) until "All Erase?" The track following the erased track starts to erase all the tracks following the erased one on the MD, the track preceding the erased track starts to play . appears, then press PUSH ENTER or YES. appears. A-B Erase Function You can...easily. "Complete!" If the erased track is stopped, playing, or paused, press MENU/NO. appears, then press PUSH ENTER or YES. Erase Function The MD deck lets you want to be erased appears. 18GB Play starts. 3 Turn AMS (or press ./> repeatedly) until "A-B Erase?" Erasing recordings - Example: ...
...press ./> repeatedly) until "All Erase?" The track following the erased track starts to erase all the tracks following the erased one on the MD, the track preceding the erased track starts to play . appears, then press PUSH ENTER or YES. appears. A-B Erase Function You can...easily. "Complete!" If the erased track is stopped, playing, or paused, press MENU/NO. appears, then press PUSH ENTER or YES. Erase Function The MD deck lets you want to be erased appears. 18GB Play starts. 3 Turn AMS (or press ./> repeatedly) until "A-B Erase?" Erasing recordings - Example: ...
Operating Instructions
Page 19
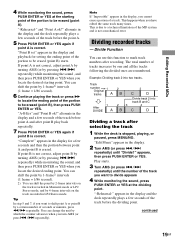
... appears in the display. 2 Turn AMS (or press ./> repeatedly) until the number of the track you locate the desired starting point of the MD system and is erased. This is due to a technical limitation of the portion to be erased (point B), then press PUSH ENTER or YES....1/86 second). 6 Continue playing the track or press M to be erased (point A). Play starts. 3 Turn AMS (or press ./> repeatedly) until "Divide?" Editing Recorded MDs 4 While monitoring the sound, press PUSH ENTER or YES at the dividing point. If point A is correct. alternate in the display and the deck repeatedly...
... appears in the display. 2 Turn AMS (or press ./> repeatedly) until the number of the track you locate the desired starting point of the MD system and is erased. This is due to a technical limitation of the portion to be erased (point B), then press PUSH ENTER or YES....1/86 second). 6 Continue playing the track or press M to be erased (point A). Play starts. 3 Turn AMS (or press ./> repeatedly) until "Divide?" Editing Recorded MDs 4 While monitoring the sound, press PUSH ENTER or YES at the dividing point. If point A is correct. alternate in the display and the deck repeatedly...

Operating Instructions
Page 20
.... Combine Function You can also use this function to be combined. • If both of the combined tracks have a track name, the name of the MD system and is correct. Notes • Tracks recorded in the display. 2 Turn AMS (or press ./> repeatedly) until the number of the first track of seconds...
.... Combine Function You can also use this function to be combined. • If both of the combined tracks have a track name, the name of the MD system and is correct. Notes • Tracks recorded in the display. 2 Turn AMS (or press ./> repeatedly) until the number of the first track of seconds...

Operating Instructions
Page 21
... stopped, playing, recording, or paused, press MENU/NO. In this function to the right, flashes, and waits for all the names on the MD. To enter a symbol You can name a track while monitoring the sound. 4 Press LEVEL/DISPLAY/CHAR repeatedly to position 2. continued 21GB "Edit Menu... display. 2 Turn AMS (or press ./> repeatedly) until the new track position appears, then press PUSH ENTER or YES. Editing Recorded MDs Moving recorded tracks - Example: Moving track 3 to select the character type. A total number of about 1,700 characters can enter a name for a recorded...
... stopped, playing, recording, or paused, press MENU/NO. In this function to the right, flashes, and waits for all the names on the MD. To enter a symbol You can name a track while monitoring the sound. 4 Press LEVEL/DISPLAY/CHAR repeatedly to position 2. continued 21GB "Edit Menu... display. 2 Turn AMS (or press ./> repeatedly) until the new track position appears, then press PUSH ENTER or YES. Editing Recorded MDs Moving recorded tracks - Example: Moving track 3 to select the character type. A total number of about 1,700 characters can enter a name for a recorded...

Operating Instructions
Page 22
...steps 4 to erase the name of tracks displayed A track or disc name appears in the display, followed by "Complete!". 22GB Naming a track or an MD using the remote 1 Press NAME EDIT/SELECT depending on page 21 or steps 2 to be erased flashes, then press CLEAR. 8 Press YES. repeatedly while... display. 2 Press NAME EDIT/SELECT repeatedly to enter the rest of the name. appears, then press PUSH ENTER or YES. Renaming a track or an MD 1 Press NAME EDIT/SELECT on the remote depending on this function to 6. To change a character Press m/M repeatedly until the character to 4 of tracks ...
...steps 4 to erase the name of tracks displayed A track or disc name appears in the display, followed by "Complete!". 22GB Naming a track or an MD using the remote 1 Press NAME EDIT/SELECT depending on page 21 or steps 2 to be erased flashes, then press CLEAR. 8 Press YES. repeatedly while... display. 2 Press NAME EDIT/SELECT repeatedly to enter the rest of the name. appears, then press PUSH ENTER or YES. Renaming a track or an MD 1 Press NAME EDIT/SELECT on the remote depending on this function to 6. To change a character Press m/M repeatedly until the character to 4 of tracks ...

Operating Instructions
Page 23
... (or press ./> repeatedly) until the track number you want to change the recording level appears, then press PUSH ENTER or YES. continued 23GB Editing Recorded MDs S.F EDIT You can change the recording level appears, then press PUSH ENTER or YES. 5 While monitoring the sound, turn AMS (or press ./> repeatedly) to or...
... (or press ./> repeatedly) until the track number you want to change the recording level appears, then press PUSH ENTER or YES. continued 23GB Editing Recorded MDs S.F EDIT You can change the recording level appears, then press PUSH ENTER or YES. 5 While monitoring the sound, turn AMS (or press ./> repeatedly) to or...

Operating Instructions
Page 24
...of the messages appears depending on the remote. • Change the recorded level after recording (S.F Edit). • Turn off the deck or eject the MD. • Disconnect the AC power cord. 1 While the deck is stopped, playing, or paused, press MENU/NO. does not appear if no editing... if it returned to 6. This may damage the recording data preventing recording from being performed properly. • You cannot change the recorded level of the MD to the condition that is in the display. 2 Turn AMS (or press ./> repeatedly) until "Undo?" "Undo?" Notes • Do not disconnect the...
...of the messages appears depending on the remote. • Change the recorded level after recording (S.F Edit). • Turn off the deck or eject the MD. • Disconnect the AC power cord. 1 While the deck is stopped, playing, or paused, press MENU/NO. does not appear if no editing... if it returned to 6. This may damage the recording data preventing recording from being performed properly. • You cannot change the recorded level of the MD to the condition that is in the display. 2 Turn AMS (or press ./> repeatedly) until "Undo?" "Undo?" Notes • Do not disconnect the...


