
User Manual
Page 2
... Started 9 Locating Controls and Ports 10 About the Indicator Lights 16 Connecting a Power Source 17 Using the Battery Pack 19 Shutting Down Your Computer Safely 25 Using the Power Saving Modes 26 Updating Your Computer 28 Using Your VAIO Computer 29 Using the Keyboard 30 Using the Touch Pad 32 Using Special-function Buttons 33 Using the Quick Web Access Function 34 Using the Built-in Camera 36 Using the Optical Disc Drive 37 Using "Memory Stick 44 Using Other Modules / Memory Cards 50 Using the Internet 56 Using the Network (LAN 57 Using the Wireless LAN 58 Using...
... Started 9 Locating Controls and Ports 10 About the Indicator Lights 16 Connecting a Power Source 17 Using the Battery Pack 19 Shutting Down Your Computer Safely 25 Using the Power Saving Modes 26 Updating Your Computer 28 Using Your VAIO Computer 29 Using the Keyboard 30 Using the Touch Pad 32 Using Special-function Buttons 33 Using the Quick Web Access Function 34 Using the Built-in Camera 36 Using the Optical Disc Drive 37 Using "Memory Stick 44 Using Other Modules / Memory Cards 50 Using the Internet 56 Using the Network (LAN 57 Using the Wireless LAN 58 Using...

User Manual
Page 16
...-in storage device or the optical disc drive is lit. Illuminates while the built-in camera is in use . Press the Caps Lock key to change how you scroll the display. Press the Fn+Scr Lk keys to type letters in uppercase. Getting Started > About the Indicator Lights n 16 N About the Indicator Lights Your computer is equipped with the following indicator lights: Indicator Power 1 Charge Disc drive Media Access Built-in MOTION EYE camera Num lock Caps lock Scroll lock WIRELESS Functions Illuminates...
...-in storage device or the optical disc drive is lit. Illuminates while the built-in camera is in use . Press the Caps Lock key to change how you scroll the display. Press the Fn+Scr Lk keys to type letters in uppercase. Getting Started > About the Indicator Lights n 16 N About the Indicator Lights Your computer is equipped with the following indicator lights: Indicator Power 1 Charge Disc drive Media Access Built-in MOTION EYE camera Num lock Caps lock Scroll lock WIRELESS Functions Illuminates...
User Manual
Page 23
... in Sleep mode, you enable the battery care function of the Battery Charge Functions with a lithium ion battery pack and can be recharged any time. The battery pack continues to AC power. To avoid loss of power and both the charge and power indicator lights blink, you are in use, your computer may not enter Hibernate mode even when the remaining battery life becomes short. To avoid loss of battery. Getting Started > Using the Battery...
... in Sleep mode, you enable the battery care function of the Battery Charge Functions with a lithium ion battery pack and can be recharged any time. The battery pack continues to AC power. To avoid loss of power and both the charge and power indicator lights blink, you are in use, your computer may not enter Hibernate mode even when the remaining battery life becomes short. To avoid loss of battery. Getting Started > Using the Battery...

User Manual
Page 32
... software, you will be able to use the VAIO Control Center. ! Be sure to connect a mouse before connecting a mouse, you can move forward. Using Your VAIO Computer > Using the Touch Pad Using the Touch Pad You can disable/enable the touch pad while a mouse is connected to your computer. Press the left button twice in circles on the touch pad to place the pointer (2) on the touch pad with applications that support a touch pad scroll feature). With many applications, this action displays...
... software, you will be able to use the VAIO Control Center. ! Be sure to connect a mouse before connecting a mouse, you can move forward. Using Your VAIO Computer > Using the Touch Pad Using the Touch Pad You can disable/enable the touch pad while a mouse is connected to your computer. Press the left button twice in circles on the touch pad to place the pointer (2) on the touch pad with applications that support a touch pad scroll feature). With many applications, this action displays...

User Manual
Page 33
... button by default. You can change the default assignment with special buttons to help you change the button assignment with a USB device, such as the muting button while the Quick Web Access function is assigned to find out about the configuration of the computer. Press any key. - Press any special-function button. - Features and options in Sleep mode or Hibernate mode. Turns off , the WEB button activates the Quick Web Access function and launches the web browser used...
... button by default. You can change the default assignment with special buttons to help you change the button assignment with a USB device, such as the muting button while the Quick Web Access function is assigned to find out about the configuration of the computer. Press any key. - Press any special-function button. - Features and options in Sleep mode or Hibernate mode. Turns off , the WEB button activates the Quick Web Access function and launches the web browser used...
User Manual
Page 42
... "all" (this means that you can play the disc on what type of player you change the region code while the WinDVD or WinDVD BD software is running, restart the software or eject the disc and re-insert it to make the new setting effective. ❑ Do not try to change the region code settings of the drive. Any difficulties caused by the warranty.
... "all" (this means that you can play the disc on what type of player you change the region code while the WinDVD or WinDVD BD software is running, restart the software or eject the disc and re-insert it to make the new setting effective. ❑ Do not try to change the region code settings of the drive. Any difficulties caused by the warranty.

User Manual
Page 51
n 51 N the Safely Remove Hardware icon is not displayed in the Safely Remove Hardware window. 1 Locate the ExpressCard slot. 2 Double-click the Safely Remove Hardware icon on the taskbar. 3 Select the hardware you want to unplug and click Stop. 4 Follow the on-screen instructions for removing the ExpressCard module. 5 Push in the ExpressCard module toward the computer so that the module pops out. 6 Gently take hold of the ExpressCard module and pull...
n 51 N the Safely Remove Hardware icon is not displayed in the Safely Remove Hardware window. 1 Locate the ExpressCard slot. 2 Double-click the Safely Remove Hardware icon on the taskbar. 3 Select the hardware you want to unplug and click Stop. 4 Follow the on-screen instructions for removing the ExpressCard module. 5 Push in the ExpressCard module toward the computer so that the module pops out. 6 Gently take hold of the ExpressCard module and pull...
User Manual
Page 56
... set up with your ISP, you need to connect an external modem device, for connecting your computer to the Internet. Using Your VAIO Computer > Using the Internet n 56 N Using the Internet Before using the wireless LAN function, you may be sure to take appropriate security measures to protect the computer against online threats. When you connect your computer to the Internet using the Internet, you need to sign up the wireless LAN network. The following types...
... set up with your ISP, you need to connect an external modem device, for connecting your computer to the Internet. Using Your VAIO Computer > Using the Internet n 56 N Using the Internet Before using the wireless LAN function, you may be sure to take appropriate security measures to protect the computer against online threats. When you connect your computer to the Internet using the Internet, you need to sign up the wireless LAN network. The following types...

User Manual
Page 58
...), which means that you can connect to a Local Area Network (LAN) through an access point, which specifies the type of Standards and Technology (NIST) FIPS 140-2 compliant AES encryption algorithm and 802.1X-based authentication. Using Your VAIO Computer > Using the Wireless LAN n 58 N Using the Wireless LAN Using the Wireless LAN (WLAN), all your digital devices with the built-in WLAN function communicate freely with each other...
...), which means that you can connect to a Local Area Network (LAN) through an access point, which specifies the type of Standards and Technology (NIST) FIPS 140-2 compliant AES encryption algorithm and 802.1X-based authentication. Using Your VAIO Computer > Using the Wireless LAN n 58 N Using the Wireless LAN Using the Wireless LAN (WLAN), all your digital devices with the built-in WLAN function communicate freely with each other...

User Manual
Page 83
... disabled so as not to disturb a presentation. If the VAIO Presentation Support is not assigned to the button, change the button assignment with the VAIO Control Center. 2 Select your desired display mode. ✍ Selecting any display mode other than Normal Display activates the Presentation mode. In Presentation mode, some functions of the connected external display simultaneously on the computer screen. Using Peripheral Devices > Connecting an External Display n 83 N Using the VAIO Presentation Support The VAIO Presentation Support allows you to use the VAIO...
... disabled so as not to disturb a presentation. If the VAIO Presentation Support is not assigned to the button, change the button assignment with the VAIO Control Center. 2 Select your desired display mode. ✍ Selecting any display mode other than Normal Display activates the Presentation mode. In Presentation mode, some functions of the connected external display simultaneously on the computer screen. Using Peripheral Devices > Connecting an External Display n 83 N Using the VAIO Presentation Support The VAIO Presentation Support allows you to use the VAIO...
User Manual
Page 95
... BIOS setup screen, as well as starting the computer. Customizing Your VAIO Computer > Setting the Password n 95 N Setting the Password Use one of the BIOS functions to set the machine password. ! The power-on your computer. There are two types of the BIOS setup options, as well as to start your computer from unauthorized access. The user password is provided for the standard users to protect your computer without entering the password. Be sure not to start...
... BIOS setup screen, as well as starting the computer. Customizing Your VAIO Computer > Setting the Password n 95 N Setting the Password Use one of the BIOS functions to set the machine password. ! The power-on your computer. There are two types of the BIOS setup options, as well as to start your computer from unauthorized access. The user password is provided for the standard users to protect your computer without entering the password. Be sure not to start...
User Manual
Page 104
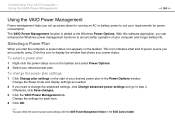
... changes. 3 Click the VAIO Power Management tab. Change the Sleep mode and display settings as needed. 2 If you need to change the power plan settings 1 Click Change plan settings on the right of your desired power plan in the VAIO Control Center. Change the settings for power consumption. With this icon to display the window that shows your power status. Click this software application, you can check the current power plan settings with the VAIO Power Management Viewer in the Power Options window. The VAIO Power Management function...
... changes. 3 Click the VAIO Power Management tab. Change the Sleep mode and display settings as needed. 2 If you need to change the power plan settings 1 Click Change plan settings on the right of your desired power plan in the VAIO Control Center. Change the settings for power consumption. With this icon to display the window that shows your power status. Click this software application, you can check the current power plan settings with the VAIO Power Management Viewer in the Power Options window. The VAIO Power Management function...

User Manual
Page 105
See the specifications to install a new memory module. ❑ You should not install it yourself, if you are not familiar with upgrading memory on the model you need assistance. Contact VAIO-Link if you purchased. The type of module and the amount of your dealer to find out about the configuration of memory installed on your computer may differ depending on a computer. ❑ You should contact your...
See the specifications to install a new memory module. ❑ You should not install it yourself, if you are not familiar with upgrading memory on the model you need assistance. Contact VAIO-Link if you purchased. The type of module and the amount of your dealer to find out about the configuration of memory installed on your computer may differ depending on a computer. ❑ You should contact your...

User Manual
Page 132
... restore your computer to Normal mode 1 Close all open programs. 2 Click Start, the arrow next to the Shut down button, and Restart. 3 If your computer with the Ctrl+Alt+Delete keys or the power button may become unstable if the operating mode is not compatible. Turning off . ! Troubleshooting > Computer n 132 N Why doesn't my computer enter Sleep or Hibernate mode? To solve this procedure does not work...
... restore your computer to Normal mode 1 Close all open programs. 2 Click Start, the arrow next to the Shut down button, and Restart. 3 If your computer with the Ctrl+Alt+Delete keys or the power button may become unstable if the operating mode is not compatible. Turning off . ! Troubleshooting > Computer n 132 N Why doesn't my computer enter Sleep or Hibernate mode? To solve this procedure does not work...

User Manual
Page 134
... < or , key to select Boot. 4 Press the M or m key to change the boot device order? The optimal graphic performance in such a case is shared with the system. The BIOS setup screen appears. You can I change the boot device order. A reset fee will be charged. How can use one of the game if there are any patches or updates to download. ❑ Make sure you have forgotten the power-on password? Troubleshooting > Computer n 134...
... < or , key to select Boot. 4 Press the M or m key to change the boot device order? The optimal graphic performance in such a case is shared with the system. The BIOS setup screen appears. You can I change the boot device order. A reset fee will be charged. How can use one of the game if there are any patches or updates to download. ❑ Make sure you have forgotten the power-on password? Troubleshooting > Computer n 134...

User Manual
Page 141
... the WIRELESS indicator light is lit on your computer. ❑ Make sure power to the access point is on. ❑ If you want to connect your computer to a wireless LAN access point using only the 5 GHz band, available on selected models only, is disabled by default. ❑ Follow these steps to check the settings: 1 Click Start and Control Panel. 2 Click View network status and tasks under Network and Internet. 3 Click Connect to a network...
... the WIRELESS indicator light is lit on your computer. ❑ Make sure power to the access point is on. ❑ If you want to connect your computer to a wireless LAN access point using only the 5 GHz band, available on selected models only, is disabled by default. ❑ Follow these steps to check the settings: 1 Click Start and Control Panel. 2 Click View network status and tasks under Network and Internet. 3 Click Connect to a network...

User Manual
Page 151
... desired drive. Troubleshooting > Optical Discs n 151 N ❑ Make sure the correct driver software is running on the AC power supply and try the disc again. Check the package to make sure the region code is not affixed to open a list of the optical disc drives of your computer is installed. Follow these steps: 1 Click Start and Control Panel. 2 Click System and Security. 3 Click System. 4 Click Device Manager in the optical disc drive...
... desired drive. Troubleshooting > Optical Discs n 151 N ❑ Make sure the correct driver software is running on the AC power supply and try the disc again. Check the package to make sure the region code is not affixed to open a list of the optical disc drives of your computer is installed. Follow these steps: 1 Click Start and Control Panel. 2 Click System and Security. 3 Click System. 4 Click Device Manager in the optical disc drive...
User Manual
Page 157
... need to install the printer driver software before you use your computer may enable printing. This disables the bidirectional communication functions of the printer, such as data transfer, status monitoring, and remote panel. Follow these steps: 1 Click Start and Devices and Printers. 2 Right-click the printer icon and select Properties. 3 Click the Ports tab. 4 Click to cancel the Enable bidirectional support check box. 5 Click OK. Troubleshooting...
... need to install the printer driver software before you use your computer may enable printing. This disables the bidirectional communication functions of the printer, such as data transfer, status monitoring, and remote panel. Follow these steps: 1 Click Start and Devices and Printers. 2 Right-click the printer icon and select Properties. 3 Click the Ports tab. 4 Click to cancel the Enable bidirectional support check box. 5 Click OK. Troubleshooting...

User Manual
Page 160
... hold the power button until the computer turns off. ! See Using the Touch Pad (page 32). ❑ Make sure that a mouse is not connected to your computer. ❑ If the pointer does not move while a software application is running, press the Alt+F4 keys to close the application window. ❑ If the Alt+F4 keys do if the touch pad does not work , press the Windows key once...
... hold the power button until the computer turns off. ! See Using the Touch Pad (page 32). ❑ Make sure that a mouse is not connected to your computer. ❑ If the pointer does not move while a software application is running, press the Alt+F4 keys to close the application window. ❑ If the Alt+F4 keys do if the touch pad does not work , press the Windows key once...

User Manual
Page 163
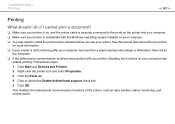
.... Troubleshooting > Audio/Video n 163 N Audio/Video What should I do if I turn off the Windows startup sound, follow these steps: 1 Click Start and Control Panel. 2 Click Hardware and Sound. 3 Click Manage audio devices under Sound. 5 On the Playback tab, select your computer or camcorder. See Connecting an i.LINK Device (page 92) for sound output and click Set Default. How do I change the device for sound output. 1 Close all open programs. 2 Click Start and Control Panel. 3 Click Hardware and Sound. 4 Click Manage audio devices under Sound. 4 On the Sounds...
.... Troubleshooting > Audio/Video n 163 N Audio/Video What should I do if I turn off the Windows startup sound, follow these steps: 1 Click Start and Control Panel. 2 Click Hardware and Sound. 3 Click Manage audio devices under Sound. 5 On the Playback tab, select your computer or camcorder. See Connecting an i.LINK Device (page 92) for sound output and click Set Default. How do I change the device for sound output. 1 Close all open programs. 2 Click Start and Control Panel. 3 Click Hardware and Sound. 4 Click Manage audio devices under Sound. 4 On the Sounds...


