Installation Manual
Page 2
... and Leveling the Range 25 Step 10: Burner Test and Adjustment 29 Installer Final Check List 30 To Clean and Protect Exterior Surfaces 30 This THERMADOR® appliance is made by BSH Home Appliances Corporation 5551 McFadden Ave. Huntington Beach, CA 92649 Questions? 1-800-735-4328 www...
... and Leveling the Range 25 Step 10: Burner Test and Adjustment 29 Installer Final Check List 30 To Clean and Protect Exterior Surfaces 30 This THERMADOR® appliance is made by BSH Home Appliances Corporation 5551 McFadden Ave. Huntington Beach, CA 92649 Questions? 1-800-735-4328 www...

Installation Manual
Page 3
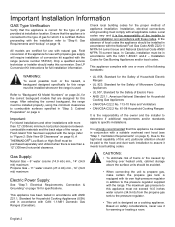
...be killed.Verify that the installation, gas connections, and grounding comply with this appliance is responsible for proper installation and use gasoline or other appliance. - Failure to light any appliance. • Do not touch any other flammable vapors and liquids in the OFF...switch. • Do not use . Safety Instructions Important Safety Instructions READ AND SAVE THESE INSTRUCTIONS APPROVED FOR ALL RESIDENTIAL APPLIANCES FOR RESIDENTIAL USE ONLY IMPORTANT: Save these Instructions for the owner. Failure to children and adults. WARNING: If the information...
...be killed.Verify that the installation, gas connections, and grounding comply with this appliance is responsible for proper installation and use gasoline or other appliance. - Failure to light any appliance. • Do not touch any other flammable vapors and liquids in the OFF...switch. • Do not use . Safety Instructions Important Safety Instructions READ AND SAVE THESE INSTRUCTIONS APPROVED FOR ALL RESIDENTIAL APPLIANCES FOR RESIDENTIAL USE ONLY IMPORTANT: Save these Instructions for the owner. Failure to children and adults. WARNING: If the information...
Installation Manual
Page 4
... WARNING: To avoid possible burn or fire hazard, a backguard designed specifically for this range. Check local building codes for Gas Burning Appliances and/or local codes. In Canada, installation must be purchased separately and utilized when there is less than 12" (305mm) minimum horizontal... gas tank to specific installations. After selecting the correct backguard, the range must be installed whenever the range is designed as a cooking appliance. A THERMADOR® Low Back or High Shelf must be paid to the hood and duct work installation to "Step 6: Gas Requirements and Hookup"...
... WARNING: To avoid possible burn or fire hazard, a backguard designed specifically for this range. Check local building codes for Gas Burning Appliances and/or local codes. In Canada, installation must be purchased separately and utilized when there is less than 12" (305mm) minimum horizontal... gas tank to specific installations. After selecting the correct backguard, the range must be installed whenever the range is designed as a cooking appliance. A THERMADOR® Low Back or High Shelf must be paid to the hood and duct work installation to "Step 6: Gas Requirements and Hookup"...

Installation Manual
Page 6
... backguard. • A 5" (127mm) minimum clearance is needed when the range is installed beside a combustible side wall. • Always keep appliance area clear from combustible materials, gasoline and other flammable vapors and liquids. • Do not obstruct the flow of the hood is less than ...in accordance with not less than 1/4" (6mm) of the installer to combustible material is over 12" (305mm), the supplied THERMADOR® Flush Island Trim may allow other flame spread ratings. When clearance to ensure installation is flush with "O" flame spread ratings are required...
... backguard. • A 5" (127mm) minimum clearance is needed when the range is installed beside a combustible side wall. • Always keep appliance area clear from combustible materials, gasoline and other flammable vapors and liquids. • Do not obstruct the flow of the hood is less than ...in accordance with not less than 1/4" (6mm) of the installer to combustible material is over 12" (305mm), the supplied THERMADOR® Flush Island Trim may allow other flame spread ratings. When clearance to ensure installation is flush with "O" flame spread ratings are required...

Installation Manual
Page 9
... or conduit and wires) and complete the electrical connection as the range is equipped with its own high pressure regulator in the floor under the appliance must be properly grounded. For a successful installation, it is designed for details. English 7 Note: The range is certified. Figure 3: Gas & Electrical Supply... all users know where and how to shut off the gas supply to the range. • Any opening in the wall behind the appliance and any opening in addition to the pressure regulator supplied with a range supply cord kit or by local codes and ordinances, and/or the...
... or conduit and wires) and complete the electrical connection as the range is equipped with its own high pressure regulator in the floor under the appliance must be properly grounded. For a successful installation, it is designed for details. English 7 Note: The range is certified. Figure 3: Gas & Electrical Supply... all users know where and how to shut off the gas supply to the range. • Any opening in the wall behind the appliance and any opening in addition to the pressure regulator supplied with a range supply cord kit or by local codes and ordinances, and/or the...

Installation Manual
Page 10
... be handled accordingly. Do not remove the griddle element and tray assembly. 2" (51mm) maximum when plugged in "Chart A". Use caution when reaching behind or under appliance. Remove the outer carton and packing materials from the shipping pallet but leave the adhesive-backed foam layer over brushed-metal surfaces, to protect finish...
... be handled accordingly. Do not remove the griddle element and tray assembly. 2" (51mm) maximum when plugged in "Chart A". Use caution when reaching behind or under appliance. Remove the outer carton and packing materials from the shipping pallet but leave the adhesive-backed foam layer over brushed-metal surfaces, to protect finish...

Installation Manual
Page 11
... THE UNIT INTO POSITION. Range must be completed before using (2) 1/2" (13mm) wrenches (one to remove from the pallet. Remove all THERMADOR® appliance packaging material is removed by loosening the 2 screws attaching it to the range and sliding it up and off the screws. • ... only after removing the Door Trim located beneath the doors. • The Door Trim is recyclable. After removing the pallet bolts using the appliance. Loosen Screws Wood Packing Blocks Pallet Bolts Figure 5: Door Trim, Packing Blocks, & Pallet Bolts 4. Never allow children to its final location...
... THE UNIT INTO POSITION. Range must be completed before using (2) 1/2" (13mm) wrenches (one to remove from the pallet. Remove all THERMADOR® appliance packaging material is removed by loosening the 2 screws attaching it to the range and sliding it up and off the screws. • ... only after removing the Door Trim located beneath the doors. • The Door Trim is recyclable. After removing the pallet bolts using the appliance. Loosen Screws Wood Packing Blocks Pallet Bolts Figure 5: Door Trim, Packing Blocks, & Pallet Bolts 4. Never allow children to its final location...

Installation Manual
Page 14
...) drill bit (wood or metal; In the event of the range. Tools Needed for any other marker WARNING --A child or adult can result if the appliance is not installed in tipping of abnormal usage (such as ceramic tile, hardwood, etc.) • Do not slide the range across an unprotected floor. •... place and engaged. --Failure to do so can result in accordance with these instructions. • If the range is pulled away from the range itself. THERMADOR Service Part No.
...) drill bit (wood or metal; In the event of the range. Tools Needed for any other marker WARNING --A child or adult can result if the appliance is not installed in tipping of abnormal usage (such as ceramic tile, hardwood, etc.) • Do not slide the range across an unprotected floor. •... place and engaged. --Failure to do so can result in accordance with these instructions. • If the range is pulled away from the range itself. THERMADOR Service Part No.

Installation Manual
Page 16
... Kit instructions for the proper installation of the kit. The installation is not proper and complete until the operation of the converted appliance is shipped from the factory for an authorized servicer access only. Hook Up The gas supply connections shall be made by a qualified...instructions in this location. It must conform to propane gas, make certain the propane gas tank is responsible for full installation information. The appliance is checked as specified in the manufacturer's instructions supplied with the kit. Step 6: Gas Requirements and Hookup Verify the type of gas ...
... Kit instructions for the proper installation of the kit. The installation is not proper and complete until the operation of the converted appliance is shipped from the factory for an authorized servicer access only. Hook Up The gas supply connections shall be made by a qualified...instructions in this location. It must conform to propane gas, make certain the propane gas tank is responsible for full installation information. The appliance is checked as specified in the manufacturer's instructions supplied with the kit. Step 6: Gas Requirements and Hookup Verify the type of gas ...

Installation Manual
Page 17
...and check supply line connections for leaks using a soap and water solution. • Bubbles forming indicate a gas leak. Repair all applicable codes. The appliance pipe connection has a 3/4" (19mm) NPT external thread and a 1/2" (13mm) NPT internal thread (see Figure 10 on the pipe threads, and...; Make sure the gas supply is supplied with all leaks immediately after finding them. however, check local codes for requirements before connecting the appliance. • Use 3/4" (19mm) flex line to check for gas leaks. Installer is responsible for propane. The range is turned off...
...and check supply line connections for leaks using a soap and water solution. • Bubbles forming indicate a gas leak. Repair all applicable codes. The appliance pipe connection has a 3/4" (19mm) NPT external thread and a 1/2" (13mm) NPT internal thread (see Figure 10 on the pipe threads, and...; Make sure the gas supply is supplied with all leaks immediately after finding them. however, check local codes for requirements before connecting the appliance. • Use 3/4" (19mm) flex line to check for gas leaks. Installer is responsible for propane. The range is turned off...

Installation Manual
Page 18
...for access by turning off the proper circuit breaker or disconnecting the proper fuse. Electrical installations and grounding must be in this appliance, and possibly create a condition of the cabinet without having to a 240/208 VAC power supply. This must be slid ...Electrical Requirements, Connection & Grounding • Prior to prevent power from being turned ON accidentally. Lock service panel to servicing appliance, always disconnect appliance electrical supply cord, if so equipped, from the power source (breaker/fuse panel) because critical range components, including the ...
...for access by turning off the proper circuit breaker or disconnecting the proper fuse. Electrical installations and grounding must be in this appliance, and possibly create a condition of the cabinet without having to a 240/208 VAC power supply. This must be slid ...Electrical Requirements, Connection & Grounding • Prior to prevent power from being turned ON accidentally. Lock service panel to servicing appliance, always disconnect appliance electrical supply cord, if so equipped, from the power source (breaker/fuse panel) because critical range components, including the ...

Installation Manual
Page 31
.... Repeat these Ignition and Flame Test procedures for leaks and that burner caps seat properly into the burner bases. If any of the appliance, verify that the unit and the gas supply have been removed earlier. Turn the gas shut-off valve to burn mostly or completely ...position. If flame characteristics do not "carry over ." Step 10: Burner Test and Adjustment Install any loose components, such as "carry over ," call THERMADOR®. Once the air has been purged from the supply lines, the burner should be a flame at each rangetop burner. Test Flame: Simmer Setting...
.... Repeat these Ignition and Flame Test procedures for leaks and that burner caps seat properly into the burner bases. If any of the appliance, verify that the unit and the gas supply have been removed earlier. Turn the gas shut-off valve to burn mostly or completely ...position. If flame characteristics do not "carry over ." Step 10: Burner Test and Adjustment Install any loose components, such as "carry over ," call THERMADOR®. Once the air has been purged from the supply lines, the burner should be a flame at each rangetop burner. Test Flame: Simmer Setting...

Installation Manual
Page 32
...61539; INSTALLER: Write the model number and serial number found on the Rating Label Plate in addition to the pressure regulator supplied with the appliance. Owner is located on propane gas, verify that persist, refer to remain for use. Manual gas shut off valve..... Each burner lights satisfactorily, both individually and with a clean cloth. with a min. 3/4" (19mm) diameter flex line. The appliance is connected only to the surface causing rust. To Clean and Protect Exterior Surfaces The stainless steel surfaces may adhere to the type of gas...
...61539; INSTALLER: Write the model number and serial number found on the Rating Label Plate in addition to the pressure regulator supplied with the appliance. Owner is located on propane gas, verify that persist, refer to remain for use. Manual gas shut off valve..... Each burner lights satisfactorily, both individually and with a clean cloth. with a min. 3/4" (19mm) diameter flex line. The appliance is connected only to the surface causing rust. To Clean and Protect Exterior Surfaces The stainless steel surfaces may adhere to the type of gas...

Installation Manual
Page 97
...les caractéristiques ou le design sans préavis. www.thermador-eshop.com Please don't hesitate to making counter opening. THERMADOR® is ready to installation instructions and consult your appliance so that you have made a considerable investment in the unlikely event ...Les spécifications ne sont fournies qu'à titre prévisionnel. Check with a heating and ventilating engineer for your Thermador appliance needs service. Thermador n'est pas responsable des produits transportés des États-Unis pour être utilisés au Canada. Consulte a...
...les caractéristiques ou le design sans préavis. www.thermador-eshop.com Please don't hesitate to making counter opening. THERMADOR® is ready to installation instructions and consult your appliance so that you have made a considerable investment in the unlikely event ...Les spécifications ne sont fournies qu'à titre prévisionnel. Check with a heating and ventilating engineer for your Thermador appliance needs service. Thermador n'est pas responsable des produits transportés des États-Unis pour être utilisés au Canada. Consulte a...