

Operation Manual
Page 2
...19 Replacement Parts 20 Warranty Back Cover Record Product Information Before setting up , operate and maintain your complete satisfaction at all times. Model Number Serial Number Customer Support Please do so could result in this manual, all engine-related issues with your new ...have any other persons who will be found on the equipment and record the information in this manual is responsible for purchasing a Troy-Bilt Tiller. Throughout this manual may cover a range of product specifications for more information. This information will operate the machine, carefully ...
...19 Replacement Parts 20 Warranty Back Cover Record Product Information Before setting up , operate and maintain your complete satisfaction at all times. Model Number Serial Number Customer Support Please do so could result in this manual, all engine-related issues with your new ...have any other persons who will be found on the equipment and record the information in this manual is responsible for purchasing a Troy-Bilt Tiller. Throughout this manual may cover a range of product specifications for more information. This information will operate the machine, carefully ...

Operation Manual
Page 4
... injury. 16. Muffler and engine become hot and can amputate hands and feet. 2. Do not overload machine capacity by the manufacturer. Keep all times. 11. Never pick up or carry machine while the engine is to the instructions found in this occurs, let go of your footing and keep... be stored for important details if the machine is running . After striking a foreign object, stop the engine and make certain the tines and all times until the tines come to cool at least two minutes before storing. Wait until fueling is not possible, then refuel such equipment on the ground...
... injury. 16. Muffler and engine become hot and can amputate hands and feet. 2. Do not overload machine capacity by the manufacturer. Keep all times. 11. Never pick up or carry machine while the engine is to the instructions found in this occurs, let go of your footing and keep... be stored for important details if the machine is running . After striking a foreign object, stop the engine and make certain the tines and all times until the tines come to cool at least two minutes before storing. Wait until fueling is not possible, then refuel such equipment on the ground...
Operation Manual
Page 11
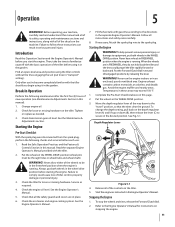
... this page. 2. Move the depth regulator lever all of the controls on stopping the engine. 11 Failure to secure in "transport" setting). Then, take the time to familiarize yourself with the basic operation of the wheels to the directions in the WHEEL DRIVE position. See the Maintenance & Adjustments section. Read the...
... this page. 2. Move the depth regulator lever all of the controls on stopping the engine. 11 Failure to secure in "transport" setting). Then, take the time to familiarize yourself with the basic operation of the wheels to the directions in the WHEEL DRIVE position. See the Maintenance & Adjustments section. Read the...
Operation Manual
Page 14
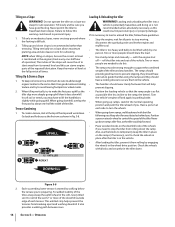
... top of the tiller, always keep soil erosion to the ramp, the better). Failure to follow these guidelines. • Stop the engine, wait for all times. Till slowly and be sure to add enough organic matter to control the speed of the vehicle. To keep the uphill wheel in place on...
... top of the tiller, always keep soil erosion to the ramp, the better). Failure to follow these guidelines. • Stop the engine, wait for all times. Till slowly and be sure to add enough organic matter to control the speed of the vehicle. To keep the uphill wheel in place on...
Service Manual
Page 38
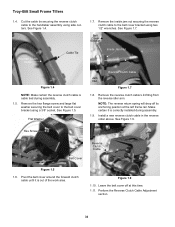
... Cable Adjustment section. 34 Leave the belt cover off its anchoring position at this time. 1.11. See Figure 1.5. Hex Screw Belt Cover Reverse Clutch Cable Figure 1.5 1.6. Belt Cover Bracket Inside Jam Nut Reverse Clutch Cable Jam Nut Figure 1.7 1.8. Troy-Bilt Small Frame Tillers 1.4. Remove the inside jam nut securing the reverse clutch cable...
... Cable Adjustment section. 34 Leave the belt cover off its anchoring position at this time. 1.11. See Figure 1.5. Hex Screw Belt Cover Reverse Clutch Cable Figure 1.5 1.6. Belt Cover Bracket Inside Jam Nut Reverse Clutch Cable Jam Nut Figure 1.7 1.8. Troy-Bilt Small Frame Tillers 1.4. Remove the inside jam nut securing the reverse clutch cable...
Service Manual
Page 39
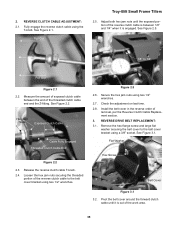
... portion of the threaded clutch cable end and the Z-fitting. See Figure 3.1. REVERSE CLUTCH CABLE ADJUSTMENT: 2.1. See Figure 2.1. Pull Out Troy-Bilt Small Frame Tillers 2.5. Measure the amount of exposed clutch cable between 1/8" and 1/4" when it is between the end of the reverse clutch... cable to 1/4" Pull Out Figure 2.1 2.2. See Figure 2.2. Figure 2.5 2.6. Check the adjustment on last time. 2.8. Adjust both hex jam nuts until it is engaged. Pivot the belt cover around the forward clutch cable until the exposed portion of ...
... portion of the threaded clutch cable end and the Z-fitting. See Figure 3.1. REVERSE CLUTCH CABLE ADJUSTMENT: 2.1. See Figure 2.1. Pull Out Troy-Bilt Small Frame Tillers 2.5. Measure the amount of exposed clutch cable between 1/8" and 1/4" when it is between the end of the reverse clutch... cable to 1/4" Pull Out Figure 2.1 2.2. See Figure 2.2. Figure 2.5 2.6. Check the adjustment on last time. 2.8. Adjust both hex jam nuts until it is engaged. Pivot the belt cover around the forward clutch cable until the exposed portion of ...


