
User Manual
Page 7
TV Output Connector 41 Integrated Peripherals 42 Power Management Setup 44 Peripheral Activities 47 IRQs Activities 50 PNP/PCI Configurations 51 IRQ Resources 53 PC Health Status 54 Frequency / Voltage Control 55 Load Fail-Safe Defaults 59 Load Optimized Defaults 60 Set Supervisor / User Password 61 Save & Exit Setup 63 Exit Without Saving 64 Chapter 4 65 Driver Installation 65 Driver Utilities 66 CD Content 68 iii
TV Output Connector 41 Integrated Peripherals 42 Power Management Setup 44 Peripheral Activities 47 IRQs Activities 50 PNP/PCI Configurations 51 IRQ Resources 53 PC Health Status 54 Frequency / Voltage Control 55 Load Fail-Safe Defaults 59 Load Optimized Defaults 60 Set Supervisor / User Password 61 Save & Exit Setup 63 Exit Without Saving 64 Chapter 4 65 Driver Installation 65 Driver Utilities 66 CD Content 68 iii

User Manual
Page 23
... Line-Out jack is for connecting to a microphone. Shown below are the corresponding connections to the 3-jack connectors on your desktop after installing the audio driver. After completing the previous installation, connect the speakers to setup the 6-channel system. The Line-In jack is for connecting to an external audio device...
... Line-Out jack is for connecting to a microphone. Shown below are the corresponding connections to the 3-jack connectors on your desktop after installing the audio driver. After completing the previous installation, connect the speakers to setup the 6-channel system. The Line-In jack is for connecting to an external audio device...

User Manual
Page 53
... field configures the power button on even when system enters power saving mode Screen is only Settings: [Auto, Yes, No] 45 necessary for older VGA drivers. This is turned off the screen when system enters power saving mode, ACPI OS such as Windows XP will override this option. BIOS Setup HDD...
... field configures the power button on even when system enters power saving mode Screen is only Settings: [Auto, Yes, No] 45 necessary for older VGA drivers. This is turned off the screen when system enters power saving mode, ACPI OS such as Windows XP will override this option. BIOS Setup HDD...
User Manual
Page 73
You must install the VIA chipset drivers first before installing other drivers such as audio or VGA drivers. The applications will only function correctly if the necessary drivers are already installed. 65 CHAPTER 4 Driver Installation This chapter gives you brief descriptions of each mainboard driver and application.
You must install the VIA chipset drivers first before installing other drivers such as audio or VGA drivers. The applications will only function correctly if the necessary drivers are already installed. 65 CHAPTER 4 Driver Installation This chapter gives you brief descriptions of each mainboard driver and application.

User Manual
Page 74
The latest updated versions are updated from the retail box, please contact the local dealer for enhancing the performance of the mainboard. If the CD is missing from time to time. Chapter 4 DRIVER UTILITIES Getting Started The mainboard includes a Driver Utilities CD that contains the driver utilities and software for the CD. Note: The driver utilities and software are available at http://www.viaembedded.com./ 66
The latest updated versions are updated from the retail box, please contact the local dealer for enhancing the performance of the mainboard. If the CD is missing from time to time. Chapter 4 DRIVER UTILITIES Getting Started The mainboard includes a Driver Utilities CD that contains the driver utilities and software for the CD. Note: The driver utilities and software are available at http://www.viaembedded.com./ 66

User Manual
Page 75
If the CD does not run automatically after closing the CD-ROM or DVD-ROM drive. Then type: "D:\Setup.exe". NOTE: D: might not be the drive letter of the CD-ROM/DVD-ROM in your system. 67 The driver utilities and software menu screen should run automatically, click on the screen. Driver Installation Running the Driver Utilities CD To start using the CD, insert the CD into the CD-ROM or DVD-ROM drive. The CD should then appear on the "Start" button and select "Run..."
If the CD does not run automatically after closing the CD-ROM or DVD-ROM drive. Then type: "D:\Setup.exe". NOTE: D: might not be the drive letter of the CD-ROM/DVD-ROM in your system. 67 The driver utilities and software menu screen should run automatically, click on the screen. Driver Installation Running the Driver Utilities CD To start using the CD, insert the CD into the CD-ROM or DVD-ROM drive. The CD should then appear on the "Start" button and select "Run..."
User Manual
Page 76
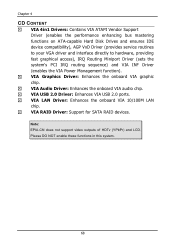
...: EPIA-CN does not support video outputs of HDTv (YPbPr) and LCD. VIA Graphics Driver: Enhances the onboard VIA graphic chip. VIA Audio Driver: Enhances the onboard VIA audio chip. Please DO NOT enable these functions in this system. 68 VIA LAN Driver: Enhances the onboard VIA 10/100M LAN chip. VIA USB 2.0 Driver: Enhances VIA USB 2.0 ports. Chapter 4 CD CONTENT VIA 4in1 Drivers: Contains VIA...
...: EPIA-CN does not support video outputs of HDTv (YPbPr) and LCD. VIA Graphics Driver: Enhances the onboard VIA graphic chip. VIA Audio Driver: Enhances the onboard VIA audio chip. Please DO NOT enable these functions in this system. 68 VIA LAN Driver: Enhances the onboard VIA 10/100M LAN chip. VIA USB 2.0 Driver: Enhances VIA USB 2.0 ports. Chapter 4 CD CONTENT VIA 4in1 Drivers: Contains VIA...