Via EPIA-MII12000G - VIA EPIA MII 12000G Motherboard Support and Manuals
Get Help and Manuals for this VIA Technologies item

View All Support Options Below
Free Via EPIA-MII12000G manuals!
Problems with Via EPIA-MII12000G?
Ask a Question
Free Via EPIA-MII12000G manuals!
Problems with Via EPIA-MII12000G?
Ask a Question
Popular Via EPIA-MII12000G Manual Pages
User Manual - Page 4
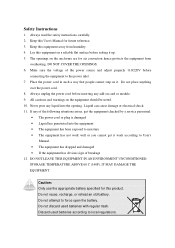
... Do not discard used batteries according to local regulations. Always read the safety instructions carefully. 2. The openings on card or module. 9. DO NOT COVER THE OPENINGS. 6. Caution: Only use ...to User's
Manual. • The equipment has dropped and damaged • If the equipment has obvious sign of the following situations arises, get the equipment checked by a service personnel:
...
User Manual - Page 7

Set Supervisor / User Password 59 Save & Exit Setup 61 Exit Without Saving 62 Chapter 4 63 Driver Installation 63 Driver Utilities 64 CD Content 65
iii
User Manual - Page 25

... Data Set Ready Request To Send Clear To Send Ring Indicate
Card Slots: PCMCIA, CF The mainboard comes with an add-on the same side as the ports.
17 These slots are accessed on card that provides support for PCMCIA and CF cards. IEEE 1394 Port The mainboard provides one 9-pin male Serial Port connector COM1. Installation
Serial...
User Manual - Page 26

... jacks as a CD player, tape player, etc.... You can be switched to Smart 5.1 6-channel audio output.
After completing the previous settings, you need to connect your desktop after installing the audio driver. Chapter 2
Audio Jacks: Line-In, Line-Out, Microphone
Jack Line-In Line-Out Mic
2-Channel Line in Line out Microphone
6-Channel...
User Manual - Page 29

... this pin.
Speaker The speaker from the system case is not in use, please short pin 3&5, pin 4&6, pin 7&9, and pin 8&10.
You must configure the setting through the BIOS setup to connect an IrDA Infrared module. Installation
IrDA Infrared Module Connector: FIR This connector allows you to activate the IR function.
User Manual - Page 43

...category. Formatted size of sectors The settings are CHS, LBA, Large, Auto. The settings are Disabled and Auto
35 The settings are None, Auto, Manual.
The settings are Mode 0/1/2/3/4, Auto. If you... storage device. BIOS Setup
IDE Primary Master/Slave, Secondary Master/Slave Press Enter to enter the sub-menu and the following screen appears:
The specifications of your hard disk...
User Manual - Page 47

... 4x video card is used for video purposes.
AGP8x mode can transfer video data at 533MB/s. ADVANCED CHIPSET FEATURES
BIOS Setup
The Advanced Chipset Features menu is used , it at 266MB/s, and 2x mode transfers data at 1066MB/s. Settings: 4MB, 8MB, 16MB, 32MB, 64MB, 128MB and 256MB
AGP Mode (Internal) This mainboard supports the AGP...
User Manual - Page 49

...Frame Buffer Size This setting instructs the BIOS to reserved the specified amount of memory for two IDE channels. INTEGRATED PERIPHERALS
BIOS Setup
Onboard IDE Channel 1/2 The integrated peripheral controller contains an IDE interface with support for the internal video controller. Settings: Enabled and Disabled
Display Card Priority This setting specifies which VGA card is also called block...
User Manual - Page 50

... to use other controller cards to connect to an audio device. Chapter 3
AC'97 Audio Auto allows the mainboard to detect whether an audio device is disabled. if not, it is used. Settings: Enabled and Disabled OnChip USB Controller Settings: All Enabled and All Disabled USB Keyboard Support Enable USB Keyboard Support for DOS and Windows...
User Manual - Page 51

... Enable the onboard floppy controller. BIOS Setup
SuperIO Device Press Enter to support both the ECP and EPP modes simultaneously. Selecting Auto allows BIOS to automatically determine the correct base I /O port address and IRQ for the onboard serial port A / serial port B. Settings: SPP, EPP, ECP, ECP + EPP
43 Settings: Disabled, 378/IRQ7, 278/IRQ5...
User Manual - Page 57

... by the IO device.
49 After receiving the signal, when the operating system is on. Settings: Off, On IRQ3~IRQ15 Enables or disables the monitoring of the specified IRQ line will interrupt itself and perform the service required by causing an IRQ to Enabled, the activity of the specified IRQ line. These...
User Manual - Page 59

Settings: Auto (ESCD) and Manual Assign IRQ For VGA/USB Assign IRQ for VGA and USB devices. BIOS Setup
Resource Controlled By The BIOS can automatically configure all the boot and Plug and Play compatible devices. Settings: Disabled and Enabled
51 Choose Auto(ESCD) if unsure, the BIOS will automatically assign IRQ, DMA and memory base address fields.
User Manual - Page 62

... MHz, 133 MHz and By SPD DRAM Timing The value in this field depends on the memory modules installed in your system. Settings: 2, 2.5
54 Changing the value from the factory setting is set to "Manual". Settings: Manual and By SPD DRAM CAS Latency This item adjusts the speed it to complete a command. However, if your system becomes...
User Manual - Page 63

...set to "Manual". Lower setting equals faster command rate. Longer setting's equals better memory performance. One bank will undergo its refresh cycle while another is set to "Manual". This field is only available when "DRAM Timing" is set to "Manual...Settings: 2T Command, 1T Command
DRAM Burst Len This field sets the length of time for one burst of each bank. Settings.... Settings: ...
User Manual - Page 73

... are: • VIA 4in1 Drivers: Contains VIA ATAPI Vendor Support Driver (enables the performance enhancing bus mastering functions on ATA-capable Hard Disk Drives and ensures IDE device compatibility), AGP VxD Driver (provides service routines to your VGA driver and interface directly to hardware, providing fast graphical access), IRQ Routing Miniport Driver (sets the system's PCI IRQ routing...
Via EPIA-MII12000G Reviews
We have not received any reviews for Via yet.