

User Manual
Page 2
...property of Phoenix Technologies Ltd. The information provided in any form or by any means, electronic, mechanical, magnetic, optical, chemical, manual or otherwise without the prior written permission of this document. PS/2 is granted, implied or otherwise, under any person of such change..., transcribed, stored in a retrieval system, or translated into any language, in this document and for the use of VIA Technologies Incorporated. However, VIA Technologies assumes no warranties, implied or otherwise, in regard to this document and to the products described in this document is...
...property of Phoenix Technologies Ltd. The information provided in any form or by any means, electronic, mechanical, magnetic, optical, chemical, manual or otherwise without the prior written permission of this document. PS/2 is granted, implied or otherwise, under any person of such change..., transcribed, stored in a retrieval system, or translated into any language, in this document and for the use of VIA Technologies Incorporated. However, VIA Technologies assumes no warranties, implied or otherwise, in regard to this document and to the products described in this document is...

User Manual
Page 3
... by the party responsible for a class B digital device, pursuant to part 15 of this equipment in a residential area is operated in accordance with the instruction manual, may cause harmful interference to radio communications. Tested To Comply With FCC Standards FOR HOME OR OFFICE USE Operation of the FCC rules. Notice 2 Shielded...
... by the party responsible for a class B digital device, pursuant to part 15 of this equipment in a residential area is operated in accordance with the instruction manual, may cause harmful interference to radio communications. Tested To Comply With FCC Standards FOR HOME OR OFFICE USE Operation of the FCC rules. Notice 2 Shielded...
User Manual
Page 4
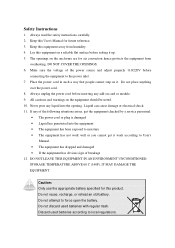
...adjust properly 110/220V before inserting any add-on card or module. 9. Always unplug the power cord before connecting the equipment to User's Manual. • The equipment has dropped and damaged • If the equipment has obvious sign of the following situations arises, get the ...get it . Do not place anything over the power cord. 8. Liquid can cause damage or electrical shock. 11. Keep this User's Manual for air convection hence protects the equipment from humidity. 4. Keep this equipment away from overheating. Do not discard used batteries according to force...
...adjust properly 110/220V before inserting any add-on card or module. 9. Always unplug the power cord before connecting the equipment to User's Manual. • The equipment has dropped and damaged • If the equipment has obvious sign of the following situations arises, get the ...get it . Do not place anything over the power cord. 8. Liquid can cause damage or electrical shock. 11. Keep this User's Manual for air convection hence protects the equipment from humidity. 4. Keep this equipment away from overheating. Do not discard used batteries according to force...

User Manual
Page 30
... LAN function. Please note that the function of ACPI WOL may be disabled when users unplug the power cord or turn off the power button manually. Chapter 2 USB pin-header: USB3/4 The mainboard provides 1 USB pin-header connector, allowing up the system when a signal is received through the network card. Pin...
... LAN function. Please note that the function of ACPI WOL may be disabled when users unplug the power cord or turn off the power button manually. Chapter 2 USB pin-header: USB3/4 The mainboard provides 1 USB pin-header connector, allowing up the system when a signal is received through the network card. Pin...

User Manual
Page 43
... location of the landing zone Number of this category. If you enter incorrect information in this menu item will not work properly if you select Manual, make sure the information is from your drive must match with the drive table. IDE Access Mode Capacity Cylinder Head Precomp Landing Zone Sector PIO... Master/Slave Press Enter to enter the sub-menu and the following screen appears: The specifications of the storage device. The settings are None, Auto, Manual. Select Auto whenever possible.
... location of the landing zone Number of this category. If you enter incorrect information in this menu item will not work properly if you select Manual, make sure the information is from your drive must match with the drive table. IDE Access Mode Capacity Cylinder Head Precomp Landing Zone Sector PIO... Master/Slave Press Enter to enter the sub-menu and the following screen appears: The specifications of the storage device. The settings are None, Auto, Manual. Select Auto whenever possible.

User Manual
Page 59
Settings: Disabled and Enabled 51 BIOS Setup Resource Controlled By The BIOS can automatically configure all the boot and Plug and Play compatible devices. Choose Auto(ESCD) if unsure, the BIOS will automatically assign IRQ, DMA and memory base address fields. Settings: Auto (ESCD) and Manual Assign IRQ For VGA/USB Assign IRQ for VGA and USB devices.
Settings: Disabled and Enabled 51 BIOS Setup Resource Controlled By The BIOS can automatically configure all the boot and Plug and Play compatible devices. Choose Auto(ESCD) if unsure, the BIOS will automatically assign IRQ, DMA and memory base address fields. Settings: Auto (ESCD) and Manual Assign IRQ For VGA/USB Assign IRQ for VGA and USB devices.

User Manual
Page 60
Press Enter and you will be reserved for further requests 52 Settings: PCI Device For Plug-and-Play compatible devices designed for PCI bus architecture Reserved The IRQ will enter the sub-menu of device using the IRQ. Chapter 3 IRQ Resources The items are adjustable only when Resources Controlled By is set each IRQ a type depending on the type of the items. IRQ Resources list IRQ 3/4/5/7/9/10/11/12/14/15 for users to set to Manual.
Press Enter and you will be reserved for further requests 52 Settings: PCI Device For Plug-and-Play compatible devices designed for PCI bus architecture Reserved The IRQ will enter the sub-menu of device using the IRQ. Chapter 3 IRQ Resources The items are adjustable only when Resources Controlled By is set each IRQ a type depending on the type of the items. IRQ Resources list IRQ 3/4/5/7/9/10/11/12/14/15 for users to set to Manual.

User Manual
Page 62
... 100 MHz, 133 MHz and By SPD DRAM Timing The value in this field depends on the memory modules installed in your system. Settings: Manual and By SPD DRAM CAS Latency This item adjusts the speed it to a higher setting. This field is only available when "DRAM Timing" ...is not recommended unless you should change it takes for the memory module to "Manual". Generally, a lower setting will improve the performance of your system. Settings: 2, 2.5 54 Changing the value from the factory setting is set to complete ...
... 100 MHz, 133 MHz and By SPD DRAM Timing The value in this field depends on the memory modules installed in your system. Settings: Manual and By SPD DRAM CAS Latency This item adjusts the speed it to a higher setting. This field is only available when "DRAM Timing" ...is not recommended unless you should change it takes for the memory module to "Manual". Generally, a lower setting will improve the performance of your system. Settings: 2, 2.5 54 Changing the value from the factory setting is set to complete ...

User Manual
Page 63
... SDRAM by masking the refresh time of data during a read/write transaction. One bank will undergo its refresh cycle while another is set to "Manual". Settings: Disabled, 2 Bank, 4 Bank Precharge to Active (Trp) This field controls the length of time it takes to precharge a row... in the memory module before precharging. Settings: 4, 8 55 This field is only available when "DRAM Timing" is set to "Manual". Longer setting's equals better memory performance. Please note that some memory modules may not offer the best performance. Settings: 2T Command, 1T Command DRAM...
... SDRAM by masking the refresh time of data during a read/write transaction. One bank will undergo its refresh cycle while another is set to "Manual". Settings: Disabled, 2 Bank, 4 Bank Precharge to Active (Trp) This field controls the length of time it takes to precharge a row... in the memory module before precharging. Settings: 4, 8 55 This field is only available when "DRAM Timing" is set to "Manual". Longer setting's equals better memory performance. Please note that some memory modules may not offer the best performance. Settings: 2T Command, 1T Command DRAM...

User Manual
Page 72
... CD, just simply insert the CD into your CD-ROM/DVD-ROM drive letter. The driver utilities and software menu screen should run the CD manually by typing "D:\Setup.exe" at Start\Run. Please visit our website (http://www.viaembedded.com/) for the CD. Chapter 4 DRIVER UTILITIES Getting Started The mainboard...
... CD, just simply insert the CD into your CD-ROM/DVD-ROM drive letter. The driver utilities and software menu screen should run the CD manually by typing "D:\Setup.exe" at Start\Run. Please visit our website (http://www.viaembedded.com/) for the CD. Chapter 4 DRIVER UTILITIES Getting Started The mainboard...