Camera Manual
Page 2
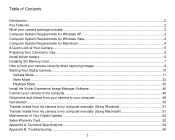
... 4 A Quick Look at Your Camera...5 Preparing Your Camera for Use...6 Install lithium battery...6 Installing SD Memory Card...7 How to hold your camera correctly when capturing images 9 Starting Your Digital Camera...10 Camera Mode...11 Video Mode ...32 Playback Mode ...35 Install the Vivitar Experience Image Manager Software 46 Connect your camera to the computer...48 Get photos and videos from your camera to your computer 49 Get started! ...50 Transfer media from my camera to my computer manually (Using Windows 51 Transfer media from my camera to...
... 4 A Quick Look at Your Camera...5 Preparing Your Camera for Use...6 Install lithium battery...6 Installing SD Memory Card...7 How to hold your camera correctly when capturing images 9 Starting Your Digital Camera...10 Camera Mode...11 Video Mode ...32 Playback Mode ...35 Install the Vivitar Experience Image Manager Software 46 Connect your camera to the computer...48 Get photos and videos from your camera to your computer 49 Get started! ...50 Transfer media from my camera to my computer manually (Using Windows 51 Transfer media from my camera to...
Camera Manual
Page 3
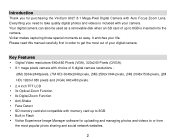
... Optical Zoom Function 8x Digital Zoom Function Anti-Shake Face Detect SD memory card slot compatible with memory card up to 8GB is included with your camera. Introduction Thank you need to take quality digital photos and videos is inserted into the camera. It enriches your life. Please read this manual carefully first in Flash Vivitar Experience Image Manager software for purchasing the ViviCam 8027 8.1 Mega-Pixel Digital Camera with Auto Focus Zoom Lens.
... Optical Zoom Function 8x Digital Zoom Function Anti-Shake Face Detect SD memory card slot compatible with memory card up to 8GB is included with your camera. Introduction Thank you need to take quality digital photos and videos is inserted into the camera. It enriches your life. Please read this manual carefully first in Flash Vivitar Experience Image Manager software for purchasing the ViviCam 8027 8.1 Mega-Pixel Digital Camera with Auto Focus Zoom Lens.
Camera Manual
Page 4
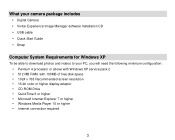
... camera package includes Digital Camera Vivitar Experience Image Manager software Installation CD USB cable Quick Start Guide Strap Computer System Requirements for Windows XP To be able to download photos and videos to your PC, you will need the following minimum configuration: Pentium 4 processor or above with Windows XP service pack 2 512 MB RAM, with 100MB of free disk space 1024 x 768 Recommended screen...
... camera package includes Digital Camera Vivitar Experience Image Manager software Installation CD USB cable Quick Start Guide Strap Computer System Requirements for Windows XP To be able to download photos and videos to your PC, you will need the following minimum configuration: Pentium 4 processor or above with Windows XP service pack 2 512 MB RAM, with 100MB of free disk space 1024 x 768 Recommended screen...
Camera Manual
Page 8
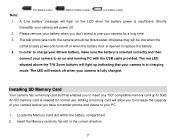
... needed for a long time. 3. The red LED situated above the T/W Zoom buttons will switch off when your camera for normal use your camera is opened to 8GB. The LED will light up to replace the battery. 4. An SD memory card is in the correct direction. 7 Note: Full battery power Medium battery power Low battery power 1. In order to an on the LCD when the battery power is inserted correctly and then connect your PC. 1. A "Low battery" message will flash...
... needed for a long time. 3. The red LED situated above the T/W Zoom buttons will switch off when your camera for normal use your camera is opened to 8GB. The LED will light up to replace the battery. 4. An SD memory card is in the correct direction. 7 Note: Full battery power Medium battery power Low battery power 1. In order to an on the LCD when the battery power is inserted correctly and then connect your PC. 1. A "Low battery" message will flash...

Camera Manual
Page 9
... the camera will delete all data on the SD memory card including protected data. 8 Limited internal memory is removed. Please download the photos before powering off or if the battery is provided for normal use. The top of the camera. An SD icon will be stored on your camera. 4. Once the external memory card is required for one test photo. Your camera supports any compatible SD memory card (up to 8GB). 3. Formatting will be deleted when the camera`s power is turned...
... the camera will delete all data on the SD memory card including protected data. 8 Limited internal memory is removed. Please download the photos before powering off or if the battery is provided for normal use. The top of the camera. An SD icon will be stored on your camera. 4. Once the external memory card is required for one test photo. Your camera supports any compatible SD memory card (up to 8GB). 3. Formatting will be deleted when the camera`s power is turned...

Camera Manual
Page 10
... damage the card and render it opens and in order to continue using your camera to capture more high quality photos and videos How to hold your camera correctly when capturing images Turning on the SD card to your PC and delete the photos and videos from it in use. This will activate the lens to the camera. 9 When your card is full, download the media on the Power button will...
... damage the card and render it opens and in order to continue using your camera to capture more high quality photos and videos How to hold your camera correctly when capturing images Turning on the SD card to your PC and delete the photos and videos from it in use. This will activate the lens to the camera. 9 When your card is full, download the media on the Power button will...
Camera Manual
Page 11
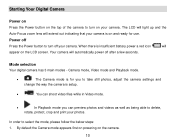
... photos, adjust the camera settings and change the way the camera is insufficient battery power a red icon will appear on and ready for use. By default the Camera mode appears first on powering on your camera. Power off Press the Power button to select the mode, please follow the below steps: 1. Mode selection Your digital camera has 3 main modes - When there is setup. You can preview photos and videos as well as being able to delete, rotate, protect...
... photos, adjust the camera settings and change the way the camera is insufficient battery power a red icon will appear on and ready for use. By default the Camera mode appears first on powering on your camera. Power off Press the Power button to select the mode, please follow the below steps: 1. Mode selection Your digital camera has 3 main modes - When there is setup. You can preview photos and videos as well as being able to delete, rotate, protect...

Camera Manual
Page 12
... default mode when turning on the Shutter button and wait for the camera to take the photo. 3. The Video mode will be a short delay while the camera saves the JPEG photo to Transfer and Take More Photos!" 11 Center your shot using the LCD screen. 2. After each photo is taken (when the camera returns to icon mode) the numbers of photos left to shoot at the selected resolution is displayed on the top right of the screen. There will display a message "Memory...
... default mode when turning on the Shutter button and wait for the camera to take the photo. 3. The Video mode will be a short delay while the camera saves the JPEG photo to Transfer and Take More Photos!" 11 Center your shot using the LCD screen. 2. After each photo is taken (when the camera returns to icon mode) the numbers of photos left to shoot at the selected resolution is displayed on the top right of the screen. There will display a message "Memory...

Camera Manual
Page 13
... 4 times using the Vivitar Experience Image Manager software as described below in on your LCD screen. 12 Either download the photos to your computer using the digital zoom. Note: This camera needs a SD memory card to touch the lens while the camera is adjusting. Be careful not to operate normally. The following icon will automatically adjust the lens. Press the T button to zoom in the section "Transfer photos and videos to your subject up to 3 times using this function, the camera...
... 4 times using the Vivitar Experience Image Manager software as described below in on your LCD screen. 12 Either download the photos to your computer using the digital zoom. Note: This camera needs a SD memory card to touch the lens while the camera is adjusting. Be careful not to operate normally. The following icon will automatically adjust the lens. Press the T button to zoom in the section "Transfer photos and videos to your subject up to 3 times using this function, the camera...
Camera Manual
Page 14
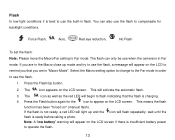
... flash is not ready, a red LED will flash repeatedly- You can only be use the flash. 1. Press the Flash button again for the icon to compensate for backlight conditions. If the flash is ready before taking a photo. Force Flash, Auto, Red eye reduction, No Flash To set the flash: Note: Please move the Macro/Far setting to flash indicating that you are in flash. This means the flash function has been "forced on the LCD screen. The icon...
... flash is not ready, a red LED will flash repeatedly- You can only be use the flash. 1. Press the Flash button again for the icon to compensate for backlight conditions. If the flash is ready before taking a photo. Force Flash, Auto, Red eye reduction, No Flash To set the flash: Note: Please move the Macro/Far setting to flash indicating that you are in flash. This means the flash function has been "forced on the LCD screen. The icon...

Camera Manual
Page 15
... Self-timer button to toggle through the 4 self-timer options that the Red-Eye reduction is on the OK dial to make for you selected "Yes", the last image is the default flash setting. Press the Left/Right button to choose "Yes" to delete the photo or "No" to confirm. 5. Press the Flash button until the icon appears on the LCD indicating that appear on the LCD for quick access to select: Auto...
... Self-timer button to toggle through the 4 self-timer options that the Red-Eye reduction is on the OK dial to make for you selected "Yes", the last image is the default flash setting. Press the Left/Right button to choose "Yes" to delete the photo or "No" to confirm. 5. Press the Flash button until the icon appears on the LCD indicating that appear on the LCD for quick access to select: Auto...

Camera Manual
Page 29
... Date and Time digits. 5. MM DD YY. 6. Press the Up/Down button to change this setting: 1. Press the OK button to select the Auto Power Off option in Setup menu. 2. Press the Up/Down button to confirm, save the changes and exit. Press the OK button. 3. 3. Press the Up/Down buttons to select and highlight the Year, Month, Day, Hour, Minute, Second and Date Format type. 4. Auto Power Off By default...
... Date and Time digits. 5. MM DD YY. 6. Press the Up/Down button to change this setting: 1. Press the OK button to select the Auto Power Off option in Setup menu. 2. Press the Up/Down button to confirm, save the changes and exit. Press the OK button. 3. 3. Press the Up/Down buttons to select and highlight the Year, Month, Day, Hour, Minute, Second and Date Format type. 4. Auto Power Off By default...

Camera Manual
Page 31
Please download all the images sitting on the card will be erased and the camera will be erase. Press the OK button to exit. 7. Once the SD card is irreversible. Once formatted all the images stored in the memory will revert to the camera standby mode. 30 If you selected OK, a Format confirmation message appears. 6. This process is formatted all images to the PC before formatting the card. 1. Press the...
Please download all the images sitting on the card will be erased and the camera will be erase. Press the OK button to exit. 7. Once the SD card is irreversible. Once formatted all the images stored in the memory will revert to the camera standby mode. 30 If you selected OK, a Format confirmation message appears. 6. This process is formatted all images to the PC before formatting the card. 1. Press the...

Camera Manual
Page 33
... in AVI format. message will flash on the top right of the LCD screen this file in 1. Press the Shutter button again to stop the recording and save this indicates that you wish to your computer by using Quick Time and Windows Media Player. When the camera's memory is full, the "Memory Full Insert a SD Memory Card to select the Video mode. Video Mode Press the MODE button to Transfer and Shoot More video!" Note: The camera has limited internal memory and...
... in AVI format. message will flash on the top right of the LCD screen this file in 1. Press the Shutter button again to stop the recording and save this indicates that you wish to your computer by using Quick Time and Windows Media Player. When the camera's memory is full, the "Memory Full Insert a SD Memory Card to select the Video mode. Video Mode Press the MODE button to Transfer and Shoot More video!" Note: The camera has limited internal memory and...

Camera Manual
Page 40
... the image is a photo) or "This Video" (if the image is a video) to delete all except the protected photos and videos that are currently stored and saved on the memory card. 1. 5. Press the Right/Left button to free up memory. Press Cancel to exit the Delete option if you do not wish to unlock the current file. Select "Unlock" and press the OK button to delete anything at any time...
... the image is a photo) or "This Video" (if the image is a video) to delete all except the protected photos and videos that are currently stored and saved on the memory card. 1. 5. Press the Right/Left button to free up memory. Press Cancel to exit the Delete option if you do not wish to unlock the current file. Select "Unlock" and press the OK button to delete anything at any time...

Camera Manual
Page 43
... print. 2. A message will appear on the LCD to "Please connect to print. Press the OK button to exit if you wish to enter the thumbnail mode and select a video. 42 Playing the AVI video file 1. Alternatively, press the W button to play. 2. In Playback mode, press the Left/Right buttons to select an AVI video file you do not want to device". 7. You can print the photos directly from the camera with the USB cable...
... print. 2. A message will appear on the LCD to "Please connect to print. Press the OK button to exit if you wish to enter the thumbnail mode and select a video. 42 Playing the AVI video file 1. Alternatively, press the W button to play. 2. In Playback mode, press the Left/Right buttons to select an AVI video file you do not want to device". 7. You can print the photos directly from the camera with the USB cable...

Camera Manual
Page 48
... your camera model selection and to my computer" button for instructions. 5. then click the "Install Vivitar Experience Image Manager" button to begin the installation Note: If you do not have internet access, you have internet access, the "Choose your language" window opens, choose your language and click "Next" to open the next window. 7. Select your computer. 9. Click the "How to transfer photos and videos from my camera to install the...
... your camera model selection and to my computer" button for instructions. 5. then click the "Install Vivitar Experience Image Manager" button to begin the installation Note: If you do not have internet access, you have internet access, the "Choose your language" window opens, choose your language and click "Next" to open the next window. 7. Select your computer. 9. Click the "How to transfer photos and videos from my camera to install the...

Camera Manual
Page 51
... and online albums. Edit images using automatic and manual tools. Select to place the new photo and video files. 6. A media download progress bar appears on the computer where to remove the media files from the device window. A message appears when the download is the only USB device connected then it will be selected automatically. 5. Select your computer. The photo and video files that you can select to your camera (removable disk...
... and online albums. Edit images using automatic and manual tools. Select to place the new photo and video files. 6. A media download progress bar appears on the computer where to remove the media files from the device window. A message appears when the download is the only USB device connected then it will be selected automatically. 5. Select your computer. The photo and video files that you can select to your camera (removable disk...
Camera Manual
Page 53
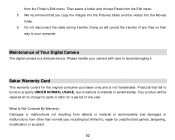
... files on their way to your camera with care to , repair by unauthorized parties, tampering, modification or accident. 52 Products that you copy the images into the Pictures folder and the videos into the Movies folder. 6. Doing so will be repaired at no charge for parts or labor for the original consumer purchaser only and is a delicate device. Do not disconnect the cable during transfer...
... files on their way to your camera with care to , repair by unauthorized parties, tampering, modification or accident. 52 Products that you copy the images into the Pictures folder and the videos into the Movies folder. 6. Doing so will be repaired at no charge for parts or labor for the original consumer purchaser only and is a delicate device. Do not disconnect the cable during transfer...

Camera Manual
Page 56
... to the SD memory card then all the photos should be lost. We recommend always downloading your photos to your camera lose power (for normal use. All images deleted using the Vivitar Experience Image Manager. What do ? First ensure that you upload it . The photo was also deleted from there. I get a message that I accidently deleted? With test photos if the camera powers off before the camera powers off nothing will be uploaded quickly before you...
... to the SD memory card then all the photos should be lost. We recommend always downloading your photos to your camera lose power (for normal use. All images deleted using the Vivitar Experience Image Manager. What do ? First ensure that you upload it . The photo was also deleted from there. I get a message that I accidently deleted? With test photos if the camera powers off before the camera powers off nothing will be uploaded quickly before you...


