Camera Manual
Page 2
MAC OS 9 Powering ON/OFF Your Digital Video Camera 10 Changing Camera Mode ...11 Navigating the Menus...12 Video Capture Mode ...13 Video Playback Mode...27 Photo Capture Mode ...30 Photo Playback Mode ...45 Connecting the Camera to a TV 51 Installing the Software ...52 Connecting the Camera to the Computer 53 Getting Photos and Videos from your Camera to Your Computer 54 Get started!...55 Transfer media from my camera to my computer manually (Using Windows 56 Transfer media from my camera to my computer manually (Using Macintosh 56 Camera Maintenance ...57...
MAC OS 9 Powering ON/OFF Your Digital Video Camera 10 Changing Camera Mode ...11 Navigating the Menus...12 Video Capture Mode ...13 Video Playback Mode...27 Photo Capture Mode ...30 Photo Playback Mode ...45 Connecting the Camera to a TV 51 Installing the Software ...52 Connecting the Camera to the Computer 53 Getting Photos and Videos from your Camera to Your Computer 54 Get started!...55 Transfer media from my camera to my computer manually (Using Windows 56 Transfer media from my camera to my computer manually (Using Macintosh 56 Camera Maintenance ...57...
Camera Manual
Page 3
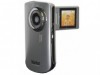
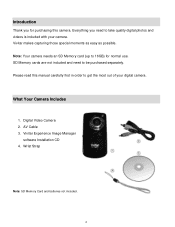
... digital camera. AV Cable 3. Wrist Strap Note: SD Memory Card and batteries not included. 2 Please read this camera. Note: Your camera needs an SD Memory card (up to 16GB) for purchasing this manual carefully first in order to get the most out of your camera. Vivitar makes capturing those special moments as easy as possible. What Your Camera Includes 1. Vivitar Experience Image Manager software Installation CD 4. Everything you for normal use. Digital Video Camera...
... digital camera. AV Cable 3. Wrist Strap Note: SD Memory Card and batteries not included. 2 Please read this camera. Note: Your camera needs an SD Memory card (up to 16GB) for purchasing this manual carefully first in order to get the most out of your camera. Vivitar makes capturing those special moments as easy as possible. What Your Camera Includes 1. Vivitar Experience Image Manager software Installation CD 4. Everything you for normal use. Digital Video Camera...

Camera Manual
Page 5
Initial Camera Setup Installing the Batteries Installing the Memory Card Turning On the Camera Using the Camera 4
Initial Camera Setup Installing the Batteries Installing the Memory Card Turning On the Camera Using the Camera 4
Camera Manual
Page 6
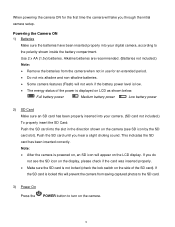
... digital camera, according to turn on the camera. 5 If the SD card is locked this will prevent the camera from the camera when not in use for the first time the camera will take you through the initial camera setup. Note: After the camera is powered on, an SD icon will appear on the LCD display. Alkaline batteries are recommended. (Batteries not included.) Note: Remove the batteries from saving captured photos...
... digital camera, according to turn on the camera. 5 If the SD card is locked this will prevent the camera from the camera when not in use for the first time the camera will take you through the initial camera setup. Note: After the camera is powered on, an SD icon will appear on the LCD display. Alkaline batteries are recommended. (Batteries not included.) Note: Remove the batteries from saving captured photos...

Camera Manual
Page 8
... menus for photos and videos. After turning on the LCD screen while record is powered ON. The video will be automatically saved to open the Photo Capture mode. Video Capture Mode Use this mode to your camera. Playback Mode (Photos & Videos) Use this mode to view and delete them as desired and press the Shutter button. This is the default mode when the camera is in the Video Capture mode. To stop the record, press the Shutter button again. To access the various menus for the Video Capture mode, press the MENU button while...
... menus for photos and videos. After turning on the LCD screen while record is powered ON. The video will be automatically saved to open the Photo Capture mode. Video Capture Mode Use this mode to your camera. Playback Mode (Photos & Videos) Use this mode to view and delete them as desired and press the Shutter button. This is the default mode when the camera is in the Video Capture mode. To stop the record, press the Shutter button again. To access the various menus for the Video Capture mode, press the MENU button while...

Camera Manual
Page 9
Camera Technical Specifications Image Sensor Image Resolution Video Resolution File Format External Memory LCD Display Lens Zoom Scene Image Quality White Balance Anti-Shake Exposure ISO Frequency Auto Power Off Metering Language Microphone Speaker Interface System Requirements Battery Working Temperature CMOS Sensor (5M) 2592x1944 pixels, (3M) 2048x1536 pixels, (2M) 1600x1200 pixels, (1M) 1280x1024 pixels, (VGA) 640x480 pixels (HD) 1280x720, (VGA) 640X480pixels (30fps), (QVGA) 320X240pixels (30 fps) JPEG/AVI SD Card (up 180 degree f=7.5mm...
Camera Technical Specifications Image Sensor Image Resolution Video Resolution File Format External Memory LCD Display Lens Zoom Scene Image Quality White Balance Anti-Shake Exposure ISO Frequency Auto Power Off Metering Language Microphone Speaker Interface System Requirements Battery Working Temperature CMOS Sensor (5M) 2592x1944 pixels, (3M) 2048x1536 pixels, (2M) 1600x1200 pixels, (1M) 1280x1024 pixels, (VGA) 640x480 pixels (HD) 1280x720, (VGA) 640X480pixels (30fps), (QVGA) 320X240pixels (30 fps) JPEG/AVI SD Card (up 180 degree f=7.5mm...
Camera Manual
Page 11
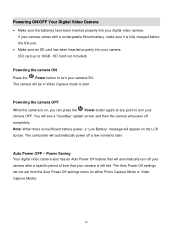
... insufficient battery power, a "Low Battery" message will automatically power off a few moments later. Auto Power OFF - Power Saving Your digital video camera also has an Auto Power Off feature that your camera ON. You will see a "Goodbye" splash screen and then the camera will be set from the Auto Power Off settings menu (in Video Capture mode to 16GB - The camera will power off your camera after a specific period of time that will automatically turn your camera is fully charged before the first use...
... insufficient battery power, a "Low Battery" message will automatically power off a few moments later. Auto Power OFF - Power Saving Your digital video camera also has an Auto Power Off feature that your camera ON. You will see a "Goodbye" splash screen and then the camera will be set from the Auto Power Off settings menu (in Video Capture mode to 16GB - The camera will power off your camera after a specific period of time that will automatically turn your camera is fully charged before the first use...
Camera Manual
Page 12
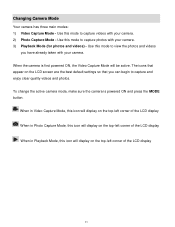
... change the active camera mode, make sure the camera is first powered ON, the Video Capture Mode will be active. When in Video Capture Mode, this icon will display on the top-left corner of the LCD display When in Photo Capture Mode, this icon will display on the top-left corner of the LCD display When in Playback Mode, this mode to view the photos and videos you can begin to capture videos with your camera. 2) Photo Capture Mode - Use this mode to capture photos...
... change the active camera mode, make sure the camera is first powered ON, the Video Capture Mode will be active. When in Video Capture Mode, this icon will display on the top-left corner of the LCD display When in Photo Capture Mode, this icon will display on the top-left corner of the LCD display When in Playback Mode, this mode to view the photos and videos you can begin to capture videos with your camera. 2) Photo Capture Mode - Use this mode to capture photos...

Camera Manual
Page 14
... the LCD screen and a red icon blinks on the LCD screen and click the Shutter button to the camera‟s SD card. Zoom In and Down - Taking a Video 1) While in Video Capture Mode use the LCD display to direct the camera at the scene you would like to quickly and easily include yourself in progress. 5) To PAUSE and then BEGIN recording again, press the LEFT direction control button. 6) To STOP the video record, press the Shutter button again. 7) The video will display Video Capture Mode by...
... the LCD screen and a red icon blinks on the LCD screen and click the Shutter button to the camera‟s SD card. Zoom In and Down - Taking a Video 1) While in Video Capture Mode use the LCD display to direct the camera at the scene you would like to quickly and easily include yourself in progress. 5) To PAUSE and then BEGIN recording again, press the LEFT direction control button. 6) To STOP the video record, press the Shutter button again. 7) The video will display Video Capture Mode by...

Camera Manual
Page 15
... RIGHT DOWN Function Pauses and continues the Video Record Zooms In Turns LED Light Off/On Zooms Out Other Shutter/OK MENU Delete MODE Starts and stops your video capture Saves your selected menu option Opens the menu options for Video Capture Mode Note: To navigate through the Menus, use the UP/DOWN/LEFT/RIGHT directions control buttons. Allows you to delete last video taken Toggles between the Photo Capture Mode, Video Capture Mode and Playback Mode Exits the menu screen 14
... RIGHT DOWN Function Pauses and continues the Video Record Zooms In Turns LED Light Off/On Zooms Out Other Shutter/OK MENU Delete MODE Starts and stops your video capture Saves your selected menu option Opens the menu options for Video Capture Mode Note: To navigate through the Menus, use the UP/DOWN/LEFT/RIGHT directions control buttons. Allows you to delete last video taken Toggles between the Photo Capture Mode, Video Capture Mode and Playback Mode Exits the menu screen 14

Camera Manual
Page 22
... direction control buttons to scroll through the menu options. 4) Press the Shutter/OK button to select and save the desired option. 21 Center - Meters the area within the spot point frame at the center of the LCD to set the exposure on the subject in the center Multi - Used in the display and adjust the image color and lighting accordingly. Language Menu You can select your camera focuses when capturing...
... direction control buttons to scroll through the menu options. 4) Press the Shutter/OK button to select and save the desired option. 21 Center - Meters the area within the spot point frame at the center of the LCD to set the exposure on the subject in the center Multi - Used in the display and adjust the image color and lighting accordingly. Language Menu You can select your camera focuses when capturing...
Camera Manual
Page 24
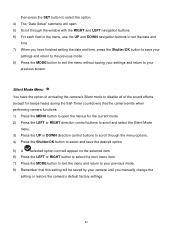
... you manually change the setting or restore the camera‟s default factory settings. 23 Silent Mode Menu You have the option of activating the camera‟s Silent mode to disable all of the sound effects (except for beeps heard during the Self-Timer countdown) that the camera emits when performing camera functions. 1) Press the MENU button to open the menus for the current mode. 2) Press the LEFT or RIGHT direction control buttons...
... you manually change the setting or restore the camera‟s default factory settings. 23 Silent Mode Menu You have the option of activating the camera‟s Silent mode to disable all of the sound effects (except for beeps heard during the Self-Timer countdown) that the camera emits when performing camera functions. 1) Press the MENU button to open the menus for the current mode. 2) Press the LEFT or RIGHT direction control buttons...
Camera Manual
Page 28
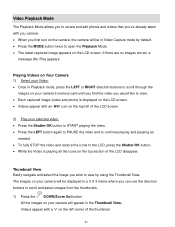
... latest captured image appears on the LCD screen. If there are no images stored, a message (No File) appears. The images on your camera will appear in the Thumbnail View. Video Playback Mode The Playback Mode allows you to review and edit photos and videos that you‟ve already taken with you camera. When you first turn on the camera, the camera will be displayed in a 3 X 3 matrix where you can use the direction buttons to...
... latest captured image appears on the LCD screen. If there are no images stored, a message (No File) appears. The images on your camera will appear in the Thumbnail View. Video Playback Mode The Playback Mode allows you to review and edit photos and videos that you‟ve already taken with you camera. When you first turn on the camera, the camera will be displayed in a 3 X 3 matrix where you can use the direction buttons to...

Camera Manual
Page 31
... to capture. 2) Click the UP/Zoom In and DOWN/Zoom Out buttons to zoom in Photo Capture mode, use the LCD display on the LCD screen. 3) Look at the scene you can see yourself on the back of the camera to direct the camera at the camera lens. 4) Click the Shutter/OK button to take the picture. 4) The picture will automatically be saved to take the picture. Taking a Self Portrait Picture You can also capture your digital video camera.
... to capture. 2) Click the UP/Zoom In and DOWN/Zoom Out buttons to zoom in Photo Capture mode, use the LCD display on the LCD screen. 3) Look at the scene you can see yourself on the back of the camera to direct the camera at the camera lens. 4) Click the Shutter/OK button to take the picture. 4) The picture will automatically be saved to take the picture. Taking a Self Portrait Picture You can also capture your digital video camera.

Camera Manual
Page 32
... Light Off/On Zooms Out Other Shutter/OK MENU Delete MODE Captures a photo Saves your selected menu option Opens the menu options for Photo Capture Mode Note: To navigate through the Menus, use the UP/DOWN/LEFT/RIGHT directions control buttons. Allows you to the time the image is pressed to delete last image taken Toggles between the Photo Capture Mode, Video Capture Mode and Playback Mode Exits the menu screen 31 Sets a delay from the time the Shutter button is captured...
... Light Off/On Zooms Out Other Shutter/OK MENU Delete MODE Captures a photo Saves your selected menu option Opens the menu options for Photo Capture Mode Note: To navigate through the Menus, use the UP/DOWN/LEFT/RIGHT directions control buttons. Allows you to the time the image is pressed to delete last image taken Toggles between the Photo Capture Mode, Video Capture Mode and Playback Mode Exits the menu screen 31 Sets a delay from the time the Shutter button is captured...

Camera Manual
Page 47
... enlarge the selected image full size. Photo Playback Mode Quick Function Buttons Your digital camera has a four-directional pad that functions as Quick Function buttons. wish to view. 3) Press the Shutter/OK button to enlarge the selected Thumbnail image Other Shutter/OK MENU MODE Saves your selected menu option Opens the menu options for Photo Playback Mode Note: To navigate through the Menus, use the UP/DOWN/LEFT/RIGHT directions control buttons. Toggles between the Photo Capture Mode, Video Capture Mode and Playback Mode Exits the menu screen 46
... enlarge the selected image full size. Photo Playback Mode Quick Function Buttons Your digital camera has a four-directional pad that functions as Quick Function buttons. wish to view. 3) Press the Shutter/OK button to enlarge the selected Thumbnail image Other Shutter/OK MENU MODE Saves your selected menu option Opens the menu options for Photo Playback Mode Note: To navigate through the Menus, use the UP/DOWN/LEFT/RIGHT directions control buttons. Toggles between the Photo Capture Mode, Video Capture Mode and Playback Mode Exits the menu screen 46

Camera Manual
Page 52
... "AV" mode. 4) When the digital video camera is set to capture and playback photos and videos. The TV slot is situated next to the USB slot at the top of the camcorder. 2) Connect the end with double-connectors to the video (yellow) and to the audio (red or white) input jack on the TV. 3) Turn on the SD card inserted in place of on the TV. 51 The images will...
... "AV" mode. 4) When the digital video camera is set to capture and playback photos and videos. The TV slot is situated next to the USB slot at the top of the camcorder. 2) Connect the end with double-connectors to the video (yellow) and to the audio (red or white) input jack on the TV. 3) Turn on the SD card inserted in place of on the TV. 51 The images will...
Camera Manual
Page 54
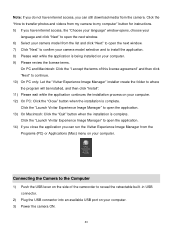
... "How to transfer photos and videos from my camera to my computer" button for instructions. 5) If you have internet access, you can still download media from the Programs (PC) or Applications (Mac) menu on your computer. Click the "Launch Vivitar Experience Image Manager" to open the application. 14) If you close the application you can run the Vivitar Experience Image Manager from the camera. Connecting the Camera to the...
... "How to transfer photos and videos from my camera to my computer" button for instructions. 5) If you have internet access, you can still download media from the Programs (PC) or Applications (Mac) menu on your computer. Click the "Launch Vivitar Experience Image Manager" to open the application. 14) If you close the application you can run the Vivitar Experience Image Manager from the camera. Connecting the Camera to the...

Camera Manual
Page 55
... be inserted. If your camera is the only USB device connected then it will cancel the transfer of any files on the computer where to place the new photo and video files. 6) Add the new photo and video files to download photos, videos or both. 4) Select your camera (removable disk) from the device window. Getting Photos and Videos from your camera is in Mass Storage Mode. 4) The first time you connect the device to the computer you...
... be inserted. If your camera is the only USB device connected then it will cancel the transfer of any files on the computer where to place the new photo and video files. 6) Add the new photo and video files to download photos, videos or both. 4) Select your camera (removable disk) from the device window. Getting Photos and Videos from your camera is in Mass Storage Mode. 4) The first time you connect the device to the computer you...

Camera Manual
Page 58
Please handle your camera with care to heat sources. 8) We recommend that you camera in wet or moist conditions. 57 Do not expose your computer. Do not use you copy the images into the Pictures folder and the videos into the Movies folder. 9) Do not disconnect the cable during transfer. Doing so will cancel the transfer of any files on their way to your camera to avoid damaging it. Camera Maintenance The digital camera is a delicate device.
Please handle your camera with care to heat sources. 8) We recommend that you camera in wet or moist conditions. 57 Do not expose your computer. Do not use you copy the images into the Pictures folder and the videos into the Movies folder. 9) Do not disconnect the cable during transfer. Doing so will cancel the transfer of any files on their way to your camera to avoid damaging it. Camera Maintenance The digital camera is a delicate device.


