

Camera Manual
Page 3
...camera needs an SD Memory card (up to 32GB) for purchasing this manual carefully first in Lithium Battery (not shown) Note: SDHC Class 4 (or higher) Memory card not included. 2 Vivitar makes capturing those special moments as easy as possible. Everything you for normal use an SDHC Class...camera. Introduction Thank you need to be purchased separately. What‟s Included 1) Digital Video Camera 2) AV Cable 3) USB Cable 4) Vivitar Experience Image Manager Software Installation CD 5) Wrist Strap 6) AC Charger 7) Built-in order to get the most out of your digital video camera....
...camera needs an SD Memory card (up to 32GB) for purchasing this manual carefully first in Lithium Battery (not shown) Note: SDHC Class 4 (or higher) Memory card not included. 2 Vivitar makes capturing those special moments as easy as possible. Everything you for normal use an SDHC Class...camera. Introduction Thank you need to be purchased separately. What‟s Included 1) Digital Video Camera 2) AV Cable 3) USB Cable 4) Vivitar Experience Image Manager Software Installation CD 5) Wrist Strap 6) AC Charger 7) Built-in order to get the most out of your digital video camera....

Camera Manual
Page 4
... Resolution File Format External Memory LCD Display Lens Zoom Exposure White Balance ISO Scene Language Flash Self-Timer Anti-Shake Print Photos Interface System Requirements Battery Working Temperature CMOS Sensor 2592x1944(5M) / 2048x1536(3M) / 1600x1200(2M) / 1280x1024(1M) / 640x480(VGA) 1280X720 (HD), VGA 640X480, QVGA 320X240 JPEG/AVI SDHC Card (up... / Turkish LED Flash lamp 2 / 5 or 10 second delay Yes Yes USB 2.0 Windows XP (SP 3), Vista (SP1) and 7 / Mac OSX v10.5.x and above Built-in Lithium Battery 0~40 ℃ 3
... Resolution File Format External Memory LCD Display Lens Zoom Exposure White Balance ISO Scene Language Flash Self-Timer Anti-Shake Print Photos Interface System Requirements Battery Working Temperature CMOS Sensor 2592x1944(5M) / 2048x1536(3M) / 1600x1200(2M) / 1280x1024(1M) / 640x480(VGA) 1280X720 (HD), VGA 640X480, QVGA 320X240 JPEG/AVI SDHC Card (up... / Turkish LED Flash lamp 2 / 5 or 10 second delay Yes Yes USB 2.0 Windows XP (SP 3), Vista (SP1) and 7 / Mac OSX v10.5.x and above Built-in Lithium Battery 0~40 ℃ 3

Camera Manual
Page 6
Parts of the Camera 1. Power Button 2. MENU Button 5. Delete Button 6. LED On-Off / Right Button 10. Shutter / OK Button 3. Digital Lens 12. AV Out Port 19. MODE Button 4. Wrist Strap Connector 15. Zoom In / Up Button 7. LED Light 13. RESET 16. SD Memory Card Slot 17. ViviLink / Left Button 9. Zoom Out / Down Button 8. LCD Screen 11. Microphone / Speaker 14. USB Port 18. Battery Charging LED 5
Parts of the Camera 1. Power Button 2. MENU Button 5. Delete Button 6. LED On-Off / Right Button 10. Shutter / OK Button 3. Digital Lens 12. AV Out Port 19. MODE Button 4. Wrist Strap Connector 15. Zoom In / Up Button 7. LED Light 13. RESET 16. SD Memory Card Slot 17. ViviLink / Left Button 9. Zoom Out / Down Button 8. LCD Screen 11. Microphone / Speaker 14. USB Port 18. Battery Charging LED 5

Camera Manual
Page 7
The charge light will turn off the camera. 2. Allow the battery to 32GB) needed for at least 3 hours before using the first time. 4. Turning On the Camera Using the Camera Selecting the modes Accessing the menu 6 Initial Camera Setup Charging the Battery Installing the Memory Card To Charge the Battery: 1. Connect the camera with the USB cable to the AC Charger or to the computer (as shown above). 3. Power off when the battery is fully charged. SD Memory card (up to charge for normal use. SDHC Class 4 (or higher) recommended.
The charge light will turn off the camera. 2. Allow the battery to 32GB) needed for at least 3 hours before using the first time. 4. Turning On the Camera Using the Camera Selecting the modes Accessing the menu 6 Initial Camera Setup Charging the Battery Installing the Memory Card To Charge the Battery: 1. Connect the camera with the USB cable to the AC Charger or to the computer (as shown above). 3. Power off when the battery is fully charged. SD Memory card (up to charge for normal use. SDHC Class 4 (or higher) recommended.

Camera Manual
Page 8
Powering the Camera ON 1) Charging the Battery Make sure the battery has been fully charged (see the SD icon on the display, please check if the card was inserted properly. Make sure the SD card ...is not locked (check the lock switch on the side of the power is displayed on LCD as shown below: Full battery power Medium battery power Low battery power 2) Installing the SD Memory Card Push the lever to open the SD/USB and AV Cable cover. Make sure a Class 4 (or higher...
Powering the Camera ON 1) Charging the Battery Make sure the battery has been fully charged (see the SD icon on the display, please check if the card was inserted properly. Make sure the SD card ...is not locked (check the lock switch on the side of the power is displayed on LCD as shown below: Full battery power Medium battery power Low battery power 2) Installing the SD Memory Card Push the lever to open the SD/USB and AV Cable cover. Make sure a Class 4 (or higher...

Camera Manual
Page 10
... up to turn off completely. The camera will be set from the Auto Power Off settings menu. If your camera uses a rechargeable lithium battery, make sure the battery is left idle. Note: Your digital video camera also has an Auto Power Off feature that you can press the Power button again at... of time that appear on , you have been inserted properly into your digital camera. Powering ON/OFF Your Digital Video Camera Make sure the batteries have already taken with your camera.
... up to turn off completely. The camera will be set from the Auto Power Off settings menu. If your camera uses a rechargeable lithium battery, make sure the battery is left idle. Note: Your digital video camera also has an Auto Power Off feature that you can press the Power button again at... of time that appear on , you have been inserted properly into your digital camera. Powering ON/OFF Your Digital Video Camera Make sure the batteries have already taken with your camera.
Camera Manual
Page 21
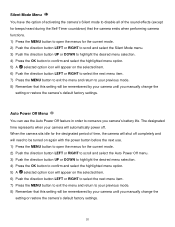
... to be turned on again with the power button before the next use the Auto Power Off feature in order to conserve you camera‟s battery life. Silent Mode Menu You have the option of activating the camera‟s Silent mode to disable all of time, the camera will shut off...
... to be turned on again with the power button before the next use the Auto Power Off feature in order to conserve you camera‟s battery life. Silent Mode Menu You have the option of activating the camera‟s Silent mode to disable all of time, the camera will shut off...

Camera Manual
Page 39
... option. 5) A selected option icon will be remembered by your previous mode. 8) Remember that this setting will be remembered by your camera until you camera‟s battery life.
... option. 5) A selected option icon will be remembered by your previous mode. 8) Remember that this setting will be remembered by your camera until you camera‟s battery life.

Camera Manual
Page 48
... hands are dry. Turn and hold the camcorder so that the door is normal. Opening the USB Cover In order to charge the battery or insert the SD card into place. (A) (B) 47
... hands are dry. Turn and hold the camcorder so that the door is normal. Opening the USB Cover In order to charge the battery or insert the SD card into place. (A) (B) 47

Camera Manual
Page 49
...; Turn and rest the camcorder on a dry and flat surface as explained above. 3. Drying Out your camcorder. Insert the SD card and charge the battery away from water and with dry hands before going underwater. Make sure the water resistant USB cover is closed properly) of the water, dry...
...; Turn and rest the camcorder on a dry and flat surface as explained above. 3. Drying Out your camcorder. Insert the SD card and charge the battery away from water and with dry hands before going underwater. Make sure the water resistant USB cover is closed properly) of the water, dry...


