DVR840XHD User Manual
Page 2
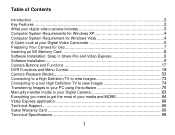
... System Requirement for Windows Vista 4 A Quick Look at your Digital Video Camcorder 5 Preparing Your Camera for Use 7 Inserting an SD Memory Card 8 Software Installation: Snap „n Share Pro and Video Express 9 Software Installation 9 Camera Buttons and Functions 17 DVR Functions and Menu Control 18 Camera Playback Modes 53 Connecting to a High Definition TV to view images 73 Connecting to a non High Definition TV to view images 74 Transferring Images to your PC using the software 75 Manually transfer media to your Digital Camera 83 Everything you need to get the most...
... System Requirement for Windows Vista 4 A Quick Look at your Digital Video Camcorder 5 Preparing Your Camera for Use 7 Inserting an SD Memory Card 8 Software Installation: Snap „n Share Pro and Video Express 9 Software Installation 9 Camera Buttons and Functions 17 DVR Functions and Menu Control 18 Camera Playback Modes 53 Connecting to a High Definition TV to view images 73 Connecting to a non High Definition TV to view images 74 Transferring Images to your PC using the software 75 Manually transfer media to your Digital Camera 83 Everything you need to get the most...
DVR840XHD User Manual
Page 3
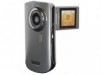
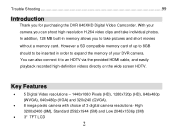
...; 3" TFT LCD 2 You can shoot high resolution H.264 video clips and take pictures and short movies without a memory card. Trouble Shooting ...99 Introduction Thank you can also connect it to expand the memory of your camera you for purchasing the DVR 840XHD Digital Video Camcorder. In addition, 128 MB built-in order to an HDTV via the provided HDMI cable, and easily playback recorded high-definition videos directly on the wide screen HDTV.
...; 3" TFT LCD 2 You can shoot high resolution H.264 video clips and take pictures and short movies without a memory card. Trouble Shooting ...99 Introduction Thank you can also connect it to expand the memory of your camera you for purchasing the DVR 840XHD Digital Video Camcorder. In addition, 128 MB built-in order to an HDTV via the provided HDMI cable, and easily playback recorded high-definition videos directly on the wide screen HDTV.

DVR840XHD User Manual
Page 4
... digital video camera includes Digital Video Camcorder USB cable AV cable HDMI Cable Power Adapter Lithium-ion Rechargeable Battery Snap n Share Pro Software installation CD Quick Start Guide Built-in Microphone Snap „n Share Pro software application can be used to download the photos and videos from your camera with the touch of a button Edit, add text, clipart and more with Video Express software. 5 X Optical Zoom Lens Supports external SD memory card...
... digital video camera includes Digital Video Camcorder USB cable AV cable HDMI Cable Power Adapter Lithium-ion Rechargeable Battery Snap n Share Pro Software installation CD Quick Start Guide Built-in Microphone Snap „n Share Pro software application can be used to download the photos and videos from your camera with the touch of a button Edit, add text, clipart and more with Video Express software. 5 X Optical Zoom Lens Supports external SD memory card...
DVR840XHD User Manual
Page 5
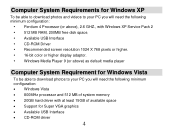
... download photos and videos to your PC you will need the following minimum configuration: Pentium 4 Processor (or above), 2.6 GHZ., with Windows XP Service Pack 2 512 MB RAM, 200MB free disk space. Available USB Interface CD-ROM Driver Recommended screen resolution 1024 X 768 pixels or higher. 16-bit color or higher display adaptor. Windows Media Player 9 (or above) as default media...
... download photos and videos to your PC you will need the following minimum configuration: Pentium 4 Processor (or above), 2.6 GHZ., with Windows XP Service Pack 2 512 MB RAM, 200MB free disk space. Available USB Interface CD-ROM Driver Recommended screen resolution 1024 X 768 pixels or higher. 16-bit color or higher display adaptor. Windows Media Player 9 (or above) as default media...
DVR840XHD User Manual
Page 19
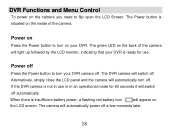
... camera will switch off a few moments later. 18 If the DVR camera is insufficient battery power, a flashing red battery icon will automatically power off . Power on Press the Power button to flip open the LCD Screen. The camera will appear on the LCD screen. When there is not in use or in an operational mode for use. The green LED on the back of the camera. DVR Functions and Menu Control To power on the camera you need to turn on your DVR...
... camera will switch off a few moments later. 18 If the DVR camera is insufficient battery power, a flashing red battery icon will automatically power off . Power on Press the Power button to flip open the LCD Screen. The camera will appear on the LCD screen. When there is not in use or in an operational mode for use. The green LED on the back of the camera. DVR Functions and Menu Control To power on the camera you need to turn on your DVR...
DVR840XHD User Manual
Page 20
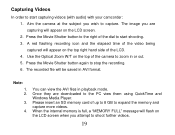
... videos. When the internal memory is full, a "MEMORY FULL" message will appear on the top of the dial to start capturing videos (with audio) with your camcorder: 1. Press the Movie Shutter button to the right of the camera to zoom in playback mode. Note: 1. 2. 3. 4. Capturing Videos In order to start shooting. 3. Aim the camera at the subject you are downloaded to the PC view them using QuickTime and Windows Media Player. Use the Optical Zoom W/T on the LCD screen...
... videos. When the internal memory is full, a "MEMORY FULL" message will appear on the top of the dial to start capturing videos (with audio) with your camcorder: 1. Press the Movie Shutter button to the right of the camera to zoom in playback mode. Note: 1. 2. 3. 4. Capturing Videos In order to start shooting. 3. Aim the camera at the subject you are downloaded to the PC view them using QuickTime and Windows Media Player. Use the Optical Zoom W/T on the LCD screen...
DVR840XHD User Manual
Page 25
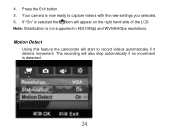
Press the Exit button. 5. Note: Stabilization is detected. 24 Your camera is selected the icon will appear on the right hand side of the LCD. The recording will start to capture videos with the new settings you selected. 6. If "On" is now ready to record videos automatically if it detects movement. Motion Detect Using this feature the camcorder will also stop automatically if no movement is not supported in HD(1080p) and WVGA/60fps resolutions. 4.
Press the Exit button. 5. Note: Stabilization is detected. 24 Your camera is selected the icon will appear on the right hand side of the LCD. The recording will start to capture videos with the new settings you selected. 6. If "On" is now ready to record videos automatically if it detects movement. Motion Detect Using this feature the camcorder will also stop automatically if no movement is not supported in HD(1080p) and WVGA/60fps resolutions. 4.

DVR840XHD User Manual
Page 28
... the LCD screen when you can be captured not only depends on the SD card‟s capacity but these photos to take a photo. Note: When the camcorder's internal memory is full, "MEMORY FULL" appears on the resolution selected. Alternatively, you attempt to press the Shutter button to your pictures. Better quality photos are three photo resolutions for you to choose from before having to download them...
... the LCD screen when you can be captured not only depends on the SD card‟s capacity but these photos to take a photo. Note: When the camcorder's internal memory is full, "MEMORY FULL" appears on the resolution selected. Alternatively, you attempt to press the Shutter button to your pictures. Better quality photos are three photo resolutions for you to choose from before having to download them...
DVR840XHD User Manual
Page 31
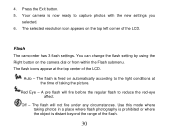
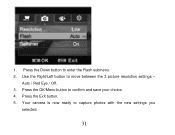
.... Red Eye - A pre flash will not fire under any circumstances. Off - Use this mode where taking the picture. The selected resolution icon appears on the camera dial or from within the Flash submenu. You can change the flash setting by using the Right button on the top left corner of the LCD. 4. Press the Exit button. 5. Your camera is fired on automatically according to capture photos with...
.... Red Eye - A pre flash will not fire under any circumstances. Off - Use this mode where taking the picture. The selected resolution icon appears on the camera dial or from within the Flash submenu. You can change the flash setting by using the Right button on the top left corner of the LCD. 4. Press the Exit button. 5. Your camera is fired on automatically according to capture photos with...
DVR840XHD User Manual
Page 32
1. Press the Down button to confirm and save your choice. 4. Press the OK/Menu button to enter the Flash submenu. 2. Use the Right/Left button to capture photos with the new settings you selected. 31 Press the Exit button. 5. Your camera is now ready to move between the 3 picture resolution settings - Auto / Red Eye / Off. 3.
1. Press the Down button to confirm and save your choice. 4. Press the OK/Menu button to enter the Flash submenu. 2. Use the Right/Left button to capture photos with the new settings you selected. 31 Press the Exit button. 5. Your camera is now ready to move between the 3 picture resolution settings - Auto / Red Eye / Off. 3.
DVR840XHD User Manual
Page 34
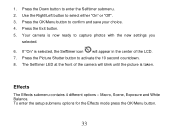
... will blink until the picture is now ready to capture photos with the new settings you selected. 6. Macro, Scene, Exposure and White Balance. To enter the setup submenu options for the Effects mode press the OK/Menu button. 33 Effects The Effects submenu contains 4 different options - The Selftimer LED at the front of the camera will appear in the center of the LCD. 7. Use...
... will blink until the picture is now ready to capture photos with the new settings you selected. 6. Macro, Scene, Exposure and White Balance. To enter the setup submenu options for the Effects mode press the OK/Menu button. 33 Effects The Effects submenu contains 4 different options - The Selftimer LED at the front of the camera will appear in the center of the LCD. 7. Use...
DVR840XHD User Manual
Page 37
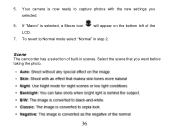
Your camera is selected, a Macro icon will appear on the bottom left of built-in step 2. Scene The camcorder has a selection of the LCD. 7. Select the scene that you selected. 6. To revert to capture photos with the new settings you want before taking the photo. 36 If "Macro" is now ready to Normal mode select "Normal" in scenes. 5.
Your camera is selected, a Macro icon will appear on the bottom left of built-in step 2. Scene The camcorder has a selection of the LCD. 7. Select the scene that you selected. 6. To revert to capture photos with the new settings you want before taking the photo. 36 If "Macro" is now ready to Normal mode select "Normal" in scenes. 5.
DVR840XHD User Manual
Page 38
The following options appear as icons on the bottom left corner of the LCD 37 Auto / Skin / Night / Backlight / Black and White / Classic / Negative. 3. Your camera is now ready to enter the Scene submenu. 2. Press the Down button to capture photos with the new settings you selected. 6. Press the Exit button. 5. . 1. Press the OK/Menu button to move between the 7 options - Use the Right/Left button to confirm and save your choice. 4.
The following options appear as icons on the bottom left corner of the LCD 37 Auto / Skin / Night / Backlight / Black and White / Classic / Negative. 3. Your camera is now ready to enter the Scene submenu. 2. Press the Down button to capture photos with the new settings you selected. 6. Press the Exit button. 5. . 1. Press the OK/Menu button to move between the 7 options - Use the Right/Left button to confirm and save your choice. 4.

DVR840XHD User Manual
Page 40
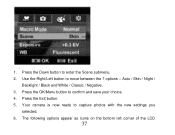
Your camera is now ready to the icon on the bottom of images automatically. 39 White Balance The camcorder adjusts the color balance of the LCD. The EV option selected appears next to capture photos with the new settings you selected. 6. Press the OK/Menu button to confirm and save your choice. 4. Press the Exit button. 5. 0.3 EV / Auto / 0.3 EV / 0.6 EV / 1.0 EV. 3.
Your camera is now ready to the icon on the bottom of images automatically. 39 White Balance The camcorder adjusts the color balance of the LCD. The EV option selected appears next to capture photos with the new settings you selected. 6. Press the OK/Menu button to confirm and save your choice. 4. Press the Exit button. 5. 0.3 EV / Auto / 0.3 EV / 0.6 EV / 1.0 EV. 3.

DVR840XHD User Manual
Page 41
Press the Down button to confirm and save your choice. 5. If one of the LCD. The option selected is selected the icon bottom of the White Balance option is immediately previewed on the 40 appears on the LCD. 4. Press the Exit button. 6. Press the OK/Menu button to enter the White Balance (WB) submenu. 2. Use the Right/Left button to capture photos with the new settings you selected. 7. Auto / Daylight / Fluorescent / Tungsten. 3. Your camera is now ready to move between the 4 options - . 1.
Press the Down button to confirm and save your choice. 5. If one of the LCD. The option selected is selected the icon bottom of the White Balance option is immediately previewed on the 40 appears on the LCD. 4. Press the Exit button. 6. Press the OK/Menu button to enter the White Balance (WB) submenu. 2. Use the Right/Left button to capture photos with the new settings you selected. 7. Auto / Daylight / Fluorescent / Tungsten. 3. Your camera is now ready to move between the 4 options - . 1.

DVR840XHD User Manual
Page 76
... photos and videos are transferred to the PC you see this message before you now need to download or transfer them from your computer. Use the "Snap „n Share Pro" program to import the videos from your camera thereby freeing up box on . 4. Turn you desire. Plug the other end of the provided USB cable into a USB port on your camera. 2. This allows you to save all your photos and videos for playing...
... photos and videos are transferred to the PC you see this message before you now need to download or transfer them from your computer. Use the "Snap „n Share Pro" program to import the videos from your camera thereby freeing up box on . 4. Turn you desire. Plug the other end of the provided USB cable into a USB port on your camera. 2. This allows you to save all your photos and videos for playing...
DVR840XHD User Manual
Page 83
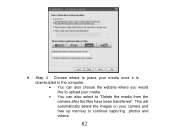
8. Choose where to place your media once it is downloaded to the computer. You can also choose the website where you would like to upload your camera and free up memory to "Delete the media from the camera after the files have been transferred". This will automatically delete the images on your media. You can also select to continue capturing photos and videos. 82 Step 4 -
8. Choose where to place your media once it is downloaded to the computer. You can also choose the website where you would like to upload your camera and free up memory to "Delete the media from the camera after the files have been transferred". This will automatically delete the images on your media. You can also select to continue capturing photos and videos. 82 Step 4 -

DVR840XHD User Manual
Page 97
... of how to use all these features please refer to the Quick Start Help Guide and/or the Show Me How Tour tutorial from within the "Video Express" application. Products that fail to function properly UNDER NORMAL USAGE, due to [email protected]. For more detailed information of one year. For all installation and software related technical support you can...
... of how to use all these features please refer to the Quick Start Help Guide and/or the Show Me How Tour tutorial from within the "Video Express" application. Products that fail to function properly UNDER NORMAL USAGE, due to [email protected]. For more detailed information of one year. For all installation and software related technical support you can...
DVR840XHD User Manual
Page 100
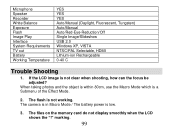
... of the Effect Mode. 2. The camera is in Macro Mode / The battery power is not clear when shooting, how can the focus be adjusted? If the LCD image is low. 3. marking. 99 Microphone Speaker Recorder White Balance Exposure Flash Image Play Interface System Requirements TV out Battery Working Temperature YES YES YES Auto/Manual (Daylight, Fluorescent, Tungsten) Auto/Manual Auto/Red-Eye-Reduction/Off Single Image/Slideshow USB 2.0 Windows XP, VISTA NTSC/PAL Selectable, HDMI Lithium-ion Rechargeable 0-40 C Trouble Shooting 1.
... of the Effect Mode. 2. The camera is in Macro Mode / The battery power is not clear when shooting, how can the focus be adjusted? If the LCD image is low. 3. marking. 99 Microphone Speaker Recorder White Balance Exposure Flash Image Play Interface System Requirements TV out Battery Working Temperature YES YES YES Auto/Manual (Daylight, Fluorescent, Tungsten) Auto/Manual Auto/Red-Eye-Reduction/Off Single Image/Slideshow USB 2.0 Windows XP, VISTA NTSC/PAL Selectable, HDMI Lithium-ion Rechargeable 0-40 C Trouble Shooting 1.

DVR840XHD User Manual
Page 101
... detail Format instruction section). 4. RP08DVDV030C7RKSE00 100 A00-090311GES The "!" means the SD card is Camera Flash not active when taking pictures? In Auto mode camera flash fires ONLY when necessary (in this condition is the default pre-set mode for several seconds when taking . Camera extends pictures exposure time under low light/ indoor condition. Shutter will not charge the battery when connected. You must be turned OFF; blinking light confirms charging, but light is NOT set Flash...
... detail Format instruction section). 4. RP08DVDV030C7RKSE00 100 A00-090311GES The "!" means the SD card is Camera Flash not active when taking pictures? In Auto mode camera flash fires ONLY when necessary (in this condition is the default pre-set mode for several seconds when taking . Camera extends pictures exposure time under low light/ indoor condition. Shutter will not charge the battery when connected. You must be turned OFF; blinking light confirms charging, but light is NOT set Flash...


