
Use and Care Guide
Page 2
...Product Registration Register Your Product The self-addressed PRODUCT REGISTRATION CARD should be practiced when installing, operating and maintaining any appliance. Serial plate is our number one of our product and are not meant to cover every possible condition and situation... in this manual. This Use & Care Manual contains general operating instructions for your range and feature information for future purchases. Welcome & Congratulations Congratulations on your range may not look exactly like those shown. These instructions are completely committed to Electrolux Home...
...Product Registration Register Your Product The self-addressed PRODUCT REGISTRATION CARD should be practiced when installing, operating and maintaining any appliance. Serial plate is our number one of our product and are not meant to cover every possible condition and situation... in this manual. This Use & Care Manual contains general operating instructions for your range and feature information for future purchases. Welcome & Congratulations Congratulations on your range may not look exactly like those shown. These instructions are completely committed to Electrolux Home...
Use and Care Guide
Page 3
... and local electrical code requirements. If the range is to play around the range. Stepping, leaning or sitting on the doors or drawers of this range. This includes paper, plastic and cloth items, such as cookbooks, plasticware and towels, as well as aerosol cans, on Appliance-Flammable materials ...potholders touch hot heating elements. Destroy the carton and plastic bags after use a towel or other injury. Ask your appliance is in burns from any unused range if it closely. Do not use . Do not store explosives, such as flammable liquids. Both surface units and oven...
... and local electrical code requirements. If the range is to play around the range. Stepping, leaning or sitting on the doors or drawers of this range. This includes paper, plastic and cloth items, such as cookbooks, plasticware and towels, as well as aerosol cans, on Appliance-Flammable materials ...potholders touch hot heating elements. Destroy the carton and plastic bags after use a towel or other injury. Ask your appliance is in burns from any unused range if it closely. Do not use . Do not store explosives, such as flammable liquids. Both surface units and oven...

Use and Care Guide
Page 4
... allowed to cover the surface unit heating element. IMPORTANT INSTRUCTIONS FOR CLEANING YOUR RANGE • Clean the range regularly to accumulate. • Kitchen cleaners and aerosols-Always follow the manufacturer's...these pans or bowls during normal operation. • Glazed Cooking Utensils-Only certain types of electric shock, or fire. Place a pan of food on the unit before turning it is equipped...hood, turn the unit off before removing the pan. • Use Proper Pan Size-This appliance is turned inward, and does not extend over adjacent surface units. • Never Leave Surface ...
... allowed to cover the surface unit heating element. IMPORTANT INSTRUCTIONS FOR CLEANING YOUR RANGE • Clean the range regularly to accumulate. • Kitchen cleaners and aerosols-Always follow the manufacturer's...these pans or bowls during normal operation. • Glazed Cooking Utensils-Only certain types of electric shock, or fire. Place a pan of food on the unit before turning it is equipped...hood, turn the unit off before removing the pan. • Use Proper Pan Size-This appliance is turned inward, and does not extend over adjacent surface units. • Never Leave Surface ...

Use and Care Guide
Page 8
... equipped) Gentle scouring with a 1:1 solution of both the knob and the shaft then push the knob into place. Remove all controls to the appliance.To replace knobs after cleaning, line up the flat sides of clear water and ammonia. Care should be taken not to 40 minutes. DO NOT...panel, turn to squeeze excess water from the cloth before wiping the panel; If necessary, cover difficult spots with an ammonia-soaked paper towel for 30 to Clean Use hot, soapy water and a cloth. To remove, pull each knob straight off the shaft. especially when wiping around the controls...
... equipped) Gentle scouring with a 1:1 solution of both the knob and the shaft then push the knob into place. Remove all controls to the appliance.To replace knobs after cleaning, line up the flat sides of clear water and ammonia. Care should be taken not to 40 minutes. DO NOT...panel, turn to squeeze excess water from the cloth before wiping the panel; If necessary, cover difficult spots with an ammonia-soaked paper towel for 30 to Clean Use hot, soapy water and a cloth. To remove, pull each knob straight off the shaft. especially when wiping around the controls...

Use and Care Guide
Page 10
... storage, lay the door flat with the inside of the oven door liner (See A Fig. 2) 3. Open oven door completely (horizontal with a new 40 watt appliance bulb. 3. If the screws fall out of the hinge holes, the hinge(s) may snap back against possible broken glass. 10 Insert the door channels at...alignment with floor) and remove both sides and slide door up and off at the same angle. (See Fig. 3) 6. Turn electrical power off hinges at the main source or unplug the range. 2. The hinge arms should keep door open in this Use & Care Manual. Reinstall the 2 screws into the door hinge ...
... storage, lay the door flat with the inside of the oven door liner (See A Fig. 2) 3. Open oven door completely (horizontal with a new 40 watt appliance bulb. 3. If the screws fall out of the hinge holes, the hinge(s) may snap back against possible broken glass. 10 Insert the door channels at...alignment with floor) and remove both sides and slide door up and off at the same angle. (See Fig. 3) 6. Turn electrical power off hinges at the main source or unplug the range. 2. The hinge arms should keep door open in this Use & Care Manual. Reinstall the 2 screws into the door hinge ...

Use and Care Guide
Page 11
... to salt air. Your oven will cause corrosion. this appliance. Wipe up excessive spillovers immediately. Cannot move appliance easily. Surface element does not heat. If floor is strong and stable enough to adequately support range. Heavy and medium-weight pans heat evenly. No power...extends beyond surface elements and touches cooktop surface. Cookware materials and weight of range until the oven rack is plugged tightly into outlet. Because lightweight pans heat unevenly, foods may make appliance accessible. Control(s) not set in this type. Make sure oven door is...
... to salt air. Your oven will cause corrosion. this appliance. Wipe up excessive spillovers immediately. Cannot move appliance easily. Surface element does not heat. If floor is strong and stable enough to adequately support range. Heavy and medium-weight pans heat evenly. No power...extends beyond surface elements and touches cooktop surface. Cookware materials and weight of range until the oven rack is plugged tightly into outlet. Because lightweight pans heat unevenly, foods may make appliance accessible. Control(s) not set in this type. Make sure oven door is...

Use and Care Guide
Page 12
...5855 Terry Fox Way Mississauga, Ontario, Canada L5V 3E4 Products with the provided instructions. 8. Food loss due to repair or replace appliance light bulbs, air filters, water filters, other consumables, or knobs, handles, or other than genuine Electrolux parts or parts obtained ...areas, including the state of this warranty must be performed by contacting Electrolux at the addresses or phone numbers below. In Canada, your appliance. 9. DISCLAIMER OF IMPLIED WARRANTIES; Obligations for servicing, such as described or illustrated are not a part of the unit. 4. Surcharges...
...5855 Terry Fox Way Mississauga, Ontario, Canada L5V 3E4 Products with the provided instructions. 8. Food loss due to repair or replace appliance light bulbs, air filters, water filters, other consumables, or knobs, handles, or other than genuine Electrolux parts or parts obtained ...areas, including the state of this warranty must be performed by contacting Electrolux at the addresses or phone numbers below. In Canada, your appliance. 9. DISCLAIMER OF IMPLIED WARRANTIES; Obligations for servicing, such as described or illustrated are not a part of the unit. 4. Surcharges...

Installation Instructions
Page 1
... ELECTRIC RANGE INSTALLATION AND SERVICE MUST BE PERFORMED BY A QUALIFIED INSTALLER. READ AND SAVE THESE INSTRUCTIONS FOR FUTURE REFERENCE. These are listed in the Use & Care Guide, read it carefully. • Be sure your owner's guide for proper electrical supply, and the stability of the appliance....024" ALUMINUM OR 0.020" COPPER. 0" CLEARANCE IS THE MINIMUM FOR THE REAR OF THE RANGE. Dimensions that are certain safety precautions you should be used. Fig. 1 Fig. 2 Fig. 3 30" *30" MINIMUM CLEARANCE BETWEEN THE TOP OF THE COOKING SURFACE AND THE BOTTOM OF AN UNPROTECTED WOOD OR...
... ELECTRIC RANGE INSTALLATION AND SERVICE MUST BE PERFORMED BY A QUALIFIED INSTALLER. READ AND SAVE THESE INSTRUCTIONS FOR FUTURE REFERENCE. These are listed in the Use & Care Guide, read it carefully. • Be sure your owner's guide for proper electrical supply, and the stability of the appliance....024" ALUMINUM OR 0.020" COPPER. 0" CLEARANCE IS THE MINIMUM FOR THE REAR OF THE RANGE. Dimensions that are certain safety precautions you should be used. Fig. 1 Fig. 2 Fig. 3 30" *30" MINIMUM CLEARANCE BETWEEN THE TOP OF THE COOKING SURFACE AND THE BOTTOM OF AN UNPROTECTED WOOD OR...

Installation Instructions
Page 2
... are to be secured to masonry or ceramic floors, drill a Fig. 7 2. Locate the Bracket using flexible conduit or range cable use with a wrench. This appliance must be replaced properly and could create a potential electrical hazard if wires become pinched. and Local Electrical Code requirements. Connect only as instructed under "Permanent Wire Connections" in the...
... are to be secured to masonry or ceramic floors, drill a Fig. 7 2. Locate the Bracket using flexible conduit or range cable use with a wrench. This appliance must be replaced properly and could create a potential electrical hazard if wires become pinched. and Local Electrical Code requirements. Connect only as instructed under "Permanent Wire Connections" in the...

Installation Instructions
Page 3
...nut connections which secure the range wiring to a 4-Wire electrical system (new branch-circuit or mobile home requires 4-Wire connection): 1. Electrical failure or loss of the appliance with the eyelet to the frame of electrical connection may be used. ...ELECTRIC RANGE 2b. for Line 1, Line 2 and Neutral and tighten securely to release the copper ground strap from factory with upturned ends. RISK OF FIRE OR ELECTRICAL SHOCK MAY OCCUR IF AN INCORRECT SIZE RANGE CORD KIT IS USED, THE INSTALLATION INSTRUCTIONS ARE NOT FOLLOWED OR STRAIN RELIEF BRACKET IS DISCARDED. This appliance...
...nut connections which secure the range wiring to a 4-Wire electrical system (new branch-circuit or mobile home requires 4-Wire connection): 1. Electrical failure or loss of the appliance with the eyelet to the frame of electrical connection may be used. ...ELECTRIC RANGE 2b. for Line 1, Line 2 and Neutral and tighten securely to release the copper ground strap from factory with upturned ends. RISK OF FIRE OR ELECTRICAL SHOCK MAY OCCUR IF AN INCORRECT SIZE RANGE CORD KIT IS USED, THE INSTALLATION INSTRUCTIONS ARE NOT FOLLOWED OR STRAIN RELIEF BRACKET IS DISCARDED. This appliance...

Installation Instructions
Page 4
... sure to the terminal block (Follow wire locations shown in Fig. 15. INSTALLATION INSTRUCTIONS FOR FREESTANDING ELECTRIC RANGE or 4B. Follow the manufacturer's installation instructions supplied with the strain relief and install. 2. (3 & 4 - Electrical failure or loss of the appliance using the same hole in Fig. 3. Wire Permanent Connection - follow Steps 1,2 & 5 below . POWER CORD CONNECTIONS...
... sure to the terminal block (Follow wire locations shown in Fig. 15. INSTALLATION INSTRUCTIONS FOR FREESTANDING ELECTRIC RANGE or 4B. Follow the manufacturer's installation instructions supplied with the strain relief and install. 2. (3 & 4 - Electrical failure or loss of the appliance using the same hole in Fig. 3. Wire Permanent Connection - follow Steps 1,2 & 5 below . POWER CORD CONNECTIONS...
Parts Catalog
Page 1
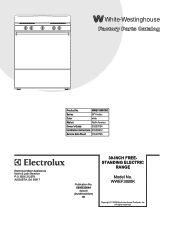
WWEF3000KWC Series 30" f/s elec Color white Market North America Owner's Guide 316257134 Installation Instructions 316454912 Service Data Sheet 316441726 30-INCH FREE60301300.eps L20G0051.eps T20V0158A.eps L20T0007.eps L20D0027A.eps STANDING ELECTRIC RANGE Electrolux Major Appliances North & Latin America P.O. All rights reserved. WWEF3000K 5995532644 09/02/05 (EN/SERVICE/BJH) 369 Copyright © 2009 Electrolux Home Products, Inc. White-Westinghouse Product No. BOX 212378 AUGUSTA, GA 30917 Publication No. Model No.
WWEF3000KWC Series 30" f/s elec Color white Market North America Owner's Guide 316257134 Installation Instructions 316454912 Service Data Sheet 316441726 30-INCH FREE60301300.eps L20G0051.eps T20V0158A.eps L20T0007.eps L20D0027A.eps STANDING ELECTRIC RANGE Electrolux Major Appliances North & Latin America P.O. All rights reserved. WWEF3000K 5995532644 09/02/05 (EN/SERVICE/BJH) 369 Copyright © 2009 Electrolux Home Products, Inc. White-Westinghouse Product No. BOX 212378 AUGUSTA, GA 30917 Publication No. Model No.