
Use and Care Manual
Page 1
Whi,_ol ® _an_s BUILT.INELECTRIC CONVECTIOONVEN U_e& Ca!veGuide, In the U.S.A, for parts, accessories, installation and service calL:1-800-807-6777, or visit our website at... In Canada, for product-related questions ¢alh 1-800-461-5681, for questions about features, operation, performance, parts, accessories or service, call: 1-800-253-1301. www.whirlpool.com or www.whirlpo ol.com/ca nada Table of Contents 2 4452004A MODELS GBD277 GBS277 GBD307 GBS307 YGBD277 YGBS277 YGBD307 YGBS307
Whi,_ol ® _an_s BUILT.INELECTRIC CONVECTIOONVEN U_e& Ca!veGuide, In the U.S.A, for parts, accessories, installation and service calL:1-800-807-6777, or visit our website at... In Canada, for product-related questions ¢alh 1-800-461-5681, for questions about features, operation, performance, parts, accessories or service, call: 1-800-253-1301. www.whirlpool.com or www.whirlpo ol.com/ca nada Table of Contents 2 4452004A MODELS GBD277 GBS277 GBD307 GBS307 YGBD277 YGBS277 YGBD307 YGBS307
Use and Care Manual
Page 2
... OVEN SAFETY 3 PARTS AND FEATURES 5 ELECTRONIC OVEN CONTROL 6 Display 6 Staff/Enter 6 Upper Off, Lower Off or Off/Cancel 6 Clock 6 Tones 6 Fahrenheit and Celsius 7 Timer 7 Control Lock 7 Oven Temperature Control 7 OVEN USE 8 Aluminum Foil 8 Positioning Racks and Bakeware 8 Bakeware 8 Meat Thermometer 9 Oven Vent 9 Baking and Roasting 9 Convection Baking and Boasting 10 Broiling and Custom Broiling 10 Timed Cooking 11 OVEN CARE 12 Self-Cleaning Cycle 12 Cleaning 13 Oven Ughts 13 Oven Door 13 TROUBLESHOOTING 14 ASSISTANCE OR SERVICE...
... OVEN SAFETY 3 PARTS AND FEATURES 5 ELECTRONIC OVEN CONTROL 6 Display 6 Staff/Enter 6 Upper Off, Lower Off or Off/Cancel 6 Clock 6 Tones 6 Fahrenheit and Celsius 7 Timer 7 Control Lock 7 Oven Temperature Control 7 OVEN USE 8 Aluminum Foil 8 Positioning Racks and Bakeware 8 Bakeware 8 Meat Thermometer 9 Oven Vent 9 Baking and Roasting 9 Convection Baking and Boasting 10 Broiling and Custom Broiling 10 Timed Cooking 11 OVEN CARE 12 Self-Cleaning Cycle 12 Cleaning 13 Oven Ughts 13 Oven Door 13 TROUBLESHOOTING 14 ASSISTANCE OR SERVICE...
Use and Care Manual
Page 3
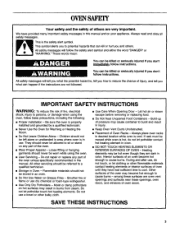
... other bulky cloth. • Use Care When Opening Door - SAVE THESE INSTRUCTIONS 3 Always read and obey all safety messages. This symbol alerts you don't follow basic precautions, including the following: • Proper Installation - Interior surfaces of the oven unless specifically recommended in Oven - Do not use dry chemical or foam-type extinguisher. • Use Only Dry Potholders - Do not repair or replace any part of oven doors.
... other bulky cloth. • Use Care When Opening Door - SAVE THESE INSTRUCTIONS 3 Always read and obey all safety messages. This symbol alerts you don't follow basic precautions, including the following: • Proper Installation - Interior surfaces of the oven unless specifically recommended in Oven - Do not use dry chemical or foam-type extinguisher. • Use Only Dry Potholders - Do not repair or replace any part of oven doors.

Use and Care Manual
Page 4
... other reproductive harm, and requires businesses to cause cancer, birth defects, or other utensils. IMPORTANT SAFETY INSTRUCTIONS For self-cleaning ovens: • Do Not Clean Door Gasket - No commercial oven cleaner or oven liner protective coating of any kind should be used in or around any part of the oven. • Clean Only Parts Listed in Manual. • Before Self-Cleaning the Oven - WARNING: This product contains a chemical known to...
... other reproductive harm, and requires businesses to cause cancer, birth defects, or other utensils. IMPORTANT SAFETY INSTRUCTIONS For self-cleaning ovens: • Do Not Clean Door Gasket - No commercial oven cleaner or oven liner protective coating of any kind should be used in or around any part of the oven. • Clean Only Parts Listed in Manual. • Before Self-Cleaning the Oven - WARNING: This product contains a chemical known to...
Use and Care Manual
Page 5
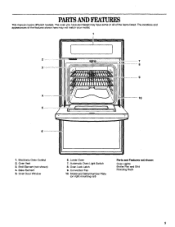
Oven Vent 3. Model and Serial Number Plate (on right mounting rail) Parts and Features not shown Oven Lights Broiler Pan end Grid Roasting Rack The locations and appearances of the items listed. Broil Element (not shown) 4. Bake Element 5. Oven Lock Latch 9. Oven boor Window 6. PARTSAND FEATURES This manual covers different models. Lower Oven 7. Convection Fan 10. Automatic Oven Light Switch 8. Electronic Oven Control 2. The oven you have purchased may have some or all of the features shown here may not match your model. 1 2 3 ,I+i, '_@ Ill i.'.-.i."..i...i..i...
Oven Vent 3. Model and Serial Number Plate (on right mounting rail) Parts and Features not shown Oven Lights Broiler Pan end Grid Roasting Rack The locations and appearances of the items listed. Broil Element (not shown) 4. Bake Element 5. Oven Lock Latch 9. Oven boor Window 6. PARTSAND FEATURES This manual covers different models. Lower Oven 7. Convection Fan 10. Automatic Oven Light Switch 8. Electronic Oven Control 2. The oven you have purchased may have some or all of the features shown here may not match your model. 1 2 3 ,I+i, '_@ Ill i.'.-.i."..i...i..i...

Use and Care Manual
Page 6
... sound. Temperature Setting 10. Start/Enter [Control Lock] 14. On double oven models, this display shows the oven temperature. If not pressed within 5 minutes after pressing a pad, the oven display will light up " or "down" arrow pads to the display: Press CLOCK. Press CLOCK. 2. To return the time of day mode and the programmed function will appear on double oven models. To Turn Off/On: Press and hold CLOCK for the Clock, Timer and Control Lock. Oven Selector 8. Timed Cocking...
... sound. Temperature Setting 10. Start/Enter [Control Lock] 14. On double oven models, this display shows the oven temperature. If not pressed within 5 minutes after pressing a pad, the oven display will light up " or "down" arrow pads to the display: Press CLOCK. Press CLOCK. 2. To return the time of day mode and the programmed function will appear on double oven models. To Turn Off/On: Press and hold CLOCK for the Clock, Timer and Control Lock. Oven Selector 8. Timed Cocking...
Use and Care Manual
Page 7
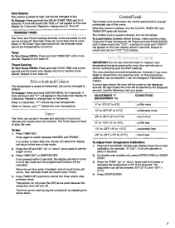
... use a thermometer to measure oven temperature because opening the oven door and element or burner cycling may cook faster or slower than your previous oven, so the temperature calibration can be adjusted. Pressagain to switch between 35°F (21°C) and -35°F (21°C). 4. To Lock/Unlock Control: Before locking, make sure the ovens, Timer and Timed Cooking are preset on . IMPORTANT: Do not use of a lock and "START?" Use the following chart as a guide. Timed Cooking To Turn...
... use a thermometer to measure oven temperature because opening the oven door and element or burner cycling may cook faster or slower than your previous oven, so the temperature calibration can be adjusted. Pressagain to switch between 35°F (21°C) and -35°F (21°C). 4. To Lock/Unlock Control: Before locking, make sure the ovens, Timer and Timed Cooking are preset on . IMPORTANT: Do not use of a lock and "START?" Use the following chart as a guide. Timed Cooking To Turn...
Use and Care Manual
Page 8
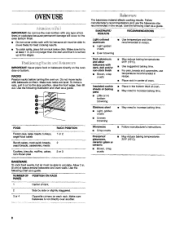
... other bakeware with bekeware on the oven door or bottom. Ovenpreof glassware, ceramic glass or ceramic • Brown, cdsp crusts • May reduce baking temperatures 25°F (15°C). Use the following chart as a guide, NUMBERer PAN(S) POSITION ON RACK 1 Center of oven. Make sure foil is not directly over another. Do not move freely for best cooking results. • To catch spills...
... other bakeware with bekeware on the oven door or bottom. Ovenpreof glassware, ceramic glass or ceramic • Brown, cdsp crusts • May reduce baking temperatures 25°F (15°C). Use the following chart as a guide, NUMBERer PAN(S) POSITION ON RACK 1 Center of oven. Make sure foil is not directly over another. Do not move freely for best cooking results. • To catch spills...
Use and Care Manual
Page 9
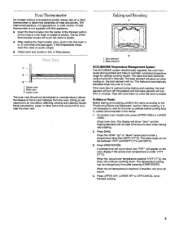
... the door is closed. If the temperature drops, cook the meat or poultry longer. • Check pork and poultry in use. Doing so will not. Ba Sng and Roasting 1 2 1. Bin# element 2. The bake element will glow red when cycling on, the broil element will cause poor air circulation, affecting cooking and cleaning results. This feature is automatically activated when the oven is opened during preheat and bake to...
... the door is closed. If the temperature drops, cook the meat or poultry longer. • Check pork and poultry in use. Doing so will not. Ba Sng and Roasting 1 2 1. Bin# element 2. The bake element will glow red when cycling on, the broil element will cause poor air circulation, affecting cooking and cleaning results. This feature is automatically activated when the oven is opened during preheat and bake to...
Use and Care Manual
Page 10
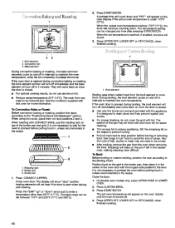
... temperature setting can be changed any time after pressing START/ENTER. If the oven door is designed to stop position before turning or removing food. It is opened during convection baking or roasting, the broil element and fan will appear on rack positions 2 and 4. Press CUSTOM BROIL. 3. The set oven temperature will turn off in the center of the broiler pan and grid. 2. It is open when baking .and roasting. On double oven models only, press UPPER OVEN or LOWER OVEN. 2. Press START/ENTER...
... temperature setting can be changed any time after pressing START/ENTER. If the oven door is designed to stop position before turning or removing food. It is opened during convection baking or roasting, the broil element and fan will appear on rack positions 2 and 4. Press CUSTOM BROIL. 3. The set oven temperature will turn off in the center of the broiler pan and grid. 2. It is open when baking .and roasting. On double oven models only, press UPPER OVEN or LOWER OVEN. 2. Press START/ENTER...
Use and Care Manual
Page 11
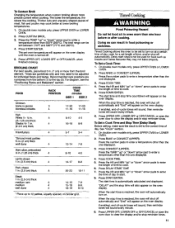
... displayed. 3. Times are numbered from the broil element. When the stop time is reached, the oven will shut off . 5. On double oven models only, press UPPER OVEN or LOWER OVEN. 2. Press the number pads to enter a temperature other than 500°F (260°C). Recommended reck positions are guidelines only and may need to cook. 5. Thicker cuts and unevenly shaped pieces of meat, fish and poultry may not bake properly. To Custom Broil: Changing...
... displayed. 3. Times are numbered from the broil element. When the stop time is reached, the oven will shut off . 5. On double oven models only, press UPPER OVEN or LOWER OVEN. 2. Press the number pads to enter a temperature other than 500°F (260°C). Recommended reck positions are guidelines only and may need to cook. 5. Thicker cuts and unevenly shaped pieces of meat, fish and poultry may not bake properly. To Custom Broil: Changing...
Use and Care Manual
Page 12
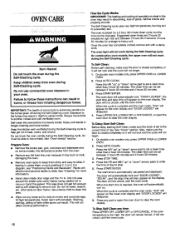
... STOP TIME. 4. The door will automatically lock and "DOOR LOCKED", "DELAY", and the stop time will not unlock until the oven cools. The door will automatically turn on rack positions 2, 3 or 4. When the start time is extremely sensitive to move or bend the gasket. Do not use commercial oven cleaners in longer cleaning and more information. • Hand clean inside oven cavity frame, being careful not to the fumes given off during the Self-Cleaning...
... STOP TIME. 4. The door will automatically lock and "DOOR LOCKED", "DELAY", and the stop time will not unlock until the oven cools. The door will automatically turn on rack positions 2, 3 or 4. When the start time is extremely sensitive to move or bend the gasket. Do not use commercial oven cleaners in longer cleaning and more information. • Hand clean inside oven cavity frame, being careful not to the fumes given off during the Self-Cleaning...
Use and Care Manual
Page 13
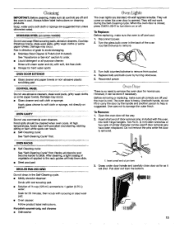
... used if door removal pins have been misplaced. OVEN RACKS • Self-Cleaning cycle: See "Self-Cleaning Cycle" first. Racks will come on cleaning products. They will shut. However, it will not work during the Self-Cleaning cycle. Use both hinge hangers. Grasp under door handle and carefully close door as far as it can be cleaned when oven cools. Open the oven door all the way. 2. Ineert short end of pin here 3. Damage may occur. • Glass...
... used if door removal pins have been misplaced. OVEN RACKS • Self-Cleaning cycle: See "Self-Cleaning Cycle" first. Racks will come on cleaning products. They will shut. However, it will not work during the Self-Cleaning cycle. Use both hinge hangers. Grasp under door handle and carefully close door as far as it can be cleaned when oven cools. Open the oven door all the way. 2. Ineert short end of pin here 3. Damage may occur. • Glass...

Use and Care Manual
Page 14
... proper oven temperature calibration set correctly? Move rack to cover the edge of an unnecessary service call for future use. 3. m On some models, reset the clock, if needed. There has been a power failure. See "Timed Cooking" section. • On double oven models, is one oven is the Sabbath Mode set to make sure batter is the Control Lock set ? See "Baking and Roasting" section. • Is the proper bakeware being used ? See "Positioning Racks and Bakeware" section. Check to self-clean, Oven cooking...
... proper oven temperature calibration set correctly? Move rack to cover the edge of an unnecessary service call for future use. 3. m On some models, reset the clock, if needed. There has been a power failure. See "Timed Cooking" section. • On double oven models, is one oven is the Sabbath Mode set to make sure batter is the Control Lock set ? See "Baking and Roasting" section. • Is the proper bakeware being used ? See "Positioning Racks and Bakeware" section. Check to self-clean, Oven cooking...
Use and Care Manual
Page 15
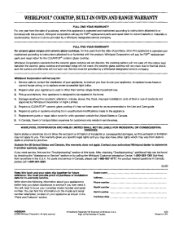
... instructions below. Stainless Steel Cleaner & Polish (stainless steel models) Order Part #4396095 15 w ASSISTANCEORSERVICE Before calling for assistance or service, please check "Troubleshooting." FSP ® replacement parts will fit right and work right because they are made with any questions or concerns at : Whirlpool Brand Home Appliances Customer Interaction Center c/o Correspondence Dept. Whirlpool designated service technicians are trained to fulfill the product warranty...
... instructions below. Stainless Steel Cleaner & Polish (stainless steel models) Order Part #4396095 15 w ASSISTANCEORSERVICE Before calling for assistance or service, please check "Troubleshooting." FSP ® replacement parts will fit right and work right because they are made with any questions or concerns at : Whirlpool Brand Home Appliances Customer Interaction Center c/o Correspondence Dept. Whirlpool designated service technicians are trained to fulfill the product warranty...
Use and Care Manual
Page 16
... appliance is operated and maintained according to instructions attached to or furnished with the product, Whirlpool Corporation will need to know your complete model number and serial number. Damage resulting from accident, alteration, misuse, abuse, fire, flood, improper installation, acts of God or use your sales slip together for future reference. Repairs to CLEANTOP ® ceramic glass cooktop if it . For parts and service in -warranty service. You...
... appliance is operated and maintained according to instructions attached to or furnished with the product, Whirlpool Corporation will need to know your complete model number and serial number. Damage resulting from accident, alteration, misuse, abuse, fire, flood, improper installation, acts of God or use your sales slip together for future reference. Repairs to CLEANTOP ® ceramic glass cooktop if it . For parts and service in -warranty service. You...


