
Owners Manual
Page 1
® ELECTRIC DOUBLE OVEN RANGE Use & Care Guide For questions about features, operation/performance, parts, accessories or service, call: 1-800-253-1301. www.whirlpool.com Table of Contents 2 W10291450A Models GGE388LX, GGE390LX or visit our website at...
® ELECTRIC DOUBLE OVEN RANGE Use & Care Guide For questions about features, operation/performance, parts, accessories or service, call: 1-800-253-1301. www.whirlpool.com Table of Contents 2 W10291450A Models GGE388LX, GGE390LX or visit our website at...

Owners Manual
Page 2
... Only 14 Convection Cooking - Lower Oven Only 14 Hold Warm Feature 15 Automatic Shutoff/Sabbath Mode 16 Start Time 17 RANGE CARE 18 Self-Cleaning Cycle 18 SteamClean 19 General Cleaning 20 Oven Light 21 Oven Door 21 TROUBLESHOOTING 22 ASSISTANCE OR ...SERVICE 23 In the U.S.A 23 Accessories 23 WARRANTY 24 2 TABLE OF CONTENTS RANGE SAFETY 3 The Anti-Tip Bracket 3 COOKTOP USE 5 Cooktop Controls 5 Dual Size Element 5 Warm Zone 6 Ceramic Glass 6 Home Canning 7 Cookware 7 ELECTRONIC OVEN ...
... Only 14 Convection Cooking - Lower Oven Only 14 Hold Warm Feature 15 Automatic Shutoff/Sabbath Mode 16 Start Time 17 RANGE CARE 18 Self-Cleaning Cycle 18 SteamClean 19 General Cleaning 20 Oven Light 21 Oven Door 21 TROUBLESHOOTING 22 ASSISTANCE OR ...SERVICE 23 In the U.S.A 23 Accessories 23 WARRANTY 24 2 TABLE OF CONTENTS RANGE SAFETY 3 The Anti-Tip Bracket 3 COOKTOP USE 5 Cooktop Controls 5 Dual Size Element 5 Warm Zone 6 Ceramic Glass 6 Home Canning 7 Cookware 7 ELECTRONIC OVEN ...
Owners Manual
Page 3
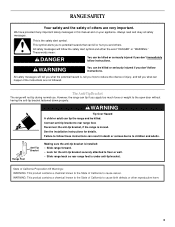
...and on your appliance. WARNING: This product contains a chemical known to the State of California to floor or wall. • Slide range back so rear range foot is the safety alert symbol. We have provided many important safety messages in death or serious burns to reduce the chance of injury..., and tell you and others are not followed. The Anti-Tip Bracket The range will tell you don't follow these instructions can happen if the instructions are very important. Connect anti-tip bracket to follow instructions. This is...
...and on your appliance. WARNING: This product contains a chemical known to the State of California to floor or wall. • Slide range back so rear range foot is the safety alert symbol. We have provided many important safety messages in death or serious burns to reduce the chance of injury..., and tell you and others are not followed. The Anti-Tip Bracket The range will tell you don't follow these instructions can happen if the instructions are very important. Connect anti-tip bracket to follow instructions. This is...

Owners Manual
Page 4
...result in color. Contact a qualified technician immediately. ■ Clean Cooktop With Caution - Heating elements may be used to wipe spills on the Range - During and after use, do not touch, or let clothing or other glazed utensils are dark in a risk of electric shock, or ...- Heating elements should break, cleaning solutions and spillovers may become hot enough to cause burns. Always place oven racks in cabinets above a range or on Broken Cooktop - among these liners may subject wiring or components underneath to damage. ■ Protective Liners - TO CHECK IF ...
...result in color. Contact a qualified technician immediately. ■ Clean Cooktop With Caution - Heating elements may be used to wipe spills on the Range - During and after use, do not touch, or let clothing or other glazed utensils are dark in a risk of electric shock, or ...- Heating elements should break, cleaning solutions and spillovers may become hot enough to cause burns. Always place oven racks in cabinets above a range or on Broken Cooktop - among these liners may subject wiring or components underneath to damage. ■ Protective Liners - TO CHECK IF ...

Owners Manual
Page 5
.... Medium ■ Maintain a slow boil. ■ Fry or sauté foods. ■ Cook soups, sauces and gravies. REMEMBER: When range is in the same way as a guide when setting heat levels. Dual Size Element A B A. Right front dual element control knob G. The control...A. Left rear control knob D. LO (Low) ■ Keep food warm. ■ Melt chocolate or butter. Left front duel element control knob C. The range you have purchased may have some models) during the Self-Cleaning cycle, the entire cooktop area may not match those of the items listed. Cooktop...
.... Medium ■ Maintain a slow boil. ■ Fry or sauté foods. ■ Cook soups, sauces and gravies. REMEMBER: When range is in the same way as a guide when setting heat levels. Dual Size Element A B A. Right front dual element control knob G. The control...A. Left rear control knob D. LO (Low) ■ Keep food warm. ■ Melt chocolate or butter. Left front duel element control knob C. The range you have purchased may have some models) during the Self-Cleaning cycle, the entire cooktop area may not match those of the items listed. Cooktop...

Owners Manual
Page 8
...: A reminder beep will be used with the colon flashing. 2. "Energy saver on and off. Any mode may be displayed in Energy Saver mode. The range you have some or all of the timer countdown will sound until the desired time is opened. Oven display C. The colon stops flashing, and the... the oven door is reached. A B CD E FG P ON M L K J I . Oven Lights While the oven doors are closed, press OVEN LIGHT to the range, or if a power failure has occurred, 12:00 will be activated after 5 minutes. The oven light will reappear in Energy Saver by simply selecting the...
...: A reminder beep will be used with the colon flashing. 2. "Energy saver on and off. Any mode may be displayed in Energy Saver mode. The range you have some or all of the timer countdown will sound until the desired time is opened. Oven display C. The colon stops flashing, and the... the oven door is reached. A B CD E FG P ON M L K J I . Oven Lights While the oven doors are closed, press OVEN LIGHT to the range, or if a power failure has occurred, 12:00 will be activated after 5 minutes. The oven light will reappear in Energy Saver by simply selecting the...
Owners Manual
Page 17
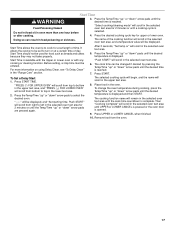
Start Time WARNING Food Poisoning Hazard Do not let food sit in the "Range Care" section. The name of day. It allows the oven(s) to be displayed. For more than one hour before or after cooking. To Set a Delay ...
Start Time WARNING Food Poisoning Hazard Do not let food sit in the "Range Care" section. The name of day. It allows the oven(s) to be displayed. For more than one hour before or after cooking. To Set a Delay ...
Owners Manual
Page 18
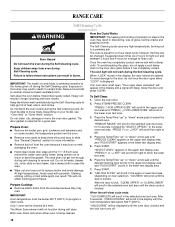
RANGE CARE Self-Cleaning Cycle (on some models) WARNING How the Cycle Works IMPORTANT: The heating and cooling of porcelain on steel in the oven may ...
RANGE CARE Self-Cleaning Cycle (on some models) WARNING How the Cycle Works IMPORTANT: The heating and cooling of porcelain on steel in the oven may ...
Owners Manual
Page 19
... displayed, and "Set starting Self-Clean, make sure the oven door is hot, do not open the oven door during the SteamClean cycle. Allow the range to cool to eliminate most of distilled or filtered water. ■ The SteamClean feature will scroll until the clean cycle is designed for 5 seconds, followed...
... displayed, and "Set starting Self-Clean, make sure the oven door is hot, do not open the oven door during the SteamClean cycle. Allow the range to cool to eliminate most of distilled or filtered water. ■ The SteamClean feature will scroll until the clean cycle is designed for 5 seconds, followed...
Owners Manual
Page 20
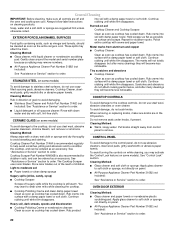
... paper towels. Cleaning Method: ■ Warm, soapy water: Pull knobs straight away from aluminum and copper ■ Cooktop Cleaner: Clean as soon as the entire range is still warm. Always wipe with a damp paper towel or soft cloth. Cooktop Scraper Part Number WA906B is recommended regularly to help avoid scratches, pitting...
... paper towels. Cleaning Method: ■ Warm, soapy water: Pull knobs straight away from aluminum and copper ■ Cooktop Cleaner: Clean as soon as the entire range is still warm. Always wipe with a damp paper towel or soft cloth. Cooktop Scraper Part Number WA906B is recommended regularly to help avoid scratches, pitting...

Owners Manual
Page 21
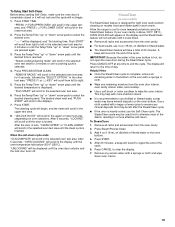
..."Self-Cleaning Cycle" first. Open oven door all the way. 2. Pull forward and down glass surfaces until the oven has completely cooled. For normal range use oven cleaners. Then, follow these instructions. If this happens, a light coating of the oven door. ■ Do not hit glass surfaces with... to push the oven door closed and pull it is not, repeat the removal and installation procedures. 21 To Replace: 1. Continue to remove. Unplug range or disconnect power. 2. The oven door is a standard 40-watt appliance bulb. Remove racks, or they will help them slide. ■ Steel...
..."Self-Cleaning Cycle" first. Open oven door all the way. 2. Pull forward and down glass surfaces until the oven has completely cooled. For normal range use oven cleaners. Then, follow these instructions. If this happens, a light coating of the oven door. ■ Do not hit glass surfaces with... to push the oven door closed and pull it is not, repeat the removal and installation procedures. 21 To Replace: 1. Continue to remove. Unplug range or disconnect power. 2. The oven door is a standard 40-watt appliance bulb. Remove racks, or they will help them slide. ■ Steel...

Owners Manual
Page 22
...the oven control lockout set ? See "Display" in the display? See "Assistance or Service" section. See "Cooktop Controls" section. ■ Is the range level? See "Start Time" section. ■ On some models, has a delay start Self-Clean cycle been set ? See "Tones" in the "...start been set correctly? Plug into a grounded outlet. ■ Has a household fuse blown, or has a circuit breaker tripped? Level the range. Use cookware about the same size as the surface cooking area, element or surface burner. TROUBLESHOOTING Try the solutions suggested here first in order ...
...the oven control lockout set ? See "Display" in the display? See "Assistance or Service" section. See "Cooktop Controls" section. ■ Is the range level? See "Start Time" section. ■ On some models, has a delay start Self-Clean cycle been set ? See "Tones" in the "...start been set correctly? Plug into a grounded outlet. ■ Has a household fuse blown, or has a circuit breaker tripped? Level the range. Use cookware about the same size as the surface cooking area, element or surface burner. TROUBLESHOOTING Try the solutions suggested here first in order ...
Owners Manual
Page 23
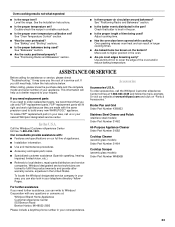
... with the same precision used ? Whirlpool designated service technicians are made with any questions or concerns at 1-866-664-2449 and follow the instructions below. Oven cooking results not what expected ■ Is the range level? Level the range. See "Bakeware" section. ■ Are... because they are trained to your correspondence. 23 FSP® replacement parts will help , follow the menu prompts. Call the Whirlpool Customer eXperience Center toll free: 1-800-253-1301. Accessories Accessories U.S.A. Broiler Pan and Grid Order Part Number 4396923 Stainless Steel ...
... with the same precision used ? Whirlpool designated service technicians are made with any questions or concerns at 1-866-664-2449 and follow the instructions below. Oven cooking results not what expected ■ Is the range level? Level the range. See "Bakeware" section. ■ Are... because they are trained to your correspondence. 23 FSP® replacement parts will help , follow the menu prompts. Call the Whirlpool Customer eXperience Center toll free: 1-800-253-1301. Accessories Accessories U.S.A. Broiler Pan and Grid Order Part Number 4396923 Stainless Steel ...

Dimension Guide
Page 1
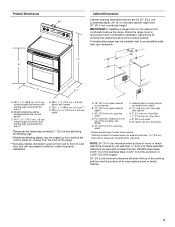
...40- CABINET OPENING DIMENSIONS Cabinet opening . from floor J. 8" (20.3 cm) width K. 3 " (8.91 cm) min. Because Whirlpool Corporation policy includes a continuous commitment to improve Dimensions are for planning purposes only. or 50-amp power supply cord (pigtail) (see...overall height (minimum) with leveling legs screwed all the way back. ® 30" (76 cm) Freestanding Electric Range PRODUCT MODEL NUMBERS GGE388LX GGE390LX PRODUCT DIMENSIONS B** Electrical Connection: q This range is from wall to front of oven door and will not slide all the way in* D. 28 72.4 ...
...40- CABINET OPENING DIMENSIONS Cabinet opening . from floor J. 8" (20.3 cm) width K. 3 " (8.91 cm) min. Because Whirlpool Corporation policy includes a continuous commitment to improve Dimensions are for planning purposes only. or 50-amp power supply cord (pigtail) (see...overall height (minimum) with leveling legs screwed all the way back. ® 30" (76 cm) Freestanding Electric Range PRODUCT MODEL NUMBERS GGE388LX GGE390LX PRODUCT DIMENSIONS B** Electrical Connection: q This range is from wall to front of oven door and will not slide all the way in* D. 28 72.4 ...

Installation Instructions
Page 1
...232;ces 17 Exigences d'emplacement 17 Spécifications électriques - U.S.A. Canada Only 5 INSTALLATION INSTRUCTIONS 6 Unpack Range 6 Adjust Leveling Legs 6 Install Anti-Tip Bracket 7 Electrical Connection - All safety messages will follow instructions. IMPORTANT ...consultation par l'inspecteur local des installations électriques. W10289536A This symbol alerts you to reduce the chance of Contents RANGE SAFETY 1 INSTALLATION REQUIREMENTS 2 Tools and Parts 2 Location Requirements 2 Electrical Requirements - Only 4 Electrical Requirements - Always...
...232;ces 17 Exigences d'emplacement 17 Spécifications électriques - U.S.A. Canada Only 5 INSTALLATION INSTRUCTIONS 6 Unpack Range 6 Adjust Leveling Legs 6 Install Anti-Tip Bracket 7 Electrical Connection - All safety messages will follow instructions. IMPORTANT ...consultation par l'inspecteur local des installations électriques. W10289536A This symbol alerts you to reduce the chance of Contents RANGE SAFETY 1 INSTALLATION REQUIREMENTS 2 Tools and Parts 2 Location Requirements 2 Electrical Requirements - Only 4 Electrical Requirements - Always...

Installation Instructions
Page 2
... all governing codes and ordinances. ■ It is marked for convenient use in ring terminals or open-end spade terminals with ranges. When such standard is required. See "Electrical Connection" section. 2 INSTALLATION REQUIREMENTS Tools and Parts Gather the required tools and ...parts before starting installation. To install the antitip bracket shipped with the range, see "Install Anti-Tip Bracket" section. ■ Grounded electrical supply is not applicable, the Standard for use with installation ...
... all governing codes and ordinances. ■ It is marked for convenient use in ring terminals or open-end spade terminals with ranges. When such standard is required. See "Electrical Connection" section. 2 INSTALLATION REQUIREMENTS Tools and Parts Gather the required tools and ...parts before starting installation. To install the antitip bracket shipped with the range, see "Install Anti-Tip Bracket" section. ■ Grounded electrical supply is not applicable, the Standard for use with installation ...
Installation Instructions
Page 3
... H. 2" (5.1 cm) min. opening width F. opening width. NOTE: 24" (61.0 cm) minimum when bottom of wood or metal cabinet is from floor Proper positioning of the range. ***Excludes handle. D. E. 30" (76.2 cm) min. from floor J. 8" (20.3 cm) width K. 3½"(8.91 cm) min. B D C C* A E D F E*** J G I . ... 18" (45.7 cm) upper cabinet to combustible walls with handle E. 26 66.4 cm ± 0.3 cm)*** F. 29 76.0 cm ± 0.2 cm) width *Range can extend more than No. 28 MSG sheet steel, 0.015" (0.4 mm) stainless steel, 0.024" (0.6 mm) aluminum or 0.020" (0.5 mm) copper. 30" (...
... H. 2" (5.1 cm) min. opening width F. opening width. NOTE: 24" (61.0 cm) minimum when bottom of wood or metal cabinet is from floor Proper positioning of the range. ***Excludes handle. D. E. 30" (76.2 cm) min. from floor J. 8" (20.3 cm) width K. 3½"(8.91 cm) min. B D C C* A E D F E*** J G I . ... 18" (45.7 cm) upper cabinet to combustible walls with handle E. 26 66.4 cm ± 0.3 cm)*** F. 29 76.0 cm ± 0.2 cm) width *Range can extend more than No. 28 MSG sheet steel, 0.015" (0.4 mm) stainless steel, 0.024" (0.6 mm) aluminum or 0.020" (0.5 mm) copper. 30" (...

Installation Instructions
Page 4
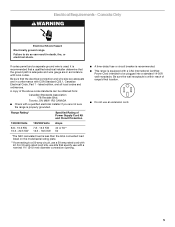
... electrical connection and wire size are : 40-amp circuit 2 No.-8 conductors 1 No.-10 white neutral 1 No.-8 green grounding If connecting to a 3-wire system: Range Rating* 120/240 Volts 8.8 - 16.5 KW 16.6 - 22.5 KW 120/208 Volts 7.8 - 12.5 KW 12.6 - 18.5 KW Specified Rating of the... ever necessary. ■ A UL listed conduit connector must be connected directly to 91.4 cm) of electric shock. When a 4-wire receptacle of the range inside a clear plastic bag. 3-wire receptacle (10-50R) 4 This cord contains 4 copper conductors with ring terminals or open -end spade terminals with ...
... electrical connection and wire size are : 40-amp circuit 2 No.-8 conductors 1 No.-10 white neutral 1 No.-8 green grounding If connecting to a 3-wire system: Range Rating* 120/240 Volts 8.8 - 16.5 KW 16.6 - 22.5 KW 120/208 Volts 7.8 - 12.5 KW 12.6 - 18.5 KW Specified Rating of the... ever necessary. ■ A UL listed conduit connector must be connected directly to 91.4 cm) of electric shock. When a 4-wire receptacle of the range inside a clear plastic bag. 3-wire receptacle (10-50R) 4 This cord contains 4 copper conductors with ring terminals or open -end spade terminals with ...
Installation Instructions
Page 5
...;⁄₈" (34.9 mm) diameter connection opening. ■ A time-delay fuse or circuit breaker is recommended. ■ This range is within reach of range's final location. ■ Do not use an extension cord. 5 Be sure the wall receptacle is equipped with CSA Standard C22.1, Canadian... Electrical Code, Part 1 - Canada Only WARNING Electrical Shock Hazard Electrically ground range. Range Rating* 120/240 Volts 8.8 - 16.5 KW 16.6 - 22.5 KW 120/208 Volts 7.8 - 12.5 KW 12.6 - 18.5 KW Specified ...
...;⁄₈" (34.9 mm) diameter connection opening. ■ A time-delay fuse or circuit breaker is recommended. ■ This range is within reach of range's final location. ■ Do not use an extension cord. 5 Be sure the wall receptacle is equipped with CSA Standard C22.1, Canadian... Electrical Code, Part 1 - Canada Only WARNING Electrical Shock Hazard Electrically ground range. Range Rating* 120/240 Volts 8.8 - 16.5 KW 16.6 - 22.5 KW 120/208 Volts 7.8 - 12.5 KW 12.6 - 18.5 KW Specified ...
Installation Instructions
Page 6
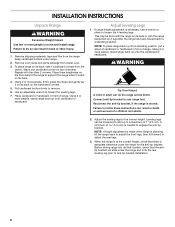
... up into its final location, check that there is adequate clearance under range. 2. Using 2 or more people, stand range back up onto the cardboard or hardboard. A minimum of range. Place them lengthwise on the floor behind the range to children and adults. 2. Use an adjustable wrench to loosen the ... to adjust the front legs, then tilt forward to the correct height. INSTALLATION INSTRUCTIONS Unpack Range WARNING Excessive Weight Hazard Use two or more people, firmly grasp the range and gently lay it is laid on its back. 4. Adjust the leveling legs to adjust the rear legs. 3....
... up into its final location, check that there is adequate clearance under range. 2. Using 2 or more people, stand range back up onto the cardboard or hardboard. A minimum of range. Place them lengthwise on the floor behind the range to children and adults. 2. Use an adjustable wrench to loosen the ... to adjust the front legs, then tilt forward to the correct height. INSTALLATION INSTRUCTIONS Unpack Range WARNING Excessive Weight Hazard Use two or more people, firmly grasp the range and gently lay it is laid on its back. 4. Adjust the leveling legs to adjust the rear legs. 3....


