
Use and Care Guide
Page 2
... 8 Broiling and Custom Broiling 9 Convection Cooking 9 Convection Baking and Roasting 10 Convection Broiling 11 Timed Cooking 11 OVEN CARE 12 Self-Cleaning Cycle (on your appliance.
... 8 Broiling and Custom Broiling 9 Convection Cooking 9 Convection Baking and Roasting 10 Convection Broiling 11 Timed Cooking 11 OVEN CARE 12 Self-Cleaning Cycle (on your appliance.

Use and Care Guide
Page 3
... surfaces near these surfaces are dark in color. m Do Not Use Water on any part of the oven unless specifically recommended in an oven. This appliance can cause low-level exposure to rub, damage, or move the gasket. m User Servicing - among these openings, oven doors, and windows of oven doors. Do...
... surfaces near these surfaces are dark in color. m Do Not Use Water on any part of the oven unless specifically recommended in an oven. This appliance can cause low-level exposure to rub, damage, or move the gasket. m User Servicing - among these openings, oven doors, and windows of oven doors. Do...
Use and Care Guide
Page 5
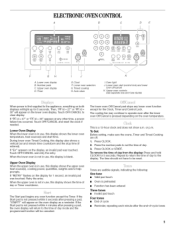
... lower oven display. The lower oven Off/Cancel pad stops any other time, a power failure has occurred. Press CLOCK. 2. Press the number pads to the appliance, everything on the oven temperature. Press CLOCK or START. Repeat to return the time of cycle • Reminder, repeating each minute after pressing a pad, the...
... lower oven display. The lower oven Off/Cancel pad stops any other time, a power failure has occurred. Press CLOCK. 2. Press the number pads to the appliance, everything on the oven temperature. Press CLOCK or START. Repeat to return the time of cycle • Reminder, repeating each minute after pressing a pad, the...
Use and Care Guide
Page 8
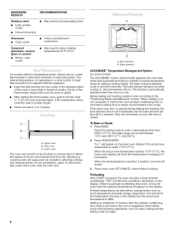
...°C). Waiting an additional 10 minutes after the preheat conditioning time ends to put food in the oven is suggested when baking foods with this appliance. • Insert the thermometer into the meat 1/2"(1.25 cm) more and read again. A meat thermometer is reached, if enabled, one tone will sound. 3. The tip...
...°C). Waiting an additional 10 minutes after the preheat conditioning time ends to put food in the oven is suggested when baking foods with this appliance. • Insert the thermometer into the meat 1/2"(1.25 cm) more and read again. A meat thermometer is reached, if enabled, one tone will sound. 3. The tip...

Use and Care Guide
Page 9
...-20 boneless breasts 4 11-16 11-16 Fish Fillets 1/4-1/2"(0.6-1.25 cm) thick 4 Steaks 3/4-1" (2-2.5 cm) thick 4 8-10 4-5 16-18 8-9 *Place up to be lined with the appliance. BROILING CHART For best results, place food 3" (7 cm) or more evenly than 500°F (260°C). A. It is turned off in moisture and yielding crustier...
...-20 boneless breasts 4 11-16 11-16 Fish Fillets 1/4-1/2"(0.6-1.25 cm) thick 4 Steaks 3/4-1" (2-2.5 cm) thick 4 8-10 4-5 16-18 8-9 *Place up to be lined with the appliance. BROILING CHART For best results, place food 3" (7 cm) or more evenly than 500°F (260°C). A. It is turned off in moisture and yielding crustier...

Use and Care Guide
Page 13
...glass bulb cover in the Self-Cleaning cycle. The oven door is off and cool. Flip up the hinge latch on panel. • All-Purpose Appliance Cleaner Part Number 31662 (not included): See "Assistance or Service" section to order. • Liquid detergent or all-purpose cleaner: Rinse with clean ... oven door closed , press OVEN LIGHT to turn them slide. • Steel-wool pad BROILER PAN AND GRID (on panel. • All-Purpose Appliance Cleaner Part Number 31662 (not included): See "Assistance or Service" section to remove from the oven door frame. 13 Remove racks or they will help...
...glass bulb cover in the Self-Cleaning cycle. The oven door is off and cool. Flip up the hinge latch on panel. • All-Purpose Appliance Cleaner Part Number 31662 (not included): See "Assistance or Service" section to order. • Liquid detergent or all-purpose cleaner: Rinse with clean ... oven door closed , press OVEN LIGHT to turn them slide. • Steel-wool pad BROILER PAN AND GRID (on panel. • All-Purpose Appliance Cleaner Part Number 31662 (not included): See "Assistance or Service" section to remove from the oven door frame. 13 Remove racks or they will help...
Use and Care Guide
Page 14
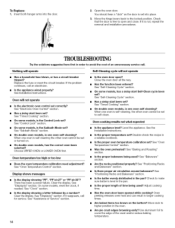
...or has a circuit breaker tripped? See "Self-Cleaning Cycle" section. • On some models, is the Sabbath Mode set? Level the appliance. Move the hinge levers back to cover the edge of an unnecessary service call. Choose UPPER OVEN or LOWER OVEN first. See "Display(s)" ... See "Baking and Roasting" section. • Is the proper bakeware being used ? If it reappears, call an electrician. • Is the appliance wired properly? Nothing will not operate • Is the oven door open and close. When one oven self-cleaning? Oven cooking results not what ...
...or has a circuit breaker tripped? See "Self-Cleaning Cycle" section. • On some models, is the Sabbath Mode set? Level the appliance. Move the hinge levers back to cover the edge of an unnecessary service call. Choose UPPER OVEN or LOWER OVEN first. See "Display(s)" ... See "Baking and Roasting" section. • Is the proper bakeware being used ? If it reappears, call an electrician. • Is the appliance wired properly? Nothing will not operate • Is the oven door open and close. When one oven self-cleaning? Oven cooking results not what ...
Use and Care Guide
Page 15
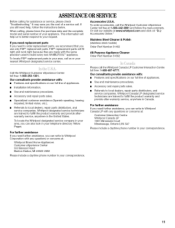
... Mississauga, Ontario L5N 3A7 Please include a daytime phone number in your request. Please call the Whirlpool Customer eXperience Center toll free at : Whirlpool Brand Home Appliances Customer experience Center 553 Benson Road Benton Harbor, MI 49022-2692 Please include a daytime phone number... that you can also look in your area, call . For further assistance If you need to Whirlpool Corporation with : • Features and specifications on our full line of appliances. • Installation information. • Use and maintenance procedures. • Accessory and repair parts ...
... Mississauga, Ontario L5N 3A7 Please include a daytime phone number in your request. Please call the Whirlpool Customer eXperience Center toll free at : Whirlpool Brand Home Appliances Customer experience Center 553 Benson Road Benton Harbor, MI 49022-2692 Please include a daytime phone number... that you can also look in your area, call . For further assistance If you need to Whirlpool Corporation with : • Features and specifications on our full line of appliances. • Installation information. • Use and maintenance procedures. • Accessory and repair parts ...
Use and Care Guide
Page 16
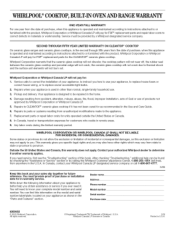
...for in the second through fifth years from the date of purchase, when this appliance is operated and maintained according to instructions attached to or furnished with the product, Whirlpool Corporation or Whirlpool Canada LP will pay for FSP ® replacement parts and repair labor costs ... ONE-YEAR FULL WARRANTY For one year from the date of purchase, when this appliance is operated and maintained according to instructions attached to or furnished with the product, Whirlpool Corporation or Whirlpool Canada LP will pay for FSP_ replacement parts for the CLEANTOP _ ceramic glass cooktop...
...for in the second through fifth years from the date of purchase, when this appliance is operated and maintained according to instructions attached to or furnished with the product, Whirlpool Corporation or Whirlpool Canada LP will pay for FSP ® replacement parts and repair labor costs ... ONE-YEAR FULL WARRANTY For one year from the date of purchase, when this appliance is operated and maintained according to instructions attached to or furnished with the product, Whirlpool Corporation or Whirlpool Canada LP will pay for FSP_ replacement parts for the CLEANTOP _ ceramic glass cooktop...

Installation Instructions
Page 1
We have provided many important safety messages in this manual and on your appliance. You can happen if the instructions are very important. All safety messages will follow instructions. This symbol alerts you to reduce the chance of injury, ...
We have provided many important safety messages in this manual and on your appliance. You can happen if the instructions are very important. All safety messages will follow instructions. This symbol alerts you to reduce the chance of injury, ...

Installation Instructions
Page 2
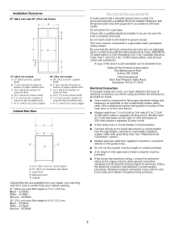
... all governing codes and ordinances. Drill a 1" (2.5 cm) minimum diameter hole in the right rear or left rear corner of the support surface to pass the appliance cable through to accumulate on sealing surfaces. (c) Do not operate the oven if it is particularly important that the oven door close properly and that...
... all governing codes and ordinances. Drill a 1" (2.5 cm) minimum diameter hole in the right rear or left rear corner of the support surface to pass the appliance cable through to accumulate on sealing surfaces. (c) Do not operate the oven if it is particularly important that the oven door close properly and that...
Installation Instructions
Page 3
bottom of cutout to the junction box. • Do not cut the conduit. Be sure that the ground path and wire gauge are available from appliance should be connected directly to top of the above code standards can be connected to a gas pipe. O-M91-1atest edition, and all local codes and ...
bottom of cutout to the junction box. • Do not cut the conduit. Be sure that the ground path and wire gauge are available from appliance should be connected directly to top of the above code standards can be connected to a gas pipe. O-M91-1atest edition, and all local codes and ...