
Dimension Guide
Page 1
... (58.4 cm) max. recessed depth E. 49¹⁄₂" (125.7 cm) recessed height Single Oven Installed in Cabinet A B F D E C A. 27" (68.6 cm) min. cutout height Because Whirlpool Corporation policy includes a continuous commitment to change without notice. For complete details, see Installation our products, we...width B. 1" (2.5 cm) top of cutout to bottom of upper cabinet door C. 14³⁄₄" (37.5 cm) bottom of the oven. Recessed oven E. Specifications subject to floor D. 25¹⁄₂" (64.8 cm) cutout width E. 1¹⁄₂" (3.8 cm) min. See ...
... (58.4 cm) max. recessed depth E. 49¹⁄₂" (125.7 cm) recessed height Single Oven Installed in Cabinet A B F D E C A. 27" (68.6 cm) min. cutout height Because Whirlpool Corporation policy includes a continuous commitment to change without notice. For complete details, see Installation our products, we...width B. 1" (2.5 cm) top of cutout to bottom of upper cabinet door C. 14³⁄₄" (37.5 cm) bottom of the oven. Recessed oven E. Specifications subject to floor D. 25¹⁄₂" (64.8 cm) cutout width E. 1¹⁄₂" (3.8 cm) min. See ...

Dimension Guide
Page 2
...2 holes. On models with your cabinets, check with Steam-Assist, it is drilled on the same side as the oven cable hole, a minimum of 194°F (90°C). CUTOUT DIMENSIONS FOR OVENS INSTALLED UNDER COOKTOP IMPORTANT: Observe all governing codes and ordinances. E. 27¾" (70.5 cm) minimum cutout height ...F. 36" (91.4 cm) from cabinet base to your builder or cabinet supplier to make sure that the junction boxes for oven trim to overlap on the bottom of the side wall to pass the water supply tubing through to the junction box. See Cutout Dimensions chart...
...2 holes. On models with your cabinets, check with Steam-Assist, it is drilled on the same side as the oven cable hole, a minimum of 194°F (90°C). CUTOUT DIMENSIONS FOR OVENS INSTALLED UNDER COOKTOP IMPORTANT: Observe all governing codes and ordinances. E. 27¾" (70.5 cm) minimum cutout height ...F. 36" (91.4 cm) from cabinet base to your builder or cabinet supplier to make sure that the junction boxes for oven trim to overlap on the bottom of the side wall to pass the water supply tubing through to the junction box. See Cutout Dimensions chart...

Dimension Guide
Page 3
... chart. E. 27¾" (70.5 cm) minimum cutout height F. 36" (91.4 cm) from cabinet base to overlap on the bottom of the oven chassis and on each side. A 1" (2.5 cm) minimum diameter hole should have been drilled in the upper right or left corner of the side wall... to pass the water supply tubing through to the undercounter label located on top of the cooktop burner box. Approved Built-In Oven and Induction Cooktop Combinations A B C D E C F G H A. 24" (61 cm) cabinet depth B. 25" (63.5 cm) countertop depth C. On models with Steam-Assist, it is...
... chart. E. 27¾" (70.5 cm) minimum cutout height F. 36" (91.4 cm) from cabinet base to overlap on the bottom of the oven chassis and on each side. A 1" (2.5 cm) minimum diameter hole should have been drilled in the upper right or left corner of the side wall... to pass the water supply tubing through to the undercounter label located on top of the cooktop burner box. Approved Built-In Oven and Induction Cooktop Combinations A B C D E C F G H A. 24" (61 cm) cabinet depth B. 25" (63.5 cm) countertop depth C. On models with Steam-Assist, it is...

Dimension Guide
Page 4
... Steam-Assist, it is required between the 2 holes. The upper shaded areas are recommended locations for oven be installed on the same side as the oven cable hole, a minimum of the oven chassis. Allow 1.6 cm) for cooktop. See Cutout Dimensions chart. Lower shaded areas are recommended locations ...for recessed junction box for 120-volt grounded outlet for oven trim to the undercounter label located on each side. Gas line through wall 10¹⁄₂" (26.7 cm) to center of ...
... Steam-Assist, it is required between the 2 holes. The upper shaded areas are recommended locations for oven be installed on the same side as the oven cable hole, a minimum of the oven chassis. Allow 1.6 cm) for cooktop. See Cutout Dimensions chart. Lower shaded areas are recommended locations ...for recessed junction box for 120-volt grounded outlet for oven trim to the undercounter label located on each side. Gas line through wall 10¹⁄₂" (26.7 cm) to center of ...

Installation Instructions
Page 2
...or left corner of the support surface to pass the appliance cable through to undercounter installation instructions for cutout dimensions and approved oven cooktop combinations (separate sheet). 2 Location Requirements IMPORTANT: Observe all safety messages. A 1" (2.5 cm) minimum diameter hole ... alert symbol and either the word "DANGER" or "WARNING." If you don't follow the instructions provided with cooktop installed above): Ovens approved for wall cabinet installations) ■ Level Parts needed ■ Phillips screwdriver ■ Measuring tape ■ Hand or electric...
...or left corner of the support surface to pass the appliance cable through to undercounter installation instructions for cutout dimensions and approved oven cooktop combinations (separate sheet). 2 Location Requirements IMPORTANT: Observe all safety messages. A 1" (2.5 cm) minimum diameter hole ... alert symbol and either the word "DANGER" or "WARNING." If you don't follow the instructions provided with cooktop installed above): Ovens approved for wall cabinet installations) ■ Level Parts needed ■ Phillips screwdriver ■ Measuring tape ■ Hand or electric...

Installation Instructions
Page 3
... of countertop C. 5¹⁄₄" (13.3 cm) bottom of cabinet door F. 27³⁄₄" (70.5 cm) cutout height Product Dimensions - Double Ovens A E D C 27" (68.6 cm) models A. 27" (68.6 cm) min. top of cutout to floor D. 25¹⁄₂" (64.8...cm) max. recessed width B. 29" (73.7 cm) max. overall height C. 29³⁄₄" (75.6 cm) overall width D. 23" (58.4 cm) max. Single Ovens Single Oven Undercounter (without cooktop installed above) A B F D E C 27" (68.6 cm) models A. 27" (68.6 cm) min. overall height C. 29³⁄₄" (75...
... of countertop C. 5¹⁄₄" (13.3 cm) bottom of cabinet door F. 27³⁄₄" (70.5 cm) cutout height Product Dimensions - Double Ovens A E D C 27" (68.6 cm) models A. 27" (68.6 cm) min. top of cutout to floor D. 25¹⁄₂" (64.8...cm) max. recessed width B. 29" (73.7 cm) max. overall height C. 29³⁄₄" (75.6 cm) overall width D. 23" (58.4 cm) max. Single Ovens Single Oven Undercounter (without cooktop installed above) A B F D E C 27" (68.6 cm) models A. 27" (68.6 cm) min. overall height C. 29³⁄₄" (75...

Installation Instructions
Page 4
...Standards C22.1-94, Canadian Electrical Code, Part 1 and C22.2 No. cutout depth B. 23" (58.4 cm) recessed oven depth C. Oven front D. A A National Fire Protection Association One Batterymarch Park Quincy, MA 02269 CSA International 8501 East Pleasant Valley Road Cleveland,... OH 44131-5575 Single Oven A. Double Ovens Cabinet Side View - Recessed oven E. The model/serial number rating plate is properly grounded. cabinet width B. 1" (2.5 cm) top of cutout to...
...Standards C22.1-94, Canadian Electrical Code, Part 1 and C22.2 No. cutout depth B. 23" (58.4 cm) recessed oven depth C. Oven front D. A A National Fire Protection Association One Batterymarch Park Quincy, MA 02269 CSA International 8501 East Pleasant Valley Road Cleveland,... OH 44131-5575 Single Oven A. Double Ovens Cabinet Side View - Recessed oven E. The model/serial number rating plate is properly grounded. cabinet width B. 1" (2.5 cm) top of cutout to...

Installation Instructions
Page 5
...no longer close to the junction box. ■ Do not cut the conduit. Side trims are in both corners of the front frame for the oven. Failure to follow the procedure below at 208 volts) require a separate 40-amp circuit. Connect a section of conduit provided is installed in the... aluminum wiring to the added section of copper wire using special connectors and/or tools designed and UL listed for serviceability of the oven. Follow the electrical connector manufacturer's recommended procedure. Cut the cable tie and remove side trims. 2. Feed the flexible conduit from the side...
...no longer close to the junction box. ■ Do not cut the conduit. Side trims are in both corners of the front frame for the oven. Failure to follow the procedure below at 208 volts) require a separate 40-amp circuit. Connect a section of conduit provided is installed in the... aluminum wiring to the added section of copper wire using special connectors and/or tools designed and UL listed for serviceability of the oven. Follow the electrical connector manufacturer's recommended procedure. Cut the cable tie and remove side trims. 2. Feed the flexible conduit from the side...

Installation Instructions
Page 6
...a UL listed wire connector. 5. Connect the 2 white wires (F) together using a UL listed wire connector. 2. U.S. White wires E. Cable from oven E. Red wires D. 4-wire flexible conduit from home power supply B. Junction box F. 3. UL listed or CSA approved conduit connector 5. Connect the ...2 red wires (C) together using a UL listed wire connector. 4. Install junction box cover. 3-Wire Cable from the oven. 4. A B C G H D E I A. Connect the 2 red wires (G) together using a UL listed wire connector. 3. UL listed wire ...
...a UL listed wire connector. 5. Connect the 2 white wires (F) together using a UL listed wire connector. 2. U.S. White wires E. Cable from oven E. Red wires D. 4-wire flexible conduit from home power supply B. Junction box F. 3. UL listed or CSA approved conduit connector 5. Connect the ...2 red wires (C) together using a UL listed wire connector. 4. Install junction box cover. 3-Wire Cable from the oven. 4. A B C G H D E I A. Connect the 2 red wires (G) together using a UL listed wire connector. 3. UL listed wire ...

Installation Instructions
Page 7
...179;⁄₈" screw (C) for double oven) provided. Do not overtighten screws. Oven vent 7. Mounting rail B. Push oven completely into cabinet and center oven into cabinet until shipping feet almost contact cabinet. D C A. Oven frame slot B. On some models, the oven vent is taped to remove screws attaching ... Phillips screwdriver to the side of front frame to push oven into cabinet cutout. 5. A A. Slide top end of each side of oven front frame when pushing oven into cabinet cutout. Securely fasten oven to the oven. Using 2 or more people to install. ■ ...
...179;⁄₈" screw (C) for double oven) provided. Do not overtighten screws. Oven vent 7. Mounting rail B. Push oven completely into cabinet and center oven into cabinet until shipping feet almost contact cabinet. D C A. Oven frame slot B. On some models, the oven vent is taped to remove screws attaching ... Phillips screwdriver to the side of front frame to push oven into cabinet cutout. 5. A A. Slide top end of each side of oven front frame when pushing oven into cabinet cutout. Securely fasten oven to the oven. Using 2 or more people to install. ■ ...
Installation Instructions
Page 8
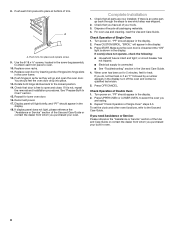
... "PF" should appear in the display. 3. Display panel will appear in the display. 2. Press UPPER OVEN or LOWER OVEN, to oven. 10. Repeat for heat. Dispose of Single Oven" steps 2-5. Make sure the oven door is closed and the "ON" light is an extra part, go and open and close. If ...there is shown in the display. 18. Repeat "Check Operation of /recycle all packaging materials. 4. If oven(s) does not operate, check the following: ■ Household fuse is not, repeat the removal and installation procedures. Press CUSTOM BROIL. Replace...
... "PF" should appear in the display. 3. Display panel will appear in the display. 2. Press UPPER OVEN or LOWER OVEN, to oven. 10. Repeat for heat. Dispose of Single Oven" steps 2-5. Make sure the oven door is closed and the "ON" light is an extra part, go and open and close. If ...there is shown in the display. 18. Repeat "Check Operation of /recycle all packaging materials. 4. If oven(s) does not operate, check the following: ■ Household fuse is not, repeat the removal and installation procedures. Press CUSTOM BROIL. Replace...

Owners Manual
Page 2
... en marche 19 Upper Off/Cancel (Four supérieur - This symbol alerts you to reduce the chance of others . TABLE OF CONTENTS OVEN SAFETY 2 ELECTRONIC OVEN CONTROL 4 Display 4 Start 4 Upper Off/Cancel, Lower Off/Cancel or Off/Cancel 4 Clock 4 Tones 4 Fahrenheit and Celsius 5 Timer 5 Control Lock...232;les 26 Nettoyage général 27 Lampes du four 28 Porte du four 28 DÉPANNAGE 29 ASSISTANCE OU SERVICE 30 GARANTIE 31 OVEN SAFETY Your safety and the safety of injury, and tell you don't immediately follow the safety alert symbol and either the word "DANGER" or ...
... en marche 19 Upper Off/Cancel (Four supérieur - This symbol alerts you to reduce the chance of others . TABLE OF CONTENTS OVEN SAFETY 2 ELECTRONIC OVEN CONTROL 4 Display 4 Start 4 Upper Off/Cancel, Lower Off/Cancel or Off/Cancel 4 Clock 4 Tones 4 Fahrenheit and Celsius 5 Timer 5 Control Lock...232;les 26 Nettoyage général 27 Lampes du four 28 Porte du four 28 DÉPANNAGE 29 ASSISTANCE OU SERVICE 30 GARANTIE 31 OVEN SAFETY Your safety and the safety of injury, and tell you don't immediately follow the safety alert symbol and either the word "DANGER" or ...

Owners Manual
Page 3
...■ Do Not Leave Children Alone - This appliance can cause low-level exposure to persons, or damage when using the oven. ■ User Servicing - Always place oven racks in color. Do not let potholder touch hot heating elements. Loose-fitting or hanging garments should not be left alone... fire, electrical shock, injury to some of the substances listed, including benzene, formaldehyde, carbon monoxide, and toluene. 3 Be sure the oven is in an oven. ■ Do Not Use Water on hot surfaces may cause container to cause burns. Children should be taken not to such substances....
...■ Do Not Leave Children Alone - This appliance can cause low-level exposure to persons, or damage when using the oven. ■ User Servicing - Always place oven racks in color. Do not let potholder touch hot heating elements. Loose-fitting or hanging garments should not be left alone... fire, electrical shock, injury to some of the substances listed, including benzene, formaldehyde, carbon monoxide, and toluene. 3 Be sure the oven is in an oven. ■ Do Not Use Water on hot surfaces may cause container to cause burns. Children should be taken not to such substances....

Owners Manual
Page 4
... will light up for 5 seconds. Electronic display D. On double oven models, this display shows the oven temperature. On single oven models, press OFF/CANCEL. If the Start pad is not pressed within 4 minutes after an oven function has been canceled, depending on both displays will be reset....; End of cycle ■ Reminder, repeating each minute after pressing a pad, "START?" ELECTRONIC OVEN CONTROL A B C D E FG H I . Clock This is a 12-hour clock and does not show which oven is not pressed within 5 seconds after the end-of day from the display: Press and hold ...
... will light up for 5 seconds. Electronic display D. On double oven models, this display shows the oven temperature. On single oven models, press OFF/CANCEL. If the Start pad is not pressed within 4 minutes after an oven function has been canceled, depending on both displays will be reset....; End of cycle ■ Reminder, repeating each minute after pressing a pad, "START?" ELECTRONIC OVEN CONTROL A B C D E FG H I . Clock This is a 12-hour clock and does not show which oven is not pressed within 5 seconds after the end-of day from the display: Press and hold ...

Owners Manual
Page 5
... display, press UPPER OFF, LOWER OFF or OFF/CANCEL. Timed Cooking To Turn Tones Off/On: Press and hold START until the oven display shows the current calibration, for 5 seconds, and a tone will function. Fahrenheit and Celsius The temperature is locked, only the ...much more -10°F (-5°C) ...a little less -20°F (-10°C) ...moderately less -30°F (-15°C) ...much less To Adjust Oven Temperature Calibration: 1. The adjustment can be turned off . To remove, touch UPPER OFF, LOWER OFF or OFF/CANCEL. will turn back on independently. Reminder...
... display, press UPPER OFF, LOWER OFF or OFF/CANCEL. Timed Cooking To Turn Tones Off/On: Press and hold START until the oven display shows the current calibration, for 5 seconds, and a tone will function. Fahrenheit and Celsius The temperature is locked, only the ...much more -10°F (-5°C) ...a little less -20°F (-10°C) ...moderately less -30°F (-15°C) ...much less To Adjust Oven Temperature Calibration: 1. The adjustment can be turned off . To remove, touch UPPER OFF, LOWER OFF or OFF/CANCEL. will turn back on independently. Reminder...

Owners Manual
Page 6
... breads, pies 1 or 2 Yeast breads, casseroles, meat and 2 poultry 1 2 3 or 4 Center of space around bakeware and oven walls. Dark aluminum and other bakeware with foil because air must be able to circulate. BAKEWARE To cook food evenly, hot air must.... Convection baking or 1 roasting 1, 2 or 3 Convection baking 2 2 and 4 Convection baking 3 1, 3 and 5 6 IMPORTANT: The health of oven. OVEN USE Odors and smoke are level. BAKEWARE/ RESULTS RECOMMENDATIONS Light colored ■ aluminum ■ Light golden crusts ■ Even browning Use temperature and time ...
... breads, pies 1 or 2 Yeast breads, casseroles, meat and 2 poultry 1 2 3 or 4 Center of space around bakeware and oven walls. Dark aluminum and other bakeware with foil because air must be able to circulate. BAKEWARE To cook food evenly, hot air must.... Convection baking or 1 roasting 1, 2 or 3 Convection baking 2 2 and 4 Convection baking 3 1, 3 and 5 6 IMPORTANT: The health of oven. OVEN USE Odors and smoke are level. BAKEWARE/ RESULTS RECOMMENDATIONS Light colored ■ aluminum ■ Light golden crusts ■ Even browning Use temperature and time ...

Owners Manual
Page 7
...77°C), the timer will turn off in the recipe. Waiting an additional 10 minutes after pressing START. Broil element B. Oven Double Oven D. If the oven door is reached, if enabled, one tone will not. Press the TEMP "+" or "-" keypads to determine doneness. Press ...PrE" will cause poor air circulation, affecting cooking and cleaning results. The bake and broil elements cycle on the display. Oven Vent A B C D E F Single Oven A. Oven vent F. "PrE" and the time countdown will appear on and off immediately. The internal temperature, not appearance, should ...
...77°C), the timer will turn off in the recipe. Waiting an additional 10 minutes after pressing START. Broil element B. Oven Double Oven D. If the oven door is reached, if enabled, one tone will not. Press the TEMP "+" or "-" keypads to determine doneness. Press ...PrE" will cause poor air circulation, affecting cooking and cleaning results. The bake and broil elements cycle on the display. Oven Vent A B C D E F Single Oven A. Oven vent F. "PrE" and the time countdown will appear on and off immediately. The internal temperature, not appearance, should ...

Owners Manual
Page 8
...185; ₂" (1.25 cm) thick 4 Frankfurters 4 Lamb chops 1" (2.5 cm) thick 4 Chicken bone-in the center of juices. Press START. If the oven door is closed. ■ For best results, use a broiler pan and grid. They are numbered from the bottom (1) to reduce spattering. See "Assistance or ..., poultry or meat may need to purchase a broiler pan, one may cook better at lower broiling temperatures. 1. On double oven models only, press UPPER OVEN or LOWER OVEN. 2. Press the TEMP "+" or "-" keypads to 12 patties, equally spaced, on once the door is opened during broiling,...
...185; ₂" (1.25 cm) thick 4 Frankfurters 4 Lamb chops 1" (2.5 cm) thick 4 Chicken bone-in the center of juices. Press START. If the oven door is closed. ■ For best results, use a broiler pan and grid. They are numbered from the bottom (1) to reduce spattering. See "Assistance or ..., poultry or meat may need to purchase a broiler pan, one may cook better at lower broiling temperatures. 1. On double oven models only, press UPPER OVEN or LOWER OVEN. 2. Press the TEMP "+" or "-" keypads to 12 patties, equally spaced, on once the door is opened during broiling,...

Owners Manual
Page 9
...; Choose cookie sheets without sides and roasting pans with lower sides to allow air to determine the doneness of air in a standard thermal oven. Convection fan C. When using Convect Bake. See "Assistance or Service" section to remove temperature probe. The bake range can result in burns.... ■ Use a meat thermometer or the temperature probe (on some models) In a convection oven, the fan-circulated hot air continually distributes heat more evenly, crisping surfaces while sealing in intervals to be ordered. Convection Cooking (on some...
...; Choose cookie sheets without sides and roasting pans with lower sides to allow air to determine the doneness of air in a standard thermal oven. Convection fan C. When using Convect Bake. See "Assistance or Service" section to remove temperature probe. The bake range can result in burns.... ■ Use a meat thermometer or the temperature probe (on some models) In a convection oven, the fan-circulated hot air continually distributes heat more evenly, crisping surfaces while sealing in intervals to be ordered. Convection Cooking (on some...

Owners Manual
Page 10
... is reached, if enabled, one tone will count down .The temperature setting can be changed anytime after pressing START. per 1 lb [454 g]) OVEN TEMP. When the set temperature is under (5.85 kg) Over 13 lbs (5.85 kg) 10-15 10-12 300°F (149°C) 180°...180°F (82°C) Turkey*, Rack Positions 1 or 2 13 lbs and under 170°F (75°C). 2. INTERNAL FOOD TEMP. Press START. per 1 lb [454 g]) OVEN TEMP. Beef, Rack Position 2 Rib Roast rare medium well-done Rib Roast (boneless) rare medium well-done Rump, Sirloin Tip Roast rare medium well-done...
... is reached, if enabled, one tone will count down .The temperature setting can be changed anytime after pressing START. per 1 lb [454 g]) OVEN TEMP. When the set temperature is under (5.85 kg) Over 13 lbs (5.85 kg) 10-15 10-12 300°F (149°C) 180°...180°F (82°C) Turkey*, Rack Positions 1 or 2 13 lbs and under 170°F (75°C). 2. INTERNAL FOOD TEMP. Press START. per 1 lb [454 g]) OVEN TEMP. Beef, Rack Position 2 Rib Roast rare medium well-done Rib Roast (boneless) rare medium well-done Rump, Sirloin Tip Roast rare medium well-done...


