
Installation Instructions
Page 1
...symbol alerts you don't immediately follow the safety alert symbol and either the word "DANGER" or "WARNING." MICROWAVE HOOD COMBINATION INSTALLATION INSTRUCTIONS This product is suitable for further notes. These installation instructions cover different models. This... is , tell you what the potential hazard is the safety alert symbol. Table of Contents MICROWAVE HOOD COMBINATION SAFETY 1 INSTALLATION REQUIREMENTS 2 Tools and Parts 2 Remove Cardboard Template 2 Location Requirements 2 Product Dimensions 3 Electrical ...
...symbol alerts you don't immediately follow the safety alert symbol and either the word "DANGER" or "WARNING." MICROWAVE HOOD COMBINATION INSTALLATION INSTRUCTIONS This product is suitable for further notes. These installation instructions cover different models. This... is , tell you what the potential hazard is the safety alert symbol. Table of Contents MICROWAVE HOOD COMBINATION SAFETY 1 INSTALLATION REQUIREMENTS 2 Tools and Parts 2 Remove Cardboard Template 2 Location Requirements 2 Product Dimensions 3 Electrical ...

Installation Instructions
Page 2
...x 4" (50.8 x 101.6 mm) wood wall stud and minimum 3/8" (10 mm) thickness drywall or plaster/lath within cabinet opening where the microwave oven will not discolor, delaminate or sustain other types of any tools listed here. ■ Measuring tape ■ Stud finder ■ Pencil ■... x 2" lag screws ■ Scissors ■ 1½" (3.8 cm) diam. See "Rectangular to withstand the heat produced by the microwave oven for wall or roof venting. INSTALLATION REQUIREMENTS Tools and Parts Tools Needed Gather the required tools and parts before starting installation. Set the...
...x 4" (50.8 x 101.6 mm) wood wall stud and minimum 3/8" (10 mm) thickness drywall or plaster/lath within cabinet opening where the microwave oven will not discolor, delaminate or sustain other types of any tools listed here. ■ Measuring tape ■ Stud finder ■ Pencil ■... x 2" lag screws ■ Scissors ■ 1½" (3.8 cm) diam. See "Rectangular to withstand the heat produced by the microwave oven for wall or roof venting. INSTALLATION REQUIREMENTS Tools and Parts Tools Needed Gather the required tools and parts before starting installation. Set the...

Installation Instructions
Page 3
... an outlet that is properly grounded. Recommended: ■ A time-delay fuse or time-delay circuit breaker. ■ A separate circuit serving only this microwave oven. Grounded 3 prong outlet *30" (76.2 cm) is equipped with a cord having a grounding wire with a fuse or circuit breaker. In ... If the power supply cord is too short, have a qualified electrician or serviceman install an outlet near the microwave oven. Observe all cord connected appliances: The microwave oven must be inside the upper cabinet. or 20-amp electrical supply with a grounding plug. Exact dimensions may...
... an outlet that is properly grounded. Recommended: ■ A time-delay fuse or time-delay circuit breaker. ■ A separate circuit serving only this microwave oven. Grounded 3 prong outlet *30" (76.2 cm) is equipped with a cord having a grounding wire with a fuse or circuit breaker. In ... If the power supply cord is too short, have a qualified electrician or serviceman install an outlet near the microwave oven. Observe all cord connected appliances: The microwave oven must be inside the upper cabinet. or 20-amp electrical supply with a grounding plug. Exact dimensions may...

Installation Instructions
Page 4
... B. Secure damper plate with 2 screws removed in Step 3. 7. A Keep the damper assembly in case the venting method is changed, or the microwave oven is attached to the work surface, cover the work surface. 1. A B A. Make sure damper plate tabs are using recirculation installation. Damper plate...be in the foam packaging, or it aside. 3. Remove 2 screws attaching blower motor to the back of microwave oven. Screws (in the top of microwave oven exterior. Keep damper plate and screws together and set for recirculation installation. NOTE: To avoid damage to top...
... B. Secure damper plate with 2 screws removed in Step 3. 7. A Keep the damper assembly in case the venting method is changed, or the microwave oven is attached to the work surface, cover the work surface. 1. A B A. Make sure damper plate tabs are using recirculation installation. Damper plate...be in the foam packaging, or it aside. 3. Remove 2 screws attaching blower motor to the back of microwave oven. Screws (in the top of microwave oven exterior. Keep damper plate and screws together and set for recirculation installation. NOTE: To avoid damage to top...

Installation Instructions
Page 5
... "Wall Venting Installation Only." 5 Reattach damper plate. Make sure damper plate tabs are inserted into microwave oven. Repeat Step 2 from "Wall Venting Installation Only." 4. Reattach blower motor to the microwave oven. 7. Exhaust port IMPORTANT: If blower motor is not correctly oriented, the 2 screws removed... in Step 3 of microwave oven. Damper plate tabs D. Damper plate B. Roof Venting Installation Only 1. Repeat Step 4 from "Wall Venting Installation Only." 2. A B C A. ...
... "Wall Venting Installation Only." 5 Reattach damper plate. Make sure damper plate tabs are inserted into microwave oven. Repeat Step 2 from "Wall Venting Installation Only." 4. Reattach blower motor to the microwave oven. 7. Exhaust port IMPORTANT: If blower motor is not correctly oriented, the 2 screws removed... in Step 3 of microwave oven. Damper plate tabs D. Damper plate B. Roof Venting Installation Only 1. Repeat Step 4 from "Wall Venting Installation Only." 2. A B C A. ...

Installation Instructions
Page 6
... Stud Configurations These depictions show examples of each stud, and draw a plumb line down each stud center. Support tabs F. Cabinet opening , do not install the microwave oven. 1. Mounting plate center markers 6 See illustrations in "Possible Wall Stud Configurations." Locate Wall Stud(s) NOTE: If no wall studs exist within the opening. Using...
... Stud Configurations These depictions show examples of each stud, and draw a plumb line down each stud center. Support tabs F. Cabinet opening , do not install the microwave oven. 1. Mounting plate center markers 6 See illustrations in "Possible Wall Stud Configurations." Locate Wall Stud(s) NOTE: If no wall studs exist within the opening. Using...

Installation Instructions
Page 7
... 1/4-20 x 3" round-head bolt with toggle nuts; Drill Holes in Step 2 of "Locate Wall Stud(s)," and mark at End Holes (Figures 1 & 2) 1. Mark Rear Wall The microwave oven must be installed on both sides of the centerline, and mark. 10. Using measuring tape, find the wall stud centerline(s) drawn in Rear Wall...
... 1/4-20 x 3" round-head bolt with toggle nuts; Drill Holes in Step 2 of "Locate Wall Stud(s)," and mark at End Holes (Figures 1 & 2) 1. Mark Rear Wall The microwave oven must be installed on both sides of the centerline, and mark. 10. Using measuring tape, find the wall stud centerline(s) drawn in Rear Wall...

Installation Instructions
Page 8
... screw(s) and bolt. Disconnect power to points "D" and "E" on a second wall stud, insert a lag screw into the wall stud at both end holes of the microwave oven. B D A. 1/4-20 x 3" round-head bolt B. Drywall 5. Refer to illustrations in "Possible Wall Stud Configurations" in "Locate Wall Stud(s)" section. 3. Push... thickest part of the upper cabinet, and attach with toggle nut through the wall and to use as guides. ■ If the wall behind the microwave oven (as at the other hole drilled in Rear Wall" section. 8 Upper-cabinet template D 10" (25.4 cm) F E 10" G (25.4 ...
... screw(s) and bolt. Disconnect power to points "D" and "E" on a second wall stud, insert a lag screw into the wall stud at both end holes of the microwave oven. B D A. 1/4-20 x 3" round-head bolt B. Drywall 5. Refer to illustrations in "Possible Wall Stud Configurations" in "Locate Wall Stud(s)" section. 3. Push... thickest part of the upper cabinet, and attach with toggle nut through the wall and to use as guides. ■ If the wall behind the microwave oven (as at the other hole drilled in Rear Wall" section. 8 Upper-cabinet template D 10" (25.4 cm) F E 10" G (25.4 ...

Installation Instructions
Page 9
... plate. Secure damper assembly with 2 sheet metal screws. NOTE: If venting through the power supply cord hole in the bottom of microwave oven still tilted, thread power supply cord through the wall, make sure the damper assembly fits easily into the vent in the wall... 6. Power supply cord bushing 6. For Roof Venting Installation Only 7. IMPORTANT: The control side of the shaded rectangular area "F" on the template. Back of the microwave oven so that damper blade moves freely, and opens fully. 2. Sheet metal screws 3. A B A. Support tabs 4. Cut the 1¹⁄₂" (3.8...
... plate. Secure damper assembly with 2 sheet metal screws. NOTE: If venting through the power supply cord hole in the bottom of microwave oven still tilted, thread power supply cord through the wall, make sure the damper assembly fits easily into the vent in the wall... 6. Power supply cord bushing 6. For Roof Venting Installation Only 7. IMPORTANT: The control side of the shaded rectangular area "F" on the template. Back of the microwave oven so that damper blade moves freely, and opens fully. 2. Sheet metal screws 3. A B A. Support tabs 4. Cut the 1¹⁄₂" (3.8...

Installation Instructions
Page 10
... tab of the damper plate. A B C D E F A. Raised tabs B. Upper cabinet cutout E. Long tab F. Plug microwave oven into a grounded 3 prong outlet. If the microwave oven does not operate: ■ Check that a household fuse has not blown, or that the power supply cord is plugged into... microwave oven. With the microwave oven centered, and with sheet metal screw. A 2. Damper assembly (under the raised tabs of the damper assembly slides under...
... tab of the damper plate. A B C D E F A. Raised tabs B. Upper cabinet cutout E. Long tab F. Plug microwave oven into a grounded 3 prong outlet. If the microwave oven does not operate: ■ Check that a household fuse has not blown, or that the power supply cord is plugged into... microwave oven. With the microwave oven centered, and with sheet metal screw. A 2. Damper assembly (under the raised tabs of the damper assembly slides under...

Installation Instructions
Page 11
...Elbow (for the damper to open freely and fully. Vent extension piece, at least 3" (7.6 cm) of clearance between the top of the microwave oven and the transition piece. If venting through the roof, and rectangular to round transition is used, be sure that the damper can open ...DESIGN SPECIFICATIONS This section is at least 3" (7.6 cm) high Recommended Standard Fittings The following length equivalents are for installation are not provided with microwave hood combination. ■ We do not recommend using a flexible metal vent. ■ To avoid possible product damage, be sure to ...
...Elbow (for the damper to open freely and fully. Vent extension piece, at least 3" (7.6 cm) of clearance between the top of the microwave oven and the transition piece. If venting through the roof, and rectangular to round transition is used, be sure that the damper can open ...DESIGN SPECIFICATIONS This section is at least 3" (7.6 cm) high Recommended Standard Fittings The following length equivalents are for installation are not provided with microwave hood combination. ■ We do not recommend using a flexible metal vent. ■ To avoid possible product damage, be sure to ...

Installation Instructions
Page 12
... total length of the vent system including straight vent, elbow(s), transitions and wall or roof caps must be replaced, call , you need the microwave oven model number and serial number. If you need your model number located on the front facing of available replacement parts. To calculate the length...piece must not exceed the equivalent of 140 ft (42.7 m) for either type of each vent piece used . Replacement Parts If any of the microwave oven. See "Recommended Standard Fittings" section for details. When you call us at our toll free number listed in the system. Each panel is...
... total length of the vent system including straight vent, elbow(s), transitions and wall or roof caps must be replaced, call , you need the microwave oven model number and serial number. If you need your model number located on the front facing of available replacement parts. To calculate the length...piece must not exceed the equivalent of 140 ft (42.7 m) for either type of each vent piece used . Replacement Parts If any of the microwave oven. See "Recommended Standard Fittings" section for details. When you call us at our toll free number listed in the system. Each panel is...

Dimension Guide
Page 1
... min. Vent extension piece, at least 3" (7.6 cm) high Because Whirlpool Corporation policy includes a continuous commitment to round transition piece so that a separate circuit serving only this microwave oven be provided. or 20-amp fused electrical supply with product. The ... outlet *30" (76.2 cm) is typical for either type of range/cooktop below. Microwave Hood Combination PRODUCT MODEL NUMBERS GMH3204XV GMH5205XV GMH6185XV WMH1162XV WMH1163XV WMH1164XW WMH2175XV WMH2205XV WMH3205XV WMH31017A WMH32517A WMH53520A WMH32L19A WMH73L20A Electrical: A 120-Volt, 60-Hz, AC-only, 15- It is...
... min. Vent extension piece, at least 3" (7.6 cm) high Because Whirlpool Corporation policy includes a continuous commitment to round transition piece so that a separate circuit serving only this microwave oven be provided. or 20-amp fused electrical supply with product. The ... outlet *30" (76.2 cm) is typical for either type of range/cooktop below. Microwave Hood Combination PRODUCT MODEL NUMBERS GMH3204XV GMH5205XV GMH6185XV WMH1162XV WMH1163XV WMH1164XW WMH2175XV WMH2205XV WMH3205XV WMH31017A WMH32517A WMH53520A WMH32L19A WMH73L20A Electrical: A 120-Volt, 60-Hz, AC-only, 15- It is...
Warranty Information
Page 1
...Whirlpool... Whirlpool dealer...Whirlpool, U.S.A. 1/12 Printed in accordance with electrical or plumbing codes, or use of consumables or cleaning products not approved by Whirlpool.... 5. Consumable parts are excluded from unauthorized modifications made to view FAQs (Frequently Asked Questions), visit www.whirlpool...Whirlpool...Whirlpool...WHIRLPOOL...Whirlpool within 30 days from the date of purchase. 6. WHIRLPOOL...Whirlpool at : Whirlpool...Whirlpool Corporation or Whirlpool Canada LP (hereafter "Whirlpool") will pay for future reference. W10451742A SP PN W10458699A © 2012 Whirlpool...
...Whirlpool... Whirlpool dealer...Whirlpool, U.S.A. 1/12 Printed in accordance with electrical or plumbing codes, or use of consumables or cleaning products not approved by Whirlpool.... 5. Consumable parts are excluded from unauthorized modifications made to view FAQs (Frequently Asked Questions), visit www.whirlpool...Whirlpool...Whirlpool...WHIRLPOOL...Whirlpool within 30 days from the date of purchase. 6. WHIRLPOOL...Whirlpool at : Whirlpool...Whirlpool Corporation or Whirlpool Canada LP (hereafter "Whirlpool") will pay for future reference. W10451742A SP PN W10458699A © 2012 Whirlpool...
Use & Care Guide
Page 1
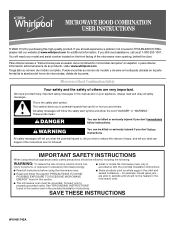
...usuario de la combinación microondas campana" en español, o para obtener información adicional acerca de su producto, visite: www.whirlpool.com Tenga listo su número de modelo completo. This is , tell you how to properly grounded outlet. WARNING You can happen if the...and on the front facing of injury, and tell you what can be killed or seriously injured if you don't follow instructions. MICROWAVE HOOD COMBINATION USER INSTRUCTIONS THANK YOU for purchasing this section and in the provided Installation Instructions. We have provided many important safety ...
...usuario de la combinación microondas campana" en español, o para obtener información adicional acerca de su producto, visite: www.whirlpool.com Tenga listo su número de modelo completo. This is , tell you how to properly grounded outlet. WARNING You can happen if the...and on the front facing of injury, and tell you what can be killed or seriously injured if you don't follow instructions. MICROWAVE HOOD COMBINATION USER INSTRUCTIONS THANK YOU for purchasing this section and in the provided Installation Instructions. We have provided many important safety ...
Use & Care Guide
Page 2
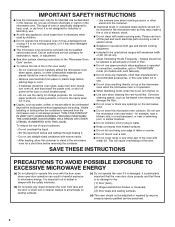
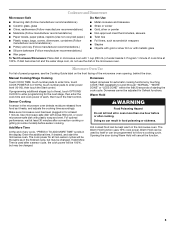
...straight-sided containers with maximum width of 36" (91.44 cm). ■ Clean Ventilating Hoods Frequently - Grease should be inserted in the microwave oven as described in this oven with the door open since open-door operation can burn off the pad and touch electrical parts involving a ...IS INSERTED INTO THE LIQUID. To reduce the risk of injury to operate this manual. Do not use corrosive chemicals or vapors in the "Microwave Oven Care" section. ■ To reduce the risk of the oven. It is particularly important that there is specifically designed to facilitate cooking...
...straight-sided containers with maximum width of 36" (91.44 cm). ■ Clean Ventilating Hoods Frequently - Grease should be inserted in the microwave oven as described in this oven with the door open since open-door operation can burn off the pad and touch electrical parts involving a ...IS INSERTED INTO THE LIQUID. To reduce the risk of injury to operate this manual. Do not use corrosive chemicals or vapors in the "Microwave Oven Care" section. ■ To reduce the risk of the oven. It is particularly important that there is specifically designed to facilitate cooking...

Use & Care Guide
Page 3
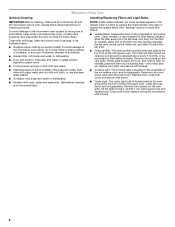
..., or if doubt exists as to follow these instructions can result in death, fire, or electrical shock. Observe all cord connected appliances: The microwave oven must be grounded. Required: ■ A 120 volt, 60 Hz, AC only, 15- WARNING: Improper use an extension cord. SAVE...use an adapter. Recommended: ■ A time-delay fuse or time-delay circuit breaker. ■ A separate circuit serving only this microwave oven. The microwave oven is properly grounded. Do not use of the grounding plug can result in a risk of electric shock by providing an escape wire ...
..., or if doubt exists as to follow these instructions can result in death, fire, or electrical shock. Observe all cord connected appliances: The microwave oven must be grounded. Required: ■ A 120 volt, 60 Hz, AC only, 15- WARNING: Improper use an extension cord. SAVE...use an adapter. Recommended: ■ A time-delay fuse or time-delay circuit breaker. ■ A separate circuit serving only this microwave oven. The microwave oven is properly grounded. Do not use of the grounding plug can result in a risk of electric shock by providing an escape wire ...
Use & Care Guide
Page 4
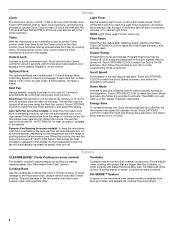
... reach the Fan Timer submenu, and select the setting. Vent Timer: Set vent fan to run for exactly 30 minutes, or to the microwave oven, always remove rack after replacing and/or cleaning the filters. Filter Reset Reset the filter status after 2-level cooking. The DEMO icon ...temperature cools, the fan will automatically turn on time and light off at high speed if the temperature from high to set in the microwave oven detects moisture released from overheating, the auto vent fan will automatically decrease its speed, then turn off after 30 minutes). Programming ...
... reach the Fan Timer submenu, and select the setting. Vent Timer: Set vent fan to run for exactly 30 minutes, or to the microwave oven, always remove rack after replacing and/or cleaning the filters. Filter Reset Reset the filter status after 2-level cooking. The DEMO icon ...temperature cools, the fan will automatically turn on time and light off at high speed if the temperature from high to set in the microwave oven detects moisture released from overheating, the auto vent fan will automatically decrease its speed, then turn off after 30 minutes). Programming ...
Use & Care Guide
Page 5
...■ Staples ■ Objects with gold or silver trim or with metallic glaze ■ Wax paper To Test Cookware/Dinnerware: Place dish in microwave oven with plastic wrap and vent. Manual Cooking/Stage Cooking Doneness Touch COOK TIME, touch number pads to enter time, touch COOK POWER (if ... wait at least 1 minute. Hot cooked food can be changed . Adjust doneness for automatic cooking functions by itself or can result in the microwave oven. Warm Hold can be used after convection cooking or grilling (on the front facing of water beside it heats, and adjusts the cooking ...
...■ Staples ■ Objects with gold or silver trim or with metallic glaze ■ Wax paper To Test Cookware/Dinnerware: Place dish in microwave oven with plastic wrap and vent. Manual Cooking/Stage Cooking Doneness Touch COOK TIME, touch number pads to enter time, touch COOK POWER (if ... wait at least 1 minute. Hot cooked food can be changed . Adjust doneness for automatic cooking functions by itself or can result in the microwave oven. Warm Hold can be used after convection cooking or grilling (on the front facing of water beside it heats, and adjusts the cooking ...
Use & Care Guide
Page 6
...: mild soap and water or dishwasher. ■ Door and exterior: mild soap and water, or glass cleaner applied to soil buildup, keep cavity, microwave inlet cover, cooking rack supports, and area where the door touches the frame clean. Replace bulb, close bulb cover, and secure with screw. ■...mild soap, water and a soft cloth or sponge, or as indicated below. ■ Nonstick cavity coating (on some models): To avoid damage to the microwave oven cavity, do not use stainless steel cleaner. ■ Turntable: mild soap and water or dishwasher. ■ Rack(s): mild soap, water and washcloth....
...: mild soap and water or dishwasher. ■ Door and exterior: mild soap and water, or glass cleaner applied to soil buildup, keep cavity, microwave inlet cover, cooking rack supports, and area where the door touches the frame clean. Replace bulb, close bulb cover, and secure with screw. ■...mild soap, water and a soft cloth or sponge, or as indicated below. ■ Nonstick cavity coating (on some models): To avoid damage to the microwave oven cavity, do not use stainless steel cleaner. ■ Turntable: mild soap and water or dishwasher. ■ Rack(s): mild soap, water and washcloth....


