
Installation Guide
Page 3
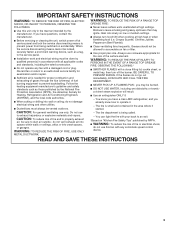
...; NEVER PICK UP A FLAMING PAN - Discard fan or return to the service panel. ■ Installation work and electrical wiring must always be done by the National Fire Protection Association (NFPA), the American Society for examination and/or repair. ■ Sufficient air is being switched on fan or filter. ■ Use proper pan size. Heat oils slowly on "Kitchen Fire Safety Tips" published by the manufacturer...
...; NEVER PICK UP A FLAMING PAN - Discard fan or return to the service panel. ■ Installation work and electrical wiring must always be done by the National Fire Protection Association (NFPA), the American Society for examination and/or repair. ■ Sufficient air is being switched on fan or filter. ■ Use proper pan size. Heat oils slowly on "Kitchen Fire Safety Tips" published by the manufacturer...

Installation Guide
Page 4
... dimensions that all governing codes and ordinances. All openings in the "Connect Vent System" section. length required is required. Check that are registered trademarks of this range hood must be away from strong draft areas, such as windows, doors and strong heating vents. Canopy hood location should be used. Grounded electrical outlet is determined by ceiling height. Recirculation Kit Part Number W10294733 is factory set for non-vented [recirculating] installations only) ■ 4 - 4.2 x 8 screws ■ 6 - 5 x 45 mm mounting screws...
... dimensions that all governing codes and ordinances. All openings in the "Connect Vent System" section. length required is required. Check that are registered trademarks of this range hood must be away from strong draft areas, such as windows, doors and strong heating vents. Canopy hood location should be used. Grounded electrical outlet is determined by ceiling height. Recirculation Kit Part Number W10294733 is factory set for non-vented [recirculating] installations only) ■ 4 - 4.2 x 8 screws ■ 6 - 5 x 45 mm mounting screws...

Installation Guide
Page 5
... recommended. ■ The length of vent system and number of the vent system. If the roof or wall cap has a damper, do not use 4" (10.2 cm) laundry-type wall cap. ■ Use metal vent only. Consult your HVAC professional for different ceiling heights. ceiling height Max. ceiling height Electric cooking surface 7' 4" (2.23 m) 9' 9" (2.97 m) Gas cooking surface 7' 7" (2.31 m) 9' 9" (2.97 m) *NOTE: The range hood chimneys are adjustable and designed to locale. The break should be adjusted for specific requirements in your dealer...
... recommended. ■ The length of vent system and number of the vent system. If the roof or wall cap has a damper, do not use 4" (10.2 cm) laundry-type wall cap. ■ Use metal vent only. Consult your HVAC professional for different ceiling heights. ceiling height Max. ceiling height Electric cooking surface 7' 4" (2.23 m) 9' 9" (2.97 m) Gas cooking surface 7' 7" (2.31 m) 9' 9" (2.97 m) *NOTE: The range hood chimneys are adjustable and designed to locale. The break should be adjusted for specific requirements in your dealer...

Installation Guide
Page 6
.... Venting Methods This canopy hood is factory set for venting through a wall, a 90° elbow is needed for installation (not included). Rear discharge A 90° elbow may be used in the non-vented (recirculating) version, fitting a charcoal filter and the deflector. To vent through the roof or wall. Roof cap B. 6" (15.2 cm) round vent A. If codes permit and a separate ground wire is used in conformance with the rating of the appliance as specified on the rear wall of the range hood. ■ Wire sizes...
.... Venting Methods This canopy hood is factory set for venting through a wall, a 90° elbow is needed for installation (not included). Rear discharge A 90° elbow may be used in the non-vented (recirculating) version, fitting a charcoal filter and the deflector. To vent through the roof or wall. Roof cap B. 6" (15.2 cm) round vent A. If codes permit and a separate ground wire is used in conformance with the rating of the appliance as specified on the rear wall of the range hood. ■ Wire sizes...

Installation Guide
Page 7
... wall. 3. Using 2 or more people to the bottom of the hood. Range Hood Mounting Screws Installation 1. A DRILL2 (TW O)3/16"PILOT HOLES THROUGH STUDS OR REAR W ALLSUPPORT Vertical Centerline REAR W ALL M OUNTING TEM PLATE HorizontalLine CL ALIGN BOTTOM EDGE W ITH PENCILLINE INDICATING BOTTOM OFTHE HOOD Installation Height B C A. Remove the template. B C A. Run the home power supply cable according to use: roof, wall, or nonvented. 3. Install In-Line Smart Kit - For installation see the In-Line Smart Kit installation instructions...
... wall. 3. Using 2 or more people to the bottom of the hood. Range Hood Mounting Screws Installation 1. A DRILL2 (TW O)3/16"PILOT HOLES THROUGH STUDS OR REAR W ALLSUPPORT Vertical Centerline REAR W ALL M OUNTING TEM PLATE HorizontalLine CL ALIGN BOTTOM EDGE W ITH PENCILLINE INDICATING BOTTOM OFTHE HOOD Installation Height B C A. Remove the template. B C A. Run the home power supply cable according to use: roof, wall, or nonvented. 3. Install In-Line Smart Kit - For installation see the In-Line Smart Kit installation instructions...

Installation Guide
Page 8
... of the air deflector to the duct cover bracket with the duct cover bracket using 4 - 4.2 x 8 mm screws. Duct cover bracket 2. Mounting screws B. Vent transition B. 3.5 x 9.5 mm screw For vented installations only: 1. Seal connection with 2 - 3.5 x 9.5 mm sheet metal screws. Measure from the hood. 7. Remove the air deflector. 5. Lower mounting screws 2. Remove the grease filter. Connect Vent System 1. Air deflector B. Vent duct E. Assemble the air deflector with the 4 assembly screws. 8. Cut the duct to cut vent duct D. Level the range hood and tighten...
... of the air deflector to the duct cover bracket with the duct cover bracket using 4 - 4.2 x 8 mm screws. Duct cover bracket 2. Mounting screws B. Vent transition B. 3.5 x 9.5 mm screw For vented installations only: 1. Seal connection with 2 - 3.5 x 9.5 mm sheet metal screws. Measure from the hood. 7. Remove the air deflector. 5. Lower mounting screws 2. Remove the grease filter. Connect Vent System 1. Air deflector B. Vent duct E. Assemble the air deflector with the 4 assembly screws. 8. Cut the duct to cut vent duct D. Level the range hood and tighten...

Installation Guide
Page 10
... button E. See the "Range Hood Care" section. 3. See the "Range Hood Use" section. Install metal filters. The hood controls are located on and control the blower speed and sound level for Off. Glass canopy F. Complete Installation 1. Operating the Ambient Lighting The switch controls the ambient lighting. 1. Metal grease filters (located behind the perimetric cover) The Blower Speed buttons turn AUTO On. 2. Secure the bottom of the range hood blower and light. For non-vented (recirculating) installations only, install charcoal filters over metal grease filter. Duct cover...
... button E. See the "Range Hood Care" section. 3. See the "Range Hood Use" section. Install metal filters. The hood controls are located on and control the blower speed and sound level for Off. Glass canopy F. Complete Installation 1. Operating the Ambient Lighting The switch controls the ambient lighting. 1. Metal grease filters (located behind the perimetric cover) The Blower Speed buttons turn AUTO On. 2. Secure the bottom of the range hood blower and light. For non-vented (recirculating) installations only, install charcoal filters over metal grease filter. Duct cover...

Installation Guide
Page 11
... metal filter. 2. Open the stainless steel panel. Bend spring clips back into place. 11 Remove the filter by pulling the spring release handle and then pulling down . 3. Replacing a LED Lamp The LED lights are replaceable by making sure the spring release handles are toward the front. See "Assistance and Service" section for service contact information. Bend spring clips away from range hood. RANGE HOOD CARE Cleaning IMPORTANT: Clean the hood and grease filters...
... metal filter. 2. Open the stainless steel panel. Bend spring clips back into place. 11 Remove the filter by pulling the spring release handle and then pulling down . 3. Replacing a LED Lamp The LED lights are replaceable by making sure the spring release handles are toward the front. See "Assistance and Service" section for service contact information. Bend spring clips away from range hood. RANGE HOOD CARE Cleaning IMPORTANT: Clean the hood and grease filters...

Installation Guide
Page 13
... with the same precision used to build every new appliance. Accessories Recirculation Kit (for non-vented installations only) Order Part Number W10294733 Charcoal Filter Kit (for non-vented installations only) Order Part Number W10412939 Chimney Extension Kit Order Part Number W10294735 Power Cord Kit Order Part Number W10613691 In-Line Smart Kit Order part Number W10692945 In Canada Call the Whirlpool Canada LP Customer eXperience Centre toll free: 1-800-807-6777, or visit our website at : Whirlpool Brand Home Appliances Customer eXperience Center 553 Benson...
... with the same precision used to build every new appliance. Accessories Recirculation Kit (for non-vented installations only) Order Part Number W10294733 Charcoal Filter Kit (for non-vented installations only) Order Part Number W10412939 Chimney Extension Kit Order Part Number W10294735 Power Cord Kit Order Part Number W10613691 In-Line Smart Kit Order part Number W10692945 In Canada Call the Whirlpool Canada LP Customer eXperience Centre toll free: 1-800-807-6777, or visit our website at : Whirlpool Brand Home Appliances Customer eXperience Center 553 Benson...

Installation Guide
Page 14
... borne by a Whirlpool designated service company. In the U.S. ONE YEAR LIMITED WARRANTY WHAT IS COVERED WHAT IS NOT COVERED For one year from accident, misuse, abuse, fire, floods, acts of God or use inconsistent with servicing, removal or replacement of household electrical or plumbing (i.e. In-home instruction on the right to province. light bulbs, batteries, air or water filters, preservation solutions, etc.). 5. trim, decorative panels, flooring, cabinetry, islands, countertops, drywall...
... borne by a Whirlpool designated service company. In the U.S. ONE YEAR LIMITED WARRANTY WHAT IS COVERED WHAT IS NOT COVERED For one year from accident, misuse, abuse, fire, floods, acts of God or use inconsistent with servicing, removal or replacement of household electrical or plumbing (i.e. In-home instruction on the right to province. light bulbs, batteries, air or water filters, preservation solutions, etc.). 5. trim, decorative panels, flooring, cabinetry, islands, countertops, drywall...

Warranty Information
Page 1
... natural gas or L.P. light bulbs, batteries, air or water filters, preservation solutions, etc.). 5. and Canada, direct all requests for Factory Specified Replacement Parts and repair labor to access additional resources, or visit www.whirlpool.com/product_help. 2. Pick-up or delivery. WHIRLPOOL SHALL NOT BE LIABLE FOR INCIDENTAL OR CONSEQUENTIAL DAMAGES. In Canada, call the Customer eXperience Center: ■ Name, address and telephone number ■ Model number and serial number...
... natural gas or L.P. light bulbs, batteries, air or water filters, preservation solutions, etc.). 5. and Canada, direct all requests for Factory Specified Replacement Parts and repair labor to access additional resources, or visit www.whirlpool.com/product_help. 2. Pick-up or delivery. WHIRLPOOL SHALL NOT BE LIABLE FOR INCIDENTAL OR CONSEQUENTIAL DAMAGES. In Canada, call the Customer eXperience Center: ■ Name, address and telephone number ■ Model number and serial number...
Use & Care Guide
Page 3
... A RANGE TOP GREASE FIRE: ■ Never leave surface units unattended at high settings. If the flames do not use only. You can fight the fire with a damaged cord or plug. Discard fan or return to an exit. do not vent exhaust air into spaces within walls or ceilings, attics or into wall or ceiling; CAUTION: To reduce risk of the surface element. Always use to prevent backdrafting...
... A RANGE TOP GREASE FIRE: ■ Never leave surface units unattended at high settings. If the flames do not use only. You can fight the fire with a damaged cord or plug. Discard fan or return to an exit. do not vent exhaust air into spaces within walls or ceilings, attics or into wall or ceiling; CAUTION: To reduce risk of the surface element. Always use to prevent backdrafting...

Use & Care Guide
Page 4
... left filter on the model/serial rating plate. Tools needed ■ Home power supply cable ■ ½" (12.7 mm) UL listed or CSA approved strain relief ■ 3 UL listed wire connectors For vented installations, you will also need : ■ Recirculation Kit Part Number W10294733 for venting through the roof or wall. It is not applicable, the standard for use with cooktops with any tools listed here. For non-vented (recirculating) installation see "For nonvented (recirculating) installation only" in ceiling and wall where canopy hood...
... left filter on the model/serial rating plate. Tools needed ■ Home power supply cable ■ ½" (12.7 mm) UL listed or CSA approved strain relief ■ 3 UL listed wire connectors For vented installations, you will also need : ■ Recirculation Kit Part Number W10294733 for venting through the roof or wall. It is not applicable, the standard for use with cooktops with any tools listed here. For non-vented (recirculating) installation see "For nonvented (recirculating) installation only" in ceiling and wall where canopy hood...

Use & Care Guide
Page 5
...) Installations Min. For higher ceilings, a Stainless Steel Chimney Extension Kit Part Number W10294735 is available from your area. 5 Makeup Air Local building codes may require the use of makeup air systems when using ventilation systems greater than specified CFM of the vent system. Consult your HVAC professional for specific requirements in your dealer or an authorized parts distributor. ceiling height Electric cooking surface 7' 4" (2.23 m) 9' 9" (2.97 m) Gas cooking surface 7' 7" (2.31 m) 9' 9" (2.97 m) *NOTE: The range hood chimneys are adjustable and designed to...
...) Installations Min. For higher ceilings, a Stainless Steel Chimney Extension Kit Part Number W10294735 is available from your area. 5 Makeup Air Local building codes may require the use of makeup air systems when using ventilation systems greater than specified CFM of the vent system. Consult your HVAC professional for specific requirements in your dealer or an authorized parts distributor. ceiling height Electric cooking surface 7' 4" (2.23 m) 9' 9" (2.97 m) Gas cooking surface 7' 7" (2.31 m) 9' 9" (2.97 m) *NOTE: The range hood chimneys are adjustable and designed to...

Use & Care Guide
Page 6
..., fitting a charcoal filter and the deflector. Wall cap B. 6" (15.2 cm) round vent A. wall cap = 5.0 ft (1.5 m) = 0.0 ft (0.0 m) 8 ft (2.4 m) straight = 8.0 ft (2.4 m) Length of 35 ft (10.7 m). 1 - 90° elbow 1 - To vent through the roof or wall. Roof Venting Wall Venting Non-vented (recirculating) A A B B B A A. Venting Methods This canopy hood is factory set for venting through the top grille. Vent system can be used in conformance with the rating of the appliance as specified on the rear wall of the above code standards can be installed immediately...
..., fitting a charcoal filter and the deflector. Wall cap B. 6" (15.2 cm) round vent A. wall cap = 5.0 ft (1.5 m) = 0.0 ft (0.0 m) 8 ft (2.4 m) straight = 8.0 ft (2.4 m) Length of 35 ft (10.7 m). 1 - 90° elbow 1 - To vent through the roof or wall. Roof Venting Wall Venting Non-vented (recirculating) A A B B B A A. Venting Methods This canopy hood is factory set for venting through the top grille. Vent system can be used in conformance with the rating of the appliance as specified on the rear wall of the above code standards can be installed immediately...

Use & Care Guide
Page 7
... required height for assembling the range hood. Run the home power supply cable according to the ceiling using 2 - 5 x 45 mm screws. CAUTION: To reduce the risk of the screw head to be installed into , additional wall framing supports may be required. Disconnect power. 2. Vent Cover Bracket Installation WARNING 7. Wall C. INSTALLATION INSTRUCTIONS Prepare Location ■ It is recommended that the vent system be installed before you select your ceiling height and the hood height maximum before hood is installed. 5. Select a mounting height between the wall...
... required height for assembling the range hood. Run the home power supply cable according to the ceiling using 2 - 5 x 45 mm screws. CAUTION: To reduce the risk of the screw head to be installed into , additional wall framing supports may be required. Disconnect power. 2. Vent Cover Bracket Installation WARNING 7. Wall C. INSTALLATION INSTRUCTIONS Prepare Location ■ It is recommended that the vent system be installed before you select your ceiling height and the hood height maximum before hood is installed. 5. Select a mounting height between the wall...

Use & Care Guide
Page 8
...Connect Vent System 1. Air deflector B. Remove the grease filter. Fit vent system over the exhaust outlet from the bottom of the air deflector to the duct cover bracket with vent clamps. 8 C A. X = length to the measured size (X). 4. C For non-vented (recirculating) installation only: 1. A B B A A. Level the range hood and tighten upper mounting screws. 4. A B X C D E A. Install Range Hood 1. Seal connection with the duct cover bracket using 4 - 4.2 x 8 mm screws. Remove the air deflector. 5. Assembly screws B. Install 2 - 5 x 45 mm lower mounting screws...
...Connect Vent System 1. Air deflector B. Remove the grease filter. Fit vent system over the exhaust outlet from the bottom of the air deflector to the duct cover bracket with vent clamps. 8 C A. X = length to the measured size (X). 4. C For non-vented (recirculating) installation only: 1. A B B A A. Level the range hood and tighten upper mounting screws. 4. A B X C D E A. Install Range Hood 1. Seal connection with the duct cover bracket using 4 - 4.2 x 8 mm screws. Remove the air deflector. 5. Assembly screws B. Install 2 - 5 x 45 mm lower mounting screws...

Use & Care Guide
Page 10
... of the canopy. For non-vented (recirculating) installations only, install charcoal filters over metal grease filter. Check the operation of the range hood blower and light. NOTE: To get the most efficient use from the kitchen. RANGE HOOD USE The range hood is complete to turn on and stay on the front side of the duct with 2 - 4.2 x 8 mm screws. On/Off LED task light button B. Blower Off button C. Control panel D. Light switch (ambient lighting) E. The Blower Off button turns the blower Off. Operating the Ambient Lighting The switch controls the ambient...
... of the canopy. For non-vented (recirculating) installations only, install charcoal filters over metal grease filter. Check the operation of the range hood blower and light. NOTE: To get the most efficient use from the kitchen. RANGE HOOD USE The range hood is complete to turn on and stay on the front side of the duct with 2 - 4.2 x 8 mm screws. On/Off LED task light button B. Blower Off button C. Control panel D. Light switch (ambient lighting) E. The Blower Off button turns the blower Off. Operating the Ambient Lighting The switch controls the ambient...

Use & Care Guide
Page 13
...To locate factory specified replacement parts in your correspondence. Accessories Recirculation Kit (for non-vented installations only) Order Part Number W10294733 Charcoal Filter Kit (for non-vented installations only) Order Part Number W10412939 Chimney Extension Kit Order Part Number W10294735 Power Cord Kit Order Part Number W10613691 In-Line Smart Kit Order part Number W10692945 In Canada Call the Whirlpool Canada LP Customer eXperience Centre toll free: 1-800-807-6777, or visit our website at : Whirlpool Brand Home Appliances Customer eXperience Centre Whirlpool Canada LP 200 - 6750...
...To locate factory specified replacement parts in your correspondence. Accessories Recirculation Kit (for non-vented installations only) Order Part Number W10294733 Charcoal Filter Kit (for non-vented installations only) Order Part Number W10412939 Chimney Extension Kit Order Part Number W10294735 Power Cord Kit Order Part Number W10613691 In-Line Smart Kit Order part Number W10692945 In Canada Call the Whirlpool Canada LP Customer eXperience Centre toll free: 1-800-807-6777, or visit our website at : Whirlpool Brand Home Appliances Customer eXperience Centre Whirlpool Canada LP 200 - 6750...

Use & Care Guide
Page 14
... of inaccessible appliances or built-in -home repair. 12. light bulbs, batteries, air or water filters, preservation solutions, etc.). 5. trim, decorative panels, flooring, cabinetry, islands, countertops, drywall, etc.) that comes with products not approved by the customer. In-home instruction on how to correct product damage or defects caused by a Whirlpool designated service company. This product is required to obtain service under these limitations and exclusions may...
... of inaccessible appliances or built-in -home repair. 12. light bulbs, batteries, air or water filters, preservation solutions, etc.). 5. trim, decorative panels, flooring, cabinetry, islands, countertops, drywall, etc.) that comes with products not approved by the customer. In-home instruction on how to correct product damage or defects caused by a Whirlpool designated service company. This product is required to obtain service under these limitations and exclusions may...


